
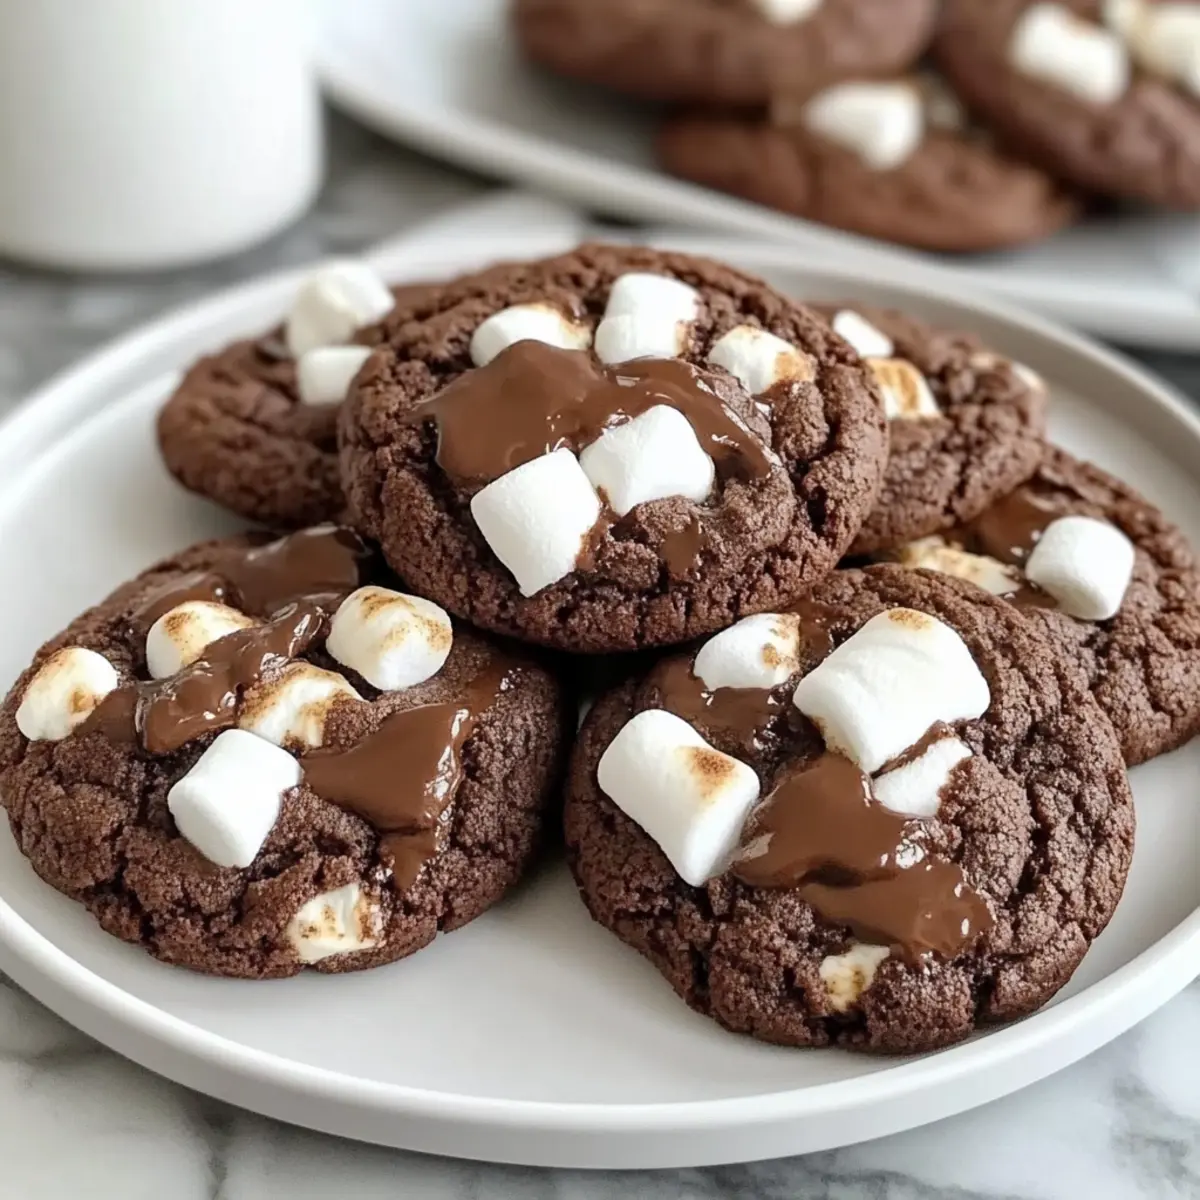
As the first whiff of chocolate dances in the air, I can’t help but smile at the sheer joy that homemade cookies bring. These Hot Chocolate Cookies take cozy winter nights to the next level, delivering a delightful softness and pockets of gooey mini marshmallows that melt in your mouth. Perfect for those evenings spent curled up with a warm drink, this recipe ensures that you can whip up a treat in no time, making it an effortless addition to your dessert repertoire. Not only are these cookies quick to prepare, but they’re also a hit with family and friends, making them ideal for gatherings or a simple indulgence at home. Ready to experience the warmth and comfort in every bite? Let’s dive into this delightful baking adventure together!
Why Are These Cookies a Must-Bake?
Irresistible flavor: These Hot Chocolate Cookies bring the beloved taste of winter’s favorite drink into cookie form, delivering a rich chocolate experience with every bite.
Quick preparation: With simple steps, you can have these cookies ready swiftly, making them perfect for unexpected guests or cozy nights in.
Customizable goodness: Feel free to play with the flavors, whether it’s adding a hint of peppermint or swapping in chocolate chips to suit your palate.
Crowd-pleaser: Their gooey marshmallow centers and soft texture make them a hit at any gathering, ensuring smiles all around.
Perfect pairing: Enjoy them with a warm mug of hot cocoa or milk for the ultimate treat that will warm your heart and home.
For more delicious cookies, check out my recipe for Chocolate Chip Cookies or explore the delightful White Chocolate Pumpkin option for a seasonal twist!
Hot Chocolate Cookies Ingredients
For the Dough
• Butter – Adds richness and moisture; consider using all butter for a richer taste.
• Shortening – Creates a tender crumb and prevents excessive spreading; all butter can be used as a swap.
• Granulated Sugar – Provides sweetness and helps with texture; adjust based on the sweetness of your hot chocolate mix.
• Large Eggs – Essential for structure and moisture; use room-temperature eggs for better mixing.
• Vanilla Extract – Enhances the overall flavor; no substitution recommended.
• All-Purpose Flour – Offers structure; a gluten-free mix can be used but may change texture.
• Unsweetened Cocoa Powder – Delivers a rich chocolate flavor; use high-quality cocoa for the best results.
• Baking Soda – Acts as a leavening agent; make sure it’s fresh for proper cookie rise.
• Salt – Balances sweetness and enhances flavor; necessary for the overall taste.
• Hot Chocolate Mix – Adds depth of flavor and sweetness; choose your favorite brand to tailor the taste.
• Mini Marshmallows – Create gooey pockets of sweetness; cut larger marshmallows into smaller pieces if you prefer.
These Hot Chocolate Cookies are sure to be a delightful treat that warms your heart and home!
Step‑by‑Step Instructions for Irresistible Hot Chocolate Cookies
Step 1: Preheat the Oven
Begin by preheating your oven to 350°F (175°C). While it warms up, prepare your baking sheets by lining them with parchment paper. This will prevent sticking and ensure your cookies bake evenly, creating a delightful base for your hot chocolate cookies.
Step 2: Cream the Butters
In a large mixing bowl, combine softened butter and shortening. Using a hand mixer or stand mixer, cream them together until the mixture is smooth and fluffy, which should take about 2-3 minutes. This step creates the rich base for your cookies, ensuring they will be tender and delicious.
Step 3: Incorporate Sugar and Eggs
Gradually add granulated sugar to the creamed butter and shortening, beating well until the mixture is light and fluffy. Next, incorporate two large eggs, one at a time, making sure each egg is fully mixed in before adding the next. Don’t forget to mix in the pure vanilla extract to elevate the flavor of your hot chocolate cookies.
Step 4: Mix the Dry Ingredients
In a separate bowl, whisk together the all-purpose flour, unsweetened cocoa powder, baking soda, and salt until thoroughly combined. Gradually add this dry mixture to the wet ingredients, mixing on low speed or with a spatula until just blended. Be careful not to over-mix; you want a soft cookie dough.
Step 5: Fold in Flavor Elements
Now, it’s time to add the star ingredients — the hot chocolate mix and mini marshmallows. Gently fold them into the cookie dough using a spatula, ensuring the marshmallows are evenly distributed throughout. These will provide delightful gooey pockets in your hot chocolate cookies.
Step 6: Portion the Dough
Using a cookie scoop or spoon, drop rounded tablespoons of the cookie dough onto your prepared baking sheets, leaving about 2 inches of space between each scoop. This spacing allows the cookies to spread evenly while baking, resulting in perfectly shaped hot chocolate cookies.
Step 7: Bake the Cookies
Place the baking sheets in the preheated oven and bake for 10-12 minutes. Look for the cookies to be set around the edges but slightly soft in the center; they will continue to firm up as they cool. Your kitchen will soon be filled with the inviting aroma of chocolate!
Step 8: Cool and Transfer
Once baked, allow the hot chocolate cookies to cool on the baking sheets for about 5 minutes. This resting time will make them easier to transfer without breaking. Afterward, gently move them to a wire rack to cool completely, ensuring they remain soft and gooey.
What to Serve with Irresistible Hot Chocolate Cookies?
As the warm aroma of these cookies wafts through your home, imagining the perfect accompaniments can elevate your cozy night in.
-
Creamy Hot Cocoa: This classic drink pairs wonderfully, enhancing the chocolate flavor while providing warmth and comfort. A sprinkle of whipped cream on top can make it feel extra special!
-
Chilled Milk: A tall glass of cold milk balances the sweetness of the cookies, making each bite even more delightful. Plus, it’s a nostalgic combination that never gets old.
-
Marshmallow Milkshake: Blend milk, ice cream, and a handful of marshmallows for a dreamy shake that echoes the cookie’s gooey centers. It’s a wonderful treat that kids will absolutely love.
-
Cinnamon Sugar Donuts: Their fluffy texture and hint of cinnamon offer a delightful contrast with the rich chocolate of the cookies. Enjoying them together provides a fun twist on comfort food.
-
Chai Tea Latte: The warm spices in chai contrast beautifully with the sweet chocolate, creating a mood of relaxation and indulgence perfect for winter.
-
Chocolate Dipped Strawberries: For a touch of elegance, fresh strawberries dipped in chocolate add a fruity freshness that complements the cookies’ richness splendidly, perfect for sharing or a special occasion.
-
S’mores Dip: A gooey s’mores dip with marshmallows and chocolate creates a fun, interactive dessert experience that allows everyone to indulge together, echoing the cookie’s flavors.
-
Roasted Nuts: A bowl of lightly salted roasted nuts offers a crunchy texture and balances sweetness, enhancing the flavor experience while serving as a great snack to nibble on.
Indulging in these pairings will not only enhance the flavors but will transform a simple cookie into a heartwarming gathering experience with loved ones.
Expert Tips for Hot Chocolate Cookies
• Use Room Temperature Eggs: Ensure your eggs are at room temperature for better blending, which results in a smoother cookie dough.
• Chill the Dough: For thicker cookies, chill the dough for 15-30 minutes before baking. This helps prevent them from spreading too much.
• Quality Cocoa Matters: Choose a high-quality unsweetened cocoa powder for a richer chocolate flavor in your hot chocolate cookies.
• Don’t Overbake: Keep an eye on the cookies in the oven; they should be slightly soft in the center when you pull them out for that gooey texture.
• Storage Savvy: Store your cookies in an airtight container for up to 3-4 days. For longer storage, consider freezing the cookie dough before baking.
• Mix and Match Flavors: Feel free to customize; add peppermint extract or swap mini marshmallows for chocolate chips to elevate your hot chocolate cookies!
Hot Chocolate Cookies Variations
Feel free to get creative and customize your Hot Chocolate Cookies to suit your tastebuds and occasions!
-
Peppermint Twist: Add ½ teaspoon of peppermint extract for a refreshing holiday flavor that will warm your heart and evoke nostalgic winter memories.
Imagine sinking your teeth into a cookie that whispers “Christmas” with every bite. This little twist can transform your cozy treat into a festive delight! -
Extra Chocolatey: Swap mini marshmallows for chocolate chips for an even richer chocolate experience in every gooey mouthful.
If you’re a chocolate lover, this variation might just become your new favorite! The melty chocolate chips add a luxurious richness that pairs beautifully with the soft cookie base. -
Gluten-Free Delight: Use a gluten-free all-purpose flour mix to make these cookies accessible to those with dietary restrictions.
Baking for friends with gluten sensitivities? No problem! You can enjoy the same delicious flavor and texture with a simple flour swap. -
Nutty Addition: Toss in ½ cup of chopped nuts, such as pecans or walnuts, for a delightful crunch that adds texture and flavor.
The combination of soft chocolatey goodness with crunchy nuts makes for a satisfying contrast that keeps your tastebuds engaged! -
Caramel Surprise: Incorporate small pieces of caramel into the cookie dough for delightful bursts of sweetness as you bite in.
This surprise element is sure to catch your guests off guard in the best way possible, adding an exciting layer of flavor you won’t want to miss. -
Spicy Kick: Stir in a pinch of cayenne pepper or cinnamon to introduce a surprising warmth that will leave a lasting impression.
Just a hint of spice can elevate the cookie and create a beautiful balance with the sweetness of the chocolate. -
S’mores Style: Fold in crushed graham crackers along with marshmallows for a playful s’mores take on these classic cookies.
It’s a fun way to capture the essence of campfire nights, wrapped in the comforting embrace of a warm cookie!
For more inspiration, don’t forget to try out some seasonal favorites like White Chocolate Pumpkin or indulge in a classic batch of Chocolate Chip Cookies that everyone loves. Happy baking!
Make Ahead Options
These Hot Chocolate Cookies are a fantastic treat to make ahead, perfect for busy weeknights or surprise guests! You can prepare the dough up to 24 hours in advance by mixing all your ingredients and then wrapping the bowl tightly with plastic wrap, or scoop dough balls onto a baking sheet and refrigerate them. If you choose to refrigerate the dough balls, just be sure to space them out to prevent sticking. When you’re ready to bake, simply take them out, let them sit at room temperature for about 10-15 minutes, and bake as directed. This way, you’ll enjoy the same gooey, chocolatey goodness with minimal fuss at each serving!
Storage Tips for Hot Chocolate Cookies
Room Temperature: Store cookies in an airtight container at room temperature for up to 3-4 days to keep them fresh and chewy.
Fridge: For longer storage, you can keep them in the fridge for up to a week. Ensure the container is tightly sealed to prevent them from drying out.
Freezer: Freeze cookie dough balls individually on a baking sheet before transferring them to a freezer bag. They can be stored for up to 3 months and baked straight from the freezer.
Reheating: To enjoy a warm cookie, microwave them for about 10-15 seconds or warm in the oven at 350°F (175°C) for a few minutes, keeping that gooey center of your Hot Chocolate Cookies irresistible!
Hot Chocolate Cookies Recipe FAQs
What type of marshmallows should I use for the cookies?
You can stick with mini marshmallows, which fit perfectly in the cookies. If you only have larger marshmallows, simply cut them into smaller pieces to ensure they melt evenly in every sweet bite.
How do I store leftover cookies?
Store your Hot Chocolate Cookies in an airtight container at room temperature for up to 3-4 days to maintain their freshness and gooey texture. If you notice them getting too hard, consider adding a slice of bread in the container; it helps keep cookies soft!
Can I freeze the cookie dough?
Absolutely! To freeze the dough, scoop it into individual balls and place them on a baking sheet lined with parchment paper. Freeze for about an hour until solid, then transfer the dough balls to a freezer-safe bag. They can be stored for up to 3 months. When ready to bake, you can pop them directly into the oven from the freezer, just add an extra minute or two to the baking time.
What should I do if my cookies are too dry?
If your cookies come out dry, this typically means they were either overbaked or the dough was too dry. To avoid this in the future, ensure to check on them closely during the last few minutes of baking and remove them as soon as they are set but still soft in the center. If you like a more moist texture, consider adding an extra tablespoon of butter or egg to the dough next time!
Can I make these cookies gluten-free?
Yes, you can substitute all-purpose flour with a gluten-free flour blend. However, keep in mind that the texture may vary slightly. For best results, look for a blend that can replace regular flour in equal amounts, and ensure to mix well so everything combines properly!
Are these cookies safe for pets?
It’s best to keep these Hot Chocolate Cookies away from pets, especially dogs, as chocolate can be toxic to them. If you’re sharing your cookies, consider whipping up a pet-friendly treat as a special snack just for them!
Melt-in-Your-Mouth Hot Chocolate Cookies for Cozy Nights
Ingredients
Equipment
Method
- Preheat your oven to 350°F (175°C) and line baking sheets with parchment paper.
- Cream softened butter and shortening together until smooth and fluffy.
- Add granulated sugar, beating well, then incorporate eggs one at a time along with vanilla extract.
- Whisk together the all-purpose flour, cocoa powder, baking soda, and salt in a separate bowl. Gradually combine with wet ingredients until just blended.
- Fold in the hot chocolate mix and mini marshmallows into the dough.
- Scoop rounded tablespoons of dough onto the baking sheets, spacing them 2 inches apart.
- Bake for 10-12 minutes until edges are set and centers are slightly soft.
- Cool the cookies on baking sheets for 5 minutes before transferring to a wire rack to cool completely.
Leave a Reply