
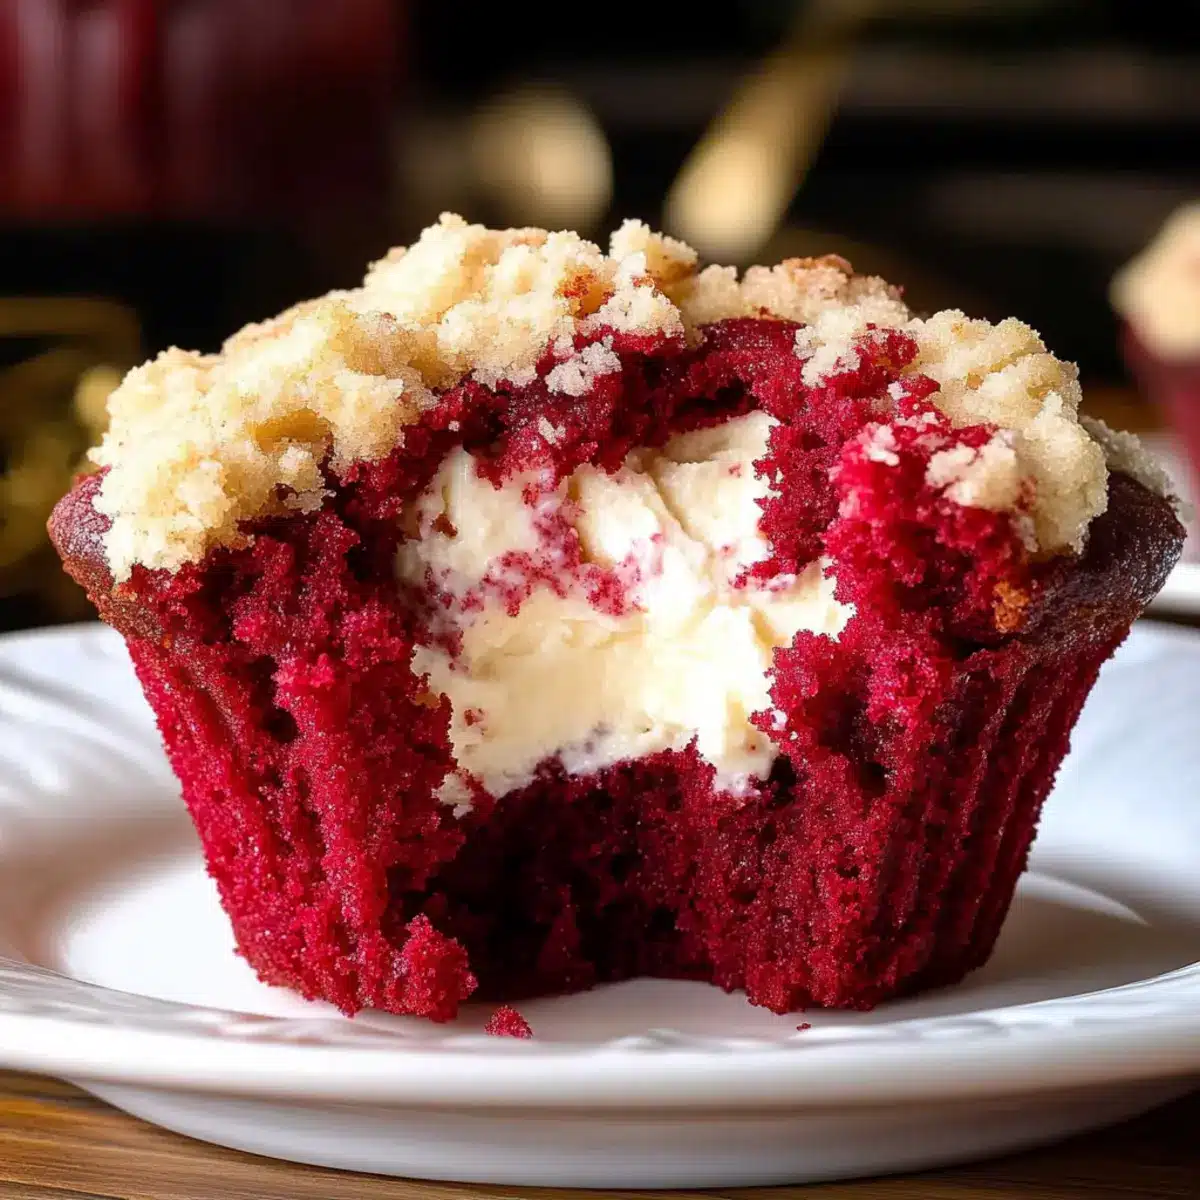
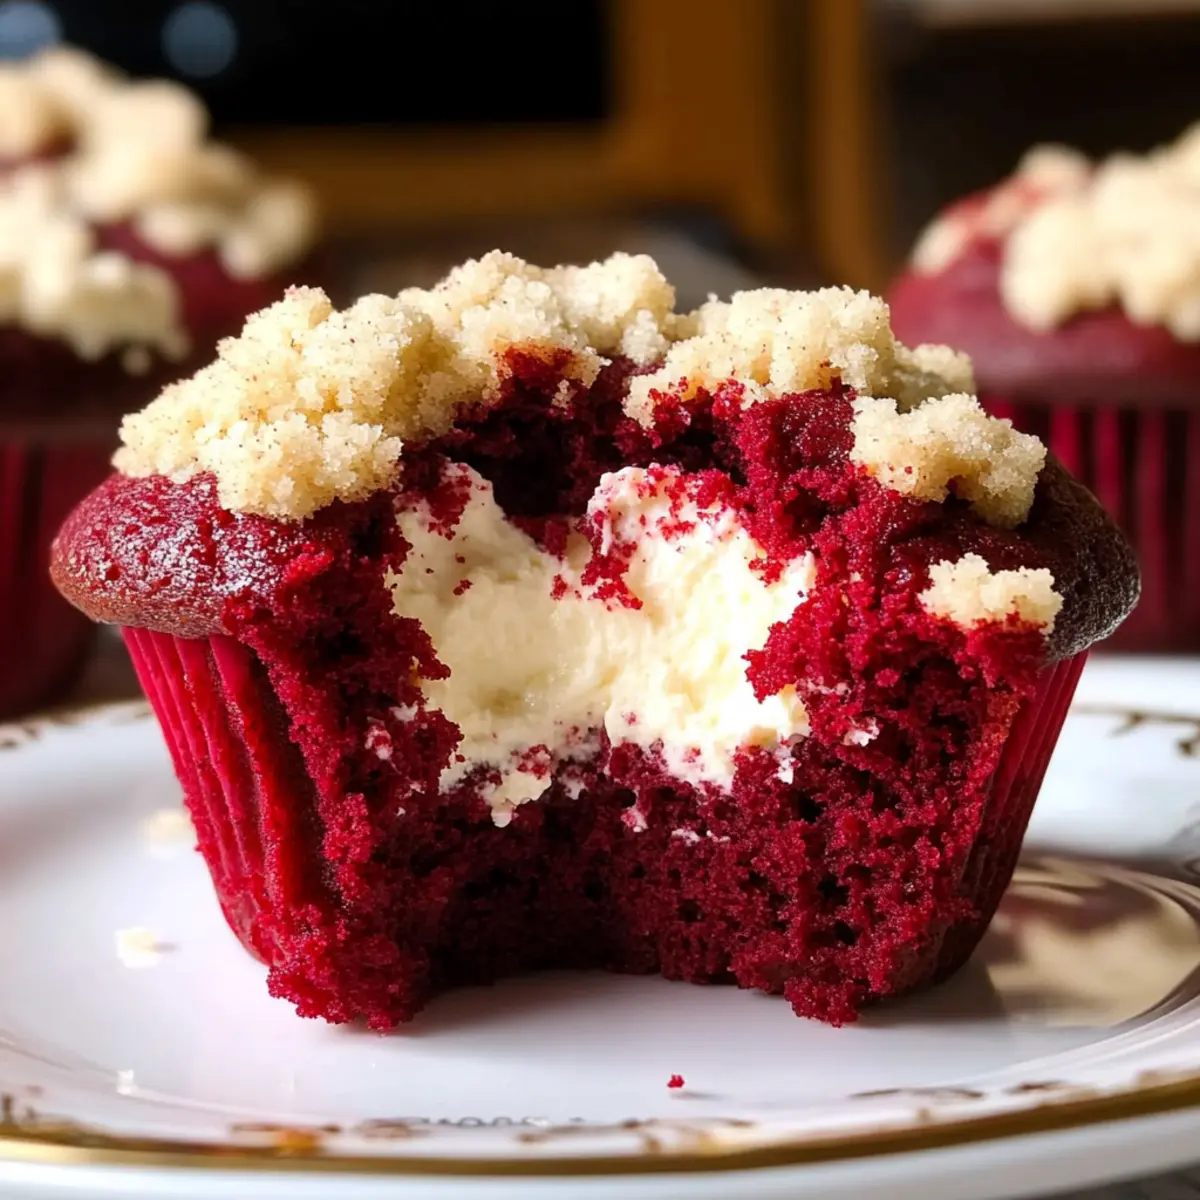
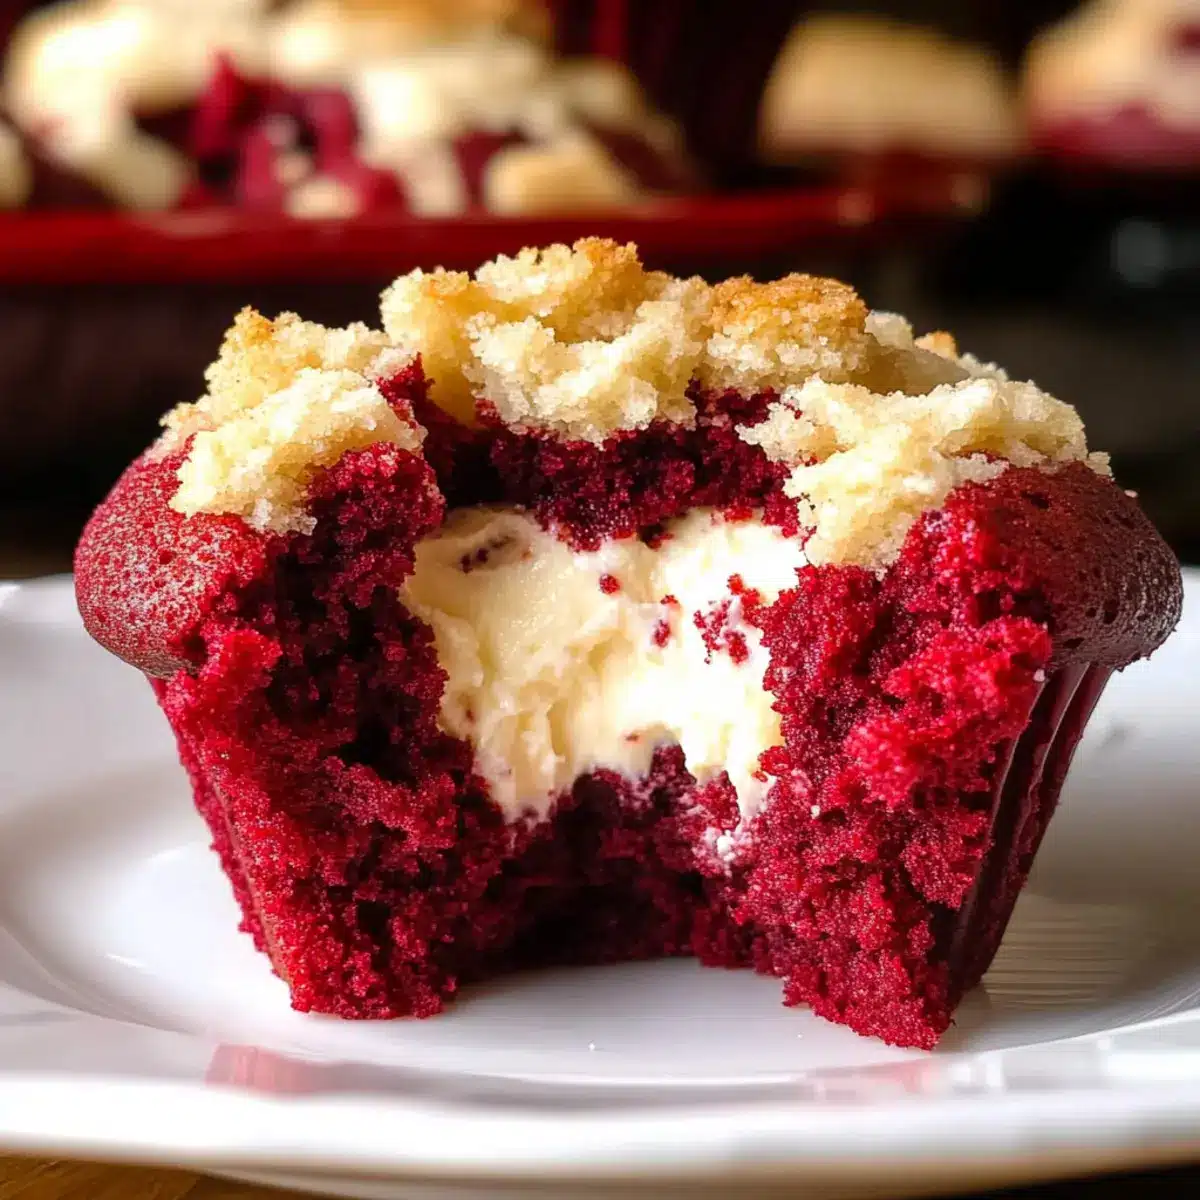
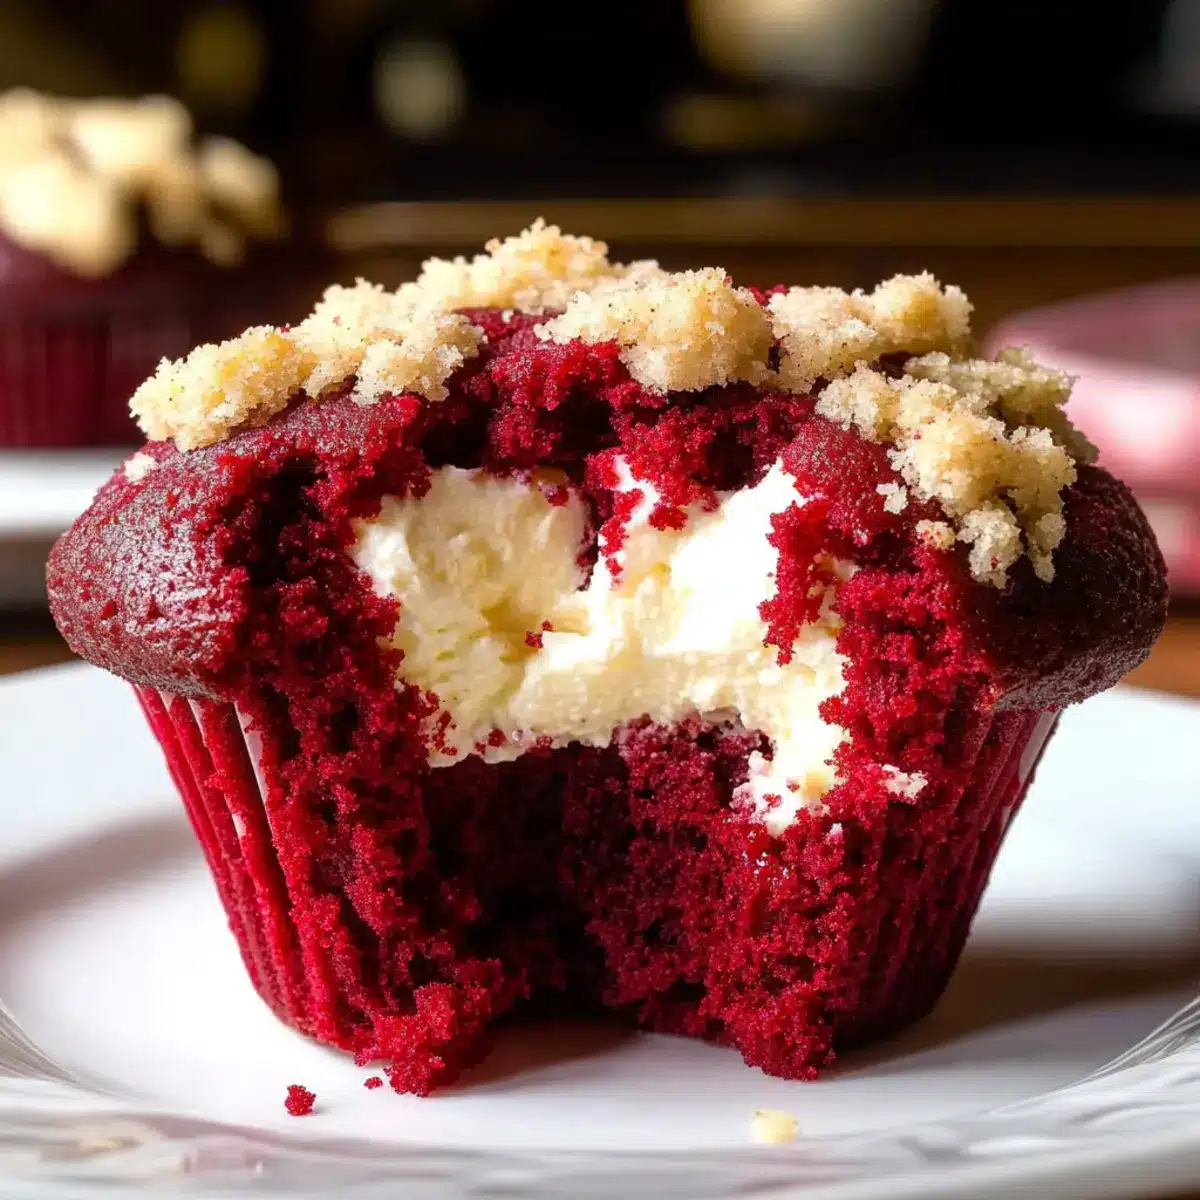
As I gazed at the vibrant red muffins cooling on my kitchen counter, a little smile crept onto my face. These Buttery Red Velvet Muffins with Cream Cheese Filling are not just another breakfast option; they’re a cozy invitation to linger over your morning coffee. With their impossibly soft texture and rich, creamy centers, they create a delightful balance that transforms any simple day into a special occasion. What’s more, the irresistible buttery crumb topping adds a satisfying crunch, making them a true indulgence without feeling overly complicated to make. Say goodbye to store-bought pastries—these homemade goodies will have everyone clamoring for more. So, are you ready to dive into the world of red velvet deliciousness?
Why are these muffins a must-try?
Irresistible Flavor: The juxtaposition of buttery richness and the cream cheese center creates a flavor explosion that’s simply unforgettable.
Simplicity Meets Elegance: These muffins are as easy to make as they are beautiful, making them perfect for both novice bakers and seasoned chefs alike.
Versatile Indulgence: Enjoy them at breakfast, as a snack, or even as a dessert; they fit seamlessly into any part of your day. Add a touch of joy to your morning routine, much like those warm, flaky Sweet Coconut Cream pancakes!
Crowd-Pleaser: Whether you’re hosting a brunch or just treating yourself, these muffins are sure to delight every palate.
Memorable Textures: With a fluffy muffin base and a crunchy crumb topping, every bite offers a delightful contrast that elevates your experience.
Get ready to relish a little taste of luxury with your next batch!
Red Velvet Muffins with Cream Cheese Filling Ingredients
For the Muffin Batter
- Cake Flour – Provides a tender texture; substitute by mixing all-purpose flour with cornstarch.
- Baking Powder – This leavening agent helps the muffins rise beautifully.
- Baking Soda – Works with the buttermilk’s acid for that fluffy lift.
- Salt – Enhances overall flavor, making every bite delightful.
- Cocoa Powder – Adds depth of flavor and a hint of color to the batter.
- Butter – Contributes richness and moisture, making these muffins utterly delicious.
- Vegetable Oil – Keeps muffins moist and soft, enhancing the overall texture.
- Brown Sugar – Adds sweetness and a lovely caramel undertone to complement the cocoa.
- Egg Whites – Provide essential structure and leavening to keep the muffins airy.
- Vanilla Extract – Enhances the overall flavor profile of the muffins.
- Red Velvet Emulsion – Infuses both flavor and vibrant color; swap with gel food coloring if needed.
- Buttermilk – Offers tenderness and a slight tang; can be substituted with milk mixed with vinegar.
For the Cream Cheese Filling
- Cream Cheese – The key ingredient for that rich, creamy center; ensure it’s softened for easy blending.
- Egg Yolk – Adds richness and helps bind the filling.
- Powdered Sugar – Sweetens the cream cheese for a delightful balance against its tanginess.
For the Crumb Topping
- Butter – Provides flavor and moisture for a crunchy topping.
- Brown Sugar – Enhances sweetness and contributes to the crumbly texture.
- All-Purpose Flour – Forms the base of the crumb topping for that perfect crunch.
These Red Velvet Muffins with Cream Cheese Filling are not just a treat but a labor of love that will elevate your baking game!
Step‑by‑Step Instructions for Red Velvet Muffins with Cream Cheese Filling
Step 1: Prepare Cream Cheese Filling
Begin by beating the softened cream cheese, egg yolk, and powdered sugar together in a bowl until smooth and creamy. Using a spatula, scrape down the sides for an even mix. Once combined, scoop dollops of this luscious filling onto a parchment-lined tray and place them in the freezer for about 30 minutes to set, ensuring they stay firm when baked inside your red velvet muffins.
Step 2: Make Crumb Topping
In a separate mixing bowl, combine softened butter, brown sugar, and all-purpose flour. Using your fingers or a fork, mix until crumbly, resembling coarse sand. This mixture will create a delightful crunchy topping, so ensure it’s evenly blended. Set your crumb topping aside, allowing the flavors to meld while you prepare the muffin batter.
Step 3: Mix Muffin Batter
In a large mixing bowl, cream together the softened butter, vegetable oil, and brown sugar until fluffy, about 2-3 minutes. Gradually add in the egg whites, mixing well after each addition. Pour in the vanilla extract and red velvet emulsion for an irresistible flavor, then give it a final mix until everything is fully incorporated before moving on to the dry ingredients.
Step 4: Combine Dry Ingredients
In a separate bowl, whisk together the cake flour, baking powder, baking soda, salt, and cocoa powder. This dry mixture is essential for the structure and richness of your red velvet muffins. Gradually incorporate the dry ingredients into the wet mixture, stirring gently to combine without overmixing. The batter should be somewhat thick yet smooth, awaiting the next addition.
Step 5: Incorporate Wet and Dry Ingredients
Slowly mix in the buttermilk into the batter, alternating with the dry ingredient mixture (beginning and ending with the dry). This step is crucial for achieving a tender muffin texture. Stir just until everything is combined and the ingredients are moistened. Gently fold in any additional chocolate chunks or nuts if desired, keeping the batter light and airy.
Step 6: Fold in Whipped Cream
Whip heavy cream in a small bowl until soft peaks form. Gently fold this whipped cream into your muffin batter with a spatula. This extra step makes the muffins light and fluffy, providing a luscious texture. Be careful not to overmix; a few visible streaks of cream are perfect for keeping the batter airy while preparing it for baking.
Step 7: Fill Muffin Pan
Line your muffin tin with paper liners. Spoon the red velvet batter into each liner, filling them halfway. Carefully place a frozen dollop of the cream cheese filling in the center of each, then spoon the remaining batter on top, filling close to the top for a nice rise. This layering method ensures that the rich filling is perfectly nestled within your irresistibly soft muffins.
Step 8: Add Crumb Topping
Generously sprinkle the crumb topping over each filled muffin liner, ensuring that every muffin is adorned with crunchy goodness. This topping not only enhances the visual appeal but also adds a delightful texture contrast when baked. Once topped, your muffins are ready to head into the oven to create a delicious blend of flavors.
Step 9: Bake
Preheat your oven to 425°F and place the muffin tin in the oven. Bake the muffins for 6 minutes, allowing them to puff up beautifully. After the time is up, reduce the temperature to 350°F and continue baking for an additional 18-22 minutes. Keep an eye on them—when a toothpick inserted into the center comes out clean with a few crumbs, they are perfectly baked and ready to be enjoyed.
Step 10: Cool in Pan
Once baked, remove the muffins from the oven and let them cool in the tin for about 10 minutes, allowing them to stabilize. This step is crucial to prevent the muffins from breaking apart when you transfer them. After cooling slightly, carefully lift them out of the tin and place them on a cooling rack to enjoy warm or store for later indulgence.
How to Store and Freeze Red Velvet Muffins
Room Temperature: Store your red velvet muffins in an airtight container at room temperature for up to 3 days. This keeps them soft, moist, and ready for breakfast or a snack.
Fridge: If you prefer a longer shelf life, you can refrigerate the muffins, but they may dry out. Enjoy within 5 days. Just be sure to wrap them tightly to maintain freshness.
Freezer: For extended storage, freeze the muffins individually wrapped in plastic wrap and then placed in a freezer bag. They can be stored for up to 3 months.
Reheating: When ready to enjoy, thaw at room temperature or pop them in the microwave for about 15-20 seconds until warm. This revives the soft, buttery texture, allowing those rich cream cheese centers to shine through!
What to Serve with Buttery Red Velvet Muffins with Cream Cheese Center
These muffins are a delightful centerpiece that pairs wonderfully with various sides to enhance your meal experience.
- Fresh Berries: The juicy bursts of blueberries or strawberries provide a refreshing contrast to the rich muffins, creating a vibrant breakfast plate.
- Creamy Greek Yogurt: A dollop of plain or vanilla Greek yogurt adds a tangy creaminess that complements the sweet muffins beautifully. This addition also boosts protein and makes for a heartier breakfast.
- Savory Breakfast Sausages: A side of savory sausages adds a delightful contrast, balancing the muffins’ sweetness with their hearty, meaty flavor. Pairing these two will satisfy all taste buds at the table!
- Coffee or Earl Grey Tea: A warm cup of coffee or a soothing cup of Earl Grey tea acts as the perfect beverage, allowing you to savor these muffins even more. The warmth draws out the muffins’ buttery flavors.
- Maple Syrup Drizzle: For a touch of indulgence, drizzle warm maple syrup atop the muffins for an extra layer of sweetness that harmonizes with the cream cheese filling.
- Glazed Fruit Salad: A light glazed fruit salad with honey and mint adds a fresh, sweet contrast that enhances your muffin experience. The bright flavors will make every bite refreshing!
- Coconut Cream Topping: Lighter than whipped cream, a scoop of airy coconut cream adds a tropical twist that pairs deliciously with the muffins, accentuating their luxurious texture.
- Chilled Sparkling Water with Lime: Refreshing and palate-cleansing, a glass of sparkling water with a splash of lime refines the richness of the muffins, making it a lovely drink choice.
These delightful pairings will elevate your breakfast or snack time, ensuring every moment with your red velvet muffins is a joyous occasion!
Expert Tips for Red Velvet Muffins
- High Initial Heat: Start baking at 425°F to achieve that sought-after muffin top before lowering the temperature.
- Fill Liners Generously: Don’t be shy—fill muffin liners nearly to the top for a beautiful rise and fluffy texture.
- Check for Doneness: Use a toothpick; it should come out with a few crumbs clinging but no wet batter.
- Cooling Time: Allow muffins to cool sufficiently in the tin to avoid crumbling during transfer.
- Whipping Made Easy: Use an immersion blender for quick and hassle-free whipped cream without extra bowls.
Red Velvet Muffins with Cream Cheese Filling Variations
Feel free to let your creativity run wild with these sumptuous muffins! Each twist adds a unique twist that could surprise your taste buds.
-
Healthier Swap: Substitute half the butter with applesauce for a lower-fat version that remains moist and delicious. It’s a fantastic way to sneak in some extra fruit!
-
Chocolate Lovers: Stir in chocolate chunks into the muffin batter before baking for an extra layer of rich flavor. The melty chocolate will perfectly complement the cream cheese center.
-
Nuts About Nuts: Add chopped walnuts or pecans to the muffin batter for a satisfying crunch and a nutty flavor that complements the cocoa beautifully.
-
Spicy Kick: Mix in a pinch of cayenne pepper or cinnamon to the batter for a surprising warmth that enhances the red velvet experience. It’s a delightful twist that intrigues and delights.
-
Dairy-Free Delight: Use a non-dairy cream cheese alternative and switch out buttermilk for a plant-based milk mixed with vinegar to create a sensitive-to-diet method without losing flavor.
-
Fruity Variations: Fold in some raspberries or blueberries to the batter for a refreshing twist, creating bursts of fruity goodness with every bite that can balance out the creaminess.
Why not serve these beauties alongside my indulgent Cinnamon Roll Muffins? The variety will make your breakfast spread truly heavenly!
Make Ahead Options
These Red Velvet Muffins with Cream Cheese Filling are perfect for meal prep enthusiasts! You can prepare the cream cheese filling up to 24 hours in advance by mixing it and freezing dollops on a parchment-lined tray. Additionally, the muffin batter can be mixed and stored in the refrigerator for up to 3 days before baking—just be sure to keep it covered tightly to maintain freshness. When you’re ready to bake, simply fill your muffin liners with the chilled batter, add the frozen cream cheese filling, and top with crumb topping before baking as directed. This prep method ensures your muffins are just as delicious while saving you time on busy mornings!
Red Velvet Muffins with Cream Cheese Filling Recipe FAQs
How do I select the best ingredients for my muffins?
Absolutely! For the best red velvet muffins, choose cake flour for its lightness and tenderness. Look for fresh buttermilk; you can make your own by mixing milk with vinegar if needed. Ensure your eggs are at room temperature to help with mixing. The vegetable oil should be neutral-flavored, and always opt for high-quality cocoa powder that gives flavor depth.
How can I store red velvet muffins properly?
To keep your muffins fresh, store them in an airtight container at room temperature for up to 3 days. If you’re looking for longer storage, wrap them individually in plastic wrap and freeze them in a freezer bag for up to 3 months. This way, you can enjoy these delightful treats whenever the craving strikes!
Can I freeze muffins with cream cheese filling?
Yes, you can! To freeze your red velvet muffins with cream cheese filling, allow them to cool completely first. Wrap each muffin tightly in plastic wrap, then place them in a freezer-safe bag. This method helps preserve their moisture and flavor. When you’re ready to indulge, simply thaw at room temperature or heat in the microwave for about 15-20 seconds.
What should I do if the muffins don’t rise as expected?
Very! If your muffins don’t rise, check that your baking powder and baking soda are fresh; expired leavening agents won’t give you the lift you want. Ensure you mix the wet and dry ingredients just until combined to avoid overmixing, which can lead to dense muffins. Finally, make sure to fill the muffin liners generously—almost to the top—for that airy rise.
Are these muffins suitable for those with dietary restrictions?
Indeed! If you have dietary restrictions, you can make some adjustments. For a gluten-free version, substitute cake flour with a gluten-free flour blend. For dairy-free options, use plant-based cream cheese and milk. Those with egg allergies can try flaxseed meal as an egg substitute (1 tablespoon of flaxseed meal mixed with 2.5 tablespoons of water replaces one egg). Always check labels for any allergens in ingredients.
How long will the muffins stay fresh?
Muffins will stay fresh for about 3 days at room temperature, stored in an airtight container. If refrigerated, they can be kept for about 5 days, but the texture may change. Freezing is best for long-term storage—up to 3 months, as mentioned earlier!
Indulgent Red Velvet Muffins with Cream Cheese Filling Magic
Ingredients
Equipment
Method
- Prepare Cream Cheese Filling by beating cream cheese, egg yolk, and powdered sugar until smooth. Scoop onto tray and freeze for 30 minutes.
- Make Crumb Topping by combining butter, brown sugar, and flour until crumbly. Set aside.
- Mix Muffin Batter by creaming butter, oil, and brown sugar until fluffy. Gradually add egg whites, then mix in vanilla and red velvet emulsion.
- Combine Dry Ingredients by whisking together flour, baking powder, baking soda, salt, and cocoa powder. Incorporate into wet mixture gradually.
- Incorporate Wet and Dry Ingredients by slowly adding buttermilk, alternating with dry ingredients. Fold in chocolate chunks or nuts if desired.
- Fold in Whipped Cream until soft peaks form, gently into muffin batter.
- Fill Muffin Pan by spooning batter into liners halfway, placing cream cheese filling in the center, and topping with remaining batter.
- Add Crumb Topping generously over each muffin liner.
- Bake at 425°F for 6 minutes, then reduce to 350°F for 18-22 minutes until a toothpick comes out clean.
- Cool in Pan for 10 minutes before transferring to a cooling rack.
Leave a Reply