
As the sun sets and the aroma of citrus begins to waft through my kitchen, I’m reminded of the incredible fusion that takes place in my favorite dessert: Cannoli Cheesecake Bars. These delightful treats harmoniously blend the creamy richness of cheesecake with the classic charm of Italian cannoli, creating a magical dessert that’s perfect for any occasion. What I love most about this recipe is not just its elegant simplicity—it’s quick to prepare and endlessly customizable to suit any palate. From nutty delights to chocolate lovers’ versions, there’s always a delicious twist to explore. Ready to embrace a new favorite? Let’s dive into making these irresistibly rich bars that are sure to have your friends and family asking for seconds!
Why Are Cannoli Cheesecake Bars a Must-Try?
Irresistible blend of flavors: Experience the captivating fusion of creamy cheesecake and classic cannoli that will satisfy your sweet cravings.
Easy to customize: With variations like Nutty Delight and Chocolate Lovers, you can tailor these bars to fit any taste preference or occasion.
Simple preparation: Just a few straightforward steps make this dessert perfect for both novice bakers and seasoned chefs alike.
Ideal for gatherings: Impress your guests with a dessert that not only tastes divine but also looks stunning on any table.
Make-ahead convenience: Prepare these delightful bars in advance, allowing you to enjoy stress-free gatherings—just chill and serve!
Looking for more delicious desserts? Try our Apple Pie Bars or our Banana Oatmeal Bars for even more delightful flavor experiences!
Cannoli Cheesecake Bars Ingredients
• Here’s everything you need for these delectable Cannoli Cheesecake Bars!
For the Crust
- Graham Cracker Crumbs – Provides a base structure for the crust; substitute with biscotti for a unique flavor.
- Unsalted Butter – Binds the crust ingredients together; make sure it’s melted for a smooth mixture.
- Granulated Sugar – Adds just the right sweetness to the crust; reduce for a less sweet base.
For the Filling
- Cream Cheese – Ensures a creamy texture in the filling; use softened for easier mixing.
- Ricotta Cheese – Essential for that classic cannoli texture; well-drain to keep the bars from becoming watery.
- Powdered Sugar – Sweetens the filling perfectly; can swap with honey for a less refined sweetener.
- Eggs – Provides structure to the filling; be sure to beat until pale for the best result.
- Vanilla Extract – Adds a wonderful depth of flavor; can be replaced with almond extract for a twist.
- Orange or Lemon Zest – Infuses a refreshing citrus note into the filling.
- Cinnamon – Enhances warmth and richness in the filling.
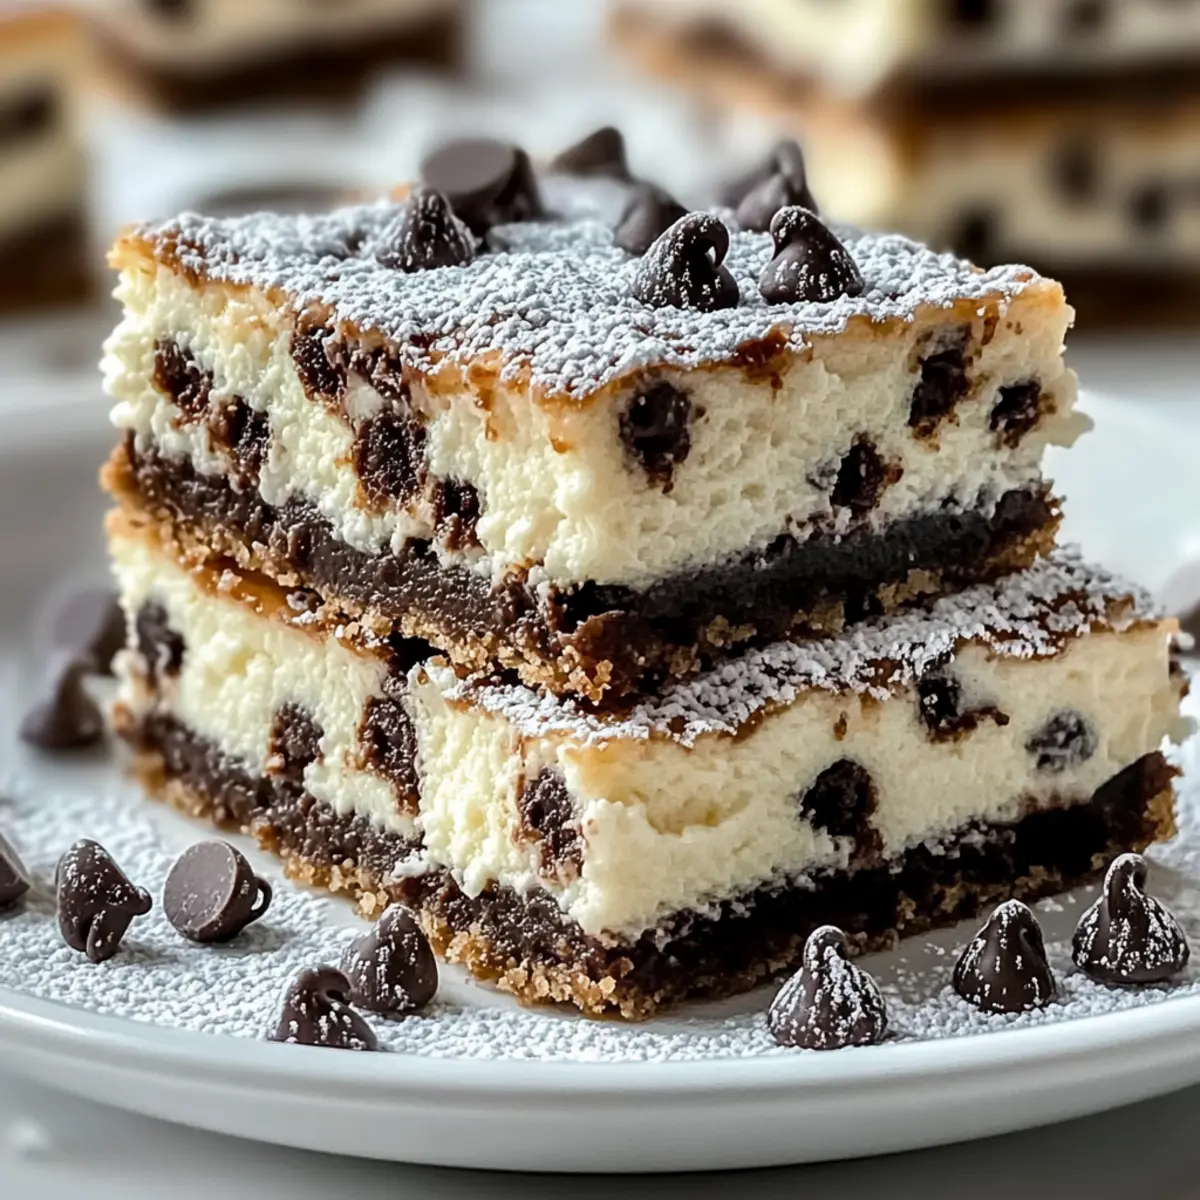
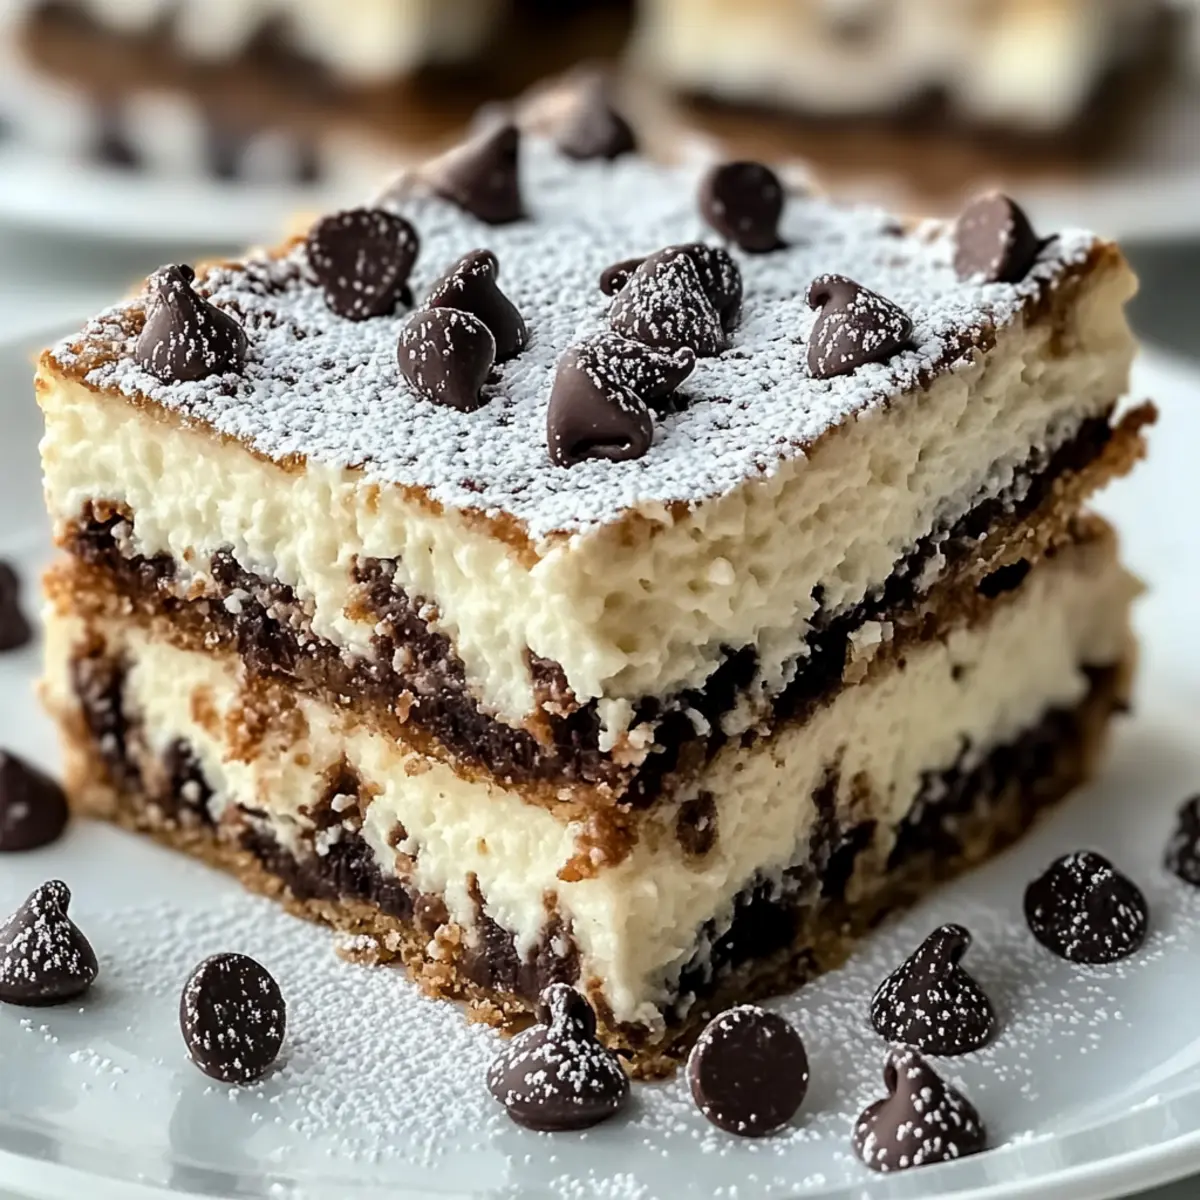
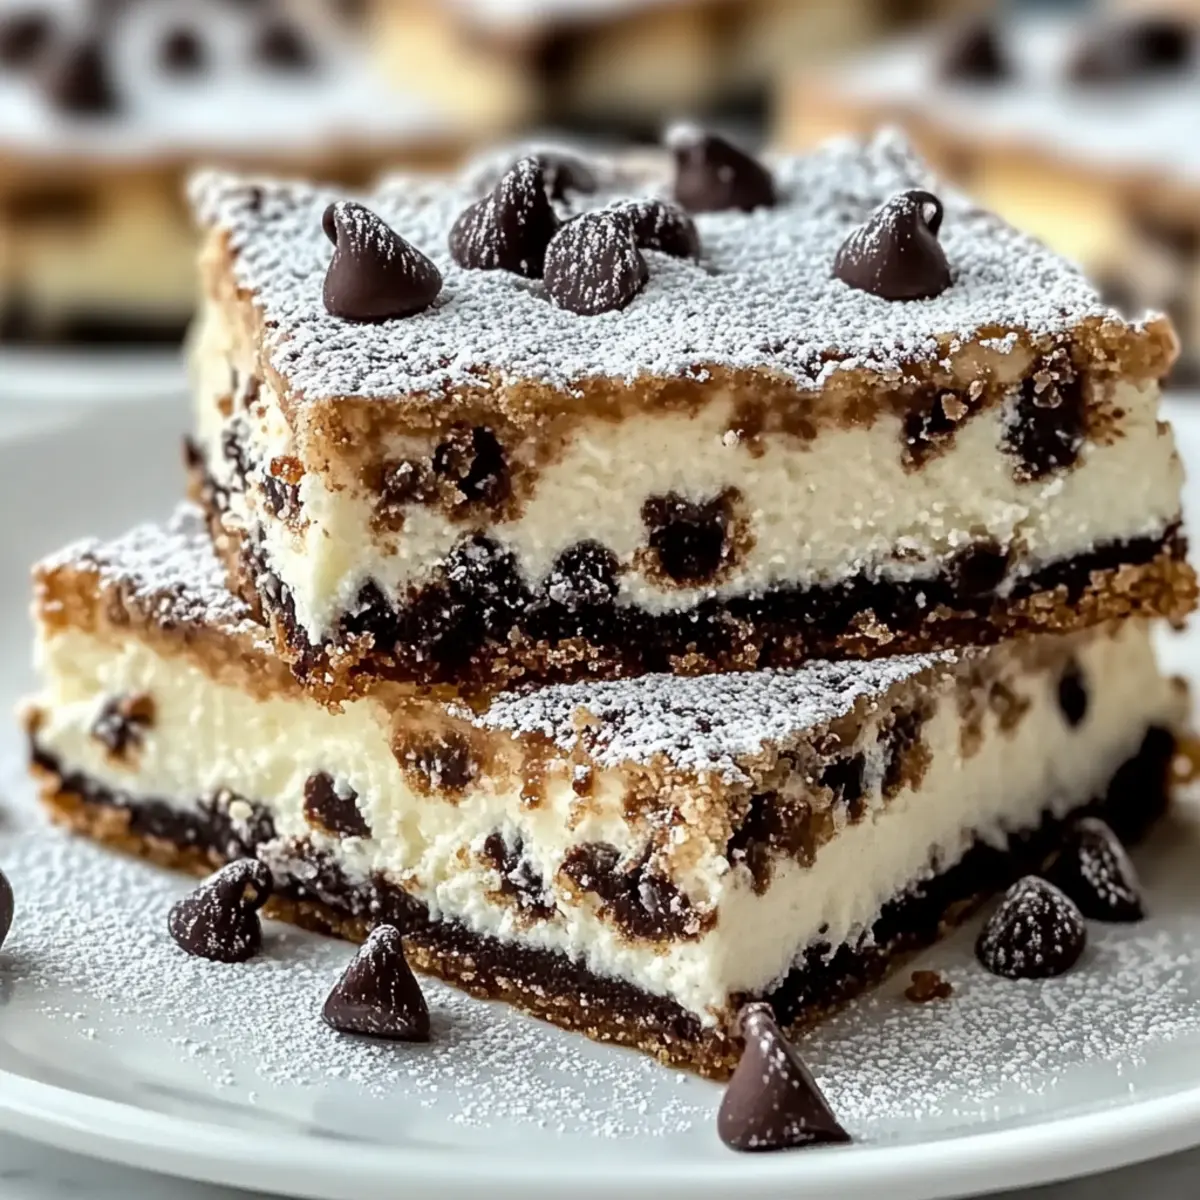
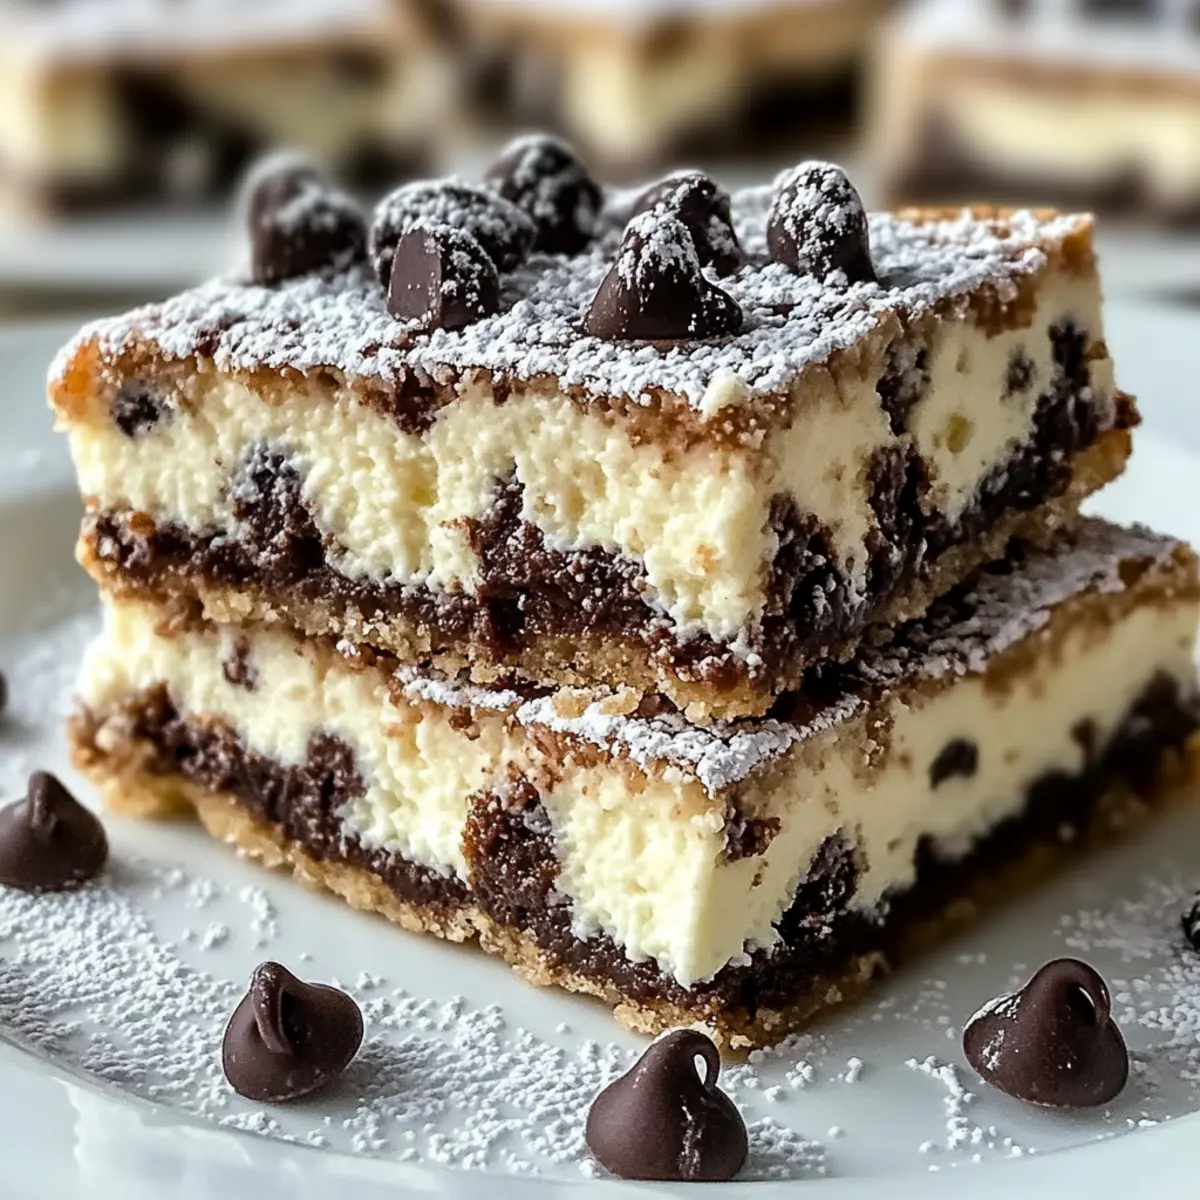
- Mini Chocolate Chips – Adds delightful texture and sweetness; dark chocolate is a great substitute for richness.
For Garnish
- Powdered Sugar – For dusting just before serving to add sweetness and beauty.
- Crushed Pistachios (Optional) – Offers a stunning visual appeal and delightful crunch.
Step‑by‑Step Instructions for Cannoli Cheesecake Bars
Step 1: Preheat and Prepare the Pan
Begin by preheating your oven to 350°F (175°C). While it’s heating, take a 9×13-inch baking pan and lightly grease it with non-stick spray or butter. This ensures easy removal later on. The prepared pan will hold the buttery graham cracker crust, setting the foundation for your delightful Cannoli Cheesecake Bars.
Step 2: Make the Crust
In a medium bowl, combine the graham cracker crumbs, melted unsalted butter, and granulated sugar. Stir until the mixture resembles wet sand, ensuring that everything is well incorporated. Press the crumb mixture firmly into the bottom of the prepared baking pan, creating an even layer. Bake the crust for 8 minutes, or until lightly golden, then remove it from the oven and let it cool completely.
Step 3: Prepare the Filling
In a large mixing bowl, beat the softened cream cheese with an electric mixer until smooth and creamy, about 2 minutes. Gradually add the well-drained ricotta cheese, powdered sugar, and eggs, blending until silky and free of lumps. Mix in the vanilla extract, zest of orange or lemon, and ground cinnamon, ensuring a harmonious flavor throughout the filling for your Cannoli Cheesecake Bars.
Step 4: Incorporate Chocolate Chips
Gently fold in the mini chocolate chips into the cheesecake mixture with a spatula, distributing them evenly. These little bursts of sweetness will add a delightful texture to your Cannoli Cheesecake Bars. Make sure not to over-mix, as you want the chips to remain whole and not break apart in the process.
Step 5: Assemble and Bake
Pour the creamy filling over the cooled crust, spreading it evenly to cover every edge. Place the filled pan in the preheated oven and bake for 35 to 40 minutes. Look for the center of the cheesecake to jiggle slightly while the edges appear set. This visual cue indicates that your Cannoli Cheesecake Bars are on their way to perfection!
Step 6: Cool and Refrigerate
After baking, remove the pan from the oven and allow it to cool at room temperature for 30 minutes. Once cooled, cover the pan with plastic wrap and refrigerate for at least 4 hours, but overnight is even better. Chilling helps the flavors meld and solidifies the filling, making cutting into bars easier.
Step 7: Serve and Garnish
When you’re ready to serve your Cannoli Cheesecake Bars, use a sharp knife to cut them into squares or rectangles. Dust the top generously with powdered sugar for a beautiful finish, and consider garnishing with crushed pistachios or extra chocolate chips for a lovely presentation. These bars are best enjoyed chilled and make for a stunning dessert at any gathering.
Make Ahead Options
These Cannoli Cheesecake Bars are ideal for busy home cooks looking to streamline their meal planning! You can prepare the crust and filling up to 24 hours in advance. Simply make the graham cracker crust and let it cool completely, then refrigerate it. For the filling, combine the cream cheese, ricotta, sugar, eggs, and flavoring, but wait to fold in the chocolate chips until just before baking to keep their texture intact. When ready to serve, simply bake the refrigerated bars, as described, and allow them to cool. This way, you’ll ensure the bars remain just as delicious while enjoying a stress-free dessert experience!
Cannoli Cheesecake Bars Variations
Feel free to let your creativity shine as you personalize these delightful Cannoli Cheesecake Bars to suit your taste!
-
Chocolate Lovers: Add cocoa powder to the crust and drizzle with melted dark chocolate for a decadent twist. The rich chocolate complementing the creamy filling will have everyone swooning.
-
Nutty Delight: Sprinkle toasted nuts like pistachios or almonds on top for an irresistible crunch. The added texture enhances each bite, making it a delightful experience.
-
Mini Versions: Bake the filling in muffin tins for adorable individual servings. Perfect for parties or just when you want a small treat, these mini bars are a hit!
-
Holiday Twist: Introduce amaretto or rum extract into the filling for a festive flavor that dances on the palate. These bars will become a stunning centerpiece for your holiday dessert table.
-
Berry Bliss: Layer fresh raspberries or strawberries over the top for a burst of fruity freshness. This sweet-tart topping not only adds flavor but also a beautiful splash of color.
-
Dairy-Free Delight: Substitute dairy products with plant-based alternatives for an inclusive version everyone can enjoy. Almond or cashew cream works wonders in maintaining that luscious texture.
-
Citrus Burst: Replace orange or lemon zest with lime and grapefruit for a refreshing twist. The zesty goodness brightens the flavors, perfect for warm summer gatherings.
Explore these variations to make each batch of Cannoli Cheesecake Bars a new adventure in flavor! For more delightful options, check out our Apple Pie Bars or Banana Oatmeal Bars.
Expert Tips for Cannoli Cheesecake Bars
- Draining Ricotta: Ensure ricotta is well-drained for the right texture; wrap it in cheesecloth or use paper towels for at least 30 minutes.
- Chill Time: Refrigerating your cannoli cheesecake bars overnight will enhance their flavor and make them easier to slice.
- Check for Doneness: Look for a slight jiggle in the center; it should be set but still slightly wobbly when finished baking.
- Flavor Variations: Don’t hesitate to experiment with crust ingredients—try using crushed biscotti for a unique twist on your classic cannoli cheesecake bars.
- Avoid Overbaking: Remember that the filling continues to set while cooling, so take them out just as the center is set.
Storage Tips for Cannoli Cheesecake Bars
- Room Temperature: Cannoli Cheesecake Bars should not be left out for more than 2 hours to prevent spoilage; always serve chilled for the best flavor and texture.
- Fridge: Store your bars in an airtight container in the refrigerator for up to 5 days to maintain their freshness. Make sure they’re cool before sealing to avoid condensation.
- Freezer: For longer storage, you can freeze the Cannoli Cheesecake Bars for up to 3 months. Wrap individual bars tightly in plastic wrap and then place them in a freezer-safe container.
- Thawing: To enjoy frozen bars, simply remove from the freezer and let them thaw in the refrigerator for a few hours before serving for optimal texture.
What to Serve With Cannoli Cheesecake Bars
Elevate your dessert experience by pairing these luscious bars with delightful accompaniments that complement their creamy richness.
-
Fresh Berries: Juicy strawberries or raspberries add a refreshing burst of flavor and a pop of color to your plate. Their tartness beautifully contrasts the sweetness of the bars.
-
Vanilla Gelato: Creamy, smooth gelato melts in your mouth, enhancing the luxurious taste of the Cannoli Cheesecake Bars. It’s a classic Italian pairing that transports your taste buds straight to Italy.
-
Espresso or Coffee: Rich, bold coffee cuts through the dessert’s sweetness, making it a perfect palate cleanser between bites. A warm cup is the ultimate cozy companion for these bars.
-
Chocolate Drizzle: A simple chocolate sauce drizzled over the bars creates an extra layer of indulgence. The rich dark chocolate elevates the dessert’s appeal while introducing a new flavor dimension.
-
Candied Citrus Peel: For a sophisticated touch, sprinkle some candied orange or lemon peel on top. This not only brightens the bars visually but also enhances the citrus notes in the filling.
-
Pistachio Brittle: Crunchy, sweet pistachio brittle adds an exciting texture contrast alongside the creamy cheesecake. It’s delightful to nibble on while enjoying your dessert.
-
Crème Fraîche: Luxurious and tangy, crème fraîche serves as a creamy dip that adds a gourmet twist. A dollop on each serving offsets the sweetness beautifully, offering a refined finish.
Indulge in a full dessert experience by exploring these pairings that harmonize perfectly with the decadent Cannoli Cheesecake Bars!
Cannoli Cheesecake Bars Recipe FAQs
How do I select ripe ingredients for Cannoli Cheesecake Bars?
When choosing ricotta cheese, look for a fresh brand with a creamy texture and a slight bounce when pressed. For citrus zest, opt for firm, vibrant oranges or lemons without soft spots indicating overripeness. The fresher your ingredients, the richer the flavor of your Cannoli Cheesecake Bars!
How should I store leftover Cannoli Cheesecake Bars, and for how long?
Store your leftover Cannoli Cheesecake Bars in an airtight container in the refrigerator for up to 5 days. Ensure they are completely cool before sealing to avoid condensation, which can affect texture. You can enjoy them chilled or at room temperature.
Can I freeze Cannoli Cheesecake Bars? If so, how?
Absolutely! To freeze, wrap each bar tightly in plastic wrap and then place them into a freezer-safe container. This method preserves flavor and prevents freezer burn. Your Cannoli Cheesecake Bars can be stored in the freezer for up to 3 months. When ready to enjoy, thaw them in the refrigerator for a few hours.
What should I do if my Cannoli Cheesecake Bars are too runny after baking?
If your bars come out runny, they may not have set properly. Ensure you bake them until the center jiggles slightly but is set—this is key! Cooling them in the refrigerator overnight will help them firm up. If all else fails, you can make a delicious parfait by layering the filling and crust in a dish!
Are Cannoli Cheesecake Bars suitable for people with dairy allergies?
If you have dairy allergies, you can use dairy-free alternatives. Look for plant-based cream cheese and ricotta substitutes available in many stores. Be sure to check the labels for allergens, and also consider using maple syrup or coconut sugar instead of powdered sugar to sweeten your filling.
How do I ensure my Ricotta is well-drained for the best texture?
To properly drain ricotta cheese, place it in a fine-mesh strainer lined with cheesecloth or use paper towels. Let it drain for at least 30 minutes to remove excess moisture. This step is crucial for achieving the perfect texture and preventing runny Cannoli Cheesecake Bars!
Decadent Cannoli Cheesecake Bars to Wow Your Guests
Ingredients
Equipment
Method
- Preheat your oven to 350°F (175°C) and prepare a 9x13-inch baking pan by greasing it.
- For the crust, mix graham cracker crumbs, melted butter, and granulated sugar until it resembles wet sand. Press into the bottom of the pan and bake for 8 minutes until lightly golden.
- For the filling, beat cream cheese until smooth, then add ricotta, powdered sugar, and eggs. Mix in vanilla, zest, and cinnamon.
- Gently fold in mini chocolate chips into the cheesecake mixture.
- Spread the filling over the cooled crust and bake for 35-40 minutes until slightly jiggly in the center.
- Cool at room temperature for 30 minutes, then refrigerate for at least 4 hours or overnight.
- Serve by cutting into squares, dust with powdered sugar, and garnish with crushed pistachios if desired.
Leave a Reply