
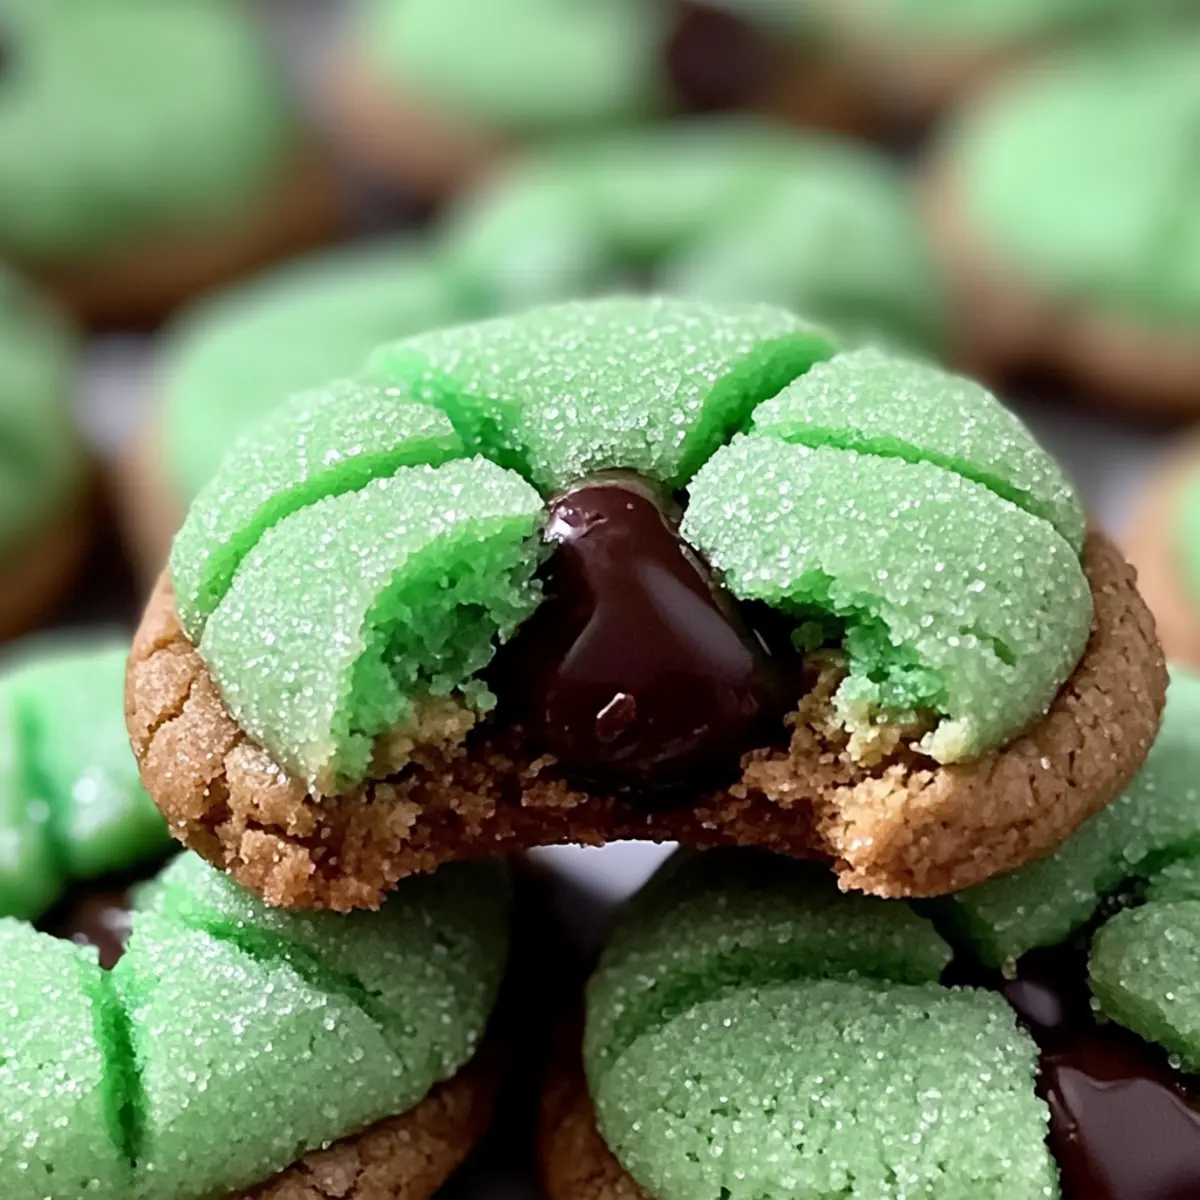
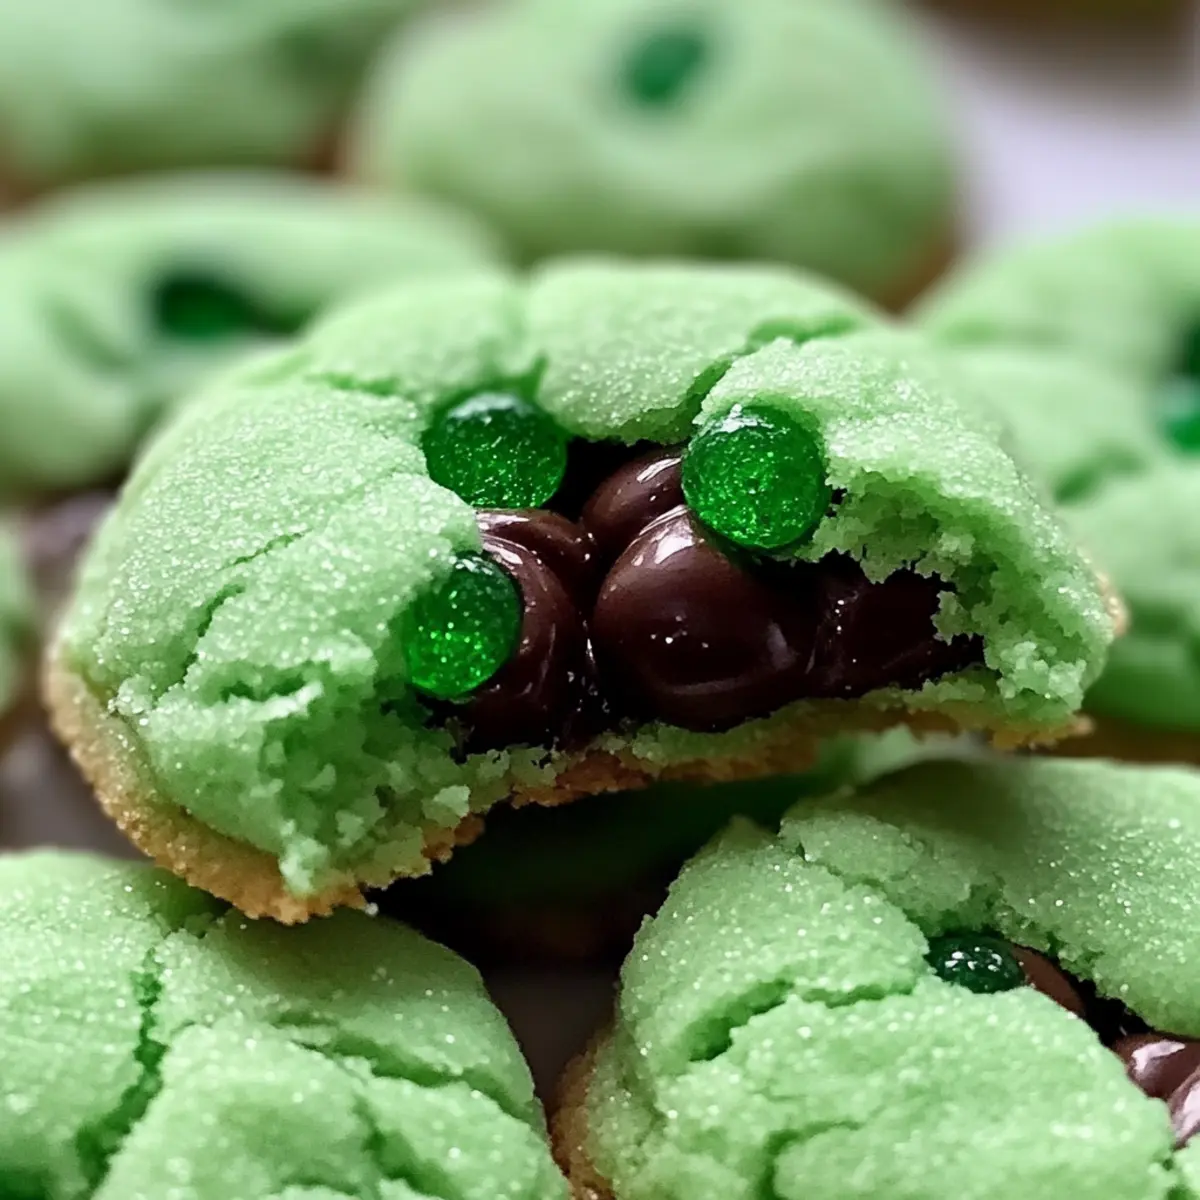
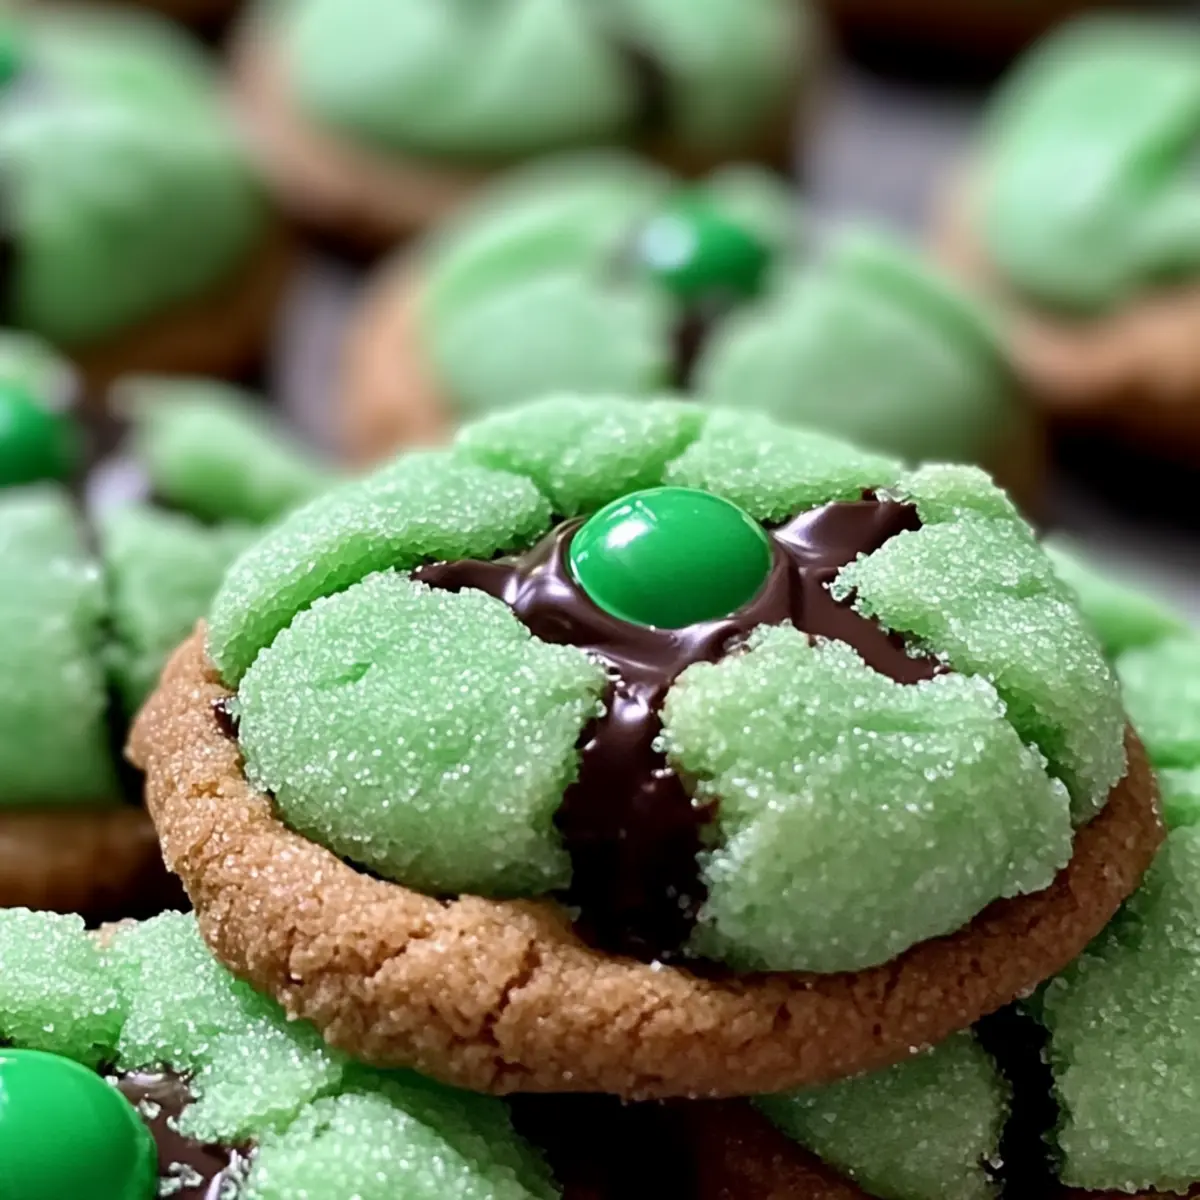
The sweet aroma of freshly baked cookies wafting through the air is something truly magical, especially when you get to share it with loved ones. As March rolls around, my excitement for St. Patrick’s Day sparks a craving for festive treats, and that’s where these Mint Blossom Cookies come into play. This delightful twist on classic peanut blossom cookies features soft, chewy chocolate goodness topped with mint chocolate candies, all dusted in sparkly green sugar. Not only are these Mint Blossom Cookies visually stunning for any dessert table, but they’re also a breeze to make, perfect for engaging both kids and adults in a little kitchen fun. Trust me, they’re sure to be a crowd-pleaser at your holiday celebration! Curious about how to bring a taste of this festive flavor into your kitchen?
Why Are These Cookies So Special?
Festive Fun: Celebrate St. Patrick’s Day with cookies that bring joy to any gathering!
Decadent Flavor: The rich chocolate base and refreshing mint create an irresistible taste that captivates all ages.
Easy to Make: With straightforward steps, you’ll have homemade treats without the stress!
Eye-Catching Appearance: Sparkly green sugar and a minty crown make these cookies a visual delight for your dessert table.
Versatile Variations: Customize your cookies by swapping out mint chocolates for traditional Hershey’s Kisses or even try a non-mint version! Whether you’re planning a family get-together or simply want to indulge, these Mint Blossom Cookies are sure to impress.
Mint Blossom Cookies Ingredients
For the Cookie Dough
• All-Purpose Flour – Provides structure; substitute with a gluten-free flour blend if desired.
• Baking Soda – Acts as a leavening agent for a soft cookie texture.
• Baking Powder – Enhances cookie puffiness for that perfect bite.
• Fine Sea Salt – Balances sweetness and enhances flavor.
• Unsalted Butter – Adds richness and tenderness; margarine can be used for a dairy-free option.
• Granulated Sugar – Sweetens the cookie base beautifully.
• Light Brown Sugar – Adds moisture and a hint of caramel flavor to the mix.
• Large Eggs – Binds the ingredients together and adds moisture; use flax eggs for a vegan substitute.
• Pure Peppermint Extract – Amplifies the mint flavor; avoid mixed extracts for purity.
• Pure Vanilla Extract – Complements the chocolate flavor wonderfully.
• Green Gel Food Coloring (optional) – Adds a festive visual appeal.
For Coating and Topping
• Granulated Sugar (for rolling) – Coats the cookie dough for an added crunch.
• Green Sanding Sugar – Adds a decorative shimmer for that extra touch of festivity.
• Dark Chocolate Kisses or Similar Candies – Creates the signature “crown” on top; use alternative chocolates if mint is unavailable.
Get ready to spread some festive cheer with these delightful Mint Blossom Cookies!
Step‑by‑Step Instructions for Mint Blossom Cookies
Step 1: Preheat Oven
Begin by preheating your oven to 350°F (175°C) and prepare your baking sheets by lining them with parchment paper. This will ensure the cookies bake evenly and don’t stick. As the oven warms up, gather all your ingredients for the Mint Blossom Cookies, making the process smoother and more enjoyable.
Step 2: Sift Dry Ingredients
In a medium mixing bowl, sift together the all-purpose flour, baking powder, baking soda, and fine sea salt. This step helps aerate the flour, ensuring a lighter cookie texture. Once the dry ingredients are well combined, set the bowl aside and prepare to tackle the wet ingredients for your delightful cookies.
Step 3: Cream Butter and Sugars
In a large mixing bowl, beat together softened unsalted butter with granulated sugar and light brown sugar until the mixture is light and fluffy, about 2-3 minutes. You’ll know it’s ready when it appears pale and creamy. This essential step for your Mint Blossom Cookies creates a rich base that adds depth to the flavor.
Step 4: Incorporate Wet Ingredients
Add large eggs, pure peppermint extract, and pure vanilla extract to the creamed butter and sugars, blending smoothly until combined. This mixture should be smooth and slightly thick. The extracts will elevate the minty essence in the Mint Blossom Cookies, making every bite memorable and festive.
Step 5: Combine Ingredients
Gradually mix the sifted dry ingredients into the wet mixture, stirring until just combined. Be careful not to overmix; the dough should remain slightly thick and cohesive. This is the foundation of your Mint Blossom Cookies, so embrace the texture and enjoy the anticipation of the final bake!
Step 6: Chill Dough
Cover the bowl of dough with plastic wrap and refrigerate for at least 30 minutes. Chilling the dough is crucial, as it helps prevent the cookies from spreading too much during baking. This time allows the flavors to meld beautifully, ensuring rich Mint Blossom Cookies that are both chewy and satisfying.
Step 7: Shape Cookies
After chilling, take the dough out and roll it into tablespoon-sized balls. First, roll each ball in granulated sugar for a touch of sweetness, then roll it again in green sanding sugar for festive sparkle. This dual coating creates a delightful crunch on the outside, preparing your Mint Blossom Cookies for their sweet topping.
Step 8: Bake
Lay the coated dough balls 2 inches apart on the prepared baking sheets. Bake in the preheated oven for 9-11 minutes, or until the edges are set and the tops look slightly cracked. The cookies should still be soft in the center, as they will firm up while cooling; this is key for a chewy texture.
Step 9: Add Mint Candies
Once you remove the baking sheets from the oven, immediately press a dark chocolate mint candy into the center of each cookie. The heat from the cookie will melt the candy slightly, creating a luscious crown for your Mint Blossom Cookies. This step adds that extra layer of flavor and a visually appealing touch.
Step 10: Cool Cookies
Allow the cookies to cool on the baking sheet for at least 15 minutes before transferring them to a wire rack. Cooling them initially on the sheet helps set the melted candies and keeps them from sliding off. Enjoy the aroma of fresh Mint Blossom Cookies revolutionizing your kitchen!
Mint Blossom Cookies Variations
Feel free to let your creativity shine by customizing these delightful cookies! The world of flavors awaits you.
-
Gluten-Free: Swap out all-purpose flour for a gluten-free flour blend to make this recipe friendly for gluten-sensitive mouths.
-
Dairy-Free: Replace unsalted butter with margarine or coconut oil to create a dairy-free version that doesn’t skimp on flavor.
-
Vegan: Use flax eggs instead of large eggs and dairy-free chocolate candies for a delightful plant-based twist.
-
Mint Chocolate Twist: For extra mint flavor, add crushed peppermint candies to the dough or sprinkle them over the tops before baking. Your taste buds will thank you!
-
Colorful Sugar: Get creative with vibrant colored sugar for rolling! Use pink, blue, or gold to match your festive celebrations. What a fun twist!
-
Chocolate Lovers: For a richer chocolate experience, mix in semi-sweet chocolate chips or chunks to the dough. These cookies will be a chocolate lover’s dream!
-
S’mores Inspired: Instead of mint candies, use chocolate squares and mini marshmallows to create s’mores Mint Blossom Cookies, perfect for a unique summer treat!
-
Peanut Butter Version: Substitute dark chocolate candies for chocolate peanut butter cups to combine two classic flavors in one delightful cookie.
For even more inspiration, you can try these variations with the delicious Brown Butter Cookies or explore the refreshing flavor of Lemon Raspberry Cookies. Enjoy your baking journey!
What to Serve with St. Patrick’s Day Mint Blossom Cookies
Celebrate your sweet baking triumph by pairing these enchanting cookies with delightful accompaniments that everyone will adore!
-
Creamy Vanilla Ice Cream: The rich, creamy texture of vanilla ice cream contrasts beautifully with the fudgy chocolate cookies, enhancing the overall indulgence. A scoop served beside these cookies creates a fun dessert experience.
-
Hot Chocolate: A warm cup of rich hot chocolate balances the minty freshness, making each bite feel like a cozy hug. Elevate it by adding a sprinkle of crushed mint candies on top for extra festivity.
-
Fresh Fruit Salad: A vibrant mix of berries and citrus cuts through the sweetness and adds a refreshing touch. Juicy flavors provide a great contrast to the dense texture of the cookies, making for a balanced dessert table.
-
Irish Coffee: Kick up the festive spirit with a warm Irish coffee, combining coffee’s boldness with whiskey’s warmth. This comforting drink pairs perfectly with the chocolate-mint flavors, rounding out the celebration beautifully.
-
Mint Hot Chocolate: Dive deeper into the mint theme with a cup of mint hot chocolate. The combination heightens the mint experience and makes for a cheerful drink choice during the St. Patrick’s Day festivities.
-
Chocolate Dipped Strawberries: Juicy strawberries dipped in chocolate add a touch of elegance and freshness. Their bright colors and succulent bites are perfect foils to the rich Mint Blossom Cookies, creating a lovely visual and flavor contrast.
How to Store and Freeze Mint Blossom Cookies
- Room Temperature: Keep your Mint Blossom Cookies in an airtight container at room temperature for up to 1 week to maintain their soft texture and sweet flavor.
- Fridge: For a longer shelf life, store the cookies in the refrigerator for up to 2 weeks in a sealed container. The chilling may enhance their minty taste!
- Freezer: Freeze cookies in a single layer on a baking sheet, then transfer them to an airtight container. They can be frozen for up to 3 months for future enjoyment.
- Reheating: Thaw frozen cookies in the fridge overnight, then warm them in a preheated oven at 350°F (175°C) for about 5 minutes to regain their delightful softness.
Expert Tips for Mint Blossom Cookies
• Chill for Success: Refrigerate the dough for at least 30 minutes. This prevents the cookies from spreading too much during baking, ensuring a thicker cookie.
• Rolling Technique: Roll dough balls in granulated sugar first, then in green sanding sugar. This helps the sugar adhere well and enhances crunchiness.
• Add Candies Promptly: Press mint candies into the cookies immediately after removing them from the oven. This step is crucial to achieve that melty crown without over-melting.
• Pure Ingredients Matter: Use pure peppermint extract for the best mint flavor. Avoid mixed extracts which can dilute the taste.
• Cool Time: Let cookies rest on the baking sheet for at least 15 minutes before transferring them. This helps set the melted candies and keeps them from sliding off.
Enjoy the fun of baking these Mint Blossom Cookies with these helpful tips!
Make Ahead Options
These St. Patrick’s Day Mint Blossom Cookies are fantastic for busy home cooks looking to save time! You can prepare the cookie dough up to 24 hours in advance. Simply make the dough through Step 6 — chilling the dough is essential to maintain the soft texture — then wrap it tightly in plastic wrap and refrigerate. When you’re ready to bake, allow the dough to sit at room temperature for about 10 minutes before shaping into balls and rolling in sugar. This way, you’ll have fresh, warm Mint Blossom Cookies with a delightful minty crown ready in no time, perfect for your St. Patrick’s Day festivities!
St. Patrick’s Day Mint Blossom Cookies Recipe FAQs
How do I know if my mint extract is good?
Absolutely! When selecting mint extract, look for a pure formula labeled as “pure peppermint extract” rather than a mixed or artificial extract. Purity ensures a strong, authentic mint flavor in your Mint Blossom Cookies. If you notice any off-smells or discoloration, it’s best to replace it.
How should I store my Mint Blossom Cookies?
To maintain the freshness of your Mint Blossom Cookies, keep them in an airtight container at room temperature for up to 1 week. If you’d like to extend their shelf life, refrigerate them for up to 2 weeks. Always make sure they are fully cooled before storage to prevent moisture buildup!
Can I freeze Mint Blossom Cookies?
Absolutely! To freeze your Mint Blossom Cookies, place them in a single layer on a baking sheet until solid. Then, transfer the cookies to an airtight container or freezer bag. They can be frozen for up to 3 months. When you’re ready to enjoy, thaw them in the fridge overnight and reheat briefly in the oven for that fresh-baked taste.
What do I do if my cookies spread too much while baking?
Very! If your Mint Blossom Cookies spread excessively during baking, it typically boils down to factors like dough temperature or ingredient measurements. Ensure your butter is not overly softened; room temperature is best. Chilling the dough for at least 30 minutes can also help prevent spreading. If not already done, try refrigerating your cookie dough before baking to achieve that perfect chewy texture.
Can I make these cookies gluten-free?
Yes, indeed! To make gluten-free Mint Blossom Cookies, simply substitute the all-purpose flour with a gluten-free flour blend. Be sure to check that the baking powder and other ingredients you use are gluten-free as well. Always perform a quick check on labels to avoid gluten exposure for any dietary restrictions.
Are Mint Blossom Cookies safe for my pets?
Not at all! Chocolate in any form is toxic to dogs and other pets, so be extra cautious not to share these Mint Blossom Cookies with them. Always ensure that treats meant for your furry friends are safe for their consumption, keeping your baking items just for human enjoyment!

Irresistible Mint Blossom Cookies for a Festive Treat
Ingredients
Equipment
Method
- Preheat oven to 350°F (175°C) and line baking sheets with parchment paper.
- Sift together flour, baking powder, baking soda, and salt in a medium bowl.
- Cream butter with granulated and brown sugar until light and fluffy.
- Add eggs, peppermint extract, and vanilla extract, blending until combined.
- Gradually mix dry ingredients into wet mixture, stirring until just combined.
- Refrigerate the dough for at least 30 minutes.
- Roll dough into tablespoon-sized balls, coating in granulated sugar followed by green sanding sugar.
- Place coated balls on baking sheets and bake for 9-11 minutes.
- Press a dark chocolate mint candy into the center of each cookie immediately after baking.
- Allow cookies to cool on baking sheet for at least 15 minutes before transferring to wire rack.
Leave a Reply