
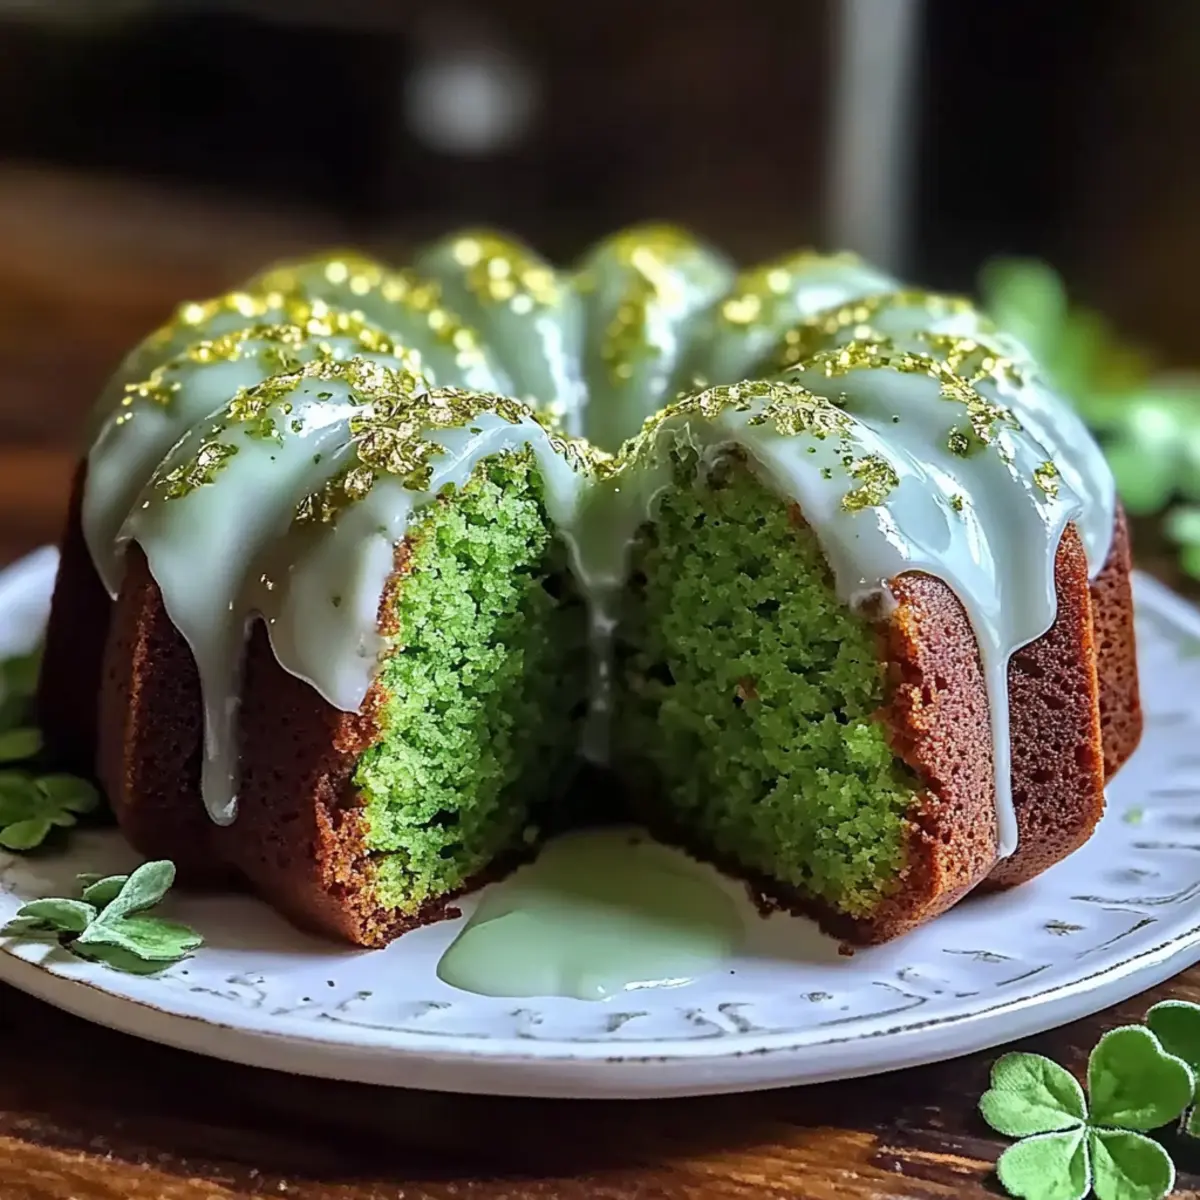
As I sifted through my pantry in search of something vibrant, I stumbled upon a little box of cocoa powder that whispered of nostalgia and celebration. That’s when the idea struck: why not whip up some Green Velvet Mini Bundt Cakes for St. Patrick’s Day? These irresistible treats are deliciously simple to make, perfect for both novice bakers and seasoned pros alike. Not only do they bring a charming festive flair to any gathering, but they can also be easily tailored to fit gluten-free and dairy-free diets without sacrificing flavor. So, are you ready to turn your kitchen into a festive haven with these delightful mini cakes that will surely amaze your friends and family? Let’s bake!
Why Are These Cakes So Special?
Festive Appeal: Perfect for St. Patrick’s Day, these mini bundt cakes add a vibrant touch to any celebration.
Versatile Recipe: Easily adaptable for gluten-free or dairy-free diets, ensuring no one misses out on the fun!
Quick and Easy: With straightforward steps, even novice bakers can shine in the kitchen.
Irresistible Flavor: The combination of cocoa and rich vanilla creates a delightful taste that captivates every palate.
Crowd-Pleasing Size: Mini portions make them ideal for sharing, and they’re sure to impress guests at any gathering.
Whether you’re in the mood for a sweet treat or something unique, these Green Velvet Mini Bundt Cakes are a fantastic choice! For more festive ideas, check out my Coconut Cream Pancakes that are also perfect for celebrations.
Green Velvet Mini Bundt Cake Ingredients
-
For the Cake Batter
• All-Purpose Flour – Provides structure; substitute with a 1:1 gluten-free baking flour blend for gluten-free version.
• Granulated Sugar – Adds sweetness; standard sugar with no noted substitutions.
• Unsweetened Cocoa Powder – Essential for flavor and color; opt for a quality brand like Hershey’s for best results.
• Baking Powder – A crucial leavening agent; ensure it’s fresh for optimal rise.
• Baking Soda – Offers additional leavening; keeps sealed to retain potency.
• Salt – Balances the sweetness; no substitutions needed.
• Buttermilk – Provides moisture and flavor; substitute with homemade milk and lemon juice mix (1 cup milk + 1 tbsp lemon juice, rest for 5-10 minutes).
• Vegetable Oil – Contributes moisture; melted butter or a neutral-flavored oil can also work.
• Eggs – Acts as a binding agent and adds moisture; room temperature helps with better mixing.
• Vanilla Extract – Adds richness; can replace with almond extract for a different flavor profile. -
For the Optional Cream Cheese Glaze
• Cream Cheese – Provides a smooth glaze; use dairy-free cream cheese for a dairy-free version.
• Powdered Sugar – Adds sweetness for the glaze; adjust consistency with milk as needed.
Step‑by‑Step Instructions for Green Velvet Mini Bundt Cakes
Step 1: Preheat Oven
Begin by preheating your oven to 350°F (175°C). While the oven heats, generously grease your mini bundt pans using baking spray or butter to ensure easy release later. This is vital for achieving the perfectly shaped Green Velvet Mini Bundt Cakes that will impress everyone at your celebration.
Step 2: Combine Dry Ingredients
In a mixing bowl, sift together 1 ½ cups of all-purpose flour, ⅓ cup of unsweetened cocoa powder, 1 tsp of baking powder, ½ tsp of baking soda, and a pinch of salt. This sifting process aerates the dry ingredients and prevents any dense spots in your cakes. Set the bowl aside, and admire the rich cocoa color as it blends, hinting at the deliciousness to come.
Step 3: Mix Wet Ingredients
In a separate large bowl, whisk together 1 cup of buttermilk, ½ cup of vegetable oil, 2 large eggs (at room temperature), and 2 tsp of vanilla extract until the mixture is smooth and well combined. The buttermilk adds moisture, creating a tender crumb in your Green Velvet Mini Bundt Cakes. Enjoy the aroma as the flavors meld together beautifully.
Step 4: Combine Mixtures
Gently fold the wet mixture into the dried ingredients using a spatula. Mix until just combined, being careful not to overmix; the batter should be slightly lumpy. This step ensures you maintain a light and tender texture for your cakes. The vibrant color will begin to show as the batter comes together, showcasing the festive green hue.
Step 5: Fill Pans
Using a spoon or a piping bag, carefully pour the batter into your prepared mini bundt pans, filling each cavity about ⅔ full. This allows room for the cakes to rise without overflowing. The anticipation builds as you see the vibrant green batter filling each pan, ready to transform into delightful treats.
Step 6: Bake
Place the filled bundt pans in the preheated oven and bake for 18 to 22 minutes. Begin checking for doneness at the 18-minute mark by inserting a toothpick into the center of a cake. It should come out clean or with a few moist crumbs for perfectly baked Green Velvet Mini Bundt Cakes.
Step 7: Cool
Once baked, allow the mini bundt cakes to cool in their pans for about 5 minutes. Gently invert the pans onto wire racks to release the cakes. This cooling period helps them set and avoid sticking, ensuring you can present them beautifully to your guests.
Step 8: Prepare Glaze (Optional)
While the cakes cool, prepare the optional cream cheese glaze. In a mixing bowl, combine 4 oz of softened cream cheese with 1 cup of powdered sugar, mixing until smooth. Adjust the glaze consistency with a splash of milk until it reaches your desired drizzle thickness, adding an irresistible sweetness to your Green Velvet Mini Bundt Cakes.
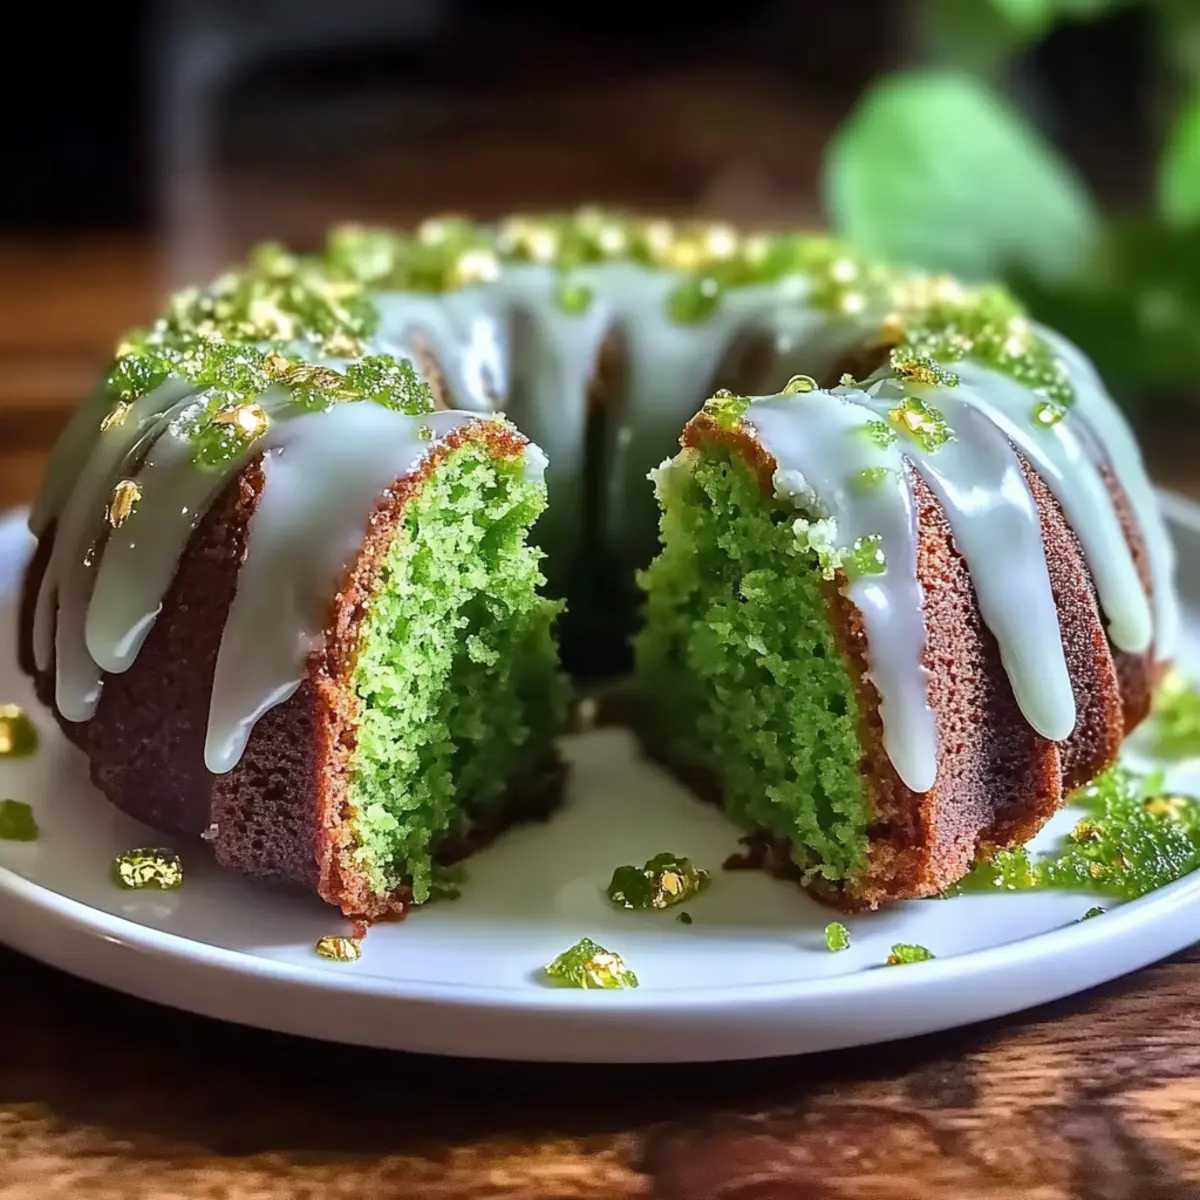
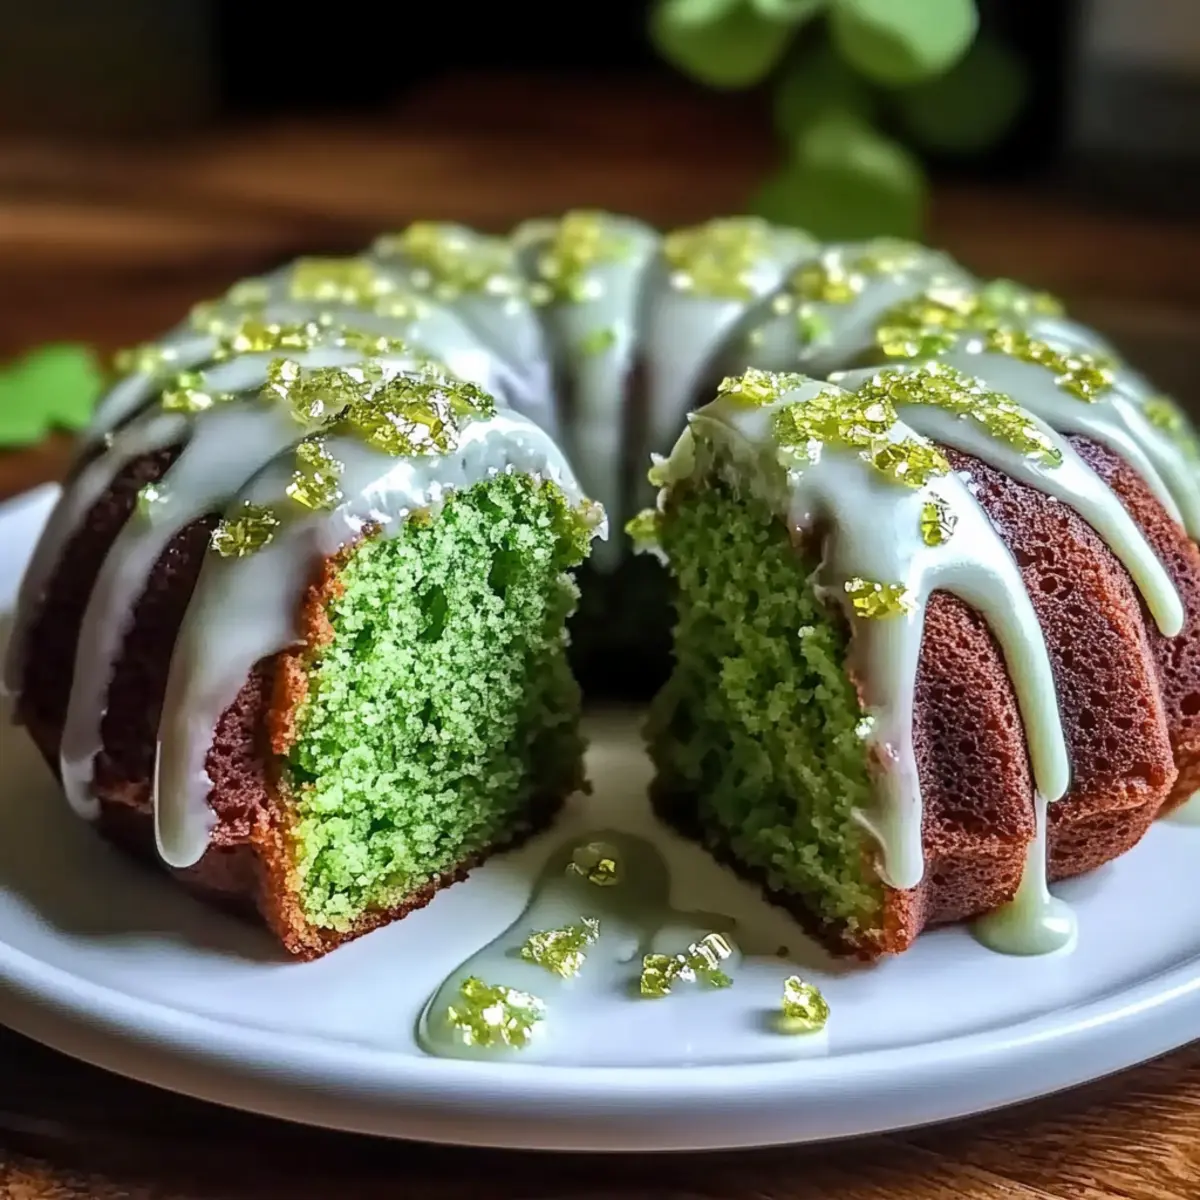
Step 9: Glaze Cakes
Drizzle the prepared cream cheese glaze over the cooled cakes before serving. This not only enhances the visual appeal but also adds a rich flavor contrast. As the glaze trickles down the lovely shapes of your mini bundt cakes, feel free to make each drizzle unique to each cake, adding that personal touch to your festive dessert!
Storage Tips for Green Velvet Mini Bundt Cakes
Fridge: Store leftover cakes in an airtight container in the refrigerator for up to 4 days to keep them fresh and moist.
Freezer: Unglazed cakes can be frozen for up to 2 months. Wrap each in plastic wrap and foil to prevent freezer burn, and thaw overnight in the fridge before glazing.
Room Temperature: If serving on the same day, keep the cakes at room temperature, covered lightly, for a soft texture and better flavor enjoyment.
Reheating: If you prefer a warm treat, reheat individual cakes in the microwave for about 10-15 seconds; be careful not to overheat to avoid dryness.
What to Serve with Irresistible St. Patrick’s Green Velvet Mini Bundt Cakes
Imagine a warm gathering filled with laughter, where the sweet scent of cocoa mingles with delightful conversation, creating a cozy atmosphere to cherish.
- Irish Breakfast Tea: The robust flavor pairs perfectly, complementing the sweetness of the cakes while adding a warm, inviting touch to your celebration.
- Whipped Cream: A dollop of fresh, fluffy whipped cream adds an airy texture that enhances the decadent experience of each bite.
- Fresh Berries: Juicy strawberries, raspberries, or blueberries provide a refreshing burst of acidity that beautifully contrasts the rich flavors of the bundt cakes.
- Chocolate Drizzle: A simple melted chocolate drizzle elevates each cake, incorporating a luxurious touch that will mesmerize chocolate lovers.
- Mint Leaves: Fresh mint offers a vibrant pop of color and a crisp, refreshing taste that brings a bright harmony to the cocoa notes.
- Vanilla Ice Cream: Creamy vanilla ice cream is a classic pairing that melts into the warm cake, creating a luscious dessert experience perfect for sharing.
- Irish Cream Liqueur: For an adult twist, serve with a splash of Irish cream over ice; the silky smoothness enhances the rich flavors of the bundt cakes, perfect for celebrations.
- Pistachio Macarons: Delightful and colorful, these French treats provide a crunchy texture that contrasts beautifully with the soft mini bundt cakes.
Expert Tips for Green Velvet Mini Bundt Cakes
- Room Temperature Ingredients: Ensure your eggs and buttermilk are at room temperature to achieve a better batter emulsion and avoid any lumps.
- Sift Flour and Cocoa: Sifting is essential to prevent dense spots in your Green Velvet Mini Bundt Cakes; it helps blend dry ingredients thoroughly.
- Gentle Folding: When combining wet and dry mixtures, fold gently to avoid overmixing—this keeps your cakes tender and light.
- Grease Properly: Use a generous amount of baking spray or butter on the bundt pans to prevent any sticking; this is key to perfect cake release.
- Check Early: Oven times can vary; start checking for doneness a few minutes before the recommended time to ensure perfectly baked cakes.
Green Velvet Mini Bundt Cakes Variations
Feel free to get creative with these mini bundt cakes and tailor them to your taste or dietary needs!
- Gluten-Free: Use a 1:1 gluten-free baking flour blend to make these tasty treats suitable for gluten-sensitive guests.
- Dairy-Free: Substitute buttermilk with a mix of almond milk and lemon juice for a delicious dairy-free alternative that doesn’t skimp on flavor.
- Matcha Twist: Replace cocoa powder with matcha powder for a vibrant green tea flavor that still keeps that lush color.
- Fun Add-Ins: Consider folding in chocolate chips or chopped nuts for an exciting textural twist that adds delightful surprises with each bite.
- Natural Coloring: Use spinach powder for a natural source of green color instead of food coloring; it’s a healthy swap that still delivers festive spirit.
- Mini Versions: Make even smaller bites by using a mini muffin tin; they’re perfect for sharing or as party favors.
- Cocoa-Free: If you want a lighter option, skip the cocoa altogether and add a touch of mint extract for a refreshing flavor that celebrates spring.
- Unique Glazes: Experiment with different glazes, such as a simple vanilla icing or a citrus glaze, to change up the flavor profile of your bundt cakes.
Embrace the fun of baking and make these delightful mini cakes your own! For more delicious inspiration, check out my Pumpkin Cupcakes Brown – they’re another great way to share joy on the table!
Make Ahead Options
These Irresistible St. Patrick’s Green Velvet Mini Bundt Cakes are a fantastic choice for meal prep, allowing you to save time while still delivering a delightful dessert! You can prepare the cake batter up to 24 hours in advance by mixing the dry and wet ingredients separately, then refrigerating them until you’re ready to bake. Additionally, you can bake the mini cakes a day ahead, letting them cool completely, and store them in an airtight container in the fridge for up to 3 days. To finish, simply glaze them just before serving for that fresh, delectable touch. This way, your festive dessert will be just as delicious while freeing up your time on the big day!
Green Velvet Mini Bundt Cakes Recipe FAQs
What is the best way to select ripe or fresh ingredients?
Absolutely! When selecting ingredients, aim for fresh, high-quality options. Choose all-purpose flour that is free from lumps and has a clear expiration date. For cocoa powder, look for brands like Hershey’s, as they provide robust flavor. Ensure your eggs are firm and recent; fresh eggs will help the cakes rise better. If using buttermilk, check for a creamy texture without any curdles.
How should I store leftover Green Velvet Mini Bundt Cakes?
Very! To maintain their freshness, store leftover cakes in an airtight container in the refrigerator for up to 4 days. This will keep them moist and flavorful. If you’re saving some for later, consider also storing unglazed cakes in the freezer. Just wrap them tightly in plastic wrap and foil to prevent freezer burn—these can last for up to 2 months!
Can I freeze mini bundt cakes, and how do I do it?
Absolutely! To freeze your Green Velvet Mini Bundt Cakes, wait until they are completely cooled first. Wrap each cake individually in plastic wrap and then in aluminum foil to prevent freezer burn. You can freeze them for up to 2 months. When you’re ready to enjoy them, take the cakes out of the freezer and thaw them overnight in the refrigerator before glazing and serving!
What should I do if my cakes don’t rise properly?
I often notice that under-risen cakes can be a result of stale baking powder or soda. Always check the freshness of these leavening agents before baking; they typically last about 6-12 months. Additionally, be careful not to overmix the batter, as this can lead to dense cakes instead of fluffy ones. Follow the mixing instructions carefully—fold gently until just combined without lumps for the best results.
Are there any dietary considerations for these mini bundt cakes?
Absolutely! This recipe can be easily adapted for various dietary needs. For gluten-free options, substitute all-purpose flour with a 1:1 gluten-free baking flour blend. To make it dairy-free, use non-dairy milk combined with lemon juice instead of buttermilk and replace the cream cheese with a vegan alternative in the glaze. Always ensure to check for allergen information related to specific brands of ingredients used.

Mouthwatering Green Velvet Mini Bundt Cakes for Celebration
Ingredients
Equipment
Method
- Preheat your oven to 350°F (175°C) and grease mini bundt pans.
- Sift together 1 ½ cups of flour, ⅓ cup of cocoa, 1 tsp baking powder, ½ tsp baking soda, and a pinch of salt.
- In another bowl, whisk together 1 cup buttermilk, ½ cup oil, 2 eggs, and 2 tsp vanilla until smooth.
- Fold the wet ingredients into the dry mixture carefully until just combined.
- Pour the batter into prepared pans, filling each cavity ⅔ full.
- Bake for 18 to 22 minutes, checking for doneness at 18 minutes.
- Cool in pans for about 5 minutes, then invert onto wire racks.
- Prepare the glaze by mixing cream cheese and powdered sugar until smooth, adjusting with milk.
- Drizzle the glaze over cooled cakes before serving.
Leave a Reply