
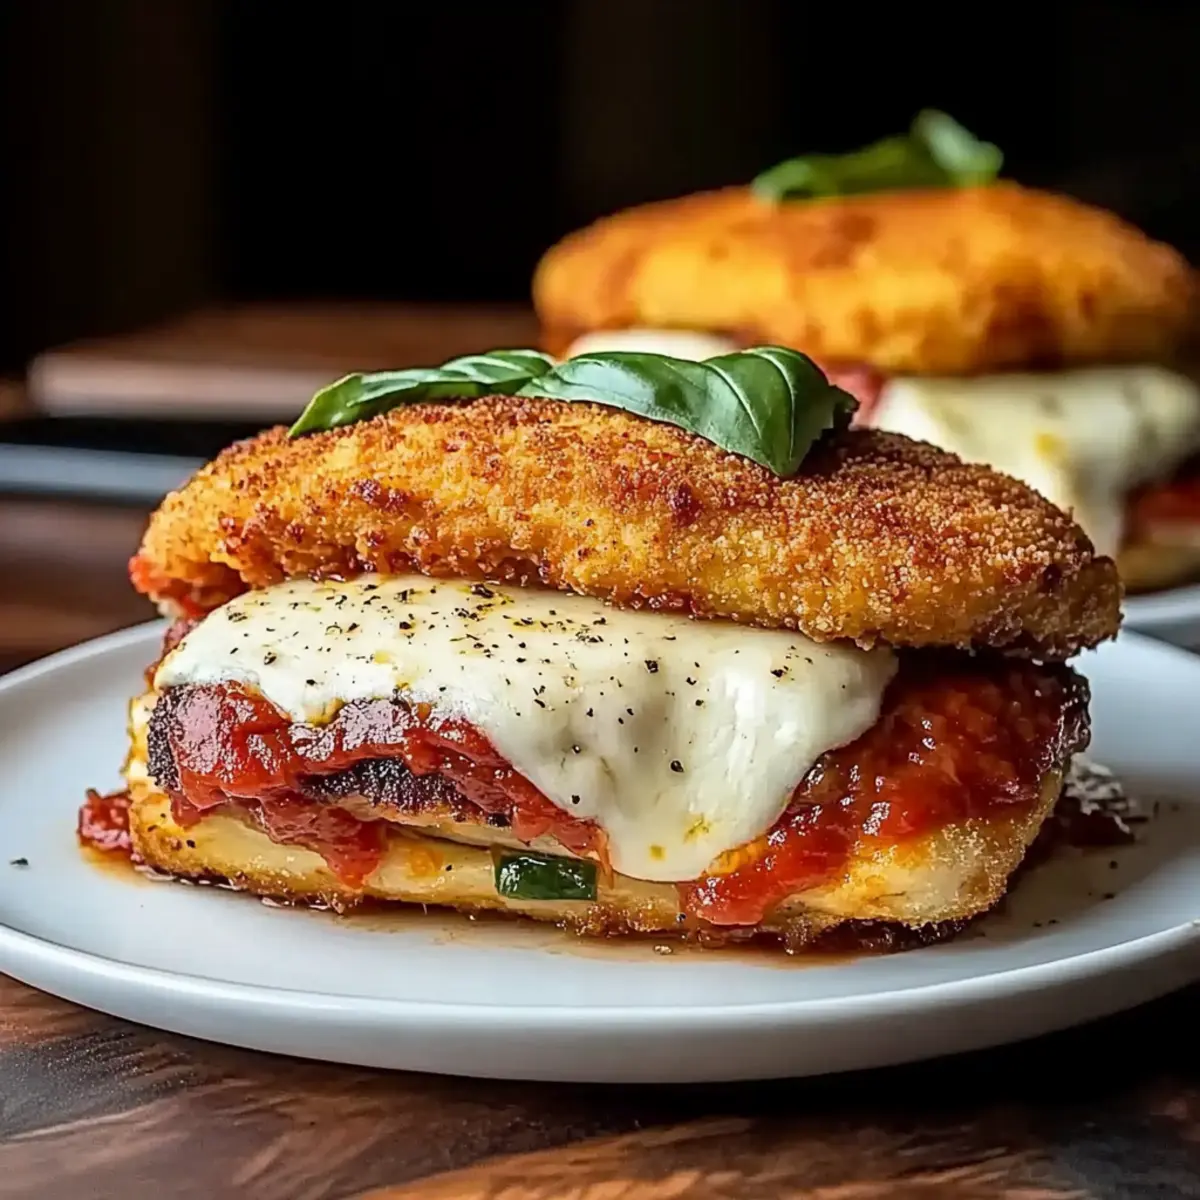
On a dreary weeknight, with the smell of takeout wafting through the air, I found myself craving something warm and comforting—something that felt like a hug from the kitchen. That’s when I decided to whip up a Classic Chicken Parmigiana. This dish features crispy, breaded chicken cutlets lavishly topped with a rich tomato sauce and gooey melted cheese, making it the ultimate comfort food. Not only is it a satisfying meal that brings the family together, but it’s also a quick recipe to prepare, perfect for those busy evenings. As the layers of flavor come together, you’ll feel a sense of accomplishment that only homemade meals can provide. Are you ready to make kitchen magic with this Italian-American classic?
Why is Chicken Parmigiana Everyone’s Favorite?
Crispy Perfection: The combination of golden-breaded chicken cutlets creates a satisfying crunch that elevates this dish.
Rich, Flavorful Sauce: A homemade garlicky tomato sauce elevates the flavors, making each bite a delightful experience.
Cheesy Goodness: The gooey mozzarella and sharp Parmigiano Reggiano meld together to form a melt-in-your-mouth topping that’s irresistible.
Family-Friendly Appeal: This recipe is perfect for gatherings, pleasing even the pickiest eaters—everyone loves a good Chicken Parm!
Quick & Easy: With straightforward steps, this meal is ready in no time, making it a great option for busy weeknights.
If you love homemade classics like Cajun Chicken Sloppy or Cheesy Chicken Spaghetti, you’ll definitely want to keep this Chicken Parmigiana in your regular rotation!
Classic Chicken Parmigiana Ingredients
For the Sauce
- Olive Oil – Used for sautéing garlic and frying chicken; can be substituted with vegetable oil if needed.
- Garlic – Provides aromatic depth to the sauce; fresh garlic is recommended for the best flavor.
- Plum Tomatoes – Acts as the base for the rich tomato sauce; canned tomatoes can be used if fresh ones are unavailable.
- Kosher Salt & Black Pepper – Essential for seasoning both the chicken and sauce; adjust to taste preferences.
- Oregano (optional) – Enhances the sauce’s flavor; dried basil or Italian seasoning are great substitutes.
For the Chicken
- All-Purpose Flour – Used for dredging chicken to help the breadcrumbs adhere; can be replaced with gluten-free flour.
- Eggs – Binds breadcrumbs to chicken cutlets; no substitute recommended for proper binding properties.
- Italian-Seasoned Breadcrumbs – Creates the crispy coating for the chicken; for an extra crunch, use Panko breadcrumbs.
For the Topping
- Mozzarella Cheese – Melts beautifully atop the chicken; provolone can be substituted for a different flavor profile.
- Parmigiano Reggiano – Adds a sharp, savory kick to the dish; Pecorino Romano can be used for a saltier taste.
- Crushed Red Pepper Flakes (optional) – Adds mild heat; feel free to omit based on your spice preference.
- Fresh Basil or Parsley – For garnish and added freshness; while optional, it enhances visual appeal and flavor balance.
This Classic Chicken Parmigiana is all about celebrating flavors that bring warmth and joy to your table!
Step‑by‑Step Instructions for Classic Chicken Parmigiana
Step 1: Prepare the Sauce
In a medium saucepan, heat 2 tablespoons of olive oil over medium heat. Add 3 minced garlic cloves and sauté until golden, about 1 minute. Next, pour in 2 cups of diced plum tomatoes, season with a pinch of kosher salt, black pepper, and optional oregano. Bring this to a simmer, allowing it to cook for 10 minutes, stirring occasionally, until it thickens and becomes fragrant.
Step 2: Prepare the Chicken
While the sauce is simmering, set up a dredging station with three shallow dishes. In the first, place a cup of all-purpose flour seasoned with salt and pepper. In the second, beat two eggs. In the third, add a cup of Italian-seasoned breadcrumbs. Dip each chicken cutlet first in the flour, ensuring it’s fully coated, then in the egg, and finally, press it into the breadcrumbs until well covered.
Step 3: Fry the Chicken
In a large skillet, heat ½ inch of olive oil over medium-high heat, aiming for a temperature between 350°F to 370°F. Carefully add the breaded chicken cutlets to the hot oil, frying them for about 3 minutes per side or until they are golden brown and crispy. Use tongs to flip them, then drain the fried cutlets on a wire rack to keep them crisp while you prepare the assembly.
Step 4: Assemble the Dish
Preheat your oven to 400°F. In a baking dish, spread a thin layer of the garlicky tomato sauce on the bottom. Layer the golden chicken cutlets on top of the sauce, then generously spoon more sauce over each piece. Finally, sprinkle 1 cup of shredded mozzarella and ½ cup of grated Parmigiano Reggiano evenly on top of the chicken cutlets.
Step 5: Bake the Chicken Parmigiana
Place the assembled Classic Chicken Parmigiana into the preheated oven and bake for 15 minutes, allowing the cheese to melt beautifully. If desired, broil for an additional 30-60 seconds for a perfect crispy finish while keeping an eye on it to avoid burning. The cheese should be bubbly and golden.
Step 6: Rest and Serve
Once out of the oven, allow the dish to rest for about 5 minutes. This helps the flavors meld together beautifully and makes for easier serving. Garnish with fresh basil or parsley before plating. Now your Classic Chicken Parmigiana is ready to be served, bringing a warm, comforting touch to the dinner table!
What to Serve with Classic Chicken Parmigiana
There’s nothing like a comforting meal to turn any ordinary dinner into a delightful feast, and pairing is key!
-
Creamy Garlic Mashed Potatoes: The silky texture complements the crispy chicken, turning each bite into a rich and savory experience.
-
Garlic Bread: Perfect for sopping up delicious sauce, its crunchy exterior and soft interior enhance the Italian flavors.
-
Sautéed Spinach: The freshness of sautéed spinach adds a lovely contrast, balancing the richness of the chicken with a vibrant green element.
-
Caesar Salad: Crisp romaine with creamy dressing and crunchy croutons makes for a refreshing side that contrasts beautifully with hearty Chicken Parmigiana.
-
Roasted Vegetables: Seasoned seasonal veggies add sweetness and depth, rounding out the meal’s flavors while providing a nutritious boost.
-
Red Wine: A medium-bodied Chianti or a fruity Merlot works wonderfully, enhancing the meal and bringing a touch of elegance to your dinner.
-
Tiramisu: End on a sweet note with this classic Italian dessert. Its light, coffee-laden layers offer a perfect contrast to the savory chicken.
These pairings create a complete culinary experience, enveloping you and your loved ones in the warm embrace of a delicious homemade Italian feast!
Make Ahead Options
These Classic Chicken Parmigiana are perfect for meal prep when you’re busy but still desire a comforting homemade meal! You can prepare the sauce up to 3 days in advance by storing it in an airtight container in the refrigerator; this allows the flavors to deepen. Additionally, you can bread the chicken cutlets ahead of time and refrigerate them for 24 hours, ensuring they’re ready for frying when you are. To finish, simply fry the cutlets, assemble the dish, and bake as instructed. Rest assured, your Chicken Parmigiana will taste just as delicious, saving you precious time without compromising on quality!
Expert Tips for Classic Chicken Parmigiana
-
Thinly Sliced Chicken: Ensure your chicken cutlets are evenly pounded to about ½ inch thick. This promotes even cooking and keeps them juicy.
-
Watch the Oil Temperature: Use a kitchen thermometer to maintain the oil temperature between 350°F to 370°F when frying. Too hot can burn the breadcrumbs, too low can make them soggy.
-
Don’t Overcrowd the Pan: Fry the chicken cutlets in batches to prevent overcrowding. This helps maintain the crispiness and ensures an even golden-brown finish.
-
Let Sauce Mature: For a deeper flavor, prepare the tomato sauce a day ahead. Allowing it to sit overnight can enhance the garlicky essence.
-
Perfect Cheese Layering: Add extra cheese under and on top to maximize gooeyness. Don’t skimp on the mozzarella and Parmigiano Reggiano for that classic stretch!
-
Rest Before Serving: Let your Classic Chicken Parmigiana rest for 5 minutes after baking. This allows the layers to set and makes serving easier.
Classic Chicken Parmigiana Variations
Feel free to personalize your Classic Chicken Parmigiana with these delightful twists that will surely elevate your dish!
-
Turkey Cutlets: Substitute chicken breasts with thin turkey cutlets for a lighter option that’s still satisfying. You’ll enjoy a similar taste with a leaner profile.
-
Veggie Boost: Add sautéed spinach, mushrooms, or zucchini into the sauce for a nutritious kick. These vibrant veggies will enhance the flavors and nutrition of the dish.
-
Creamy Twist: Mix a little heavy cream into the tomato sauce for a rich and creamy variation that kids will adore. This twist adds a silky texture that complements the cheese beautifully.
-
Pasta Layer: Serve the chicken on a bed of al dente spaghetti for a classic Italian presentation. The pasta will soak up the sauce, creating a comforting meal that is truly irresistible.
-
Spicy Kick: For those who like it hot, add crushed red pepper flakes directly into the sauce or sprinkle on top before serving. This fiery touch can transform the flavor profile into something exciting.
-
Different Cheeses: Swap out mozzarella for burrata or fontina for an interesting taste twist. Each cheese brings its unique creaminess that enhances the overall dish.
-
Herb Infusion: Incorporate fresh or dried basil directly into the sauce for an aromatic boost. Fresh herbs elevate the flavor and add a pop of color.
If you love this comforting classic, don’t forget to explore other family favorites like Cheesy Chicken Crescent and Garlic Parmesan Chicken.
How to Store and Freeze Classic Chicken Parmigiana
- Room Temperature: Best enjoyed fresh, but if left out, it can sit at room temperature for no more than 2 hours to avoid food safety risks.
- Fridge: Leftover Classic Chicken Parmigiana can be stored in an airtight container in the refrigerator for up to 3 days. Reheat gently in the oven or microwave.
- Freezer: For longer storage, freeze portions in airtight containers or heavy-duty freezer bags for up to 2 months. Reheat in the oven for best texture.
- Reheating: When reheating, consider placing the chicken parm in the oven at 350°F until heated through (about 20 minutes) to preserve the crispy coating.
Classic Chicken Parmigiana Recipe FAQs
How do you know when the chicken is perfectly ripe for cooking?
Absolutely! When choosing chicken for your Classic Chicken Parmigiana, look for breasts that are pale pink and plump, with no dark spots or a foul odor. If you’re unsure, it’s always best to check the sell-by date and ensure it feels firm to the touch.
What’s the best way to store leftover Chicken Parmigiana?
You can store leftover Classic Chicken Parmigiana in an airtight container in the refrigerator for up to 3 days. Just make sure to let it cool to room temperature before sealing it up to maintain freshness. When you’re ready to enjoy it again, reheat gently in the oven or the microwave.
Can I freeze Chicken Parmigiana for later?
Yes! I often freeze portions of Classic Chicken Parmigiana, and it keeps well for up to 2 months. To freeze, make sure to wrap it tightly in plastic wrap or use heavy-duty freezer bags. When you’re ready to enjoy it, just reheat in the oven at 350°F until heated through, about 20 minutes. This will help maintain its crispy coating!
What should I do if my chicken cutlets are soggy after frying?
Very good question! If your Classic Chicken Parmigiana cutlets turn out soggy, it could be due to overcrowding the pan while frying. Always fry in batches and make sure your oil is hot enough (350°F to 370°F) before adding the chicken. After frying, let them drain on a wire rack instead of paper towels to keep the bottom from getting steamed.
Is there a gluten-free option for Chicken Parmigiana?
Absolutely! For a gluten-free Classic Chicken Parmigiana, simply substitute the all-purpose flour with a gluten-free flour blend and use gluten-free breadcrumbs. This way, everyone can enjoy this comfort food without missing out!
Can my pets share the Chicken Parmigiana with me?
While it’s tempting to share, it’s best to keep your Classic Chicken Parmigiana away from pets. Ingredients like garlic and excessive cheese can be harmful to them. Always opt for pet-friendly treats if you want to pamper your furry friends!
Classic Chicken Parmigiana: Your Ultimate Comfort Food Fix
Ingredients
Equipment
Method
- In a medium saucepan, heat 2 tablespoons of olive oil over medium heat. Add 3 minced garlic cloves and sauté until golden, about 1 minute. Pour in 2 cups of diced plum tomatoes, season with kosher salt, black pepper, and optional oregano. Bring to a simmer and cook for 10 minutes, stirring occasionally.
- Set up a dredging station with three shallow dishes: 1 for 1 cup of all-purpose flour seasoned with salt and pepper, 1 for beaten eggs, and 1 for 1 cup of Italian-seasoned breadcrumbs. Coat each chicken cutlet in flour, then egg, and finish with breadcrumbs.
- In a large skillet, heat ½ inch of olive oil over medium-high heat (350°F to 370°F). Fry the breaded chicken cutlets for about 3 minutes per side until golden brown and crispy. Drain on a wire rack.
- Preheat the oven to 400°F. In a baking dish, spread a thin layer of garlicky tomato sauce, layer chicken cutlets, add more sauce on top, and sprinkle with 1 cup of mozzarella and ½ cup of Parmigiano Reggiano.
- Bake in the preheated oven for 15 minutes. Broil for 30-60 seconds for a crispy finish, watching carefully.
- Let the dish rest for about 5 minutes. Garnish with fresh basil or parsley before serving.
Leave a Reply