
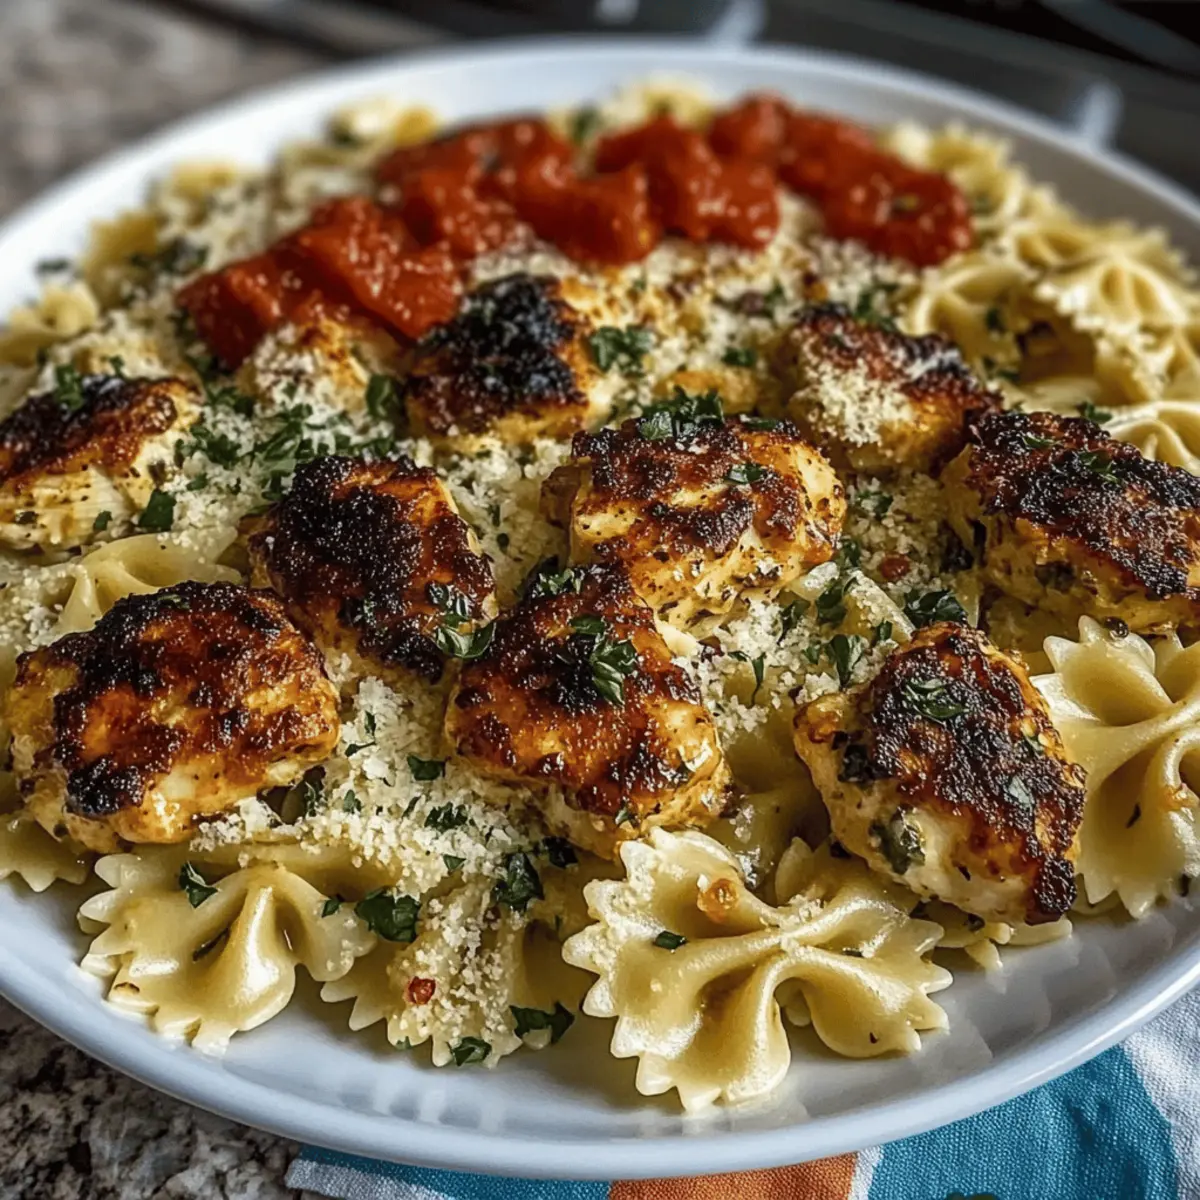
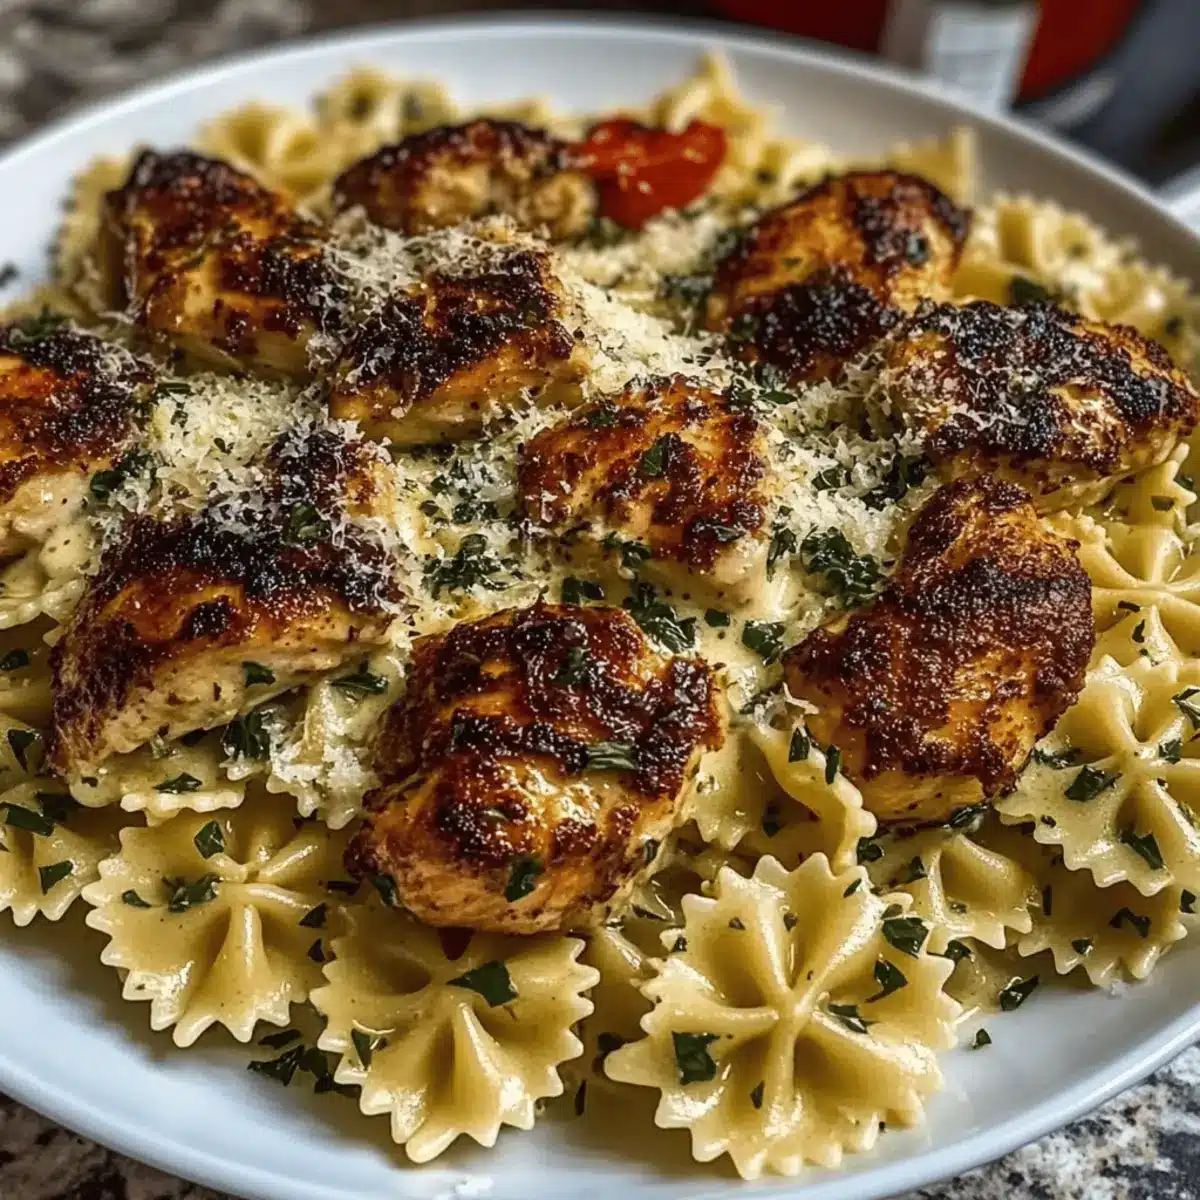
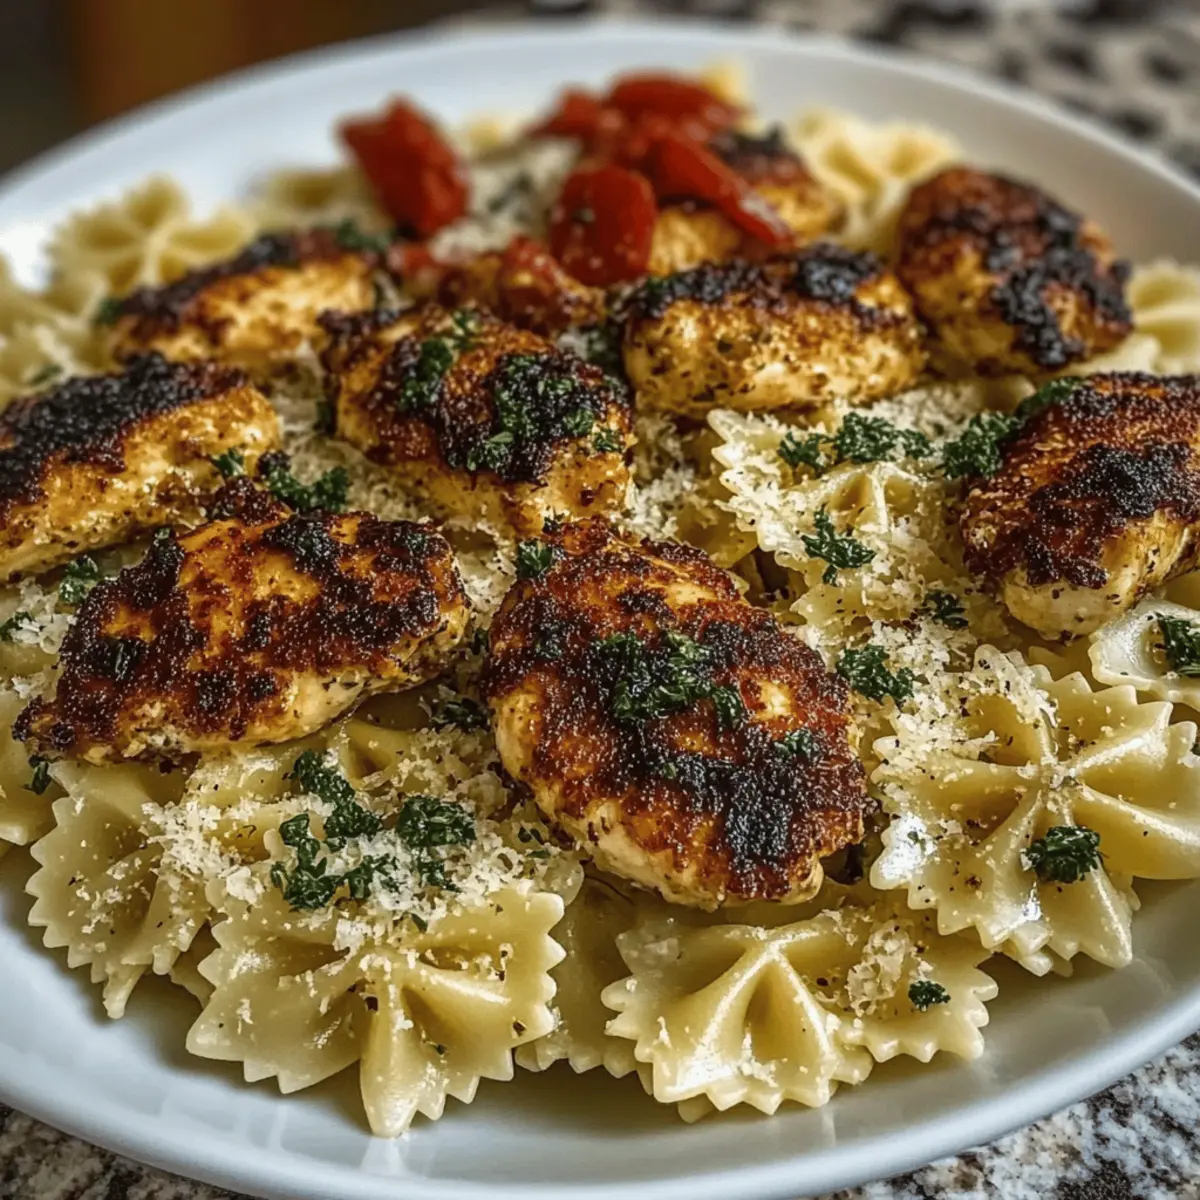
A delightful aroma wafts through my kitchen as I sauté garlic, instantly transporting me to a cozy Italian bistro. This is the magic of my Cheesy Bowtie Pasta with Garlic Parmesan Chicken—a dish that transforms a simple weeknight dinner into an unforgettable experience. Comfort food at its finest, this creamy, rich pasta comes together in under an hour, making it perfect for those busy evenings when you crave something special. With fun bowtie pasta and tender, golden chicken enveloped in a velvety cheese sauce, it’s not just a meal; it’s a warm embrace on a plate. The beauty of this recipe lies in its customization, allowing you to swap ingredients based on your pantry or preferences. So, are you ready to indulge in a comforting bowl of cheesy goodness that the entire family will love?
Why is this recipe a must-try?
Quick Cooking: Get dinner on the table in less than an hour, without sacrificing flavor.
Customizable: Easily adapt the recipe to include your favorite vegetables or cheeses for a personal touch.
Family-Friendly: Kids and adults alike will adore the fun shape of the bowtie pasta and the creamy sauce.
Rich Flavor: The delightful blend of garlic, Parmesan, and cheddar creates a mouthwatering experience that keeps you coming back for more.
Crowd-Pleaser: This cheesy pasta dish is perfect for gatherings, ensuring that guests leave satisfied. If you’re a fan of comforting meals, consider pairing it with Garlic Parmesan Chicken or serving with a side of One Pot Garlic Butter Shrimp Pasta for a splendid dinner!
Cheesy Bowtie Pasta with Garlic Parmesan Chicken Ingredients
For the Pasta
• Bowtie Pasta – Provides a fun shape that captures sauce effectively; can substitute with penne or rotini.
For the Chicken
• Chicken Breasts – Offers protein and heartiness to the dish; using cooked rotisserie chicken can save time.
• Olive Oil – Used for searing chicken to achieve a golden exterior.
• Salt & Pepper – Essential seasonings for enhancing the overall flavor of the chicken.
For the Sauce
• Garlic (minced) – Adds aromatic flavor to the sauce; fresh garlic is preferred for the best taste.
• Butter – Used for sautéing garlic and forming the base of the creamy sauce.
• Flour – Helps create a roux for thickening the cheese sauce.
• Milk – Creates a creamy base for the sauce; whole milk provides a richer flavor.
• Heavy Cream – Adds richness and creaminess to the dish.
• Parmesan Cheese – The star cheese that lends flavor; freshly grated is recommended for better melt.
• Sharp Cheddar Cheese – Introduces a tangy flavor; feel free to adjust the amount to your taste.
• Italian Seasoning – Enhances depth of flavor; a perfect complement to the cheesy goodness of the dish.
This delightful Cheesy Bowtie Pasta with Garlic Parmesan Chicken is sure to become a family favorite!
Step‑by‑Step Instructions for Cheesy Bowtie Pasta with Garlic Parmesan Chicken
Step 1: Cook the Pasta
Bring a large pot of salted water to a rolling boil and add the bowtie pasta. Cook according to package instructions until al dente, usually about 8-10 minutes. Once cooked, drain the pasta and set it aside, allowing some steam to escape to prevent sticking.
Step 2: Sear the Chicken
Season both sides of the chicken breasts with salt and pepper. In a large skillet, heat 2 tablespoons of olive oil over medium-high heat. Sear the chicken for about 6-7 minutes on each side until golden brown and fully cooked through, reaching an internal temperature of 165°F. After cooking, let the chicken rest for a few minutes before slicing it into bite-sized pieces.
Step 3: Sauté the Garlic
In the same skillet, reduce the heat to medium and add 2 tablespoons of butter. Once melted, add 3 cloves of minced garlic and sauté for about 1-2 minutes until fragrant and lightly golden, stirring gently to avoid burning. This flavorful base will infuse the sauce for your Cheesy Bowtie Pasta with Garlic Parmesan Chicken.
Step 4: Create the Roux
Sprinkle in 2 tablespoons of flour, stirring continuously for about 1 minute. The mixture will thicken and develop a slightly nutty aroma, forming a roux that will help thicken your creamy cheese sauce. Make sure to scrape any flavorful bits from the bottom of the skillet as you cook.
Step 5: Whisk in Cream and Milk
Gradually whisk in 1 cup of milk and 1 cup of heavy cream, continuing to stir until the sauce is smooth and begins to thicken, approximately 3-4 minutes. Keep the heat on medium to ensure a gentle simmer. This creamy base is the heart of your Cheesy Bowtie Pasta with Garlic Parmesan Chicken.
Step 6: Add the Cheese
Once the sauce is thickened, reduce heat to low and stir in 1 cup of grated Parmesan cheese and 1 cup of shredded sharp cheddar cheese. Keep stirring until the cheeses are fully melted and the sauce is creamy and luscious, about 2-3 minutes. The cheese must blend into the sauce for maximum richness.
Step 7: Season the Sauce
Add 1 teaspoon of Italian seasoning to the sauce, adjusting salt and pepper to taste. Stir thoroughly to combine and enhance the flavors in your creamy sauce. This step ensures your Cheesy Bowtie Pasta has all the delicious herbaceous notes needed to elevate your dish.
Step 8: Combine Pasta and Chicken
Now, add the drained bowtie pasta and sliced chicken to the cheese sauce in the skillet. Gently toss everything together until the pasta and chicken are well coated with the luscious sauce, letting it warm through for about 2 minutes. This melding of flavors creates that comforting experience.
Step 9: Let It Rest and Serve
Remove the skillet from heat and let your Cheesy Bowtie Pasta with Garlic Parmesan Chicken sit for a few minutes to allow the flavors to meld beautifully. Serve hot, garnished with extra Parmesan cheese or a sprinkle of chopped parsley for a lovely touch. Enjoy this comforting dish that’s sure to please everyone at the table!

Expert Tips for Cheesy Bowtie Pasta
Perfectly Cooked Pasta: Always cook bowtie pasta until al dente to maintain its shape and texture in the creamy sauce. Overcooking can lead to mushiness.
Sear for Flavor: Ensure the chicken is properly seared to lock in moisture and enhance flavor. Skipping this step can result in dry chicken.
Use Fresh Garlic: Fresh minced garlic adds robust flavor that dried garlic simply can’t replicate, elevating your cheesy sauce to new heights.
Grate Your Cheese: For the best meltability in your Cheesy Bowtie Pasta with Garlic Parmesan Chicken, use freshly grated Parmesan and cheddar cheese.
Rest Before Serving: Allow the dish to sit for a few minutes after combining the pasta and sauce. This resting period helps flavors blend harmoniously for a richer taste.
Cheesy Bowtie Pasta with Garlic Parmesan Chicken Variations
Feel free to let your creativity shine with these exciting twists and substitutions that elevate your dish to a whole new level!
-
Veggie-Loaded: Add sautéed spinach, broccoli, or mushrooms for a nutritious boost. These vibrant veggies not only enhance the flavor but also add a pop of color.
-
Rotisserie Shortcut: Swap raw chicken for cooked rotisserie chicken to save time. It’s a delicious way to bring incredible flavor without the extra cooking.
-
Creamy Dream: Replace heavy cream with sour cream or Greek yogurt for a tangy twist. This option adds a delightful creaminess while lightening up the dish just a bit.
-
Cheese Swap: Try using Gouda or mozzarella instead of cheddar for different flavor profiles. Each cheese brings its own unique taste, offering an adventurous twist to this classic.
-
Gluten-Free: Opt for gluten-free bowtie pasta to make this dish suitable for those with dietary restrictions. It’s an easy way to ensure everyone can enjoy this comforting meal.
-
Herb Infusion: Add fresh basil or parsley as a final touch to brighten the flavors. It not only makes the dish more aromatic but also elevates the presentation beautifully.
-
Heat it Up: Crank up the heat with crushed red pepper flakes or diced jalapeños. This will add a spicy kick that warms the soul on chilly nights.
-
Creamy Tomato Sauce: Mix in a half cup of marinara sauce for a slightly tangy flavor and vibrant color. This delightful twist offers a new dimension to the beloved creamy sauce.
With these variations, your Cheesy Bowtie Pasta with Garlic Parmesan Chicken can become a signature dish that’s as unique as your family’s tastes. And if you’re looking for more delectable ideas, don’t forget to check out Garlic Parmesan Chicken to accompany your meal!
What to Serve with Cheesy Bowtie Pasta with Garlic Parmesan Chicken
A delightful meal deserves delicious companions; let’s create the perfect dinner spread together.
-
Garlic Bread: A warm, crusty loaf slathered in garlic butter makes for the ideal side, inviting you to scoop up every last drop of creamy sauce.
-
Caesar Salad: Crisp romaine lettuce, crunchy croutons, and tangy dressing provide a refreshing contrast to the richness of the pasta, lightening the overall meal.
-
Roasted Vegetables: Vibrant roasted broccoli or Brussels sprouts add nutrients and texture, enhancing the dish’s comforting vibe with a splash of color on the plate.
-
Italian Herb Tea: A soothing herbal tea with hints of basil or oregano can cleanse the palate between mouthfuls, bringing a touch of Italian charm to dinner.
-
Lemon Sorbet: Finish your meal with a zesty scoop of lemon sorbet, which serves as a light, refreshing end that balances the creamy richness of the pasta.
-
Sparkling Water: Pair with a refreshing glass of sparkling water infused with lemon slices; it adds a fizzy touch that complements the luscious flavors beautifully.
Build your perfect dining experience with these pairings, ensuring every bite of your Cheesy Bowtie Pasta with Garlic Parmesan Chicken is as delightful as the last.
Storage Tips for Cheesy Bowtie Pasta with Garlic Parmesan Chicken
Fridge: Store leftovers in an airtight container in the refrigerator for up to 3 days. Make sure to cool it down before sealing to preserve freshness.
Freezer: For longer storage, freeze the pasta in a sealed freezer bag or container for up to 2 months. Thaw in the fridge overnight before reheating.
Reheating: When you’re ready to enjoy your Cheesy Bowtie Pasta again, reheat gently on the stovetop over low heat, adding a splash of milk to loosen the sauce and restore creaminess.
Room Temperature: Avoid leaving the pasta out at room temperature for more than 2 hours to ensure food safety and quality.
Make Ahead Options
These Cheesy Bowtie Pasta with Garlic Parmesan Chicken are perfect for meal prep enthusiasts! You can cook the bowtie pasta and sear the chicken up to 24 hours in advance; simply refrigerate them separately in airtight containers. Additionally, you can prepare the cheese sauce (without the chicken) and store it in the fridge for up to 3 days. When you’re ready to enjoy your meal, reheat the pasta and chicken in a skillet; whisk in the creamy sauce, adding a splash of milk to maintain its rich consistency. This way, you’ll have a comforting, homemade dish ready in no time, just as delicious as if made fresh!
Cheesy Bowtie Pasta with Garlic Parmesan Chicken Recipe FAQs
What type of pasta is best for this recipe?
Absolutely! Bowtie pasta is the star here as its unique shape captures the creamy sauce beautifully. If you don’t have bowtie pasta on hand, feel free to substitute it with penne or rotini for similar results. Just avoid long noodles like spaghetti, as they won’t hold the sauce as well.
How should I store leftovers?
Leftovers can be stored in an airtight container in the refrigerator for up to 3 days. Make sure to allow it to cool completely before sealing the container to maintain its freshness. When you want to enjoy it again, reheat gently on the stovetop, adding a splash of milk to refresh the creamy consistency.
Can I freeze Cheesy Bowtie Pasta with Garlic Parmesan Chicken?
Yes! For longer storage, you can freeze this delightful dish in a sealed freezer bag or container for up to 2 months. To do this, let the pasta cool completely, then portion it into servings and seal tightly. When you’re ready to eat, thaw it overnight in the fridge, then reheat gently on the stovetop, adding a bit of milk to ensure the sauce remains creamy.
What if I have a dairy allergy?
No problem! You can easily customize this dish to suit dietary restrictions. Try using dairy-free alternatives such as almond or oat milk in place of regular milk and heavy cream, and substitute with vegan cheese options. Be sure to check labels for any additional allergens and adjust the seasonings to your taste.
How can I enhance the flavor of the dish?
The more the merrier! To elevate the flavors, consider adding sautéed vegetables such as spinach, broccoli, or mushrooms. You could also mix in a bit of crushed red pepper for a spicy kick or swap the cheeses—try gouda for a smoky twist or mozzarella for extra creaminess. Cooking is all about creativity!
What should I do if the sauce is too thick?
If you notice your sauce is too thick, there’s an easy fix! Simply add a little more milk or cream, stirring it in gradually over low heat until you reach your desired consistency. This ensures your Cheesy Bowtie Pasta with Garlic Parmesan Chicken is creamy and delicious every time.
Cheesy Bowtie Pasta with Garlic Parmesan Chicken Bliss
Ingredients
Equipment
Method
- Cook the Pasta: Bring a large pot of salted water to a rolling boil and add the bowtie pasta. Cook according to package instructions until al dente, usually about 8-10 minutes. Once cooked, drain the pasta and set it aside.
- Sear the Chicken: Season chicken breasts with salt and pepper. In a skillet, heat olive oil over medium-high heat and sear chicken for 6-7 minutes on each side until golden brown. Let it rest before slicing.
- Sauté the Garlic: In the same skillet, reduce heat, add butter, and once melted, add minced garlic. Sauté for 1-2 minutes until fragrant.
- Create the Roux: Sprinkle in flour, stirring continuously for about 1 minute until thickened.
- Whisk in Cream and Milk: Gradually whisk in milk and heavy cream, stirring until smooth and thickened for 3-4 minutes.
- Add the Cheese: Reduce heat to low, stir in Parmesan and cheddar cheese until fully melted.
- Season the Sauce: Add Italian seasoning, adjust salt and pepper to taste, stir thoroughly.
- Combine Pasta and Chicken: Add the drained pasta and sliced chicken to the cheese sauce, toss gently to coat.
- Let It Rest and Serve: Let the dish sit for a few minutes before serving. Enjoy!
Leave a Reply