
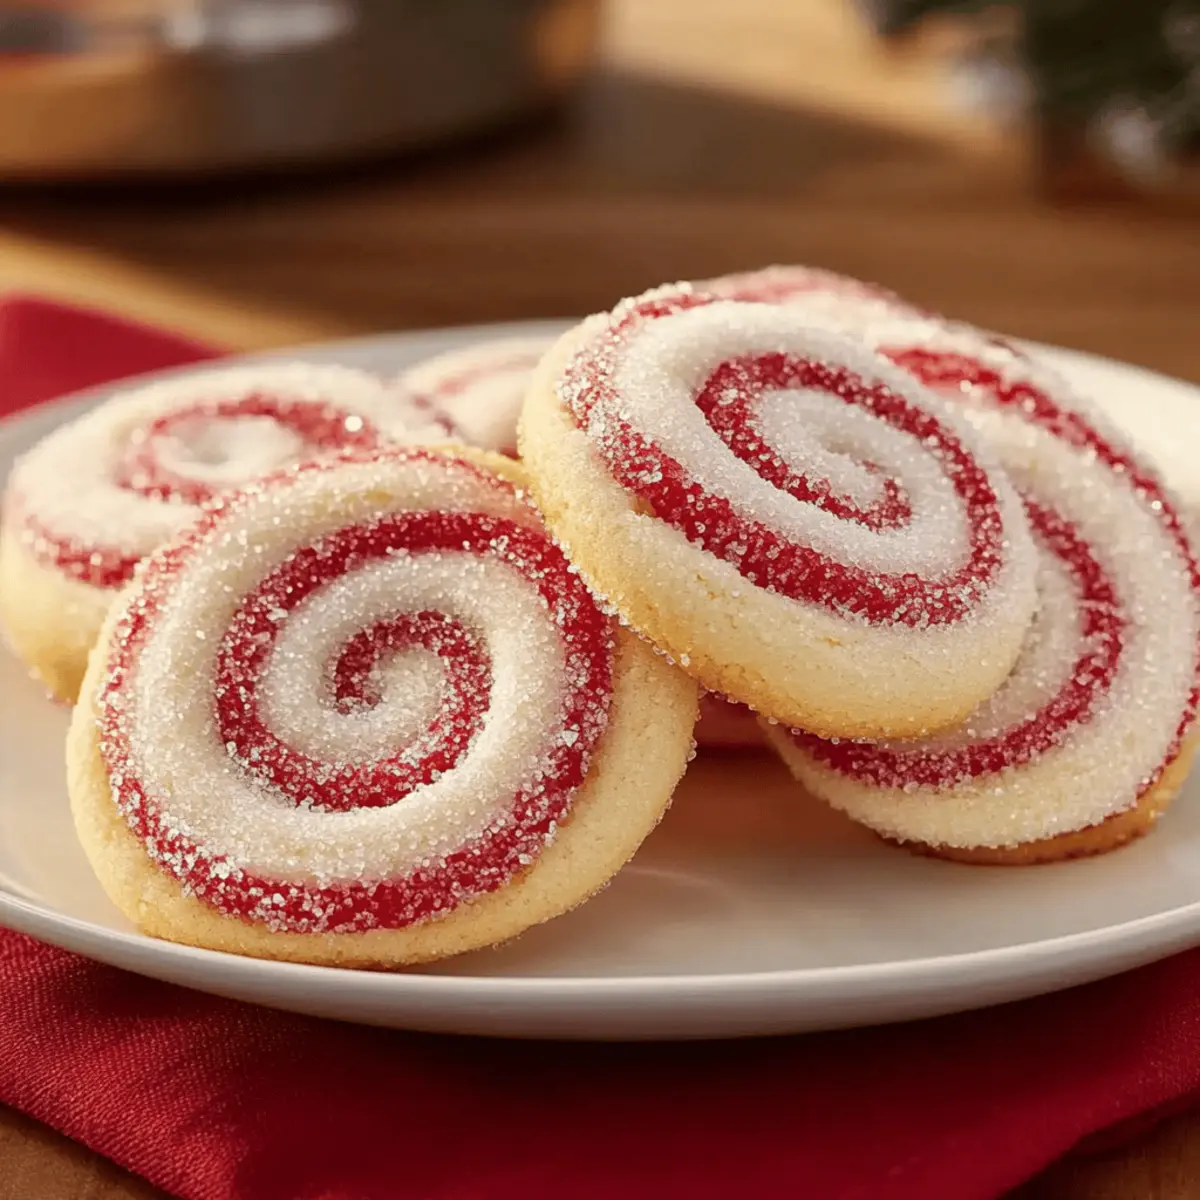
As I unwrapped that first batch of cookies from the oven, a wave of nostalgia washed over me, reminiscent of my childhood holiday rituals. These Bakery-Perfect Peppermint Swirl Cookies are the very embodiment of festive cheer, with striking red and white spirals that will make your heart sing. Not only do they deliver a delightful minty freshness, but they also offer a satisfying crunch that takes your baking to the next level. With easy-to-follow techniques to prevent color bleeding, these cookies are sure to steal the show at your holiday gatherings or make memorable gifts. Ready to add a sprinkle of magic to your baking? Let’s dive into this delightful recipe!
Why are Peppermint Swirl Cookies a must-bake?
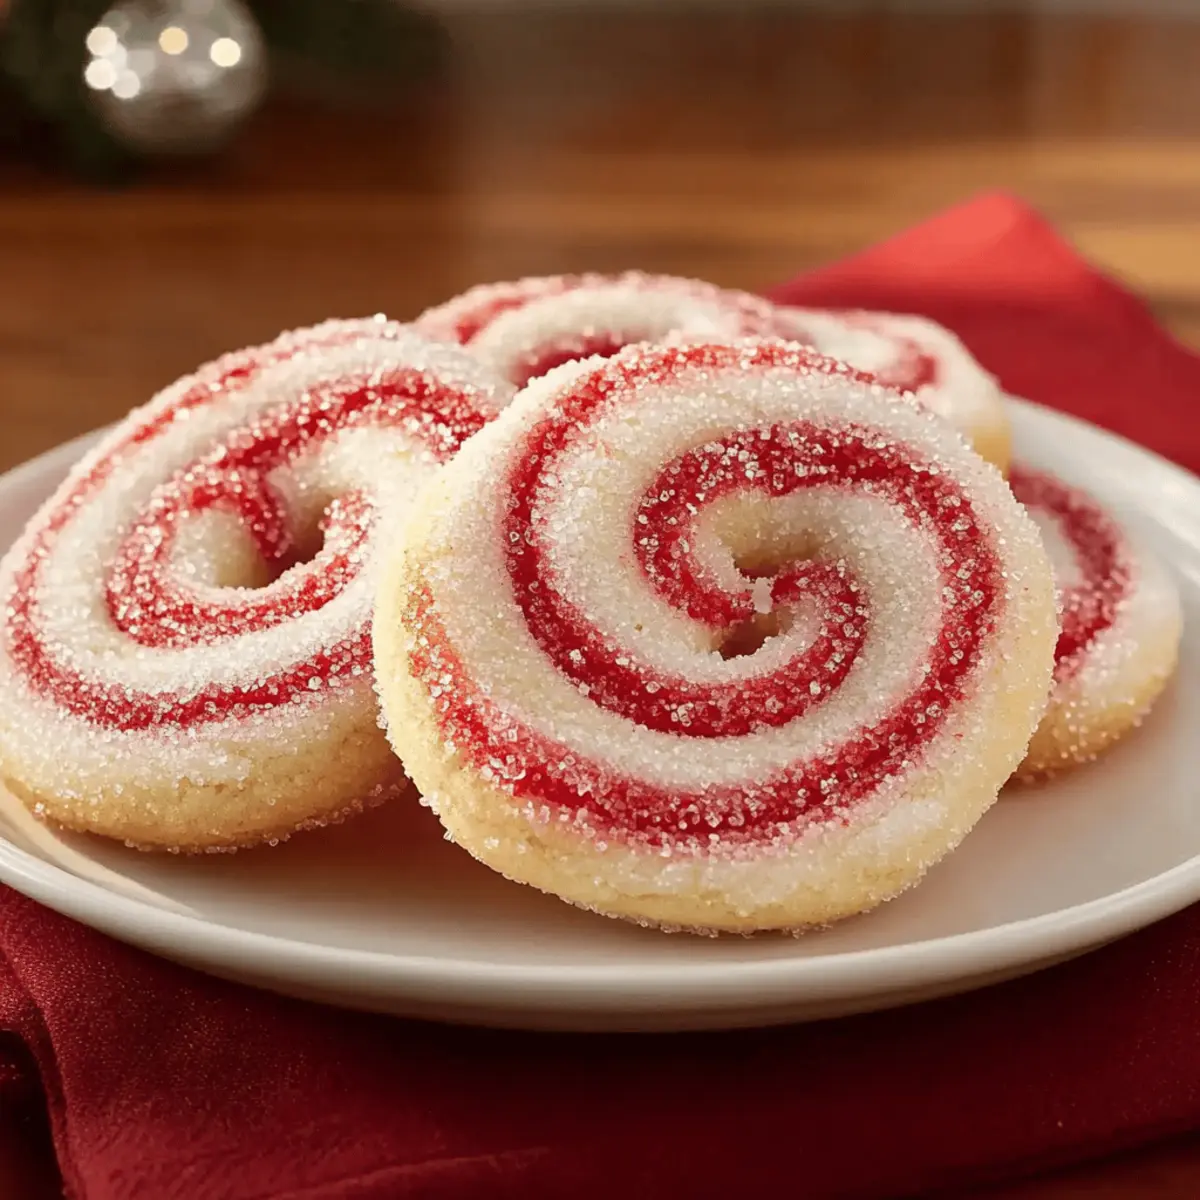
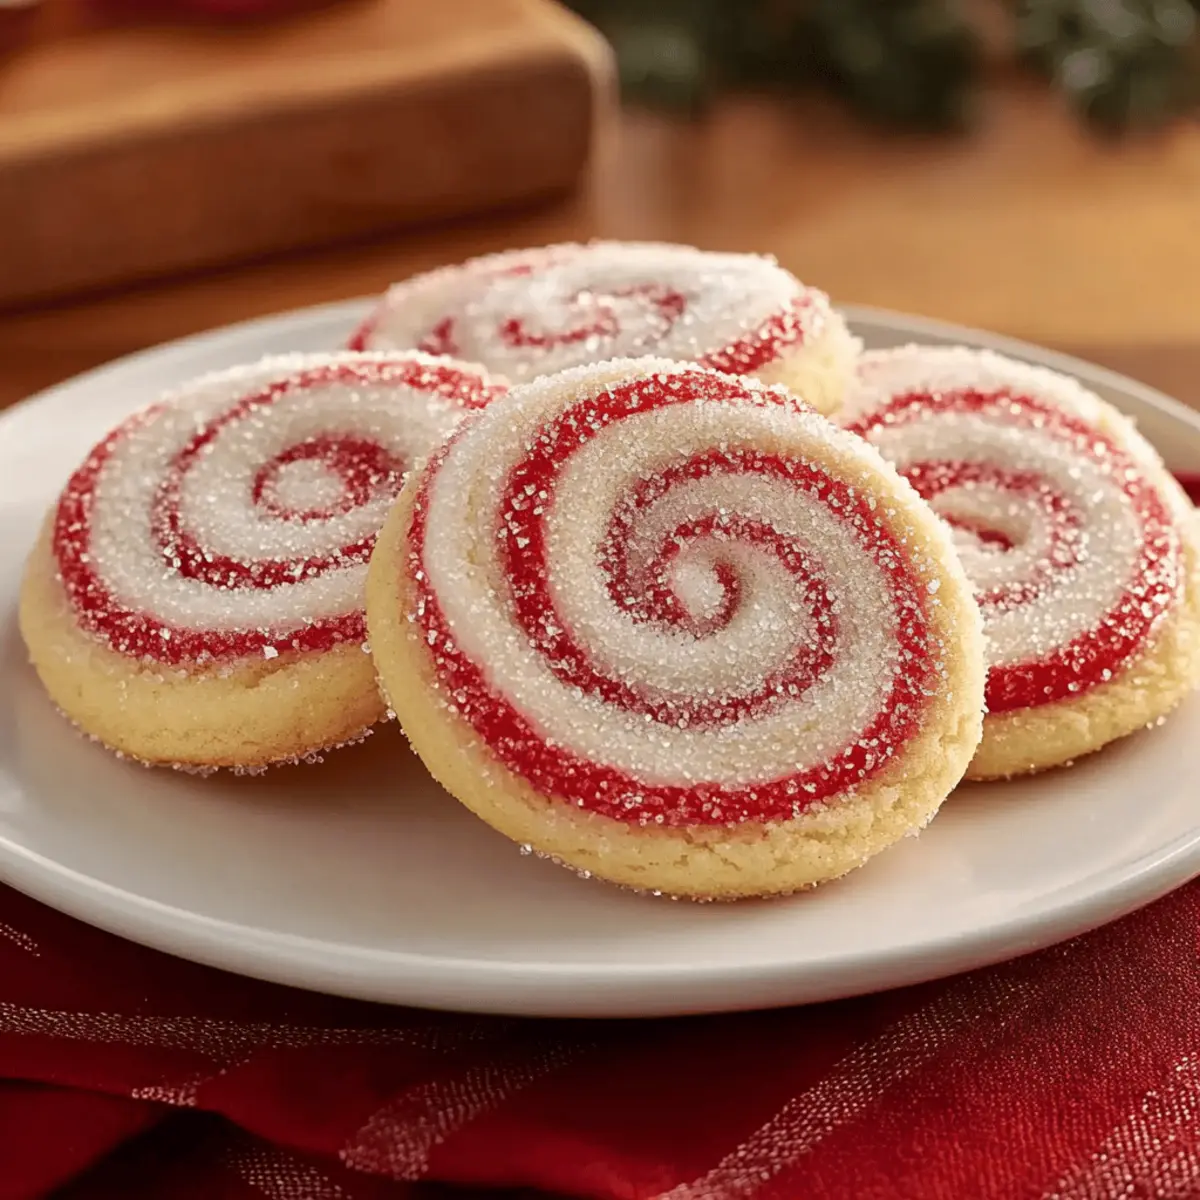
Visual Appeal: These cookies are not only tasty but stunning, showcasing vibrant swirls that brighten up any dessert table.
Festive Flavor: The minty essence mingles perfectly with the crunch of coarse sugar, bringing the holiday spirit to every bite.
Easy to Master: With simple techniques, you can achieve a bakery-quality look right at home; no professional skills required!
Time-Saving: Chilling the dough in advance allows for flexibility in your baking schedule, making it perfect for busy holiday preparations.
Versatile Treats: Feel free to experiment with different extracts or candy coatings for personalized flavors that will delight your friends and family.
Make these delightful Lemon Raspberry Cookies for a colorful addition or pair with hot cocoa for a cozy experience!
Peppermint Swirl Cookies Ingredients
• For the Cookie Dough
- All-purpose flour – Essential for structure; substitute with gluten-free flour for a gluten-free version.
- Baking powder – Helps the cookies rise for a delightful texture; no substitute recommended.
- Salt – Elevates flavor and balances sweetness; opt for kosher or sea salt for best results.
- Unsalted butter – Creates a rich flavor and tender crumb; ensure it’s softened to room temperature.
- Granulated sugar – Adds sweetness and texture; can be switched with a sugar substitute as needed.
- Large egg – Binds the ingredients and adds moisture; a flaxseed egg can substitute for a vegan option.
- Vanilla extract – Provides warmth and depth; almond extract can be used for a different flavor profile.
- Peppermint extract – Adds the signature minty flavor; feel free to blend with other extracts for unique variations.
- Red gel food coloring – Ensures vibrant swirls without altering dough consistency; avoid liquid types for best results.
• For Topping
- Coarse sugar or crushed peppermint candies – Specified for coating, adding an appealing crunch and presentation; adjust based on your taste preference or omit if less sweetness is desired.
These Peppermint Swirl Cookies promise to be a delightful addition to your holiday baking repertoire!
Step‑by‑Step Instructions for Peppermint Swirl Cookies
Step 1: Prep Dry Ingredients
In a medium bowl, whisk together 2 cups of all-purpose flour, 1 teaspoon of baking powder, and a pinch of salt until well combined. This mixture will create the foundation for your Peppermint Swirl Cookies. Set it aside while you move on to the wet ingredients, ensuring a thorough blend to avoid lumps.
Step 2: Cream Butter and Sugar
In a large mixing bowl, blend 1 cup of softened unsalted butter with 1 cup of granulated sugar using an electric mixer on medium speed. Continue mixing until the mixture becomes light and fluffy, about 3-5 minutes. Next, add 1 large egg, 2 teaspoons of vanilla extract, and 1 teaspoon of peppermint extract, beating until fully incorporated and smooth.
Step 3: Combine Mixtures
Gradually incorporate the dry flour mixture into the wet ingredients at low speed. Mix until a soft dough begins to form, being careful not to overmix, as this could lead to tough cookies. You want a smooth dough that sticks together well, indicating the perfect base for your peppermint-flavored treats.
Step 4: Divide the Dough
Once the dough is gathered, divide it evenly in half on a clean surface. Keep one half plain while adding red gel food coloring to the other half to achieve a vibrant red hue. Work the color into the dough until fully blended, ensuring a consistent color throughout to create striking swirls for your Peppermint Swirl Cookies.
Step 5: Chill the Dough
Wrap each dough half in plastic wrap and refrigerate for at least 30 minutes. Chilling the dough firms it up, making it easier to roll and preventing any color bleeding in the layers, crucial for those beautiful swirls in your cookies.
Step 6: Roll Dough
After chilling, roll out both halves of the dough on a lightly floured surface into rectangles, about 10×12 inches and 1/4 inch thick. Carefully align the two rectangles, pressing them together gently to avoid any gaps. This step is essential for creating the lovely swirls in the Peppermint Swirl Cookies.
Step 7: Form Dough Log
Starting from one edge, tightly roll the aligned dough into a log shape, ensuring the colors remain distinct. Wrap the log in plastic wrap and chill it in the refrigerator for another 2 hours. This chilling step helps the dough maintain its shape, leading to beautiful cookie slices.
Step 8: Preheat Oven and Bake
Preheat your oven to 375°F (190°C). Once heated, remove the dough log from the fridge and slice it into uniform 1/4-inch rounds using a sharp knife. Arrange the cookie slices on a baking sheet lined with parchment paper and bake for 8-10 minutes, until the edges turn lightly golden while keeping a soft texture.
Step 9: Cool Completely
After baking, transfer the cookies from the baking sheet to a wire rack. Allow the Peppermint Swirl Cookies to cool completely, as this step ensures they set properly for a delightful crunch with each bite. Once cooled, they’re ready to be enjoyed or decorated!
How to Store and Freeze Peppermint Swirl Cookies
Room Temperature: Store cookies in an airtight container at room temperature for up to 5-7 days. To maintain freshness, consider adding a slice of bread to keep them soft.
Fridge: If you want to extend freshness, you can store them in the fridge for up to 10 days. Just ensure they’re in an airtight container to prevent them from absorbing odors.
Freezer: Freeze baked cookies for up to 1 month. For best results, place them in a single layer on a baking sheet to freeze initially, then transfer to a freezer bag. This way, you prevent sticking!
Reheating: To enjoy your Peppermint Swirl Cookies warm, reheat in a preheated oven at 350°F (175°C) for about 5-7 minutes until just warmed through.
Expert Tips for Perfect Peppermint Swirl Cookies
- Chill Thoroughly: Always chill the dough properly to ensure clear separation of colors and prevent unwanted color bleeding during rolling.
- Measure Carefully: Accurate measurement of ingredients is essential; even slight variations can affect the texture of your Peppermint Swirl Cookies.
- Avoid Overmixing: Mix only until combined after adding dry ingredients to keep cookies tender and prevent them from becoming tough.
- Use Sharp Knife: A very sharp knife is vital for slicing the dough log; this helps maintain the swirls without squishing them.
- Watch Baking Time: Keep an eye on the cookies while baking; removing them just as the edges turn golden helps maintain a soft center.
Make Ahead Options
These Peppermint Swirl Cookies are perfect for meal prep enthusiasts! You can prepare the dough up to 24 hours in advance, making it a breeze to whip these festive treats into shape when you’re ready. Simply follow the initial steps of the recipe, then wrap the formed dough log in plastic wrap and refrigerate. For longer storage, you can freeze the raw, unsliced dough for up to 3 months—just ensure it’s tightly sealed to maintain freshness. When you’re ready to bake, slice the chilled dough into rounds, bake, and enjoy these delicious Peppermint Swirl Cookies with minimal effort. Your future self will thank you for the time-saving benefits!
Peppermint Swirl Cookies Variations
Feel free to personalize your soon-to-be favorites and make them your own!
-
Gluten-Free: Substitute all-purpose flour with a gluten-free flour blend for a delightful gluten-free treat. Ensure your blend contains xanthan gum for better texture.
-
Vegan: Replace the egg with a flaxseed egg (1 tablespoon flaxseed meal + 3 tablespoons water) and use vegan butter for a plant-based version. You won’t miss the egg!
-
Mint-Free: Swap out the peppermint extract for almond or orange extract to create a unique flavor twist. Imagine the bright, citrusy notes mingling with the dough!
-
Chocolate Delight: Add 1/2 cup of mini chocolate chips into the dough for an unexpected chocolatey burst with every bite. The combination of chocolate and mint is simply divine.
-
Cinnamon Spice: Add 1 teaspoon of ground cinnamon to the flour mixture for a warm, spicy kick that will complement the mint. It enhances the festive aura of these cookies!
-
Color Variations: Use different colors of gel food coloring to create swirls for various holidays or occasions. How about swirling in green for St. Patrick’s Day or pink for Valentine’s Day?
-
Crunchy Toppings: Instead of coarse sugar, use crushed pretzels or nuts for a salty crunch that pairs beautifully with sweet cookies. The contrast will surprise your taste buds!
-
Cookie Sandwiches: Transform these cookies into festive sandwich cookies by adding a layer of cream cheese frosting or chocolate ganache between two cookies. What a treat for the holidays!
While you’re at it, why not try making some delicious Brown Butter Cookies for a richer flavor or whip up a batch of colorful Strawberry Crunch Cookies to brighten your day?
What to Serve with Bakery-Perfect Peppermint Swirl Cookies
These vibrant treats are the perfect centerpiece to any festive gathering, and pairing them with the right accompaniments can elevate your holiday experience.
-
Rich Hot Cocoa: The warm, creamy texture of hot cocoa complements the minty freshness, making it a perfect cozy pairing for chilled evenings.
-
Freshly Brewed Coffee: The bold flavors of coffee enhance the sweetness of the cookies, creating a delightful balance that’s perfect for any time of day.
-
Creamy Vanilla Ice Cream: A scoop of vanilla ice cream offers a contrast in temperature and a silky texture to the crispy edges of the cookies, creating a satisfying treat.
-
Spiced Mulled Wine: The warm spices in mulled wine harmonize beautifully with the peppermint, enhancing the festive spirit of your holiday celebrations.
-
Coconut Macaroon Cake: The chewy coconut and sweetness of a macaroon cake adds different textures to your dessert table, creating an inviting and varied selection.
-
Chocolate Dipped Pretzels: The salty crunch of pretzels dipped in chocolate provides a nice contrast to the sweetness, making for an irresistible snack combo.
-
Gingerbread Tea: The warming spices in gingerbread tea beautifully complement the peppermint flavor, enhancing the cozy vibe of your holiday gatherings.
-
Sugar Cookies: Pairing these vibrant cookies with classic sugar cookies allows variation in flavor and texture, making your dessert platter more inviting.
-
Fruity Sorbet: A light and refreshing sorbet can cleanse the palate, offering a fruity burst that complements the rich mint of the cookies.
Indulging in Bakery-Perfect Peppermint Swirl Cookies with these delightful accompaniments will surely create memorable moments this holiday season!

Peppermint Swirl Cookies Recipe FAQs
How do I choose the best peppermint extract for my cookies?
When selecting peppermint extract, opt for pure peppermint extract for a more intense flavor. Look for brands that list natural ingredients without artificial additives. This will ensure that your Peppermint Swirl Cookies have that authentic minty taste that matches the holiday spirit!
How should I store my Peppermint Swirl Cookies for optimal freshness?
To keep your cookies fresh, store them in an airtight container at room temperature for about 5-7 days. For added softness, pop a slice of bread into the container; this will help maintain moisture levels. If you want to preserve them longer, you can refrigerate the cookies for up to 10 days, just ensure they are sealed to avoid odors.
Can I freeze my Peppermint Swirl Cookies?
Absolutely! You can freeze both your baked Peppermint Swirl Cookies and the raw, unsliced dough. For the baked cookies, place them in a single layer on a baking sheet to freeze initially, then transfer them to a freezer bag where they can be stored for up to 1 month. For the raw dough, wrap it tightly in plastic wrap and freeze it for up to 3 months. Thaw before slicing and baking them!
What should I do if my dough seems too sticky?
If you find your dough is overly sticky, try chilling it for a little longer to firm it up. You can also sprinkle a bit of flour on your work surface while rolling it out. If this doesn’t help, gently knead in more flour, a tablespoon at a time, until the dough reaches a workable consistency. Keep in mind, this might slightly alter the final texture, so be cautious!
Can I use liquid food coloring instead of gel?
It’s best to avoid liquid food coloring as it can alter the consistency of your dough, potentially making it too wet. Instead, stick with gel food coloring, which provides vibrant color without affecting the dough’s firmness. This will ensure those gorgeous swirls stay intact while baking!
Are these cookies safe for pets or people with allergies?
While these Peppermint Swirl Cookies are delightful for human consumption, they contain ingredients like butter, sugar, and eggs, which aren’t suitable for pets. Always check for allergies, especially to egg, gluten, or dairy. For a vegan option, you can substitute the egg with a flaxseed egg, and use a dairy-free butter alternative!
Delicious Peppermint Swirl Cookies for a Festive Treat
Ingredients
Equipment
Method
- In a medium bowl, whisk together 2 cups of all-purpose flour, 1 teaspoon of baking powder, and a pinch of salt until combined.
- In a large mixing bowl, blend 1 cup of softened unsalted butter with 1 cup of granulated sugar until light and fluffy.
- Add 1 large egg, 2 teaspoons of vanilla extract, and 1 teaspoon of peppermint extract, beating until smooth.
- Gradually incorporate the dry flour mixture into the wet ingredients at low speed until a soft dough forms.
- Divide the dough in half, keeping one half plain and adding red gel food coloring to the other half.
- Wrap each dough half in plastic wrap and refrigerate for at least 30 minutes.
- Roll out both halves into rectangles, about 10x12 inches and 1/4 inch thick. Align and press them together.
- Starting from one edge, tightly roll the aligned dough into a log shape and chill for another 2 hours.
- Preheat your oven to 375°F (190°C). Slice the dough log into uniform 1/4-inch rounds and bake for 8-10 minutes until edges are lightly golden.
- Transfer cookies to a wire rack to cool completely before enjoying or decorating.
Leave a Reply