
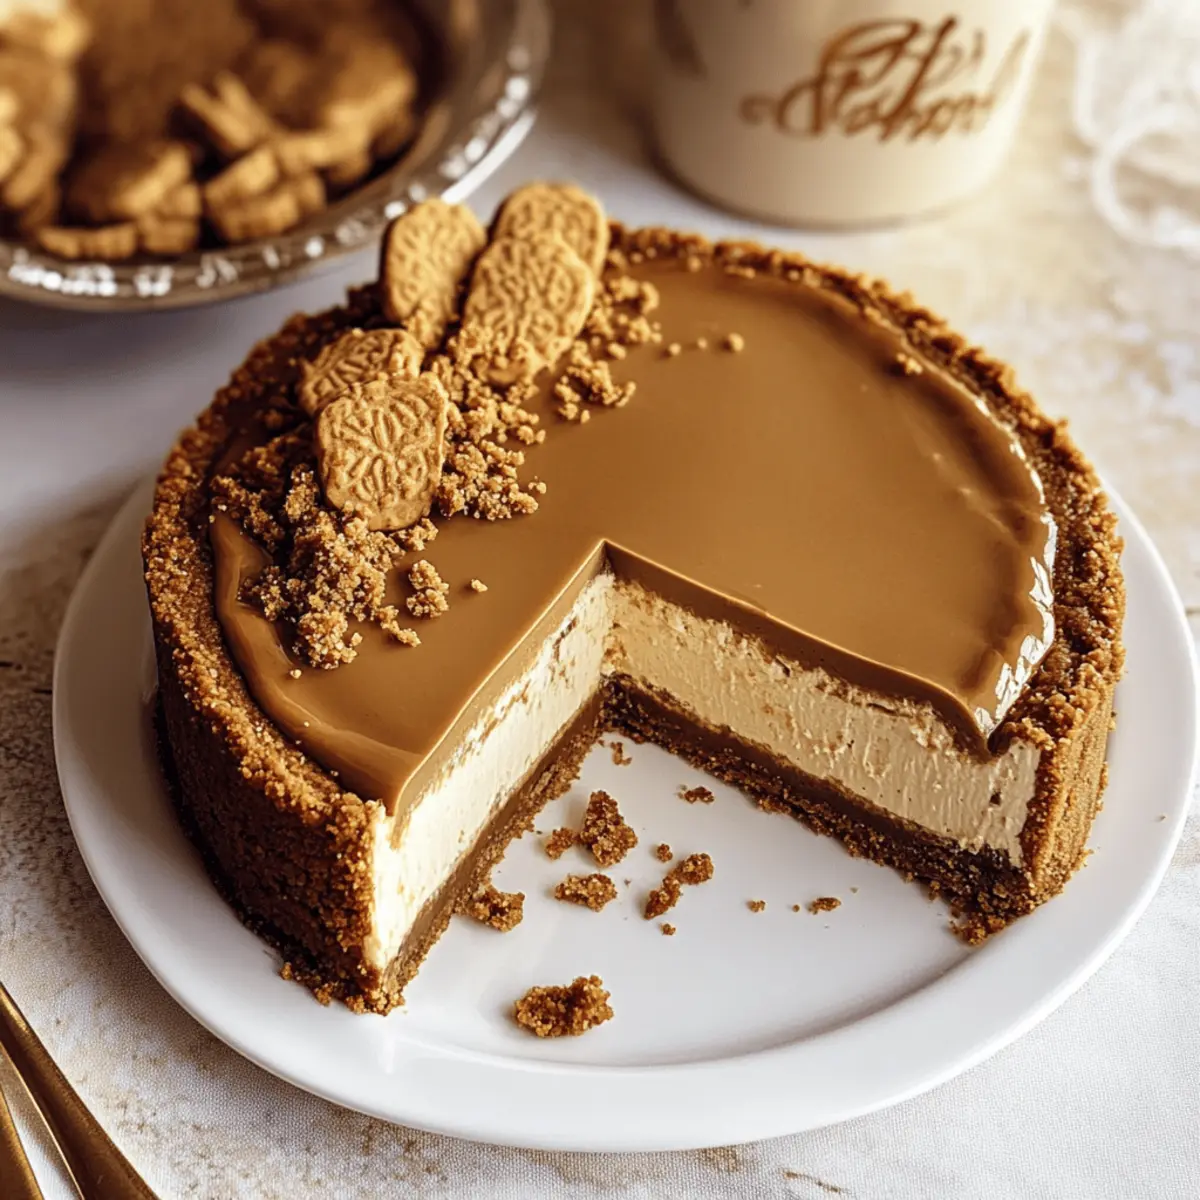
As I stirred the ingredients for my Biscoff cheesecake, a wondrous aroma of spiced cookies wafted through my kitchen, instantly transporting me to my favorite café. This heavenly dessert, with its buttery Biscoff cookie crust and velvety cheesecake filling, is a complete delight for anyone craving a sweet escape from the ordinary. Not only is this Biscoff cheesecake incredibly easy to whip up, but it’s also a guaranteed crowd-pleaser that will leave your friends and family asking for seconds. Topped with a lush layer of warm Biscoff spread, this dessert promises a creamy indulgence that blends nostalgia with the joys of home baking. Are you ready to dive into a slice of this sticky-sweet heaven? Let’s get started!

Why is Biscoff Cheesecake so irresistible?
Decadent Flavor: Each slice boasts a delightful blend of buttery Biscoff and rich cream cheese that dances on your taste buds.
Easy Preparation: With just a few simple steps, this recipe is approachable for bakers of all levels; perfect for a weekend treat or a last-minute dessert!
Showstopper Appeal: Impress your guests with an elegant cheesecake that looks as good as it tastes, making it ideal for celebrations or cozy family gatherings.
Versatile Base: You can easily customize this cheesecake with different toppings or even swap out the Biscoff spread for Nutella—endless possibilities await!
Perfect for Sharing: Slice it up for a potluck or enjoy it with your loved ones over coffee; this cheesecake encourages sharing and joyful moments.
Whether you’re new to baking or a seasoned pro, you will love making this Biscoff cheesecake that satisfies every craving.
Biscoff Cheesecake Ingredients
• Get ready to indulge!
For the Crust
- Biscoff Cookies – These provide a flavorful base; you can use speculoos cookies for a similar taste.
- Unsalted Butter – Binds the cookie crumbs for richness; opt for salted butter if needed, but reduce any added salt.
For the Filling
- Cream Cheese – Essential for that creamy texture; always choose full-fat for optimal results.
- Granulated Sugar – Sweetness is key; for a deeper flavor, brown sugar is a lovely alternative.
- Greek Yogurt – Adds creaminess and a slight tang; sour cream can be used if necessary.
- Vanilla Extract – Enhances flavor depth; try vanilla bean paste for an extra aromatic touch.
- Ground Cinnamon – Infuses warm spice notes; nutmeg is a great substitute if desired.
- Large Eggs – Key for setting the cheesecake; remember to bring them to room temperature for easier mixing.
For the Topping
- Biscoff Spread – This creates a luscious top layer with intense Biscoff flavor; warming it slightly makes spreading a breeze.
- Additional Biscoff Cookies – Optional for garnish, adding a delightful touch and crunch to your presentation.
Gather these Biscoff cheesecake ingredients, and prepare for a heartfelt baking experience that will surely enchant your taste buds!
Step‑by‑Step Instructions for Biscoff Cheesecake
Step 1: Prepare the Pan
Line a 9-inch springform pan with parchment paper, allowing some overhang for easy removal later. This step ensures a non-stick surface for your Biscoff cheesecake, making it simple to release once cooled. Once lined, set the pan aside to focus on creating the crust.
Step 2: Make the Crust
In a food processor, crush the Biscoff cookies until they resemble fine crumbs, about 30 seconds. In a mixing bowl, combine the crumbs with melted butter, stirring until the mixture resembles wet sand. Press this mixture into the bottom and slightly up the sides of the prepared pan. Chill in the refrigerator while you preheat the oven.
Step 3: Preheat Oven
Preheat your oven to 325°F (163°C) to ensure it reaches the right temperature before baking the cheesecake. This step is crucial for even cooking and allows the Biscoff cheesecake to set properly. As the oven heats, prepare the filling by gathering your ingredients.
Step 4: Mix Filling
In a large bowl, mix the softened cream cheese, granulated sugar, Greek yogurt, vanilla extract, and ground cinnamon using an electric mixer. Beat until creamy and smooth, about 2-3 minutes. Gradually add in the eggs, one at a time, mixing well after each addition until fully incorporated and smooth.
Step 5: Fill Pan
Carefully pour the creamy cheesecake filling over the chilled crust in your prepared springform pan. Use a spatula to spread it evenly for a smooth top. Ensure there are no air bubbles by gently tapping the pan on the counter, as this will help the cheesecake bake evenly.
Step 6: Bake
Place a shallow pan filled with water on the lower rack of the oven to create steam, which helps prevent cracks in the cheesecake. Bake the Biscoff cheesecake for 65-70 minutes, or until the edges are set but the center is still slightly jiggly. You’ll know it’s ready when the edges start to pull away slightly from the pan.
Step 7: Cool
Once baked, turn off the oven and crack the door open to let the cheesecake cool gradually for about 1 hour. After that, transfer the cheesecake to a wire rack and allow it to cool completely. Once cooled, refrigerate for at least 4 hours or overnight to achieve the perfect texture and flavor.
Step 8: Top & Serve
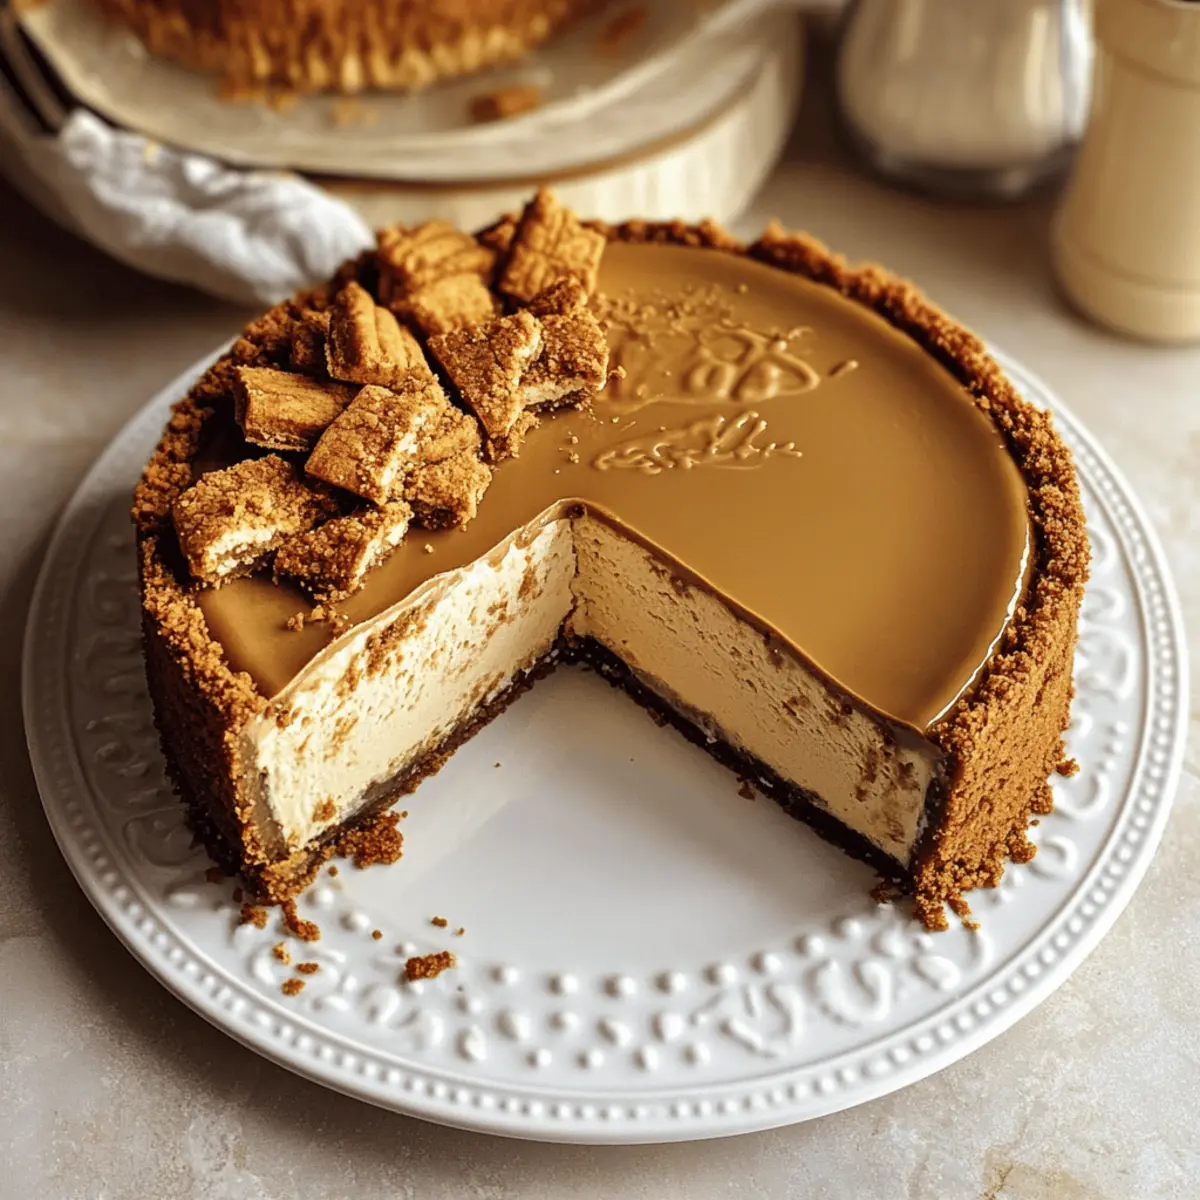
After chilling, carefully release the cheesecake from the springform pan, using the parchment overhang for easy lifting. Warm the Biscoff spread slightly in the microwave for about 10-15 seconds, then spread it generously over the top of the cheesecake. Garnish with crumbled Biscoff cookies for added texture and flare before slicing and serving.

What to Serve with Biscoff Cheesecake
For the perfect finish to your delightful baking adventure, pairing the right sides can elevate your Biscoff cheesecake experience.
-
Fresh Berries: The tartness of raspberries or strawberries cuts through the richness of the cheesecake, creating a beautiful balance.
-
Whipped Cream: A dollop of lightly sweetened whipped cream adds an airy touch and a delightful texture that complements every bite.
-
Coffee or Espresso: The warm, bold flavors of coffee enhance the sweetness of the cheesecake, making for an indulgent dessert experience.
-
Chocolate Sauce: Drizzling warm chocolate sauce over the cheesecake introduces a rich layer, enhancing the flavors with a touch of luxury.
-
Ice Cream: Pairing with a scoop of vanilla or caramel ice cream offers a delightful contrast in temperature and texture, making it an irresistible treat.
-
Caramel Drizzle: Sweet, gooey caramel adds an extra layer of flavor, seamlessly blending with the Biscoff elements in the cheesecake for a luscious treat.
These pairings not only add depth to your table but also create an inviting atmosphere that keeps the joy of baking alive. Enjoy the decadence that follows!
Biscoff Cheesecake Variations & Substitutions
Feel free to get creative and make this Biscoff cheesecake your own with these delightful variations!
- Gluten-Free: Use gluten-free cookies instead of Biscoff for the crust to maintain that buttery flavor without the gluten.
- Chocolate Lovers: Swirl in melted chocolate into your cheesecake batter before baking for a rich, decadent twist.
- Nutty Flavor: Substitute Biscoff spread with almond or peanut butter for a nutty variation that adds new depth.
- Mini Cheesecakes: Create individual portions by using a muffin tin; bake for 18-20 minutes for perfect bite-sized treats.
- Extra Spice: Add a pinch of nutmeg along with the cinnamon for a warm, spiced flavor that enhances the overall aroma.
- Fruity Twist: Top your cheesecake with a layer of fresh berries or a berry compote for a refreshing contrast to the creamy cheesecake.
- Sour Cream Substitute: If you’re out of Greek yogurt, sour cream works beautifully, adding a delightful tanginess to your filling.
- Spicy Kick: Incorporate a dash of chili powder to the filling for a surprising heat that contrasts with the sweetness of the Biscoff.
By mixing and matching these ideas, your Biscoff cheesecake will shine in ways that cater to your cravings, while making the most of what you have on hand! Enjoy your sweet culinary journey!
Make Ahead Options
These Biscoff cheesecakes are perfect for meal prep enthusiasts! You can prepare the crust and filling separately up to 24 hours in advance, keeping the crust tightly wrapped in plastic wrap and the filling stored in an airtight container in the refrigerator; this helps maintain its creamy texture. When you’re ready to assemble, simply pour the cheesecake filling over the chilled crust and bake as instructed. Make sure to allow the cheesecake to cool completely before refrigerating it for at least 4 hours or overnight. With these make-ahead tips, you’ll enjoy a delicious, hassle-free dessert that tastes just as incredible with minimal effort!
How to Store and Freeze Biscoff Cheesecake
Fridge: Store the Biscoff cheesecake in an airtight container for up to 5 days. Make sure it’s fully cooled before covering to maintain freshness.
Freezer: Wrap individual slices tightly in plastic wrap, then place them in an airtight container or freezer bag. This way, they can be frozen for up to 1 month.
Thawing: When you’re ready to enjoy a slice, transfer it to the fridge and let it thaw overnight for the best texture and flavor.
Reheating: If you prefer warm cheesecake, reheat a slice in the microwave for about 10-15 seconds. Enjoy the heavenly flavors melted into every bite!
Tips for the Best Biscoff Cheesecake
• Room Temperature Ingredients: Ensure all your ingredients, especially cream cheese and eggs, are at room temperature for a smooth and lump-free batter.
• Water Bath: Use a water bath (bain-marie) during baking to retain moisture and prevent cracks in your cheesecake.
• Bake Time: Keep a close eye on the baking process; overbaking can dry out your Biscoff cheesecake, so remove it when the center is slightly jiggly.
• Chilling is Crucial: Allowing the cheesecake to chill for at least 4 hours (or ideally overnight) allows flavors to meld and the texture to set beautifully.
• Topping Tips: For an easy topping, warm the Biscoff spread slightly in the microwave; this makes it smoother and easier to spread without tearing the cheesecake.
• Serve with Accompaniments: Enhance your Biscoff cheesecake experience by serving with coffee or fresh berries for a lovely balance of flavors.
Biscoff Cheesecake Recipe FAQs
What type of Biscoff cookies should I use for the crust?
For the crust, I recommend using traditional Biscoff cookies to capture that iconic flavor. If they’re unavailable, speculoos cookies are a wonderful substitute that will yield a very similar taste.
How do I store leftover Biscoff cheesecake?
Store any leftover Biscoff cheesecake in an airtight container in the fridge for up to 5 days. Make sure it has cooled completely before covering to preserve its creamy texture. If you want to extend its lifespan, slices can also be wrapped tightly and frozen for up to 1 month.
Can I freeze Biscoff cheesecake?
Absolutely! To freeze your Biscoff cheesecake, individually wrap each slice in plastic wrap and then place them in an airtight container or freezer bag. This two-step process helps prevent freezer burn and allows you to enjoy slices at your convenience!
What should I do if my Biscoff cheesecake cracks while baking?
No worries! If your cheesecake cracks, it often means it was overbaked or the oven temperature was too high. To prevent this in the future, ensure you use a water bath during baking, as it helps create steam that keeps the cheesecake moist. Also, check for doneness when the edges are set and the center still has a slight jiggle.
Can I use alternatives for any of the ingredients?
Yes! If you’re looking for alternatives, try using sour cream instead of Greek yogurt for similar creaminess. If you’re concerned about allergies, choose gluten-free Biscoff cookies to make this dessert more accommodating. Just remember that the flavor may vary slightly based on the alternatives.
Are there any dietary considerations for pets or allergies?
For your furry friends, take note that cheesecake ingredients like cream cheese and sugar are not safe for pets, so avoid sharing. If you’re serving guests with allergies, be cautious with allergens like gluten in cookies or dairy in cream cheese. Always check ingredient labels to ensure everyone can enjoy this delicious Biscoff cheesecake recipe!
Irresistibly Creamy Biscoff Cheesecake to Satisfy Your Cravings
Ingredients
Equipment
Method
- Line a 9-inch springform pan with parchment paper, ensuring some overhang for easy removal later.
- Crush the Biscoff cookies in a food processor until fine. Combine with melted butter and press into the bottom and sides of the prepared pan. Chill in the refrigerator.
- Preheat the oven to 325°F (163°C).
- In a large bowl, mix softened cream cheese, granulated sugar, Greek yogurt, vanilla extract, and ground cinnamon until creamy. Gradually add eggs, mixing well.
- Pour the filling over the chilled crust and smooth it with a spatula. Tap the pan to remove air bubbles.
- Place a shallow pan of water in the oven and bake the cheesecake for 65-70 minutes, until edges are set and center is slightly jiggly.
- Turn off the oven and crack the door open, allowing the cheesecake to cool for about 1 hour. Transfer to a wire rack to cool completely.
- Refrigerate for at least 4 hours or overnight.
- Carefully remove the cheesecake from the springform pan, warm the Biscoff spread slightly and spread over the top. Garnish with crumbled Biscoff cookies before serving.
Leave a Reply