
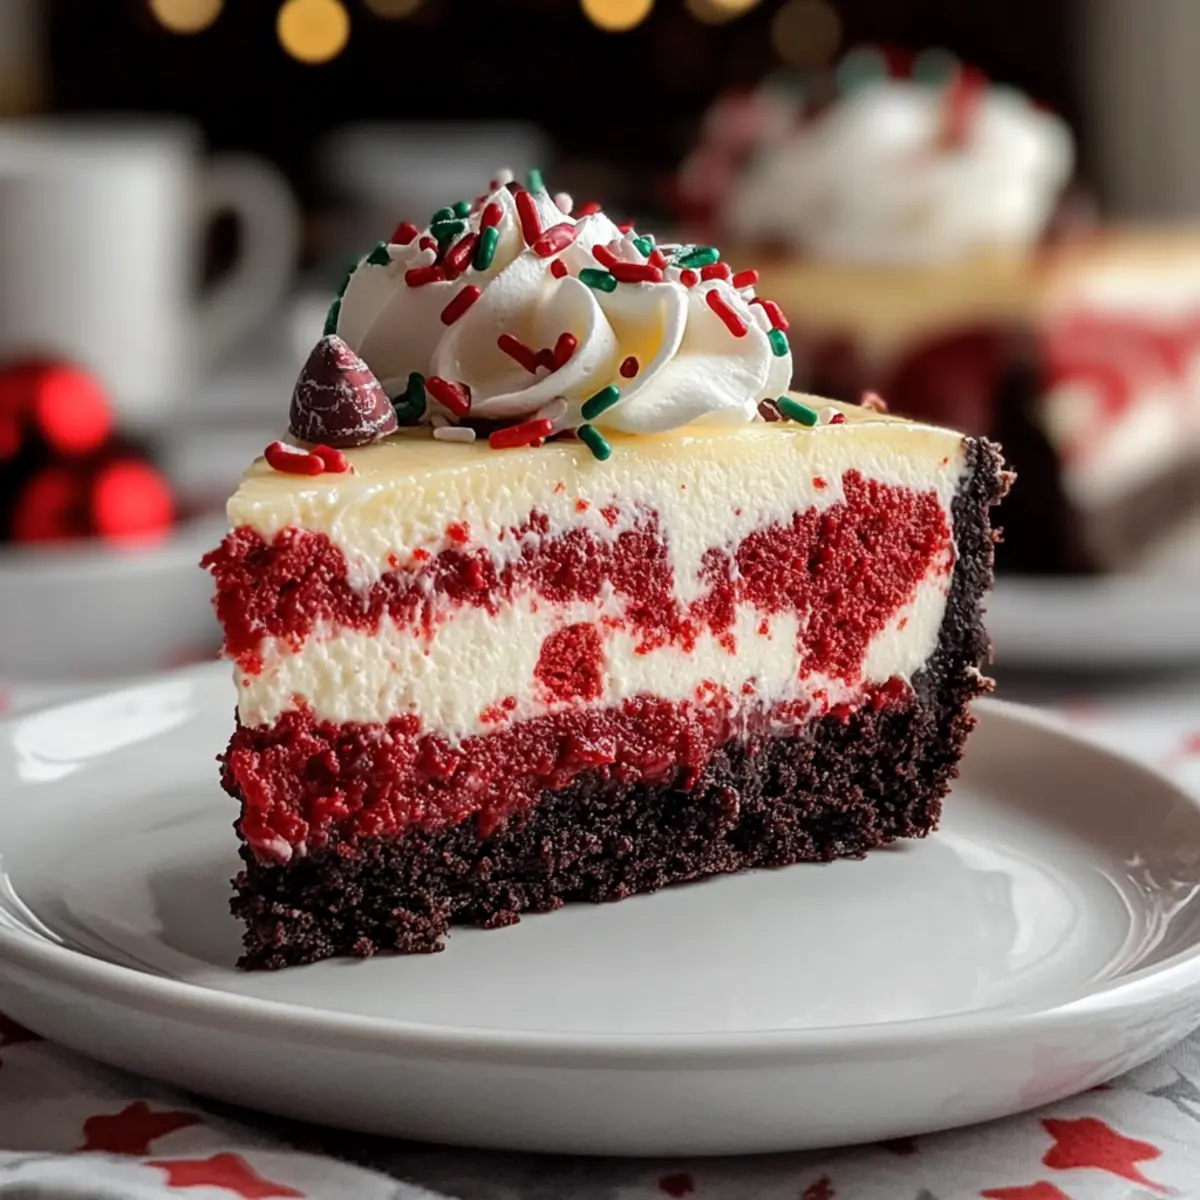
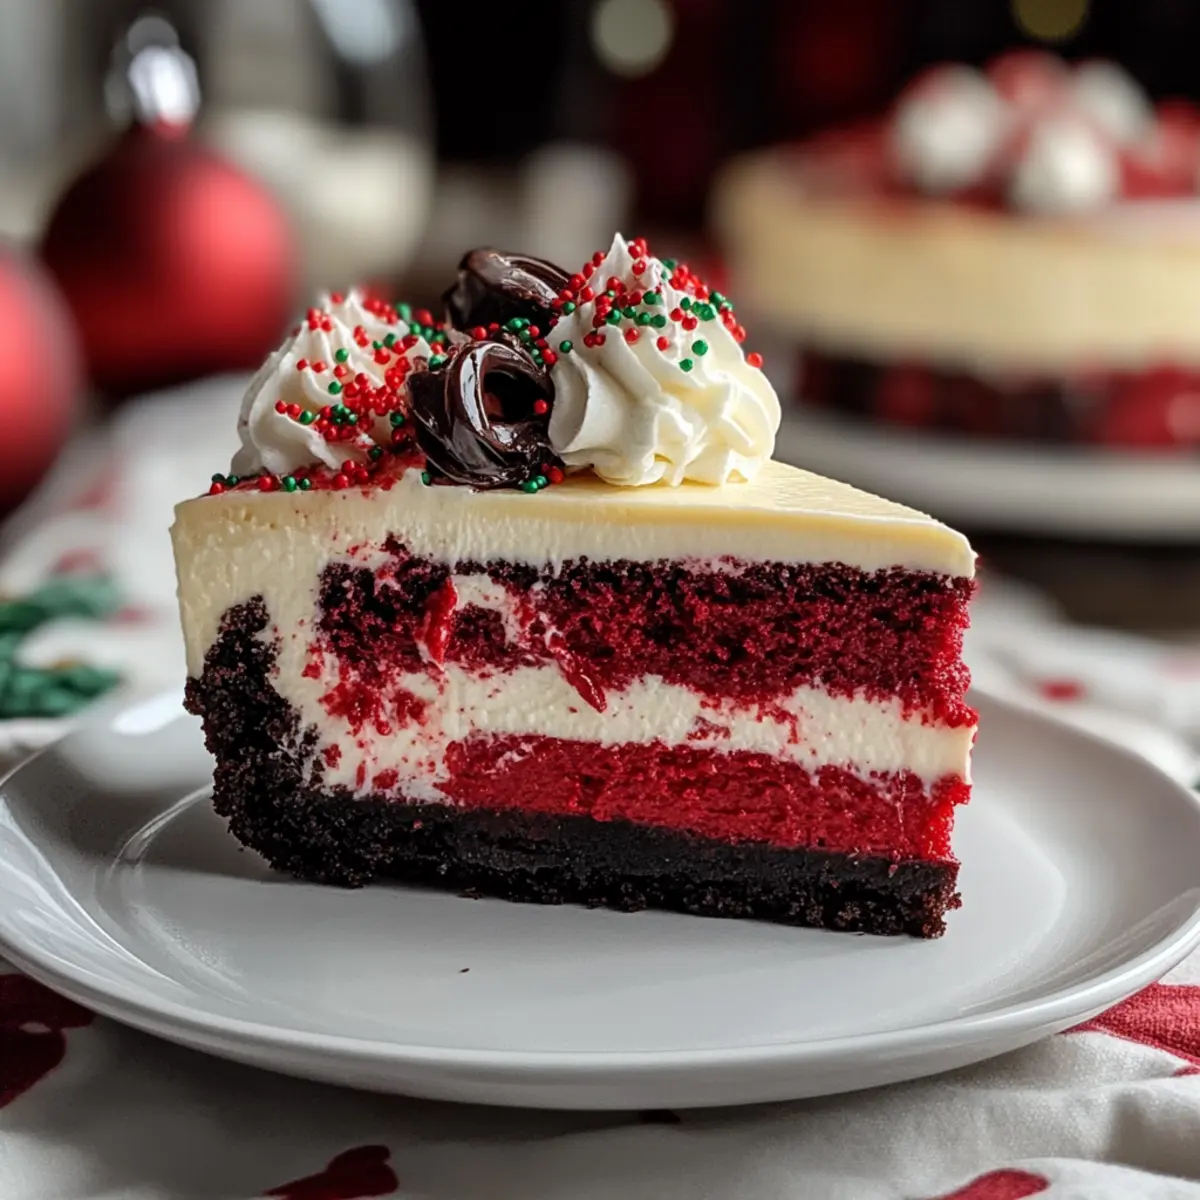
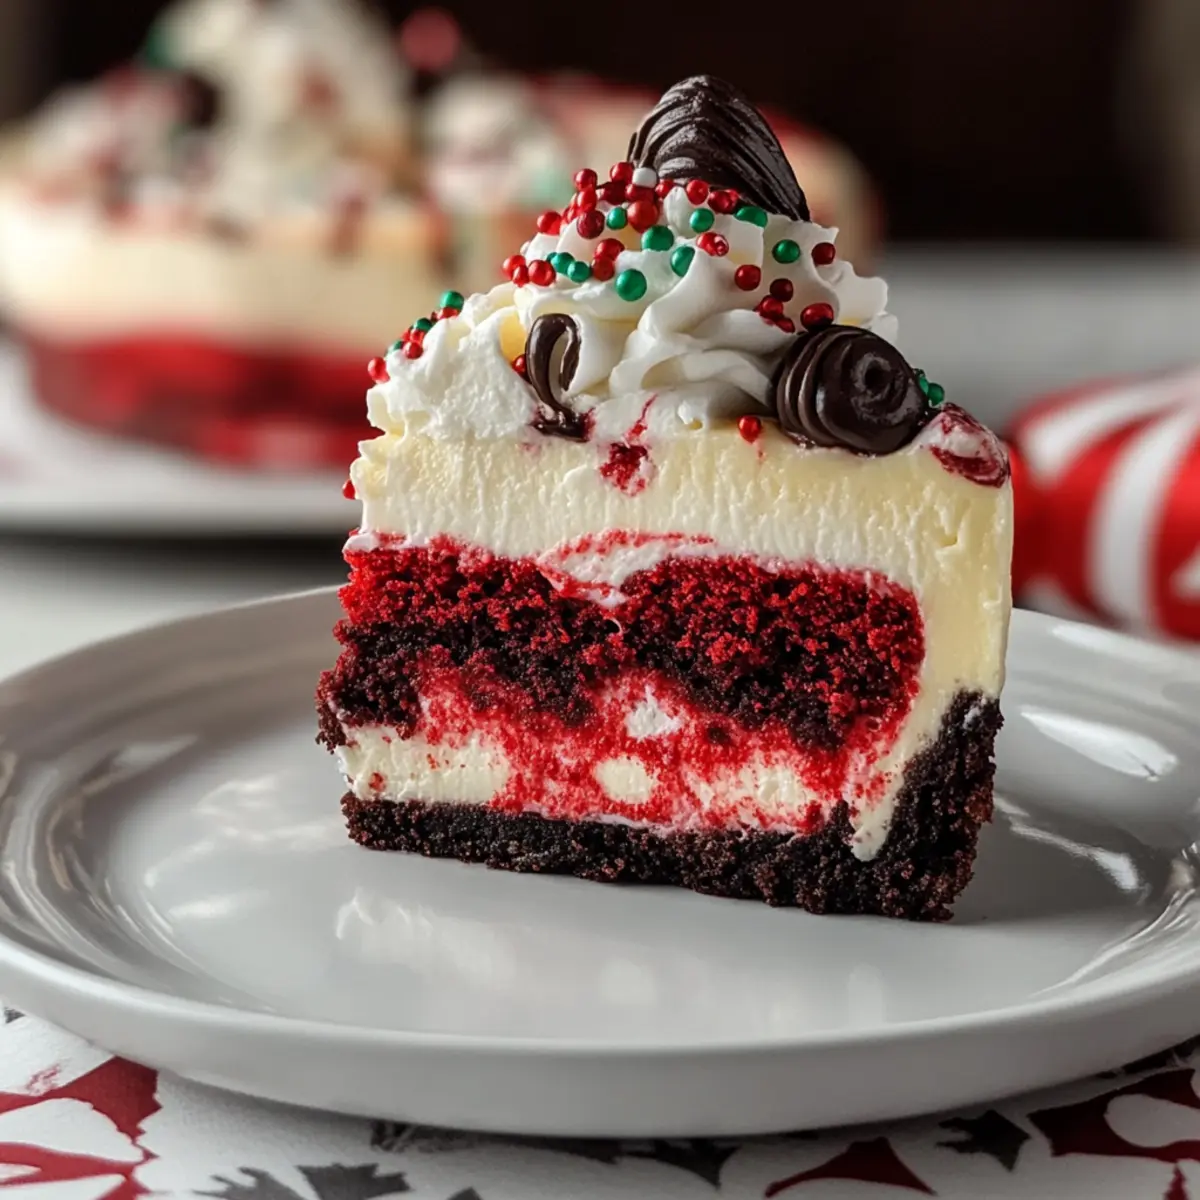
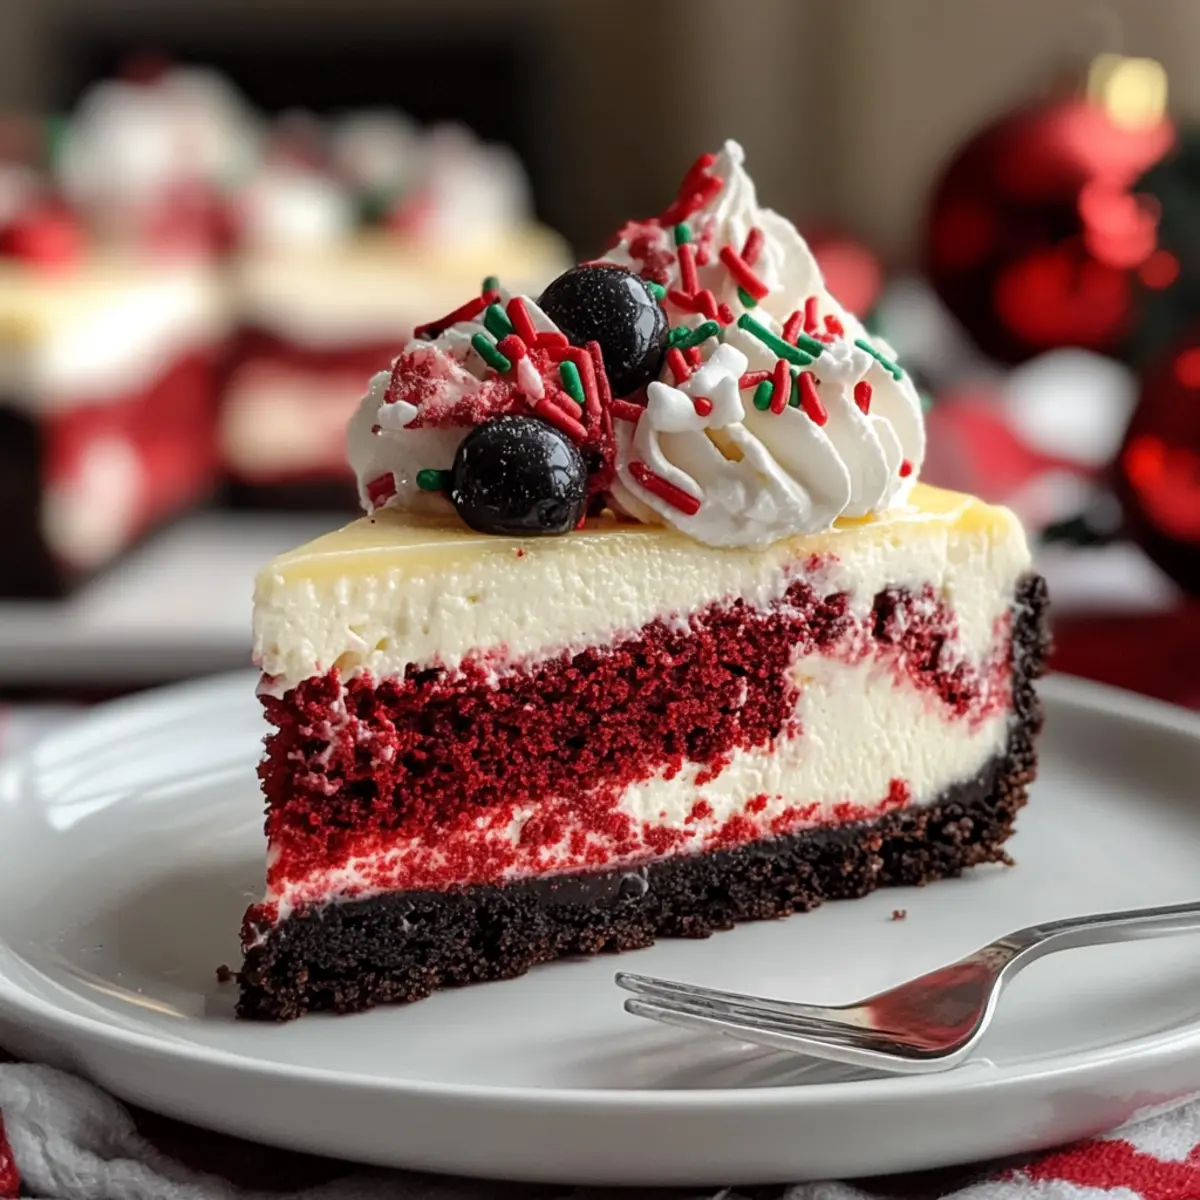
A dash of vibrant red, a swirl of creamy white—it’s hard to resist the allure of a Christmas Red Velvet Cheesecake. As the holiday season approaches, I find myself longing for that perfect centerpiece that not only delightfully pleases the eye but also warms the heart. This festive cheesecake combines rich layers of moist red velvet with silky cheesecake, all embraced by a fluffy cream cheese frosting that makes every slice a joyous celebration. The best part? It’s surprisingly easy to whip up and the ultimate crowd-pleaser, perfect for your festive gatherings. Ready to elevate your dessert game this Christmas? Let’s dive into the magical world of this delightful cheesecake!
Why is this cheesecake a holiday must?
Layers of Joy: This Christmas Red Velvet Cheesecake features rich red velvet and creamy cheesecake, creating a mesmerizing indulgence for your holiday table.
Effortless Baking: With simple steps, you don’t need to be a baking pro to impress your guests.
Showstopper Presentation: Its vibrant color and fluffy cream cheese frosting make it irresistibly festive and photogenic.
Versatile Flavors: Feel free to swap the Oreo crust for something unique or add festive toppings for a personalized touch. Enjoy it with a warm beverage or as an elegant end to your meal! Check out my Chicken Alfredo Garlic for more comforting options.
Christmas Red Velvet Cheesecake Ingredients
Elevate your holiday dessert game with these simple yet delightful ingredients!
For the Crust
- Oreo cookies – Provides a delicious and sturdy crust; substitute with graham crackers for a traditional flavor.
- Butter – Enhances the richness of the crust; use unsalted butter for better control over sweetness.
For the Cheesecake Filling
- Cream cheese – The main ingredient for the cheesecake filling, delivering creaminess; ensure it’s at room temperature for easy mixing.
- White sugar – Sweetens the filling and balances the flavors; consider coconut sugar for a caramel note.
- Heavy whipping cream – Creates a rich and airy texture in the cheesecake; can substitute with full-fat coconut cream for a dairy-free version.
- Vanilla extract – Adds depth of flavor; a drop of almond extract can enhance the complexity.
- Cocoa powder – Introduces a subtle chocolate flavor in the cheesecake; use Dutch-processed cocoa for a richer taste.
- Red food coloring – Achieves the signature red hue of the cheesecake; gel food coloring is recommended for vibrant color without altering the batter’s consistency.
For the Topping
- Whipped cream – Topping for a light, airy finish; freshly whipped cream enhances flavor and texture.
- Christmas sprinkles – Adds festive flair and visual appeal; use colored sugar or edible glitter for decorative purposes.
- Mini Oreos – Garnish that complements the crust flavor and theme; alternatively, use chocolate shavings or crushed candy canes for a seasonal touch.
This Christmas Red Velvet Cheesecake is the perfect centerpiece for your holiday celebrations, adding a splash of color and a touch of sweetness to your gatherings!
Step‑by‑Step Instructions for Christmas Red Velvet Cheesecake
Step 1: Prepare Pan & Oven
Preheat your oven to 350°F (175°C) to ensure it’s hot enough for baking. While it heats, wrap a 9-inch springform pan tightly in aluminum foil, creating a waterproof barrier. This step is vital to prevent any water from seeping into the pan during the baking process, ensuring a perfect base for your Christmas Red Velvet Cheesecake.
Step 2: Make the Red Velvet Crust
In a large bowl, finely crush Oreo cookies until they resemble sand. Combine them with melted unsalted butter and a couple of tablespoons of sugar, mixing until the texture is consistent. Press this mixture firmly into the bottom of the prepared springform pan. Bake for 8-10 minutes until set, and then allow the crust to cool completely before adding the filling.
Step 3: Prepare Cheesecake Filling
In a mixer, beat softened cream cheese until smooth and creamy. Gradually add sugar, vanilla extract, cocoa powder, and red food coloring, mixing until fully incorporated. In a separate bowl, whip heavy whipping cream until soft peaks form. Gently fold this whipped cream into your red velvet cheesecake mixture to keep it airy, creating that luscious texture you crave for your Christmas Red Velvet Cheesecake.
Step 4: Bake the Cheesecake
Lower the oven temperature to 325°F (160°C) for even baking. Place the filled springform pan into a larger baking dish filled with hot water, creating a water bath to prevent cracks. Bake for 1 to 1.25 hours, until the edges are set but the center still jiggles slightly. This gentle baking method ensures that your cheesecake comes out silky and smooth.
Step 5: Cool & Chill
Once baked, turn off the oven and leave the cheesecake inside with the door ajar for about 1 hour. This gradual cooling helps prevent sudden temperature changes that can cause cracks. Afterward, transfer the cheesecake to a wire rack to cool to room temperature, then refrigerate it for at least 6-8 hours—or overnight—for the best flavor and texture.
Step 6: Decorate & Serve
Once chilled, carefully release the springform pan. Top your beautiful Christmas Red Velvet Cheesecake with freshly whipped cream for a light, airy finish. Feel free to get creative with festive sprinkles or mini Oreos for decoration. For clean slicing, run a hot knife around the edges before cutting into it, revealing the stunning layers within.
Storage Tips for Christmas Red Velvet Cheesecake
Fridge: Store any leftovers in an airtight container for up to 3-4 days to maintain freshness and flavor. Ensure the cheesecake is completely cooled before sealing.
Freezer: For longer storage, you can freeze the Christmas Red Velvet Cheesecake for up to 2 months. Wrap it tightly in plastic wrap, then in aluminum foil to prevent freezer burn.
Thawing: When ready to enjoy, transfer the cheesecake from the freezer to the fridge and let it thaw overnight. This gradual thawing helps preserve its creamy texture.
Reheating: Although best served chilled, if you prefer it slightly warmed, place slices in the microwave for 10-15 seconds. Avoid overheating to maintain its delectable creaminess.
Christmas Red Velvet Cheesecake Variations
Feel free to add your personal touch to this delightful cheesecake and explore some tasty twists!
-
Ginger Snap Crust: Swap out the Oreo crust for a crunchy ginger snap crust for a warm and spicy flavor. The ginger adds an aromatic note that perfectly complements the sweetness of the cheesecake.
-
Orange Zest Infusion: Adding a hint of orange zest to the cheesecake provides a refreshing citrus lift. It contrasts beautifully with the richness, making each bite even more delightful.
-
Dairy-Free Version: Use full-fat coconut cream instead of heavy whipping cream for a delicious dairy-free option that maintains the airy texture. Coconut brings a subtle tropical vibe to this festive dessert!
-
Alternative Toppings: Get creative with your garnishes! You can use crumbled peppermint, chocolate shavings, or even edible glitter to make your cheesecake shine. Each addition transforms it into a unique masterpiece.
-
Mini Servings: For an impressive presentation, bake the cheesecake in ramekins. This way, everyone gets their individual portion, making it perfect for small gatherings or holiday parties.
-
Tiered Cheesecake: Create a stunning showstopper by making multiple layers of red velvet and cheesecake mixtures in a larger springform pan. The height adds drama when you cut into it, revealing your festive treat!
-
Chocolate Ganache Drizzle: Add a luscious chocolate ganache on top for a rich finish. It adds another layer of flavor and an elegant touch to your holiday spread.
-
Nutty Crunch Layer: For a delightful texture, sprinkle crushed walnuts or pecans in between the cheesecake layers. This nod to the traditional flavors gives a lovely crunch alongside the creamy goodness.
With these variations, your Christmas Red Velvet Cheesecake will never feel boring, and each bite will be a delightful surprise. If you’re looking for more festive ideas, don’t forget to check out my 4-ingredient gluten-free chocolate oat cookies or the comforting flavors from Chicken Alfredo Garlic. Enjoy experimenting!
Make Ahead Options
These Christmas Red Velvet Cheesecakes are perfect for easing the holiday rush! You can prepare the crust up to 24 hours in advance by making it and storing it tightly wrapped in plastic wrap at room temperature to maintain its crunchiness. The cheesecake filling can also be made and poured into the cooled crust, then covered and refrigerated for up to 3 days. When ready to serve, simply bake as directed and cool fully. To maintain that sumptuous texture, let it chill overnight—this allows the flavors to meld beautifully while ensuring it’s just as delicious when enjoyed. Sprinkle the festive toppings just before serving for the best presentation!
Expert Tips for Perfect Cheesecake
-
Room Temperature Ingredients: Ensure all ingredients, especially cream cheese, are at room temperature before mixing to avoid lumps in your Christmas Red Velvet Cheesecake.
-
Water Bath Importance: Always use a water bath during baking; it helps maintain moisture and prevents cracking, resulting in a smooth texture.
-
Chill Overnight: For the best flavor and texture, let the cheesecake chill overnight. It allows the flavors to meld beautifully and sets the cheesecake properly.
-
Cut with Care: Use a hot knife to slice the cheesecake for clean cuts. Wipe the blade after each slice to keep those layers looking sharp and beautiful.
-
Experiment with Toppings: Don’t be afraid to get creative with toppings! Consider adding crushed peppermint or edible glitter for a festive touch on your Christmas Red Velvet Cheesecake.
What to Serve with Christmas Red Velvet Cheesecake
The holiday season is the perfect time to create a memorable meal that pairs beautifully with this festive dessert.
-
Velvety Hot Chocolate: A warm cup of rich hot chocolate complements the cheesecake’s creamy texture, enhancing your holiday experience.
-
Spiced Apple Cider: The aromatic spices in apple cider provide a cozy, seasonal sweetness that balances the cheesecake’s richness.
-
Gingerbread Cookies: Their spiced flavor and crunch create a delightful contrast to the smoothness of the cheesecake, perfect for nibbles alongside dessert.
-
Creamy Mashed Potatoes: If served as part of a holiday meal, these buttery potatoes add comfort and richness to the dining experience.
-
Mixed Berry Salad: A fresh burst of berries brightens the plate and refreshes the palate after each sweet, indulgent bite of cheesecake.
-
Peppermint Bark: A festive treat that offers a crunchy, chocolatey contrast, plus peppermint’s refreshing taste is ideal for holiday gatherings.
-
Red Wine: The comforting depth of a full-bodied red wine can enhance the flavors of the cheesecake, making for a refined pairing.
-
Bourbon Eggnog: This traditional drink adds a creamy, spiced element that perfectly matches the festive nature of the cheesecake.
-
Winter Fruit Tart: A fruity tart adds brightness and a bit of acidity, balancing the richness of the red velvet cheesecake beautifully.
Christmas Red Velvet Cheesecake Recipe FAQs
What type of Oreo cookies should I use for the crust?
Absolutely, you should use regular Oreo cookies for their ideal flavor and texture in the crust. If you want to experiment, graham crackers can serve as a delightful substitute, giving your cheesecake a more traditional taste.
How should I store leftovers?
I recommend storing any leftover Christmas Red Velvet Cheesecake in an airtight container in the refrigerator for up to 3-4 days. Make sure it’s completely cooled before sealing to ensure it stays fresh and flavorful.
Can I freeze the cheesecake?
Yes, you can freeze your Christmas Red Velvet Cheesecake for up to 2 months. Wrap it tightly in plastic wrap, followed by aluminum foil, to protect it from freezer burn. When you’re ready to enjoy, transfer it to the fridge to thaw overnight, allowing it to return to its creamy texture!
What can I do if my cheesecake cracks while baking?
Very often, cracks occur due to a sudden temperature change. To avoid this, always use a water bath; it helps maintain moisture while baking, preventing the cheesecake from drying out. If it does crack, don’t worry! You can always cover it with whipped cream or festive toppings for a beautiful presentation.
Is this cheesecake safe for those with nut allergies?
Indeed! This Christmas Red Velvet Cheesecake is nut-free as long as you use nut-free brands for the ingredients like whipped cream and food coloring. However, always check the labels, especially for allergens, to ensure that everyone at your gathering can indulge worry-free.
How can I tell when my cheesecake is done baking?
To know when your cheesecake is perfectly baked, look for the edges to be set while the center jiggles slightly—this indicates it’s ready! You’ll also want to keep an eye out for a smooth and slightly puffed surface. If it looks nearly done, it’s best to err on the side of caution and remove it from the oven to prevent overbaking.
Irresistible Christmas Red Velvet Cheesecake to Delight Your Guests
Ingredients
Equipment
Method
- Preheat your oven to 350°F (175°C). Wrap a 9-inch springform pan tightly in aluminum foil to create a waterproof barrier.
- Finely crush Oreo cookies and combine with melted unsalted butter. Press into the bottom of the pan and bake for 8-10 minutes.
- Beat softened cream cheese until smooth, then add sugar, vanilla extract, cocoa powder, and red food coloring. Fold in whipped cream gently.
- Lower the oven to 325°F (160°C) and bake in a water bath for 1 to 1.25 hours until edges are set.
- Turn off the oven and let the cheesecake cool inside for 1 hour before transferring to room temperature and refrigerating for 6-8 hours or overnight.
- Release the springform pan, top with whipped cream and festive decorations, and slice with a hot knife.
Leave a Reply