
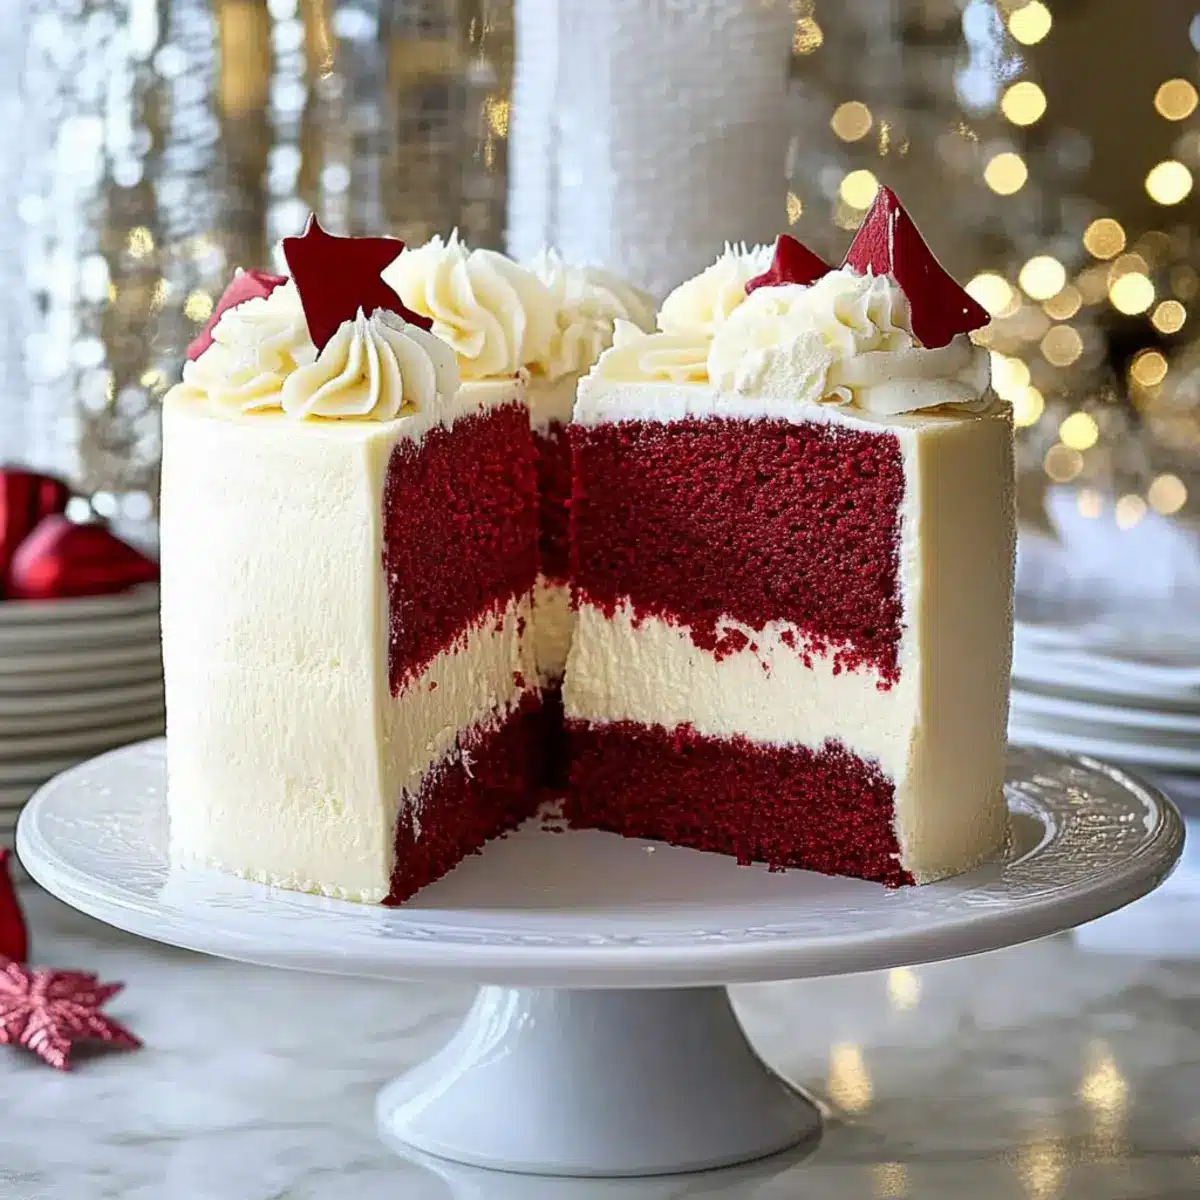
As I stood in my kitchen, the smell of cocoa wafting through the air, I realized this was the moment—creating a Christmas Red Velvet Cheesecake that’s not just a dessert, but a festive celebration on a plate. With its eye-catching red and white layers, this holiday delicacy captures the spirit of the season while delighting taste buds with each velvety bite. What’s more, it’s a dream come true for home bakers seeking a showstopper that requires minimal time and fuss, making it perfect for those busy holiday gatherings. Plus, the rich, creamy cheesecake tucked between the tender red velvet layers is undeniably indulgent, guaranteed to impress your friends and family. Are you ready to bring some holiday magic to your table this year?

Why is this cheesecake a holiday favorite?
Indulgence at Its Finest: This Christmas Red Velvet Cheesecake combines two beloved desserts, creating a rich and satisfying treat that will have everyone reaching for seconds.
Visually Stunning: With its vibrant red layers and creamy white frosting, it’s a show-stopper that will elevate any holiday dessert table and impress guests.
Easy to Make: While it looks intricate, the recipe is straightforward, perfect for both novice bakers and seasoned chefs craving a festive challenge.
Flexibility for All Diets: Whether you’re gluten-free or looking to swap out certain ingredients, this recipe allows for substitutions, ensuring everyone can enjoy a slice. For more delicious options, try out my 4-ingredient gluten-free chocolate oat cookies as a sweet treat!
Perfect Make-Ahead Dessert: You can prepare it a day in advance, saving time on the big day while still offering a delightful surprise for your guests.
Christmas Red Velvet Cheesecake Ingredients
For the Cake Layers
• All-Purpose Flour – Provides structure; substitute with gluten-free flour if needed.
• Unsweetened Cocoa Powder – Adds a rich chocolate flavor; use Dutch-processed for deeper taste.
• Baking Powder – Essential for leavening; do not substitute.
• Baking Soda – Works with vinegar for a lighter texture; crucial for rise.
• Salt – Enhances flavor; fine salt ensures even distribution.
• Granulated Sugar – Sweetens and retains moisture; brown sugar can enhance flavor.
• Vegetable Oil – Ensures a moist crumb; can replace with melted butter.
• Buttermilk – Adds moisture and a tang; substitute with a milk-vinegar mix if needed.
• Eggs – Bind ingredients; for an egg-less version, use flax eggs (1 tbsp ground flaxseed + 3 tbsp water per egg).
• Red Food Coloring – Achieves festive vibrancy; gel food color is best for intensity.
• Vanilla Extract – Deepens flavor; opt for pure vanilla for excellent taste.
• White Vinegar – Reacts with baking soda; use lemon juice if you’re out.
For the Cheesecake Layer
• Cream Cheese – Delivers creaminess; always use full-fat for best results.
• Sour Cream – Adds tang; also best in full-fat variety.
• Granulated Sugar – Sweetens the cheesecake; can adjust to taste.
• Eggs – Create a smooth texture; can substitute with flax eggs as mentioned before.
For the Frosting
• Powdered Sugar – Gives frosting sweetness and texture; can be reduced for less sweetness.
• Unsalted Butter – Provides creaminess; margarine is a great dairy-free alternative.
This Christmas Red Velvet Cheesecake not only looks spectacular on your holiday table but also promises to deliver a taste experience that will leave everyone asking for the recipe!
Step‑by‑Step Instructions for Christmas Red Velvet Cheesecake
Step 1: Preheat the Oven
Begin by preheating your oven to 350°F (175°C). While the oven heats up, grease two 9-inch round cake pans with butter or non-stick spray. This will ensure that your beautiful red velvet cake layers release easily once baked. Have your mixing bowls and whisk ready for assembling the cake batter.
Step 2: Combine Dry Ingredients
In a large mixing bowl, whisk together 2 cups of all-purpose flour, 1 cup of unsweetened cocoa powder, 1 teaspoon of baking powder, 1 teaspoon of baking soda, and 1 teaspoon of salt. Mixing these dry ingredients well will ensure even distribution of the leavening agents, setting a solid foundation for your Christmas Red Velvet Cheesecake layers.
Step 3: Mix Wet Ingredients
In a separate bowl, combine 1 ½ cups of granulated sugar, 1 cup of vegetable oil, 1 cup of buttermilk, 2 large eggs, 2 tablespoons of red food coloring, 1 tablespoon of white vinegar, and 1 teaspoon of vanilla extract. Whisk until the mixture is smooth and fully blended; this will create a rich, flavorful batter for your cake.
Step 4: Combine Mixtures
Gradually add the dry mixture to the wet ingredients, mixing on low speed until you achieve a smooth, lump-free batter. Be careful not to overmix; just a minute or so should be sufficient. This step is crucial for obtaining the luscious texture of your red velvet cake layers that will beautifully complement the cheesecake.
Step 5: Bake
Divide the batter evenly between the prepared cake pans and spread it out smoothly with a spatula. Place the pans in the preheated oven and bake for 25 to 30 minutes. To check for doneness, insert a toothpick into the center of each cake; it should come out clean when the cakes are ready.
Step 6: Cool
Once baked, remove the cakes from the oven and let them cool in the pans for about 10 minutes. After that, carefully transfer the cakes to wire racks to cool completely. Allowing the cakes to cool thoroughly is essential before layering with the cheesecake component of your Christmas Red Velvet Cheesecake.
Step 7: Prepare the Cheesecake Layer
While the cakes cool, prepare the cheesecake filling. In a mixing bowl, combine 16 ounces of cream cheese, 1 cup of sour cream, 1 cup of granulated sugar, and 3 large eggs. Blend until smooth and creamy. Pour this mixture into a greased springform pan and bake in a separate oven at 325°F (160°C) for 45 to 50 minutes, or until the center is just set.
Step 8: Assemble
Once all components have cooled, begin assembling your Christmas Red Velvet Cheesecake. Place one layer of red velvet cake on a serving plate, then carefully spread the cheesecake layer on top. Add the second red velvet cake layer and frost the top and sides with cream cheese frosting for a delightful finish that showcases both treats.
Step 9: Chill
After assembly, refrigerate your Christmas Red Velvet Cheesecake for at least 4 hours to set. This chilling time allows for the flavors to meld beautifully and ensures that each slice holds its shape when served, making it an impressive centerpiece for your holiday dessert table.

What to Serve with Christmas Red Velvet Cheesecake
This delightful dessert wraps holiday spirit in every bite, inviting you to create a memorable dining experience around it.
- Creamy Mashed Potatoes: Their velvety texture provides a comforting contrast that pairs seamlessly with the rich flavors of cheesecake.
- Roasted Brussels Sprouts: Their crispy edges and savory notes enhance the sweetness of the cheesecake, adding a punch of flavor to your meal.
- Holiday Glazed Ham: The sweet and savory glaze complements the creamy cheesecake, making every bite an indulgent treat during your festive gathering.
- Sparkling Wine: A chilled glass of bubbly adds a celebratory touch while cutting through the richness of the cheesecake, balancing flavors beautifully.
- Cranberry Sauce: This tart and sweet accompaniment brightens up bites of cheesecake, creating a delightful harmony of flavors that’ll have guests coming back for more.
- Chocolate Mousse: A rich and airy dessert option with a hint of chocolate, providing an elegant finish to your holiday meal that pairs wonderfully with the red velvet layers.
Creating a festive spread elevates the holidays, ensuring each course is as enchanting as the next!
Make Ahead Options
The Christmas Red Velvet Cheesecake is a fantastic option for meal prep, allowing you to enjoy delightful flavors without the last-minute rush. You can bake the red velvet cake layers up to 24 hours in advance; simply wrap them tightly in plastic wrap and store them at room temperature. The cheesecake layer can also be prepared a day ahead and kept in the refrigerator to maintain its creamy texture. When it’s time to assemble, just layer the cakes with the chilled cheesecake and frost as desired. This way, you’ll have a stunning dessert ready to impress, without sacrificing flavor or quality!
Expert Tips for Christmas Red Velvet Cheesecake
-
Keep Ingredients Room Temperature: Ensure eggs, cream cheese, and sour cream are at room temperature for a smoother batter and cheesecake filling.
-
Layer Carefully: When assembling, make sure each layer is cool to avoid melting the frosting and maintain that beautiful, defined look of your Christmas Red Velvet Cheesecake.
-
Chill Thoroughly: Don’t rush the chilling step! Refrigerate for at least 4 hours or overnight for the best texture and to let those flavors truly develop.
-
Use Gel Food Coloring: Opt for gel food coloring instead of liquid to achieve a vibrant red without altering the cake’s texture.
-
Avoid Overmixing: When combining your wet and dry ingredients, mix just until combined to ensure a tender crumb in your red velvet layers.
How to Store and Freeze Christmas Red Velvet Cheesecake
Fridge: Store your cheesecake in an airtight container or cover it tightly with plastic wrap. It will keep well in the refrigerator for up to 5 days, perfect for enjoying a festive treat after the big day.
Freezer: For longer storage, wrap individual slices or the whole cheesecake in plastic wrap, then aluminum foil. Freeze for up to 2 months to preserve the delicious taste of your Christmas Red Velvet Cheesecake.
Thawing: To enjoy, transfer the cheesecake to the fridge and let it thaw overnight. It can also be left at room temperature for about 1 hour before serving for a softer texture.
Reheating: If you prefer your cheesecake slightly warmed, place it in a preheated oven at 300°F (150°C) for 10-15 minutes. This step can enhance the creamy texture, bringing back that freshly baked essence!
Christmas Red Velvet Cheesecake Variations
Feel free to explore these delightful twists to customize your Christmas Red Velvet Cheesecake experience!
-
Whipped Cream Topping: Replace the cream cheese frosting with a light whipped cream topping for a fluffier finish that complements the richness of the cheesecake.
-
Chocolate Shavings: Top the cheesecake with chocolate shavings for an indulgent touch. Not only do they add elegance, but they also offer a delightful crunch with every bite.
-
Crushed Peppermint: Enhance your cheesecake’s festive flair by sprinkling crushed peppermint on top. The mint will provide a refreshing contrast to the sweetness of the cake.
-
Chocolate Chips: For a chocolate lover’s twist, fold in semi-sweet chocolate chips into the red velvet layers. They will melt and create pockets of chocolatey goodness!
-
Nutty Crunch: Add chopped walnuts or pecans to the batter for a delightful crunch that pairs perfectly with the creamy cheesecake center. It adds a lovely texture that surprises the palate.
-
Citrus Zest: Incorporate a touch of orange or lemon zest into the cheesecake layer for a refreshing zing. This bright flavor can cut through the richness of the dessert beautifully.
-
Spiced Variations: For a cozy twist, sprinkle a hint of cinnamon or nutmeg into the batter. These warm spices will complement the festive vibe of your Christmas dessert.
-
Gluten-Free Option: Substitute all-purpose flour with a gluten-free flour blend for a gluten-free version that everyone can enjoy. You can still achieve that beautiful texture—just as delicious!
Remember, there’s no wrong way to make this cheesecake your own! Looking for more sweet options? Try making my delicious Chicken Alfredo Garlic as a savory side or explore the flavors of my 4-ingredient gluten-free chocolate oat cookies.
Christmas Red Velvet Cheesecake Recipe FAQs
What type of cocoa powder should I use for the cake layers?
I recommend using unsweetened cocoa powder, as it adds the perfect chocolate flavor to your Christmas Red Velvet Cheesecake. For a deeper taste, opt for Dutch-processed cocoa, which has a richer flavor that complements the vanilla and tangy cheesecake layer beautifully.
How should I store the cheesecake and for how long?
To store your Christmas Red Velvet Cheesecake, place it in an airtight container or wrap it tightly with plastic wrap. It will stay fresh in the refrigerator for up to 5 days. If you want to savor it longer, you can freeze it!
Can I freeze the cheesecake? If so, how?
Absolutely! To freeze your Christmas Red Velvet Cheesecake, wrap individual slices or the entire cheesecake in plastic wrap, followed by aluminum foil to prevent freezer burn. This way, it can keep its deliciousness for up to 2 months. When you’re ready to enjoy it, just let it thaw in the fridge overnight or leave it at room temperature for about an hour.
What should I do if my cheesecake cracks while baking?
Don’t worry! Cracks can happen, and the good news is that they can often be hidden with frosting. Make sure to cool your cheesecake slowly in the oven with the door ajar for about an hour after baking, which helps prevent sudden temperature changes that can cause cracks. Also, ensure that you’re mixing the filling just until smooth to avoid incorporating too much air.
Are there any ingredient substitutions for dietary needs?
Very! This Christmas Red Velvet Cheesecake recipe is adaptable for various dietary preferences. For a gluten-free version, substitute all-purpose flour with gluten-free flour. If you’re following a dairy-free diet, you can use vegan cream cheese and milk substitutes. Also, for an egg-free option, flax eggs (1 tbsp ground flaxseed + 3 tbsp water per egg) work quite well for both the cake layers and cheesecake filling. This ensures that everyone can enjoy a slice of this festive delight!
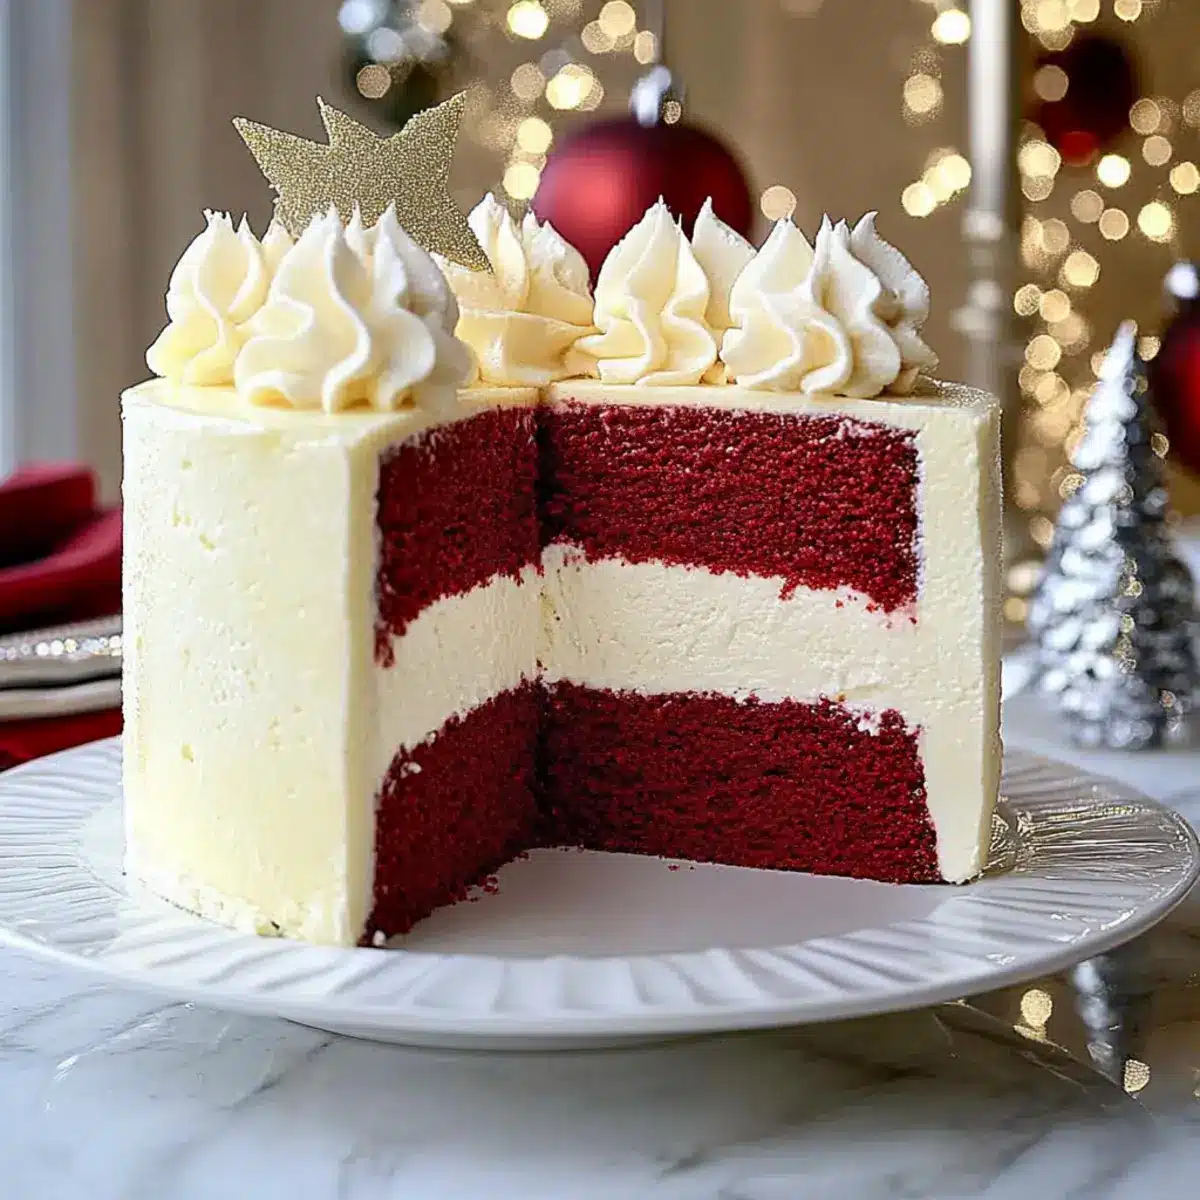
Christmas Red Velvet Cheesecake That Steals the Show
Ingredients
Equipment
Method
- Preheat your oven to 350°F (175°C) and grease two 9-inch round cake pans.
- In a large bowl, whisk together the dry ingredients: flour, cocoa powder, baking powder, baking soda, and salt.
- In another bowl, mix the wet ingredients: sugar, oil, buttermilk, eggs, food coloring, vinegar, and vanilla extract until smooth.
- Gradually add the dry mixture to the wet, mixing on low speed until smooth.
- Divide the batter between the prepared pans, and bake for 25 to 30 minutes. Check doneness with a toothpick.
- Let the cakes cool in the pans for 10 minutes before transferring to wire racks to cool completely.
- Prepare the cheesecake layer by blending cream cheese, sour cream, sugar, and eggs until smooth. Bake at 325°F (160°C) for 45 to 50 minutes.
- Once cooled, assemble by placing one layer of cake on a plate, adding the cheesecake layer, and topping it with the second cake layer.
- Frost the top and sides with cream cheese frosting, and refrigerate for at least 4 hours before serving.
Leave a Reply