
As the autumn leaves begin to fall, the air fills with the warm and inviting scent of baking apples—there’s nothing quite like it! These Healthy Gluten-Free Apple Pie Bars with Salted Peanut Butter Caramel encapsulate the essence of fall in a delightful bar format, making them a perfect addition to your dessert repertoire. Packed with wholesome ingredients, these bars not only provide a nutritious alternative that’s gluten-free and adaptable for vegan diets but also foster a sense of comfort and indulgence without the guilt. Plus, they’re quick to whip up, ensuring you spend less time in the kitchen and more time enjoying precious moments with family and friends. Ready to create a mouthwatering treat that satisfies both your taste buds and your health goals? Let’s dive in!
Why Are These Apple Pie Bars Special?
Unique flavor combination: The warm spices blend perfectly with the rich, creamy salted peanut butter caramel for a taste that’s simply irresistible.
Hearty texture: With a chewy oat crust and tender apple filling, each bite offers a comforting crunch that’ll remind you of a classic apple pie.
Simple to make: This recipe is designed for bakers of all skill levels. Quick prep and minimal fuss mean you’ll have these delicious bars ready in no time.
Customizable: Feel free to switch up the apple varieties or nut butters based on your preferences, ensuring this treat can be tailored to your taste!
Guilt-free indulgence: Gluten-free, dairy-free, and with options for vegan diets, these bars let you enjoy dessert without sacrificing your health goals.
Ready to elevate your dessert game? These apple pie bars are a fantastic way to impress friends and family at your next gathering!
Apple Pie Bars Ingredients
• This recipe for apple pie bars requires a delightful mix of wholesome ingredients to create that amazing flavor!
For the Crust
- Gluten Free Oat Flour – Provides structure; substitute with all-purpose flour if gluten isn’t a concern.
- Old-Fashioned Rolled Oats – Adds texture and a chewy bite; ensure they’re labeled gluten-free if needed.
- Brown Sugar (or Coconut Sugar) – Moisture and caramel flavor enhancer; use coconut sugar for a healthier option.
- Ground Cinnamon – Delivers warmth and spice; nutmeg or pumpkin spice can be two delightful alternatives.
- Baking Soda – Helps the crust rise slightly; no substitution necessary.
- Salt – Elevates overall flavor; using fine salt ensures even mixing.
- Butter (or Vegan Buttery Stick) – Richness and moisture for the crust; opt for vegan buttery sticks if dairy-free.
- Vanilla Extract – Adds sweetness and aroma; no substitutes are needed here.
For the Filling
- Honeycrisp Apples – Sweet and tart, perfect for baking; feel free to substitute with Granny Smith or Fuji apples.
- Pure Maple Syrup – Sweetness for the filling with an added flavor boost; honey can work in a pinch (not vegan).
- Cornstarch (or Arrowroot Starch) – Thickens the filling; can use regular flour if gluten-free isn’t a concern.
- Allspice & Nutmeg – Adds depth to the apple mix; pumpkin spice can also be a delicious swap.
- Salt (pinch) – Balances the sweetness; just a tiny hint goes a long way.
For the Peanut Butter Caramel
- Creamy All-Natural Peanut Butter – The base for the caramel; almond or sunflower seed butter serves as nut-free alternatives.
- Pure Maple Syrup – Sweetener for the caramel; honey or agave syrup can work too.
- Coconut Oil – Helps thin the caramel; a neutral oil can be substituted if preferred.
- Vanilla Extract – Accentuates the flavor; almond extract can be a tasty variation.
- Sea Salt (pinch) – Enhances the sweetness; adjust based on your taste preferences.
Enjoy creating these delightful apple pie bars with salted peanut butter caramel! Your family and friends will be raving about this deliciously healthy treat!
Step‑by‑Step Instructions for Apple Pie Bars with Salted Peanut Butter Caramel
Step 1: Preheat and Prepare the Pan
Preheat your oven to 350°F (175°C) while you prepare an 8×8 inch baking pan. Line the pan with parchment paper, allowing some edges to overhang for easy removal later. Lightly spray the parchment with cooking spray to prevent sticking, ensuring your Apple Pie Bars with Salted Peanut Butter Caramel come out perfectly.
Step 2: Mix the Crust Ingredients
In a large mixing bowl, combine gluten-free oat flour, rolled oats, brown sugar, ground cinnamon, baking soda, and salt. Stir well until all dry ingredients are fully incorporated, creating a uniform mixture. This will form the foundation of your apple pie bars, providing that delicious crust everyone loves.
Step 3: Combine with Wet Ingredients
Next, pour in the melted butter and add vanilla extract to the flour mixture. Mix using a spatula or your hands until a crumbly dough forms, ensuring everything is evenly blended. Reserve about a cup of this mixture for the topping later; this will create a delightful crunch atop your bars.
Step 4: Press the Crust into the Pan
Firmly press the remaining dough mixture into the bottom of the prepared baking pan. Use your hands or the back of a measuring cup to create an even layer. Aim for a compact crust that covers the entire base, as this will support the apple filling and maintain the structure of your Apple Pie Bars with Salted Peanut Butter Caramel.
Step 5: Cook the Apple Filling
In a skillet over medium heat, add a small amount of melted butter and the sliced Honeycrisp apples. Cook for about 5–7 minutes until the apples start to soften out. Stir in pure maple syrup, remaining cinnamon, allspice, nutmeg, and cornstarch. Continue cooking until the mixture thickens, which will take just a couple of minutes.
Step 6: Assemble the Bars
Once the apple mixture is ready, pour it over the pressed crust, making sure to distribute it evenly across the surface. Sprinkle the reserved crumble mixture over the top of the apples. This layer will create a golden, crunchy topping that perfectly complements the soft apple filling in your Apple Pie Bars with Salted Peanut Butter Caramel.
Step 7: Bake the Bars
Place the pan in the preheated oven and bake for 30–35 minutes. Keep an eye on the bars; they are done when the topping turns golden brown and the filling is bubbly. The aroma will fill your kitchen, giving you a taste of the deliciousness to come.
Step 8: Cool and Prepare Caramel
After baking, remove the pan from the oven and allow the apple pie bars to cool completely. While they cool, whisk together creamy natural peanut butter, pure maple syrup, coconut oil, vanilla extract, and a pinch of sea salt in a bowl until smooth. If necessary, briefly microwave the mixture to achieve a silky texture that drizzles beautifully.
Step 9: Drizzle and Serve
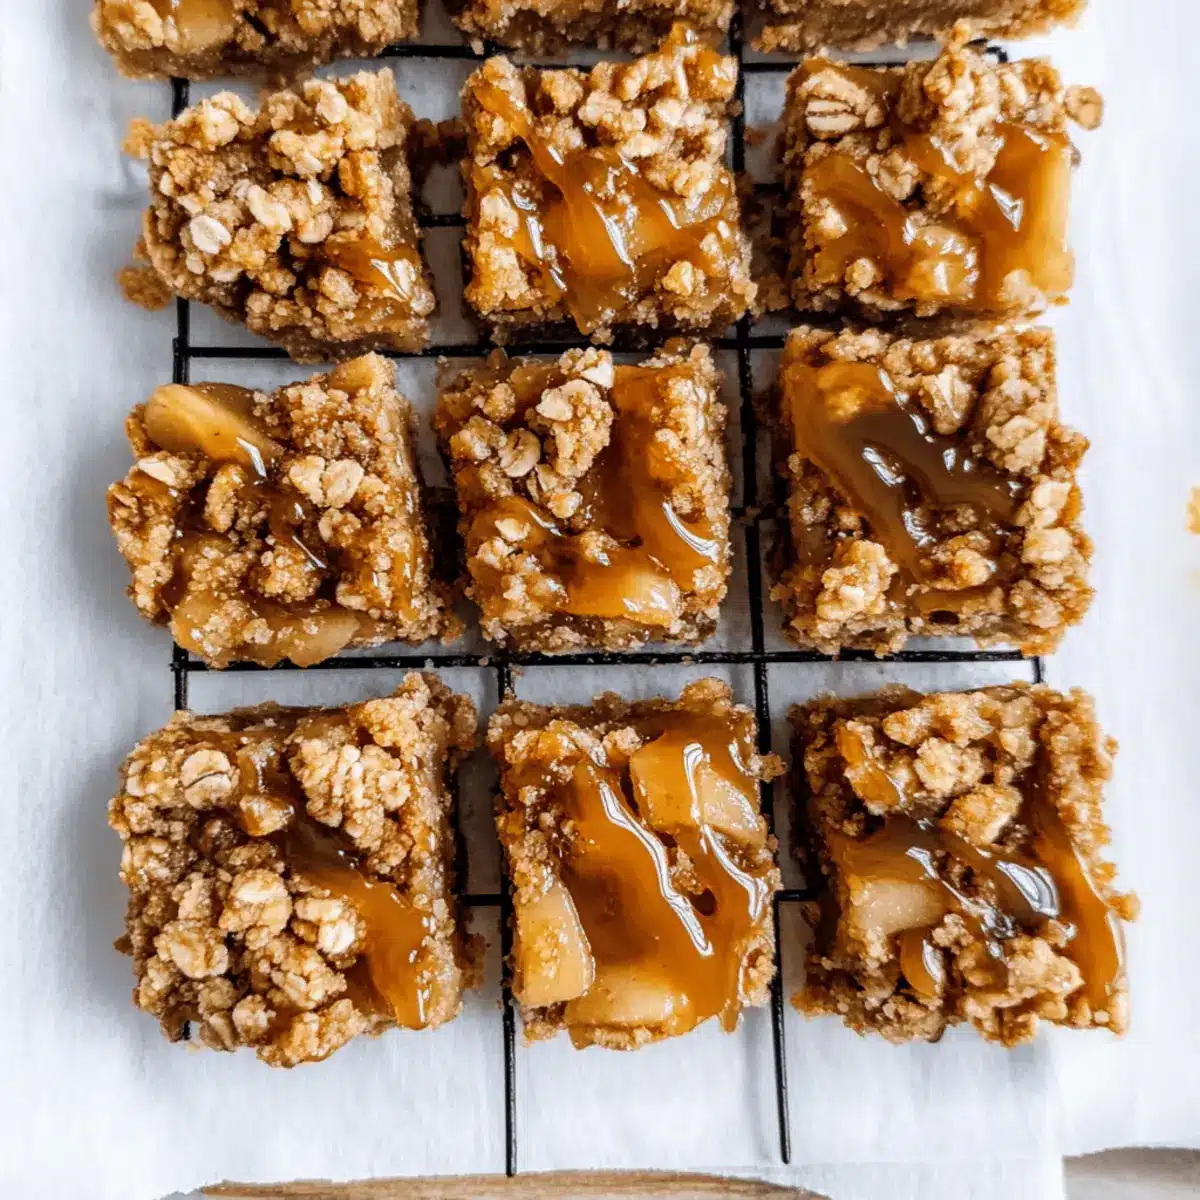
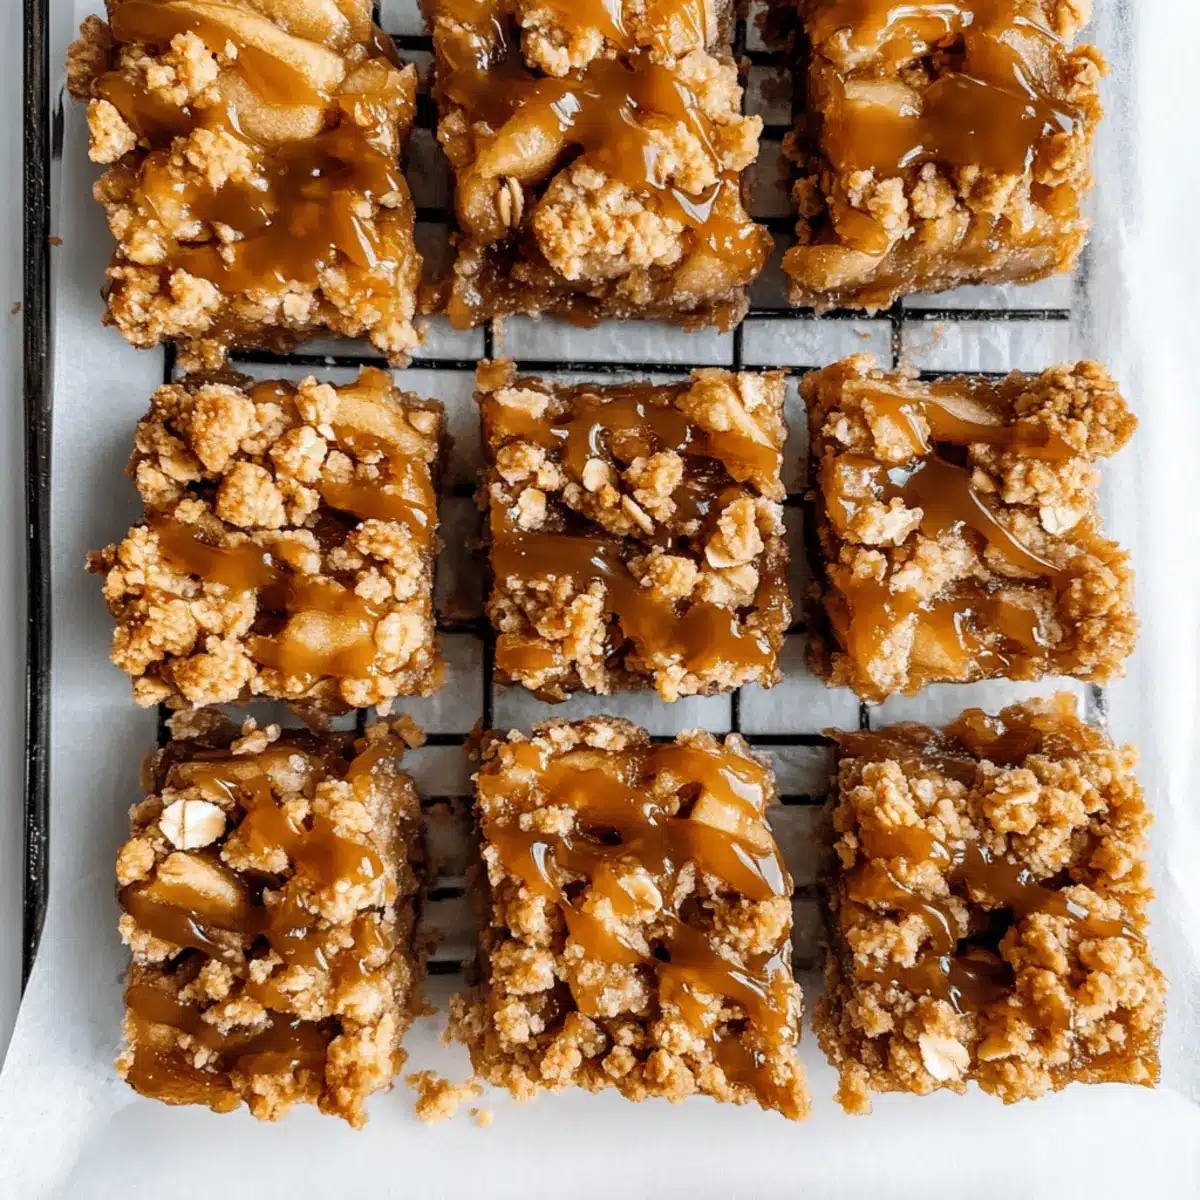
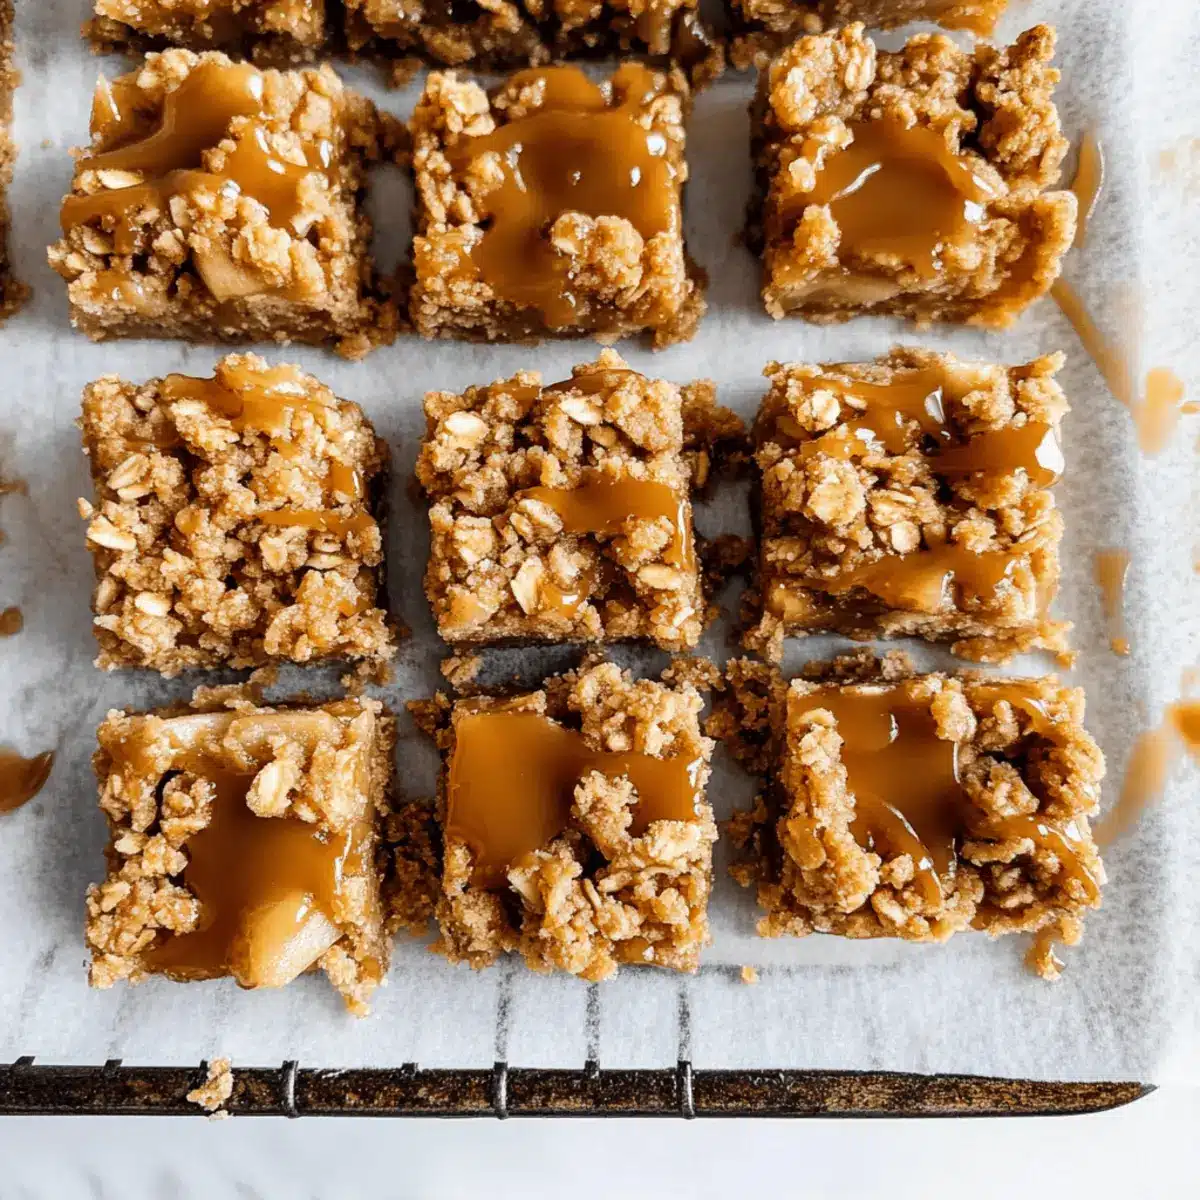
Once cooled, carefully lift the apple pie bars out of the pan using the parchment edges. Slice them into 16 equal pieces and place on a serving platter. Generously drizzle your homemade salted peanut butter caramel over each bar. Serve them warm or at room temperature as a delightful dessert that everyone will love!
Tips for the Best Apple Pie Bars
-
Use Fresh Apples: Choose firm, fresh Honeycrisp apples for the best flavor and texture. They offer the perfect balance of sweet and tart in your filling!
-
Check Oat Quality: Ensure your rolled oats and oat flour are certified gluten-free, especially if catering to those with sensitivities.
-
Cool Before Caramel: Let the bars cool completely before drizzling the salted peanut butter caramel. This prevents it from melting into the bars and keeps the layers distinct.
-
Adjust Sweetness: Depending on the tartness of your apples, adjust the sweeteners in both the filling and caramel to suit your taste for the perfect balance in your apple pie bars.
-
Don’t Rush Baking: Bake until the topping is golden brown and the filling is bubbly, as underbaking could lead to a soggy base in your apple pie bars with salted peanut butter caramel.
Apple Pie Bars with Salted Peanut Butter Caramel Variations
Feel free to get creative and make these delicious apple pie bars your own with these fun and easy adaptations!
- Nut-Free Alternative: Swap creamy peanut butter for sunflower seed butter to make the caramel nut-free and just as luscious.
- Vegan Twist: Use coconut oil instead of butter for both the crust and caramel to create a completely vegan version that everyone can enjoy.
- Different Sweeteners: Experiment with agave syrup or date syrup in place of maple syrup for both the filling and caramel—each will bring a unique flavor profile.
- Fruit Add-in: Toss in some dried cranberries or raisins with the apples for extra flavor and texture; they add a delightful chewiness to the bars!
- Chocolate Drizzle: Melt dark chocolate and drizzle over the cooled bars in place of or in addition to the peanut butter caramel for a rich, indulgent treat.
- Spice It Up: Add a pinch of cayenne pepper to the caramel for a spicy kick that balances the sweetness beautifully—creating an unexpected and delightful flavor.
- Apple Variety Swap: Feel free to experiment with different apple varieties like Granny Smith for a tart twist or Fuji for extra sweetness, catering to your taste preferences.
- Topping Upgrade: Fold in chopped walnuts or pecans into the crust mixture for added crunch or sprinkle them over the top before baking for a nutty enhancement.
These variations can turn your beloved apple pie bars into exciting new treats, opening a world of flavor at your next gathering or cozy night in. Happy baking!
Make Ahead Options
These Healthy Gluten-Free Apple Pie Bars with Salted Peanut Butter Caramel are an excellent choice for meal prep! You can prepare the crust and filling up to 24 hours in advance. Simply mix the crust ingredients and press them into the pan, then store it wrapped in the refrigerator. For the apple filling, sauté the apples and mix in all the spices and cornstarch, allowing it to cool before refrigerating. When you’re ready to bake, spread the chilled apple mixture over the crust, sprinkle with the reserved crumble, and bake as directed. This not only saves time but ensures your bars are just as delicious on serving day!
What to Serve with Healthy Gluten-Free Apple Pie Bars with Salted Peanut Butter Caramel
There’s nothing quite like indulging in sweet, warm dessert bars that make your taste buds dance!
-
Coconut Whipped Cream: Light and airy, it adds a tropical twist that complements the rich peanut butter caramel beautifully.
-
Vanilla Ice Cream: Creamy and soothing, it creates a delightful contrast against the warm bars, enhancing every bite.
-
Caramel Sauce: A drizzle of extra caramel can intensify the flavor profile, making each bar even more decadently delicious.
-
Chai Tea: The warm spices in chai harmonize poetically with the flavors in your apple pie bars, creating a cozy pairing.
-
Spiced Apple Cider: As the quintessential fall beverage, it brings out the apple notes in the recipe while wrapping you in warmth.
-
Cranberry Almond Salad: A bright, fresh salad with nuts provides a crisp contrast to the sweetness of the bars; the tartness of cranberries perfectly balances the meal.
-
Hazelnut Coffee: A cup of nutty coffee elevates your dessert experience, pairing wonderfully with the salted peanut butter caramel.
-
Chocolate Drizzle: A sprinkle of melted dark chocolate adds a rich depth that perfectly complements the sweet and salty elements of the bars.
Each of these options is sure to elevate your dessert experience and leave you craving more!
How to Store and Freeze Apple Pie Bars
Fridge: Store the apple pie bars in an airtight container in the refrigerator for up to 1 week. They stay fresh and delicious, awaiting your next indulgence.
Freezer: To freeze, wrap individual bars tightly in plastic wrap and place them in a freezer-safe bag. They can be kept for up to 3 months—perfect for those spontaneous cravings!
Reheating: For a warm treat, simply microwave the bars for 15-20 seconds or heat them in the oven at 350°F (175°C) for about 10 minutes. Enjoy the gooey peanut butter caramel and soft apple filling all over again!
Tip: If you’re preparing a batch for future enjoyment, be sure to cool them completely before wrapping to avoid condensation inside the packaging.

Apple Pie Bars with Salted Peanut Butter Caramel Recipe FAQs
How do I select ripe apples for the filling?
The best apples for your bars are ones that are firm and fragrant, like Honeycrisp or Granny Smith. Look for apples that are free from bruises or dark spots; a slight sheen on the skin often indicates freshness. For the sweetest flavor, choose apples that feel heavy for their size.
How should I store leftover apple pie bars?
Store your apple pie bars in an airtight container in the refrigerator, where they’ll keep fresh for up to 1 week. If you want to enjoy them later, make sure they are fully cooled, then wrap them tightly in plastic wrap before placing them in the container to minimize drying out.
Can I freeze apple pie bars?
Absolutely! To freeze your apple pie bars, first allow them to cool completely. Then, wrap each bar tightly in plastic wrap, placing them in a freezer-safe bag. They can be stored in the freezer for up to 3 months. When you’re ready to enjoy them again, simply microwave for 15-20 seconds or heat them in a 350°F (175°C) oven for about 10 minutes.
What if my apple filling is too runny?
If your apple filling turns out runny, it might be due to the apples being too juicy or not enough thickening agent being used. To remedy this, you can either return the filling to the stove with a bit more cornstarch or arrowroot mixed with water, cooking until it thickens. Alternatively, for future bakes, adjust the cornstarch quantity or choose a firmer apple variety.
Are these apple pie bars suitable for people with allergies?
These bars can be made allergy-friendly with a little adjustment! To ensure they are gluten-free, use certified gluten-free oat flour and oats. For a dairy-free option, replace the regular butter with a vegan buttery stick. Additionally, you can use sunflower seed butter instead of peanut butter to make them nut-free, perfect for lunchboxes or gatherings!
What’s the best way to reheat frozen apple pie bars?
To enjoy your frozen apple pie bars, remove them from the freezer and let them thaw in the refrigerator overnight for the best texture. If you’re short on time, microwave them directly from frozen for 30-40 seconds or heat them in a preheated oven at 350°F (175°C) for 10-15 minutes until warmed through. The gooey peanut butter caramel will melt and enhance the delightful softness of the apple filling!
Savor Apple Pie Bars with Salted Peanut Butter Caramel Delight
Ingredients
Equipment
Method
- Preheat your oven to 350°F (175°C) and prepare an 8x8 inch baking pan lined with parchment paper.
- In a large mixing bowl, combine gluten-free oat flour, rolled oats, brown sugar, ground cinnamon, baking soda, and salt. Mix well.
- Pour in melted butter and add vanilla extract. Mix until a crumbly dough forms, reserving about a cup for the topping.
- Press the remaining dough into the bottom of the prepared baking pan to create a compact crust.
- In a skillet, sauté the sliced apples in melted butter for 5-7 minutes, then stir in maple syrup, remaining cinnamon, allspice, nutmeg, and cornstarch until thickened.
- Pour the apple mixture over the pressed crust and sprinkle the reserved crumb mixture on top.
- Bake in the oven for 30-35 minutes until topping is golden brown and filling is bubbly.
- Allow to cool completely before preparing the caramel by whisking together peanut butter, maple syrup, coconut oil, vanilla extract, and sea salt until smooth.
- Drizzle the caramel over the cooled apple pie bars, slice into 16 pieces, and serve.
Leave a Reply