
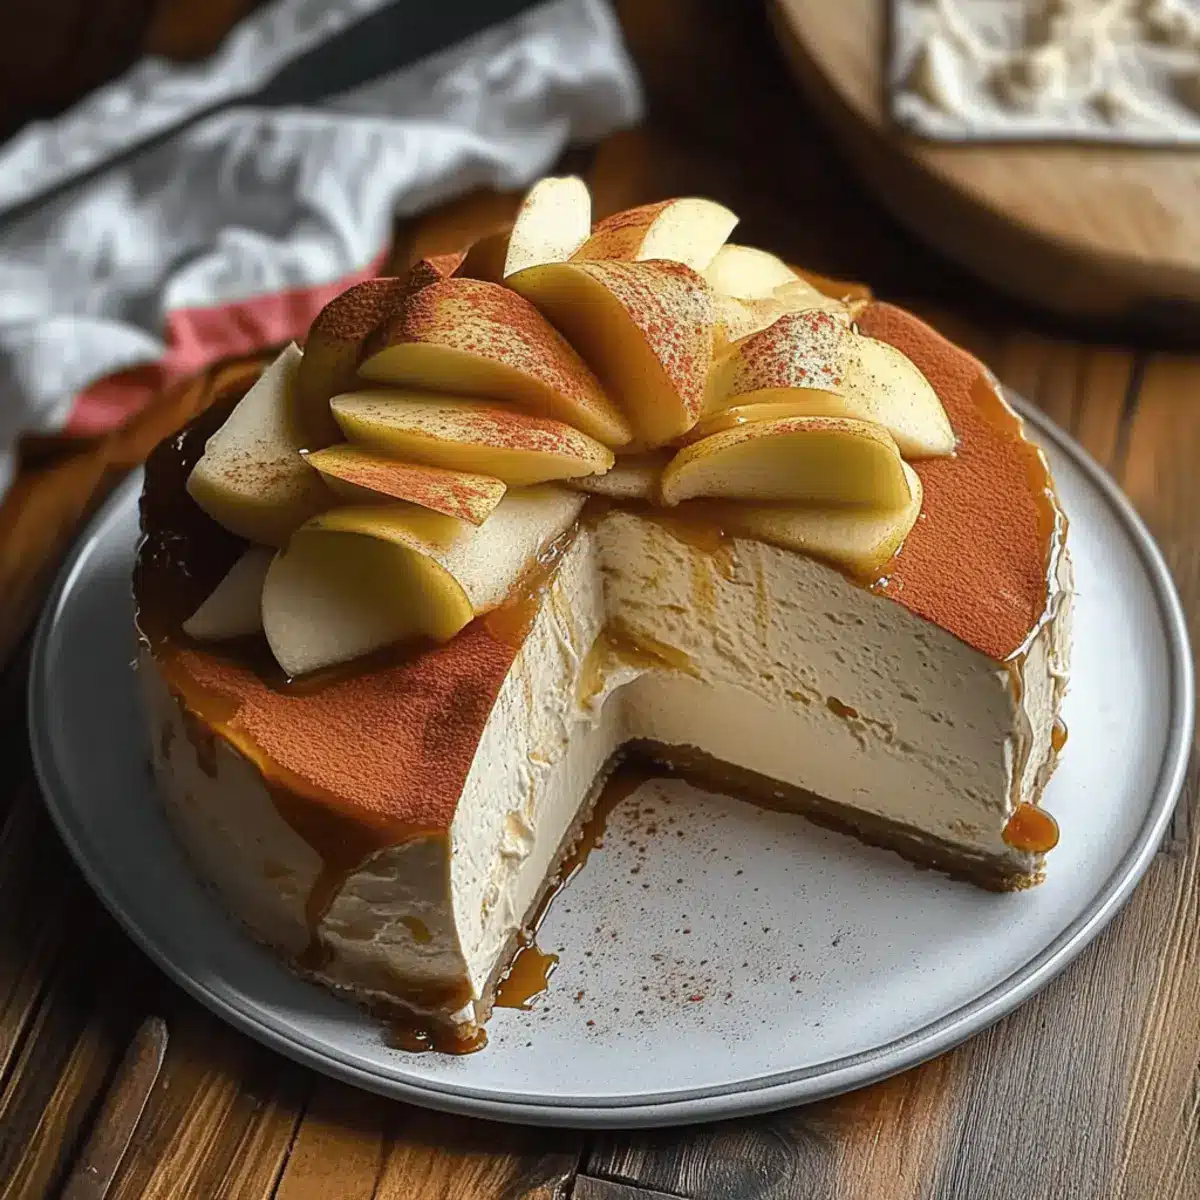
This autumn, as the air turns crisp and leaves transform into a tapestry of colors, I found myself craving a dessert that captures the very essence of the season. Enter the Apple Cider Cheesecake, a delightful twist on your traditional cheesecake that weaves in the tangy, cozy notes of reduced fresh apple cider. Not only is this creamy cheesecake a delicious alternative to typical pumpkin desserts, but it’s also a stunning centerpiece for any gathering. With an easy no-bake water bath technique, you can achieve that luxurious, velvety texture without the fuss. Plus, it’s a freezer-friendly treat, perfect for those busy holiday weeks. How do you feel about giving this comforting classic a seasonal spin?
Why is Apple Cider Cheesecake a Must-Try?
Deliciously Creamy: This cheesecake is rich and velvety, combining the tartness of fresh apple cider with the smoothness of cream cheese. Fall Flavors: Infused with warm spices, it embodies the essence of autumn, making each bite a seasonal delight. Effortlessly Elegant: The no-bake water bath technique ensures a flawless texture while being surprisingly easy to master. Versatile Options: Feeling adventurous? Try using an Oreo crust for a chocolate kick or personalize it with mulling spices! Impressive Presentation: Perfect for serving at gatherings, this showstopper is sure to win hearts, just like my Apple Brownies Deliciously do.
Apple Cider Cheesecake Ingredients
Gather these goodies for a delicious fall treat!
For the Cheesecake Filling
- Fresh Apple Cider – Provides that essential apple flavor; opt for tart varieties like Honeycrisp.
- Brown Sugar – Adds delightful sweetness and depth; feel free to use either light or dark sugar.
- Cream Cheese – The creamy base; ensure it’s at room temperature for easy blending.
- Sour Cream – Gives creaminess and a tangy kick; go for full-fat for the best texture.
- Cinnamon – Enhances the comforting spice profile; adjust according to your preference.
- Eggs – Essential for structure; use room temperature eggs for optimal mixing.
- All-Purpose Flour – Helps set the texture; almond flour works for a gluten-free option.
For the Crust
- Digestive Cookies or Graham Crackers – Forms the crust base; can easily swap for gluten-free cookies if needed.
- Melted Butter – Binds the crust together; coconut oil is a great dairy-free alternative.
Optional Flavor Enhancers
- Mulling Spices – Add cloves or allspice while reducing the cider for an extra flavor boost.
This Apple Cider Cheesecake promises to wrap you in the warm, cozy embrace of fall in every creamy bite!
Step‑by‑Step Instructions for Apple Cider Cheesecake
Step 1: Prepare Cider Reduction
In a saucepan over medium-high heat, bring 3 cups of fresh apple cider to a rolling boil. Reduce the heat to medium-low and let it simmer for 30-45 minutes, occasionally stirring, until it thickens and reduces to about 1/3 cup. If desired, you can add mulling spices for extra flavor. Once reduced, remove it from the heat and allow it to cool completely.
Step 2: Preheat Oven
While the cider cools, preheat your oven to 350°F (175°C). Prepare a springform pan by lightly greasing it and lining the bottom with parchment paper. This will help make releasing the cheesecake easy later on, ensuring a beautiful presentation for your Apple Cider Cheesecake.
Step 3: Make the Crust
In a food processor, blend your digestive cookies or graham crackers until they form fine crumbs. Transfer the crumbs to a mixing bowl and combine them with melted butter and a pinch of salt. Mix until the crumbs are evenly coated, then firmly press the mixture into the bottom of your prepared pan. Pre-bake the crust for 10 minutes, then let it cool while you prepare the filling.
Step 4: Mix Filling
Using a large mixing bowl, beat the softened cream cheese and brown sugar together with an electric mixer until smooth and lump-free. Gradually add in the cooled cider reduction, sour cream, vanilla extract, cinnamon, and all-purpose flour. Mix until well combined and creamy; this filling is the heart of your Apple Cider Cheesecake, so make sure it’s smooth!
Step 5: Incorporate Eggs
Add the eggs one by one to the cheesecake filling, mixing gently after each addition. It’s important not to overmix at this stage; just blend until everything is smoothly incorporated. This careful technique will help prevent any cracks in your finished cheesecake, maintaining its lovely texture.
Step 6: Bake Cheesecake
Pour the creamy filling over the cooled crust in the springform pan. To create a water bath for baking, place your cheesecake pan inside a larger roasting or baking pan and fill the outer pan with hot water until it reaches halfway up the sides of the cheesecake pan. Bake for 80-90 minutes, or until the edges are set but the center remains slightly jiggly.
Step 7: Cool Gradually
Once baked, turn off the oven and crack the door open, allowing the cheesecake to cool slowly for 30 minutes. This gradual cooling process helps to prevent cracking. After this time, remove the pan from the water bath and allow the cheesecake to cool on the counter for another 15 minutes before refrigerating it for at least 8 hours to fully set.
Step 8: Serve and Enjoy
When ready to serve, carefully remove the sides of the springform pan. Slice your Apple Cider Cheesecake and plate it up with your favorite garnishes, like a drizzle of caramel sauce or a sprinkle of cinnamon. Enjoy this seasonal treat as a delightful centerpiece for any fall gathering!

Apple Cider Cheesecake Variations & Substitutions
Feel free to get creative with this recipe and customize it to match your flavor preferences and dietary needs!
- Oreo Crust: Swap the traditional crust for crushed Oreo cookies for a delightful chocolate contrast.
- Gluten-Free: Use gluten-free cookies for the crust and almond flour instead of all-purpose flour to make it gluten-friendly.
- Dairy-Free: Substitute cream cheese and sour cream with dairy-free versions to create a creamy treat for everyone.
- Mini Cheesecakes: Pour the filling into muffin tins instead for adorable individual servings—just adjust baking time to 25-30 minutes!
- Spice it Up: Introduce warming spices like nutmeg or ginger for additional flavor complexity that echoes the essence of fall.
- Caramel Drizzle: Top with homemade apple cider caramel, adding a sweet, rich layer that pairs beautifully with the cheesecake.
- Nutty Crust: Add finely chopped nuts to your crust mix for a crunchy texture that complements the creamy filling.
- Fruity Twist: Incorporate finely diced apples or pears into the filling for extra fruitiness in each bite.
Whichever variation you choose to make, this Apple Cider Cheesecake is bound to create warm, cozy memories just like my Apple Cobbler Warm does!
What to Serve with Apple Cider Cheesecake?
Imagine a cozy autumn evening, fragrant with warm spices and sweet apple notes, where every bite of your cheesecake harmonizes with lovely sides and drinks.
-
Warm Spiced Cider: This drink complements the cheesecake’s apple flavor, creating a perfect match that feels like a warm hug.
-
Cinnamon-Glazed Apples: Sautéed with brown sugar and spices, these tender apples enhance the apple notes in the cheesecake, adding a delightful texture contrast.
-
Simple Sugar Cookies: The light, buttery flavor of cookies provides a gentle, sweet pairing that won’t overpower the cheesecake while adding a crunchy element to the meal.
-
Pecan Pie Bars: Offering a nutty richness, these bars echo the fall theme and provide a different texture to balance the creamy dessert. The caramel notes enhance the overall sweetness too.
-
Fall Salad: A mix of arugula, candied nuts, and a tart vinaigrette brightens the plate, adding freshness and a crisp contrast to the creamy cheesecake.
-
Coffee or Caramel Latte: These warm beverages deepen the flavors of your dessert, providing a cozy close to your meal. The creamy textures mirror the cheesecake’s richness, making every sip enjoyable.
-
Whipped Cream with Cinnamon: A dollop of this light topping adds airiness while accentuating the autumn spices and rounding out the cheesecake’s flavors wonderfully.
-
Pumpkin Spice Muffins: These serve as a delightful fall-inspired companion, creating a multi-layered dessert experience and enhancing that warm, seasonal flavor profile.
-
Ice Cream: A scoop of vanilla or caramel ice cream can bring a refreshing chill to the meal, balancing the richness of the cheesecake with its cool, creamy texture.
-
Caramel Sauce: Drizzle it on top for extra sweetness and a luscious glossy finish, enhancing the autumn essence of the cheesecake even more.
Make Ahead Options
These Apple Cider Cheesecakes are a fantastic choice for meal prep, allowing you to savor the joys of fall without the last-minute rush! You can prepare the crust up to 3 days in advance and store it tightly wrapped in the refrigerator. For the filling, it can be made and poured over the crust up to 24 hours before baking, which enhances the flavor. Simply wrap the pan in plastic wrap and refrigerate until you’re ready to bake. When it’s time to serve, bake the cheesecake and allow it to cool as directed. This way, your dessert will be just as delicious and festive, making it a stress-free option for busy weeknights or special gatherings!
Storage Tips for Apple Cider Cheesecake
Fridge: Store your cheesecake in the refrigerator for up to 3-4 days; cover it tightly with plastic wrap or aluminum foil to retain moisture and flavor.
Freezer: For longer storage, freeze slices of the Apple Cider Cheesecake for up to 2 months. Wrap each slice individually in plastic wrap and place in an airtight container or freezer bag.
Reheating: To enjoy the cheesecake after freezing, simply thaw it in the refrigerator overnight. Serve chilled or at room temperature for the best flavor experience.
Make-Ahead: This cheesecake is perfect for making a day in advance. It allows the flavors to develop and ensures it is ready for any fall gathering!
Expert Tips for Apple Cider Cheesecake
- Perfect Reduction: Make sure to boil the cider until it’s reduced to about 1/3 cup; this intensifies the apple flavor for your cheesecake.
- Room Temperature Ingredients: Always blend cream cheese and eggs at room temperature to avoid lumps and ensure a smooth filling texture.
- Gentle Mixing: After adding eggs, mix gently to avoid incorporating too much air, which can cause cracks in your Apple Cider Cheesecake.
- Water Bath Essentials: Wrap your pan tightly in foil to prevent water from seeping in, ensuring a perfectly creamy cheesecake without any cracks.
- Cool Gradually: Allowing the cheesecake to cool slowly in the oven prevents sudden temperature changes that can lead to cracking.
Apple Cider Cheesecake Recipe FAQs
What type of apple cider should I use for the best flavor?
Absolutely, using fresh apple cider is key for this cheesecake! I recommend opting for tart varieties like Honeycrisp or Granny Smith, as they lend a vibrant flavor to the final product. Stay away from overly sweet ciders for a balanced cheesecake.
How long can I store my Apple Cider Cheesecake in the fridge?
You can enjoy your delicious cheesecake for up to 3-4 days when stored properly. Just make sure to cover it tightly with plastic wrap or aluminum foil to keep it moist and flavorful. If you see any dark spots forming, that’s an indication to enjoy it soon!
Can I freeze Apple Cider Cheesecake, and how?
Yes, you can freeze your cheesecake, making it a great make-ahead option! Wrap individual slices in plastic wrap, ensuring they’re tightly sealed to prevent freezer burn. Place the wrapped slices in an airtight container or freezer bag, and they’ll stay delicious for up to 2 months. When you’re ready to enjoy, thaw the slices in the refrigerator overnight.
What should I do if my cheesecake cracks while baking?
Oh no, cracks can happen! To prevent this, make sure you wrap the springform pan tightly in foil before placing it in the water bath. Also, mix the eggs in gently to avoid incorporating too much air. If cracks do occur, don’t worry! You can cover them with a dollop of whipped cream or caramel sauce when serving.
Is it safe for pets or people with allergies?
While this cheesecake is delicious for humans, it contains ingredients like cream cheese, sour cream, and eggs that are not suitable for pets. If serving to guests with allergies, ensure to check for dairy or gluten sensitivities, as the cheesecake does contain both. Consider making a gluten-free version if needed by using almond flour in the crust.
How do I keep my cheesecake from being too dense?
For a light and fluffy texture, it’s essential to use room temperature cream cheese and eggs. This ensures everything blends smoothly for a perfect filling. Additionally, avoid overmixing after adding the eggs; mix until just combined to keep excess air bubbles from forming. This little tip will keep your Apple Cider Cheesecake creamy and delightful!
Creamy Apple Cider Cheesecake to Celebrate Fall Flavors
Ingredients
Equipment
Method
- In a saucepan over medium-high heat, bring 3 cups of fresh apple cider to a rolling boil. Reduce the heat to medium-low and let it simmer for 30-45 minutes, occasionally stirring, until it thickens and reduces to about 1/3 cup. If desired, you can add mulling spices for extra flavor. Once reduced, remove it from the heat and allow it to cool completely.
- While the cider cools, preheat your oven to 350°F (175°C). Prepare a springform pan by lightly greasing it and lining the bottom with parchment paper.
- In a food processor, blend your digestive cookies or graham crackers until they form fine crumbs. Transfer the crumbs to a mixing bowl and combine them with melted butter and a pinch of salt. Press the mixture into the bottom of your prepared pan and pre-bake for 10 minutes.
- Using a large mixing bowl, beat the softened cream cheese and brown sugar together until smooth and lump-free. Gradually add the cooled cider reduction, sour cream, cinnamon, and flour. Mix until creamy.
- Add the eggs one by one, mixing gently after each addition to avoid overmixing.
- Pour the filling over the cooled crust in the springform pan. Place the pan in a larger baking pan and fill the outer pan with hot water. Bake for 80-90 minutes.
- Once baked, turn off the oven and crack the door open, allowing the cheesecake to cool slowly for 30 minutes. Remove from water bath and cool on counter for another 15 minutes before refrigerating for at least 8 hours.
- When ready to serve, carefully remove the sides of the springform pan. Slice and plate with garnishes like caramel sauce or cinnamon.
Leave a Reply