
I still remember the first time I took a bite of a Brownie Bottom Mini Cheesecake. The unforgettable moment when dense, chocolatey brownie perfectly mingled with creamy cheesecake felt like a hug for my taste buds. This delightful bite-sized dessert not only satisfies cravings for something sweet but also brings joy to any gathering. With minimal prep time and endless customization options, they are perfect for satisfying even the pickiest of eaters. Whether you’re looking to please a crowd or indulge in a personal treat, these mini cheesecakes will not disappoint. Curiosity piqued? Let’s dive into the heavenly world of these creamy, fudgy delights!
Why are Brownie Bottom Mini Cheesecakes irresistible?
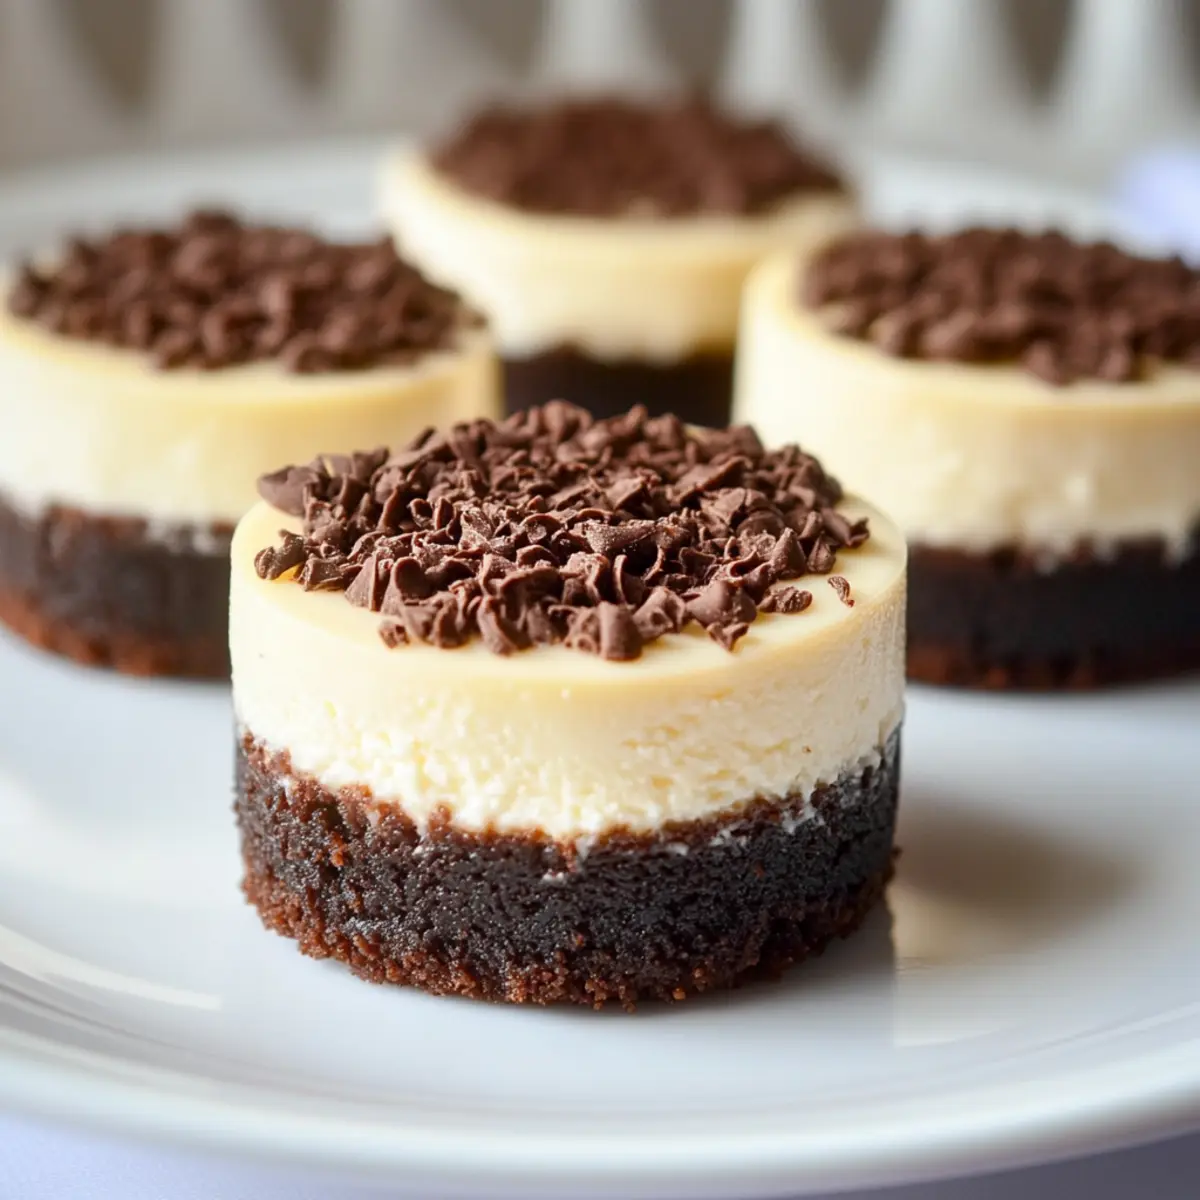
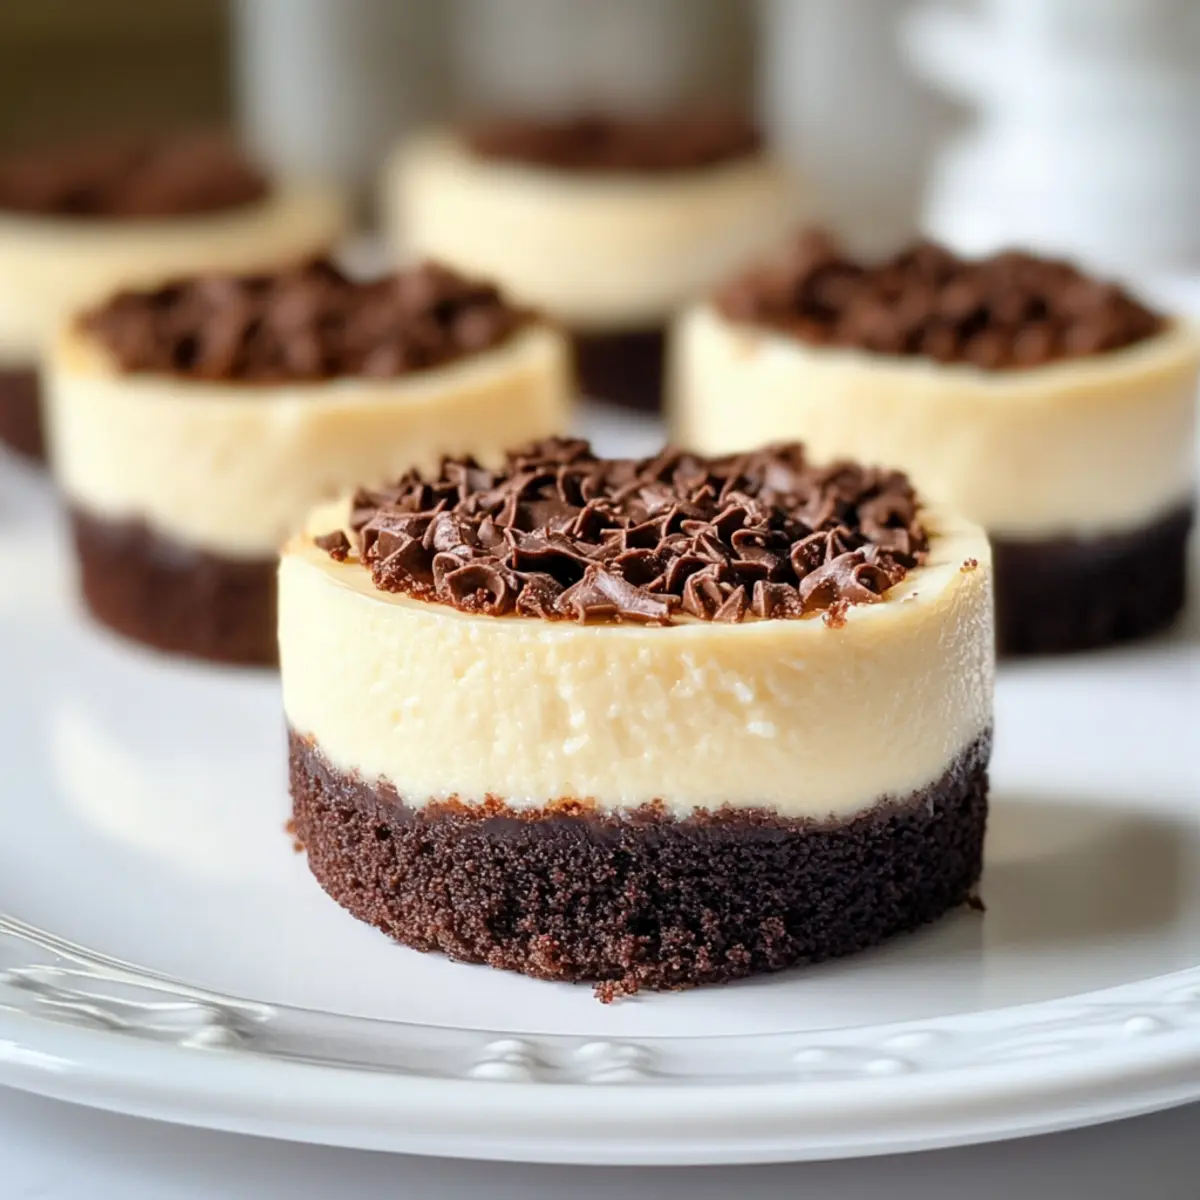
Decadent Flavor: Each mini cheesecake features a rich, chocolatey brownie base paired with a smooth cheesecake layer, creating a taste sensation you won’t forget.
Bite-Sized Delights: Perfectly portioned, these little gems are just the right size for a sweet treat without the guilt.
Customizable Toppings: Whether you prefer fresh berries, whipped cream, or a chocolate drizzle, you can easily tailor these to your taste.
Quick & Easy: With minimal prep time, they’re the ideal bake for busy days or last-minute gatherings.
Versatile Dessert: From birthday parties to cozy nights in, these cheesecakes fit any occasion – they’re definitely crowd-pleasers! For those looking for a gluten-free option, you might also consider our Gluten Free Chocolate treat for a delightful alternative.
Brownie Bottom Mini Cheesecakes Ingredients
For the Brownie Layer
- Unsalted Butter – Adds richness and soft texture; you can use salted butter but reduce any added salt.
- Semisweet Chocolate – Provides deep chocolate flavor; substitute with dark chocolate for a more intense taste.
- Granulated Sugar – Contributes sweetness and texture to the brownie layer; consider natural sweeteners like stevia for a lighter option.
- Eggs – Binds the mixture together and enhances the fudgy texture; for a vegan option, use flax eggs.
- Vanilla Extract – Enhances the chocolate flavor; pure vanilla extract is recommended for the best results.
- All-Purpose Flour – Main dry ingredient providing structure; swap with gluten-free flour for a gluten-free option.
- Salt – Balances sweetness and enhances overall flavors.
For the Cheesecake Layer
- Cream Cheese – The star of the cheesecake; always use full-fat for a creamy texture.
- Granulated Sugar (for cheesecake) – Sweetens the cheesecake layer; powdered sugar can be used for a smoother blend.
- Egg (for cheesecake) – Helps set the cheesecake; consider an egg replacer for a vegan alternative.
- Sour Cream – Adds creaminess and tang; Greek yogurt works well as a substitute.
Optional Toppings
- Whipped Cream – Adds a light, airy finish; a must for an indulgent touch.
- Fresh Berries – Beautiful and flavorful decorators; they also add a refreshing contrast to the richness.
- Chocolate or Caramel Drizzle – Elevates presentation and taste; ideal for those who want a sweeter kick.
- Crushed Nuts – Introduces crunch and texture; ideal if you like a bit of nutty flavor in your desserts.
- Colorful Sprinkles – Fun and festive; perfect for celebrations!
Discover how these Brownie Bottom Mini Cheesecakes can become the dazzling highlight of any dessert spread, pleasing everyone’s palates with their harmonious blend of flavors!
Step‑by‑Step Instructions for Brownie Bottom Mini Cheesecakes
Step 1: Preheat and Prepare Brownie Layer
Preheat your oven to 350°F (175°C). In a medium saucepan, melt together ½ cup of unsalted butter and 4 oz of semisweet chocolate over low heat, stirring until smooth. Remove from heat and allow this to cool slightly. Once cooled, mix in 1 cup of granulated sugar, followed by 2 eggs—adding them one at a time—then stir in 1 teaspoon of vanilla extract, ½ cup of all-purpose flour, and a pinch of salt until well combined.
Step 2: Bake the Brownie Layer
Line a mini muffin pan with paper liners. Pour the brownie mixture into each cavity, filling them about one-third full. Bake in the preheated oven for approximately 8 minutes, or until the edges look set but the centers are still soft. Once baked, remove the pan from the oven and allow the brownie layers to cool slightly while you prepare the cheesecake layer.
Step 3: Prepare Cheesecake Layer
In a separate mixing bowl, beat 8 oz of softened cream cheese until smooth and creamy. Gradually add ¼ cup of granulated sugar and 1 teaspoon of vanilla, mixing well. Incorporate 1 egg and ½ cup of sour cream into the mixture, beating until just combined. Be careful not to overmix, as you want a smooth cheesecake layer without air bubbles.
Step 4: Assemble and Bake Mini Cheesecakes
Spoon the cheesecake batter over the cooled brownie layers, filling each cup nearly to the top. Lower the oven temperature to 325°F (163°C) and bake the assembled mini cheesecakes for 15 to 18 minutes. Watch for the edges to look set while the centers still jiggle slightly. This indicates they are perfectly baked.
Step 5: Cool and Chill
After baking, let the mini cheesecakes cool in the pan for about 30 minutes. Then, carefully transfer them to the refrigerator and chill for at least 2 hours. This chilling period allows the flavors to meld and the texture to firm up beautifully, making your Brownie Bottom Mini Cheesecakes even more delightful.
Step 6: Serve and Enjoy
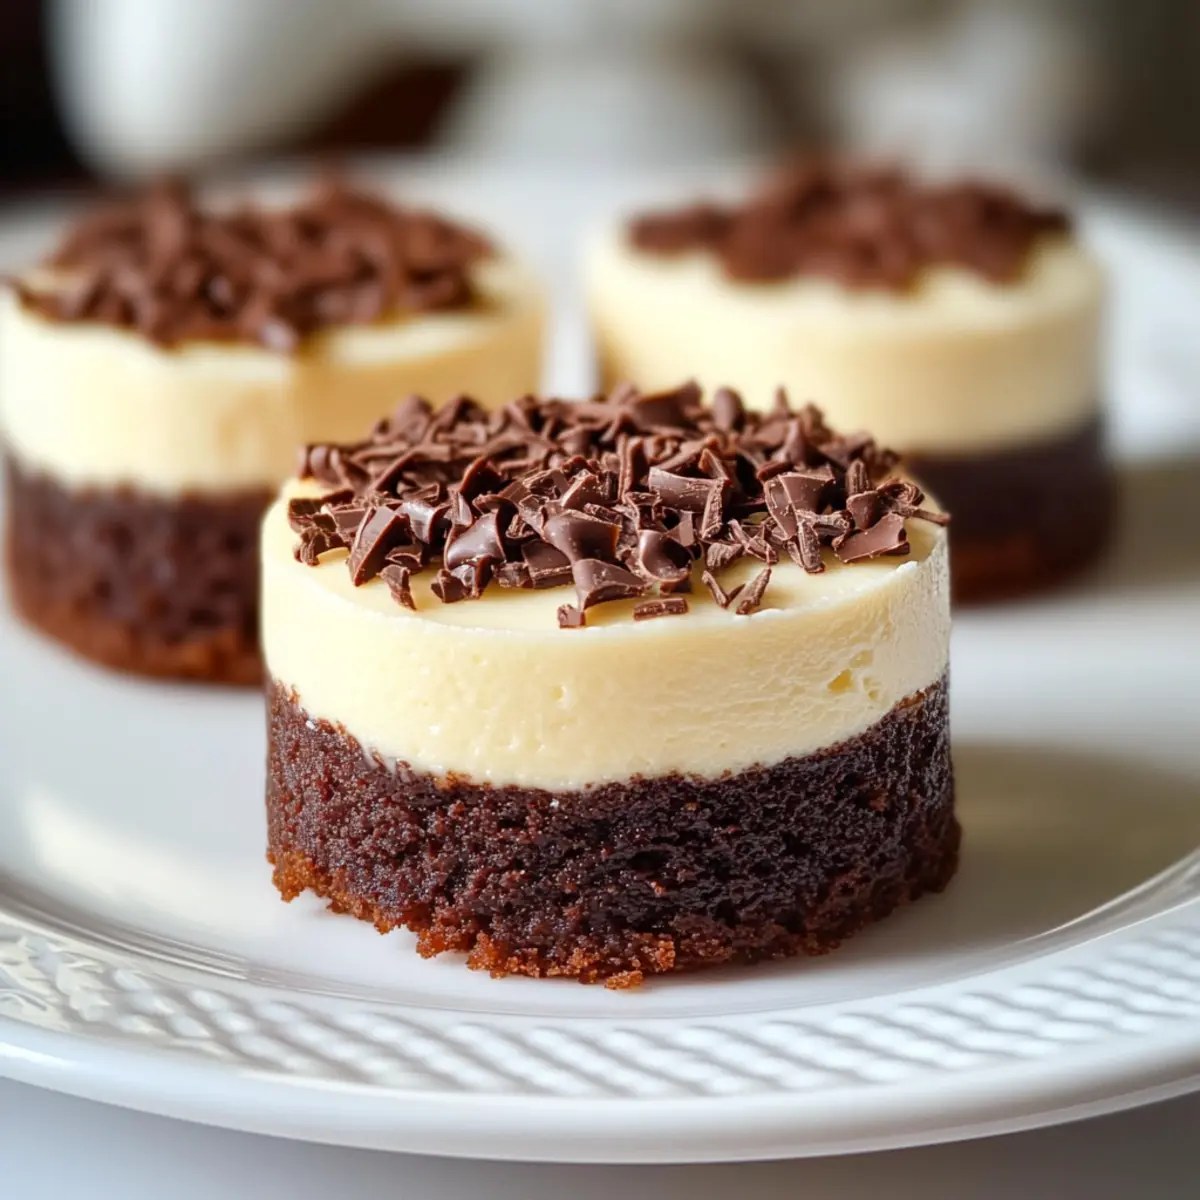
Once chilled, take the mini cheesecakes out of the fridge. Add your desired toppings such as whipped cream, fresh berries, chocolate drizzle, or colorful sprinkles for an extra touch. These beautiful Brownie Bottom Mini Cheesecakes are now ready to impress your guests!

Expert Tips for Brownie Bottom Mini Cheesecakes
- Room Temperature Cream Cheese: Ensure your cream cheese is at room temperature. This will help you achieve a smooth cheesecake layer and avoid lumps.
- Avoid Overmixing: When combining the cheesecake ingredients, mix just until combined to prevent air bubbles, which can lead to cracks in your finished cheesecakes.
- Chill Thoroughly: Cooling the cheesecakes in the fridge for at least 2 hours is essential. This not only firms up the texture but also enriches the flavors of your Brownie Bottom Mini Cheesecakes.
- Pre-Bake for Stability: Bake the brownie layer until just set to create a firm base. This step is crucial to support the cheesecake layer above.
- Custom Toppings: Get creative with your toppings! From fresh berries to chocolate drizzles, customize your Brownie Bottom Mini Cheesecakes for a stunning presentation.
What to Serve with Brownie Bottom Mini Cheesecakes
Bring your dessert experience to a whole new level by pairing these heavenly delights with the perfect accompaniments for every occasion.
- Fresh Berries: Juicy strawberries, raspberries, or blueberries add a refreshing pop, cutting through the richness of the cheesecake.
- Whipped Cream: Light and airy, a dollop of fresh whipped cream enhances the creaminess while adding a touch of elegance to your plating.
- Chocolate Drizzle: A decadent drizzle of melted chocolate intensifies the dessert’s sweetness and adds a luscious finish.
- Crushed Nuts: Chopped almonds or hazelnuts bring a delightful crunch, providing a lovely contrast to the smooth cheesecake texture.
- Coffee or Espresso: A rich cup of coffee pairs beautifully, balancing the sweetness while enhancing those chocolatey tones.
- Vanilla Ice Cream: A scoop of creamy vanilla ice cream complements the dessert and makes it even more indulgent.
- Caramel Sauce: Drizzling warm caramel sauce adds a sweet depth, making each bite irresistible when combined with the brownie base.
- Mint Leaves: Fresh mint leaves can provide a bright contrast in flavor and a splash of color, elevating the presentation.
- Sparkling Water with Lime: For a refreshing drink, sparkling water with a splash of lime offers a zesty palate cleanser between bites.
Storage Tips for Brownie Bottom Mini Cheesecakes
Fridge: Store your cooled mini cheesecakes in an airtight container for up to 3-4 days. This keeps them fresh and prevents them from drying out.
Freezer: For longer storage, individually wrap each cheesecake in plastic wrap and place in a freezer-safe container. They can be frozen for up to 2 months.
Thawing: To enjoy your frozen Brownie Bottom Mini Cheesecakes, transfer them to the fridge the night before serving. This gradual thaw ensures they maintain their creamy texture.
Reheating: For a warm treat, gently microwave a cheesecake for about 10-15 seconds, ensuring not to overheat, as this could affect the texture.
Brownie Bottom Mini Cheesecakes Variations
Feel free to play with the flavors and textures of these mini cheesecakes for a delightful twist!
-
Fruit-Infused: Mash fresh fruits like raspberries or strawberries into the cheesecake mixture for a fruity zing. A swirl of berry puree on top can enhance the visual appeal too!
-
Nutty Delight: Stir in finely chopped walnuts or pecans into the brownie layer for added crunch. This gives your cheesecakes a delightful nutty flavor that perfectly complements the rich chocolate.
-
Vegan Alternative: Substitute cream cheese with a vegan cream cheese and use flax eggs instead of regular eggs for a plant-based option. They’re just as creamy and delicious!
-
Cheesecake Flavor Twist: Add a teaspoon of almond extract to the cheesecake layer for a unique, nutty flavor. It brings an unexpected charm to the classic dessert.
-
Chocolate Lovers: Fold mini chocolate chips into the cheesecake layer for an extra chocolatey bite. You could also drizzle melted chocolate over the tops before serving!
-
Spicy Surprise: For a touch of warmth, add a pinch of cayenne or cinnamon to the brownie batter. This will add a delightful kick that balances out the sweetness.
-
Gluten-Free Version: Swap the all-purpose flour for a good quality gluten-free flour blend to cater to gluten-sensitive guests. They won’t miss out on any deliciousness!
-
Decadent Drizzles: Top with melted caramel or a rich chocolate ganache for a truly indulgent treat. It adds a luxurious finish that appeals to all dessert lovers.
Not sure which flavor to start with? Try out a few options and let the mini cheesecakes surprise you! Whether you’re in the mood for a classic or something out-of-the-ordinary, these bites can adapt to your heart’s desire. Consider also pairing them with Apple Brownies Deliciously for a stunning dessert platter!
Make Ahead Options
These Brownie Bottom Mini Cheesecakes are perfect for meal prep enthusiasts! You can prepare the brownie layer up to 24 hours in advance by baking it and storing it in an airtight container in the refrigerator. The cheesecake layer can also be made ahead; simply mix it and refrigerate for up to 3 days. To assemble, just spoon the cheesecake batter over the cooled brownie layers and bake as directed. For the best quality, chill the finished mini cheesecakes for at least 2 hours before serving to enhance their flavors. This way, you’ll have these delightful treats ready to enjoy with minimal effort on busy weeknights!
Brownie Bottom Mini Cheesecakes Recipe FAQs
What type of chocolate should I use for the brownie base?
I recommend using semisweet chocolate for a well-balanced flavor. If you prefer a richer taste, feel free to substitute it with dark chocolate for an even deeper chocolatey experience.
How should I store leftover mini cheesecakes?
To keep your Brownie Bottom Mini Cheesecakes fresh, store them in an airtight container in the fridge for about 3-4 days. Make sure they are fully cooled before sealing to avoid condensation, which can lead to a soggy bottom.
Can I freeze these mini cheesecakes?
Absolutely! For longer storage, individually wrap each cheesecake in plastic wrap and place them in a freezer-safe container. They will stay fresh for up to 2 months. When you’re ready to enjoy them, simply transfer the cheesecakes to the fridge the night before serving to thaw gradually.
What if my cheesecake layer cracks?
No need to worry! Cracking is often due to overmixing or baking at a high temperature. To prevent this, mix your cheesecake ingredients just until combined—no need to beat them too much—and ensure you bake at the correct temperature. If cracks do appear, a generous topping of whipped cream or berries can perfectly disguise them!
Are there any dietary considerations for these cheesecakes?
Yes, the Brownie Bottom Mini Cheesecakes can be made gluten-free by using gluten-free flour in the brownie layer. For a vegan option, substitute the cream cheese with a plant-based alternative and use flax eggs instead of regular eggs. Just be sure your chocolate is dairy-free!
Brownie Bottom Mini Cheesecakes That Wow Every Dessert Lover
Ingredients
Equipment
Method
- Preheat your oven to 350°F (175°C). In a medium saucepan, melt together unsalted butter and semisweet chocolate over low heat, stirring until smooth. Remove from heat and allow to cool slightly. Mix in granulated sugar, followed by eggs one at a time, then stir in vanilla extract, all-purpose flour, and salt until combined.
- Line a mini muffin pan with paper liners. Pour the brownie mixture into each cavity, filling them about one-third full. Bake for approximately 8 minutes, until edges look set but centers are still soft. Remove from oven and cool slightly.
- In a separate mixing bowl, beat softened cream cheese until smooth. Gradually add granulated sugar and vanilla, mixing well. Incorporate an egg and sour cream into the mixture, beating until just combined.
- Spoon cheesecake batter over cooled brownie layers, filling nearly to the top. Lower oven temperature to 325°F (163°C) and bake the mini cheesecakes for 15 to 18 minutes.
- Let mini cheesecakes cool in the pan for about 30 minutes. Then carefully transfer to the refrigerator and chill for at least 2 hours.
- Once chilled, take mini cheesecakes out of the fridge. Add desired toppings and serve.
Leave a Reply