
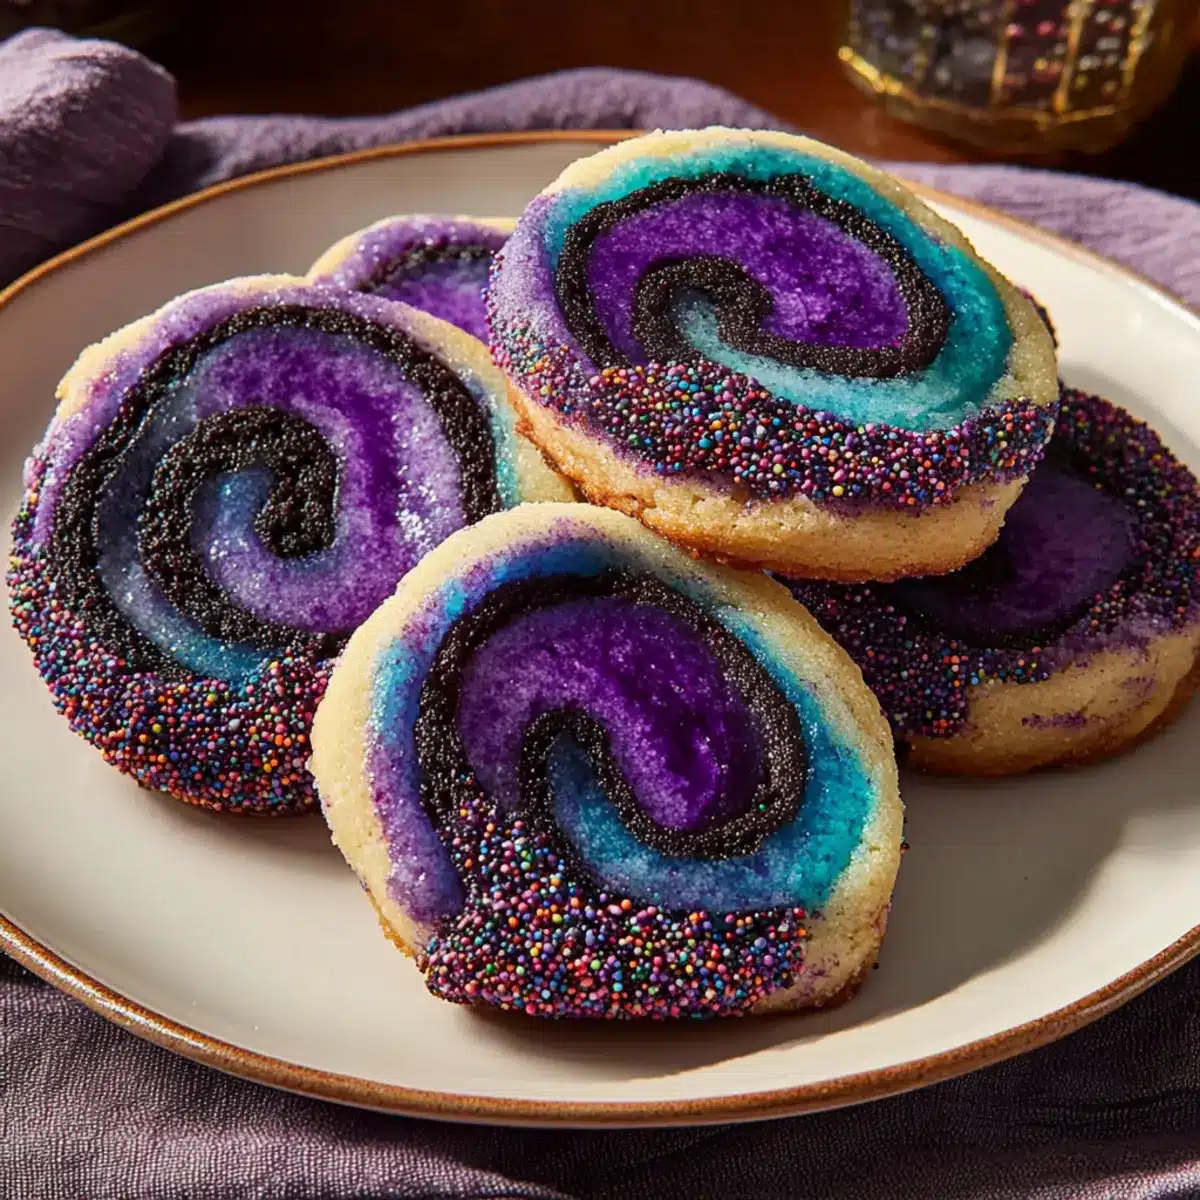
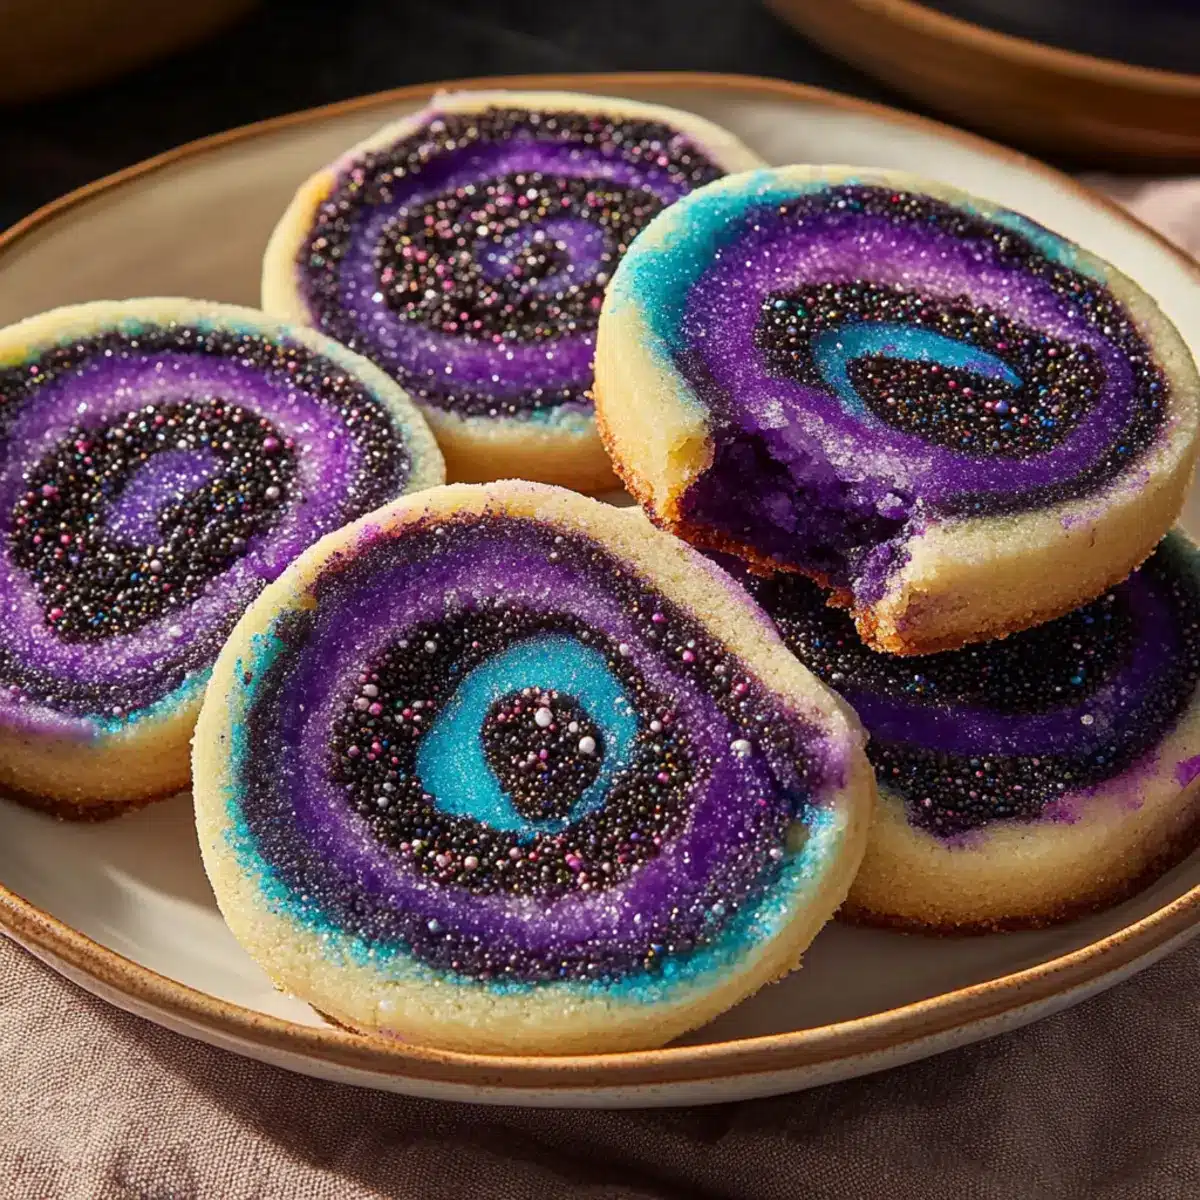
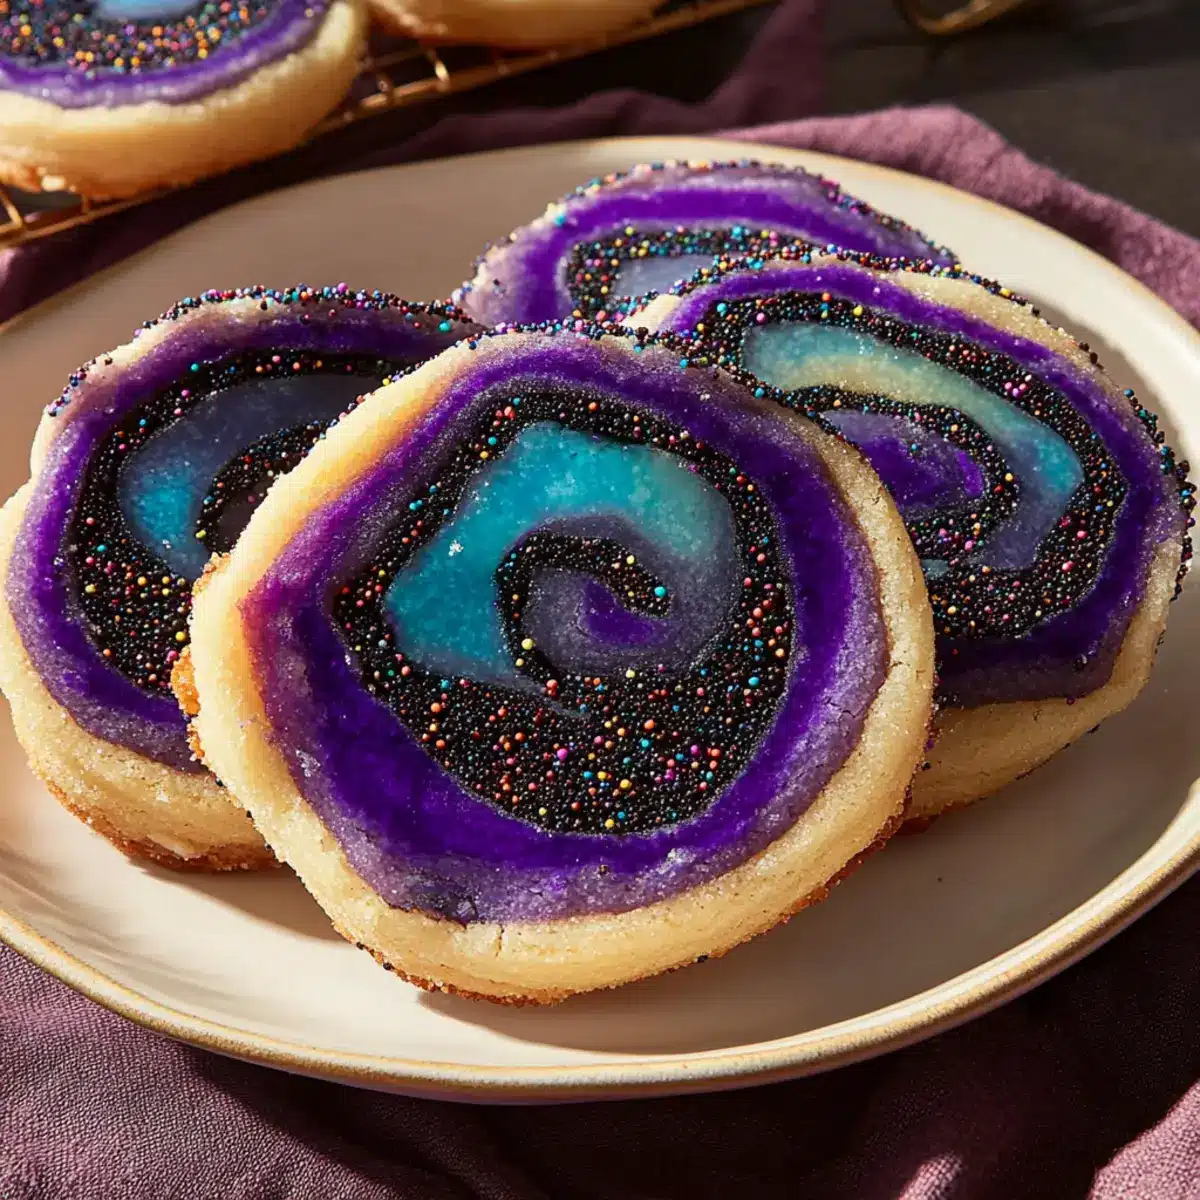
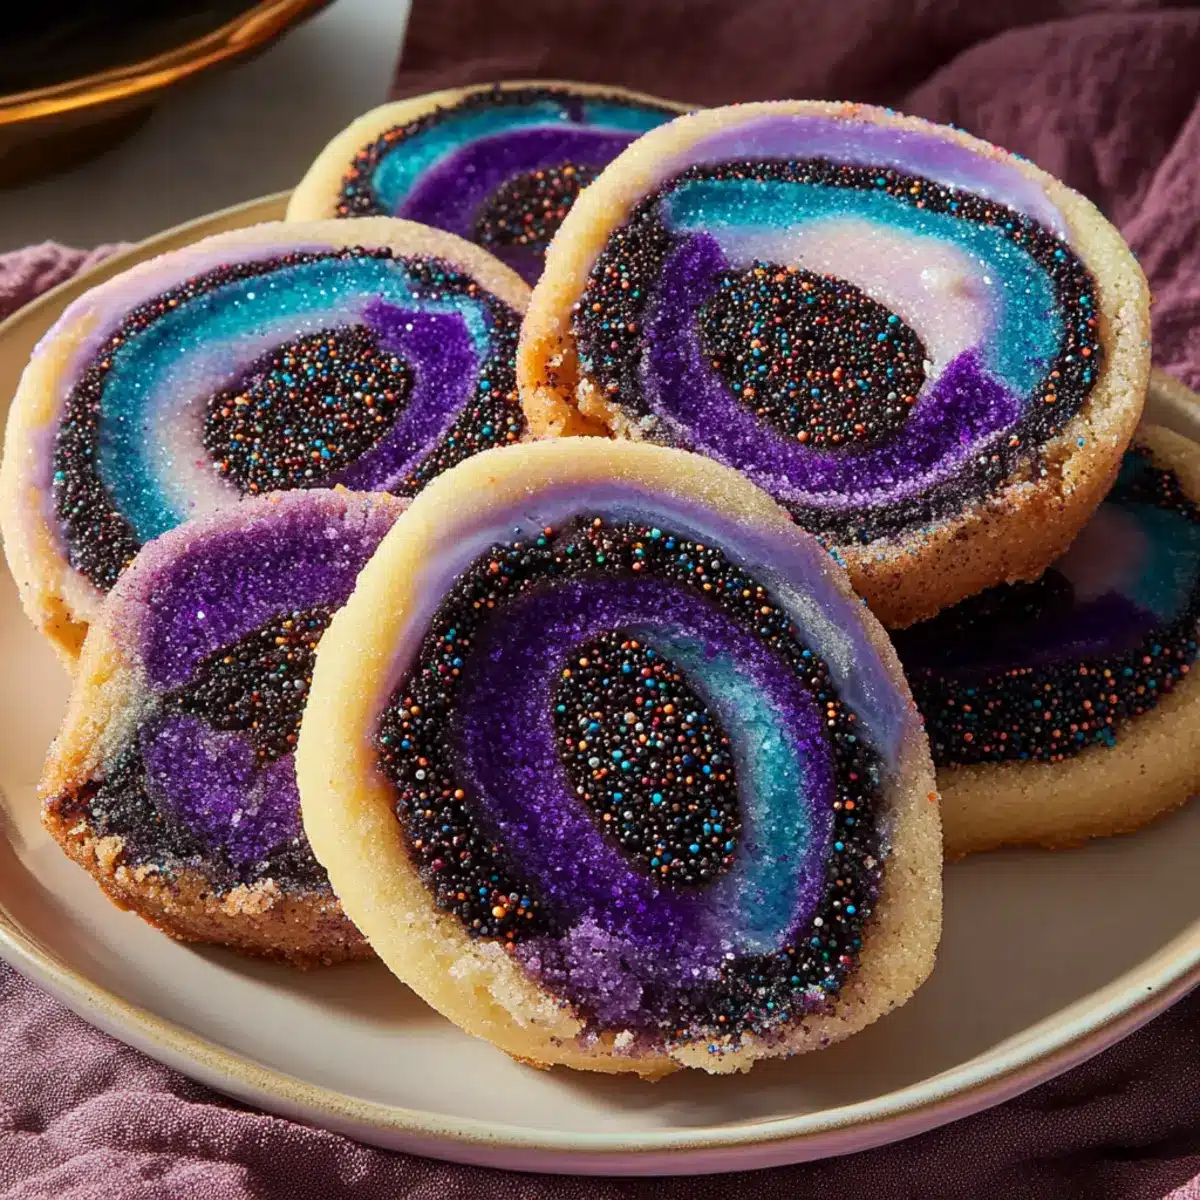
As the vibrant colors of autumn leaves begin to dance outside my kitchen window, I can’t help but think of baking something magical. Enter the Magical Spiral Cookies—a delightful treat that brings a playful twist to your holiday gatherings. These whimsical cookies are not only visually stunning with their swirls of purple, black, and white, but they also boast a buttery softness that melts in your mouth. What I love most about this recipe is that it’s an engaging activity for both kids and adults, making it perfect for a family baking day. Plus, these treats are super versatile, allowing you to adapt their colors and themes for any celebration. So, are you ready to twist and swirl your way into a world of colorful baking?
Why Are Magical Spiral Cookies So Special?
Fun, Whimsical Design: These cookies are not just treats; they’re a visual delight. The vibrant swirls and playful colors make them the star of any celebration!
Easy to Make: With simple ingredients and straightforward steps, anyone can whip up these enchanting cookies, making it perfect for family baking days.
Versatile Themes: Customize colors for any occasion! Imagine red and green for Christmas or orange and black for Halloween. The options are endless!
Crowd-Pleasing Treats: Whether it’s a birthday party or a cozy get-together, these cookies will impress your guests and leave them wanting more.
Perfect for Kids: Get the little ones involved in the baking fun! Rolling and swirling the dough is a fantastic hands-on activity for all ages.
Plus, you can pair these cookies with a warm drink, just like my Chocolate Chip Cookies do, for a cozy experience!
Magical Spiral Cookies Ingredients
• Here’s everything you need to create these delightful treats!
For the Dough
- Unsalted Butter – Provides richness and a buttery flavor; make sure it’s at room temperature for easy creaming.
- Powdered Sugar – Creates a smooth, meltaway texture in the dough, perfect for those magical spiral moments.
- Eggs – Add moisture and bind the dough together for that soft, tender texture.
- Milk – Contributes additional moisture, enhancing the deliciousness of your Magical Spiral Cookies.
- Vanilla & Almond Extract – Enhances flavor; almond can be replaced with another extract like peppermint or lemon for a unique twist.
- All-Purpose Flour – Serves as the essential structure of the cookie, keeping those swirls fabulous.
- Salt – Balances sweetness and enhances flavor, making each bite unforgettable.
For the Colors
- Purple & Black Gel Food Coloring – Used for vibrant colors; opt for gel to maintain texture without adding extra moisture.
- Purple & Black Sprinkles – Add visual appeal and a delightful crunch; customize them to fit the theme of your celebration!
Step‑by‑Step Instructions for Magical Spiral Cookies
Step 1: Make the Dough
In a large mixing bowl, cream together 1 cup of unsalted butter and 2 cups of powdered sugar using an electric mixer on medium speed until light and fluffy, about 3 minutes. Add 2 eggs and 1 tablespoon of milk, mixing until smoothly combined. Gradually incorporate 3 cups of all-purpose flour, 1 teaspoon of salt, and 1 teaspoon each of vanilla and almond extract until you form a soft dough that holds together beautifully.
Step 2: Divide and Color
Once your dough is ready, divide it into three portions: one for color and two for the base. Tint one third of the dough purple using gel food coloring, kneading it in until fully integrated. For the remaining portion, split it in half, leaving one half white and tinting the other black with gel food coloring, ensuring all colors are vibrant and inviting.
Step 3: Roll and Stack Layers
On a floured surface, roll out the black and white dough halves into rectangles about 1/4-inch thick. Carefully stack the white rectangle on top of the black, pressing gently to secure. Lightly roll the stacked dough with a rolling pin to blend the edges together, ensuring a seamless connection that sets the stage for your Magical Spiral Cookies.
Step 4: Make the Purple Center
Next, roll out the purple dough into a long rectangle, about 1/4-inch thick, and spread it with purple sprinkles, pressing them into the dough for added texture. Roll it tightly into a log, making sure it’s evenly shaped and the sprinkles are nicely distributed. This colorful log will bring the magic to your spiral cookies.
Step 5: Assemble the Full Spiral
Position your purple dough log at one end of the black-and-white stack. Gently roll the dough stack around the purple log, ensuring it is tightly enclosed to form a beautiful spiral shape. As you roll, be cautious to keep the log in the center and maintain the integrity of the layers, creating the stunning visual you desire.
Step 6: Chill and Coat
Wrap the combined log in plastic wrap and chill in the refrigerator for at least 1 hour. Once firmly chilled, remove from the fridge and roll the log in additional purple and black sprinkles, coating it thoroughly to add a festive crunch. This step not only enhances the look but also helps the layers set perfectly.
Step 7: Slice and Bake
Preheat your oven to 375°F (190°C). Unwrap your chilled dough log and use a sharp knife to slice it into rounds about 1/2-inch thick. Place the cookie slices on a parchment-lined baking sheet, spacing them an inch apart. Bake for 10 minutes or until the edges are just set and beginning to lightly golden. Let cool on a wire rack before enjoying your delightful Magical Spiral Cookies!
Magical Spiral Cookies Variations
Feel free to add a personal touch to your Magical Spiral Cookies with these delightful twists that are sure to enchant your taste buds!
-
Holiday Colors: Transform the dough into seasonal delights with red and green for Christmas or orange and black for Halloween! Such vibrant hues can bring your gatherings to life.
-
Flavor Swap: Replace almond extract with peppermint or lemon for a refreshing twist; these variations can evoke the spirit of the season in every bite!
-
Natural Marbling: Skip the food coloring altogether and achieve an appealing marbling effect by combining vanilla and cocoa dough. The result is beautifully earthy and absolutely tasty!
-
Mini Spirals: Instead of large logs, make smaller bite-sized spirals—perfect for parties or sharing at the office! These mini gems make delightful treats that everyone can enjoy.
-
Chocolate Twist: Mix in cocoa powder with the dough to create a rich chocolatey version. Not only will you achieve a deeper flavor, but the dark contrasts with the colors beautifully!
-
Nutty Crunch: Fold in some finely chopped nuts like walnuts or pecans into your dough for added texture and a nutty aroma that pairs perfectly with the sweetness of the cookies.
Feel like adding even more flavors to your baking repertoire? Be sure to check out my Brown Butter Cookies for a nutty, caramel twist that will pique your curiosity, or embrace the refreshing goodness of my Lemon Raspberry Cookies for a fruity explosion!
Make Ahead Options
These Magical Spiral Cookies are perfect for busy home cooks looking to save time! You can prepare the cookie dough up to 3 days in advance. Simply follow the recipe up to the chilling step, wrap the dough log tightly in plastic wrap, and refrigerate. If you’re looking to plan even further ahead, the unbaked dough can be frozen for up to 2 months—just make sure to thaw it overnight in the refrigerator before slicing and baking. This way, you can easily have fresh, colorful cookies at your fingertips whenever a celebration arises. When you’re ready to enjoy, slice, bake, and revel in the deliciousness of these festive treats!
Expert Tips for Magical Spiral Cookies
-
Chill Dough Properly: Chilling the dough thoroughly ensures that your Magical Spiral Cookies maintain defined layers while slicing. It prevents the cookies from spreading too much while baking.
-
Use a Sharp Knife: A sharp knife is essential for cutting even rounds. It ensures clean cuts, helping you achieve those beautiful spirals without crushing the dough.
-
Mix Colors Thoroughly: Make sure to knead the gel food coloring into the dough until fully integrated. This prevents any uneven color distribution, making your spirals vibrant and eye-catching.
-
Watch Baking Time: Keep an eye on your cookies as they bake. Overbaking can lead to dryness; they should be just set around the edges but still soft in the center.
-
Customize Your Sprinkles: Feel free to switch up your sprinkles to match the occasion! Use themed sprinkles for holidays or parties; they’ll make your Magical Spiral Cookies even more festive.
What to Serve with Magical Spiral Cookies?
Indulging in these vibrant treats opens up a world of complementary flavors that elevate your dessert experience.
-
Rich Hot Chocolate: A warm cup of rich hot chocolate provides a luxurious balance to the sweet, colorful cookies, enhancing their festive flair.
-
Creamy Vanilla Ice Cream: The smooth, creamy vanilla ice cream creates a delightful contrast in texture, cooling down the sweetness of the cookies while adding an extra treat.
-
Fresh Seasonal Fruit Salad: A refreshing fruit salad bursting with seasonal berries or citrus balances the sweetness, providing a light and colorful accompaniment.
-
Tea Party Favorites: Serve with a variety of teas like Earl Grey or chamomile. Their gentle flavors enhance the festive cookies and encourage leisurely enjoyment.
-
Sparkling Lemonade: A glass of sparkling lemonade adds a fizzy zest that complements the buttery, sweet nature of the spiral cookies, making your gathering feel celebratory.
-
Chocolate Dipped Pretzels: The chocolatey crunch of dipped pretzels offers a salty-sweet twist, creating a fun snack pairing with the cookies.
-
Whipped Cream Topping: A dollop of whipped cream on top of each cookie adds a light, airy touch that beautifully contrasts with the dense, colorful layers.
-
Mini Fruit Tarts: Serve alongside mini fruit tarts for a banquet of color and flavor variety, perfect for festive parties and special occasions.
-
Festive Punch: A holiday-themed punch with hints of cranberry or apple spices can create a joyous atmosphere that complements the visual delight of the cookies.
How to Store and Freeze Magical Spiral Cookies
Airtight Container: Store your baked Magical Spiral Cookies in an airtight container at room temperature for up to 1 week to maintain their freshness and delightful texture.
Unbaked Dough: Wrap unbaked dough logs in plastic wrap and refrigerate for up to 3 days. This allows you to prepare the dough in advance and bake fresh cookies when you’re ready.
Freezer Storage: For longer storage, freeze the wrapped dough logs for up to 2 months. When you’re ready to enjoy, thaw them at room temperature before slicing and baking.
Reheating Tip: If you have leftover baked cookies, gently warm them in the oven at 300°F for a few minutes to regain their softness before serving.
Magical Spiral Cookies Recipe FAQs
How do I choose the right butter for my Magical Spiral Cookies?
Absolutely! For the best results, always use unsalted butter at room temperature. This allows for easy creaming with powdered sugar, which is essential for creating that fluffy texture in the cookie dough. Plus, using unsalted butter lets you control the amount of salt in your recipe.
How should I store my Magical Spiral Cookies?
Very simply! Store your baked cookies in an airtight container at room temperature for up to 1 week. This keeps them fresh and maintains their delightful softness. If you notice they’re getting a bit hard, you can place a slice of bread in the container; it helps keep the cookies soft!
Can I freeze the dough for Magical Spiral Cookies?
Of course! To freeze the unbaked dough logs, wrap them tightly in plastic wrap and then place them in a resealable freezer bag. They can be stored in the freezer for up to 2 months. When you’re ready to bake, simply thaw at room temperature for about 30 minutes before slicing and baking!
What should I do if my dough isn’t rolling well?
If you find your dough is sticking, don’t worry—the more the merrier! Dust a bit of flour on your work surface and rolling pin to help it roll out smoothly. If the dough is too soft due to warm temperatures, try chilling it for another 15-20 minutes before rolling. This chilling solidifies the butter, making the dough easier to handle.
Are there any allergy considerations for Magical Spiral Cookies?
You bet! These cookies contain gluten from all-purpose flour and dairy from the butter and milk. If you’re baking for someone with specific allergies, you can substitute gluten-free flour blends and use dairy-free margarine as alternatives. Always check the labels on your ingredients to ensure they meet dietary needs.
How long will my Magical Spiral Cookies last after baking?
These delightful cookies can be stored at room temperature in an airtight container for up to 1 week. If you want them to last longer, I recommend freezing them! Just make sure they are well-wrapped to prevent freezer burn. They’ll stay delicious for up to 3 months, making them perfect for planning ahead for future gatherings!
Magical Spiral Cookies: Festive Treats for Colorful Celebrations
Ingredients
Equipment
Method
- In a large mixing bowl, cream together unsalted butter and powdered sugar using an electric mixer on medium speed until light and fluffy, about 3 minutes.
- Add eggs and milk, mixing until smoothly combined.
- Gradually incorporate flour, salt, and extracts until a soft dough forms.
- Divide the dough into three portions and tint one portion purple using gel food coloring.
- Split the remaining dough into half, leaving one half white and tinting the other black.
- On a floured surface, roll out the black and white dough halves into rectangles about 1/4-inch thick.
- Stack the white rectangle on the black and roll gently to blend edges.
- Roll out the purple dough into a long rectangle, spread with purple sprinkles, and roll tightly into a log.
- Position the purple log at one end and roll the black-and-white stack around it tightly.
- Wrap the log in plastic wrap and chill in the refrigerator for at least 1 hour.
- Preheat the oven to 375°F (190°C) and roll the chilled log in sprinkles before slicing into rounds about 1/2-inch thick.
- Place slices on a parchment-lined baking sheet and bake for 10 minutes or until edges are lightly golden.
Leave a Reply