
As I stood in my kitchen, the fragrant aroma of garlic and ginger wafted through the air, instantly transporting me to a bustling Asian market. This is where the magic of my Soy Chicken Garlic Ginger recipe begins. With succulent chicken marinated in a rich, savory sauce, it’s a delightful fusion of sweet, salty, and a hint of spice that promises to awaken your taste buds. This dish not only fits perfectly into my busy weeknights, but it’s also incredibly versatile—easily adjustable to suit your desired heat and sweetness levels. Whether you’re aiming for a quick dinner that feels fancy or simply looking to impress your loved ones, this meal has you covered. Isn’t it time to elevate your home-cooked meals? Let’s dive into this flavorful journey together!
Why Choose Soy Chicken Garlic Ginger?
Ease of Preparation: This recipe is designed for busy weeknights, enabling you to whip up a delicious meal in no time.
Flavor Explosion: The combination of garlic, ginger, and soy sauce creates an irresistible, savory sauce that will tantalize your taste buds.
Customization: Want it spicier or sweeter? This dish is versatile, allowing you to adjust the heat and sweetness to your preference.
Healthy Choice: With low-sodium soy sauce and fresh ingredients, it’s a nourishing option that doesn’t compromise on taste.
Crowd-Pleaser: Serve this dish at your next gathering and watch as it quickly becomes a favorite among friends and family. For more delicious chicken dishes, check out my Garlic Parmesan Chicken or Chicken Alfredo Garlic Bread!
Soy Chicken Garlic Ginger Ingredients
For the Marinade
- Boneless, Skinless Chicken Thighs – Perfect for marinating as they stay juicy and tender during cooking.
- Low-Sodium Soy Sauce – The primary flavor agent; using low-sodium helps control saltiness for a healthier dish.
- Rice Vinegar – Adds a touch of acidity; can substitute with apple cider vinegar if needed.
- Fresh Ginger (Grated) – Provides warmth and spice; always choose fresh for the best flavor.
- Garlic (Minced) – Contributes depth and aroma; freshly minced garlic outshines the powdered version.
- Brown Sugar – Balances the savory elements with sweetness; feel free to swap it with honey for a richer taste.
- Sesame Oil – Enhances the nutty flavor and aroma; optional but highly recommended for added depth.
- Red Pepper Flakes – Adjusts spice level; use as much or as little as you like for a customized kick.
- Cornstarch – Used as a thickening agent for the sauce; ensure it dissolves fully to avoid clumps.
For the Sauce
- Chicken Broth – Deepens the flavor; choosing low-sodium broth is wise if you’re watching your salt intake.
- Honey or Maple Syrup – Provides an additional sweet note; maple syrup is a great vegan-friendly option.
For Cooking and Serving
- Vegetable Oil – Essential for frying the chicken; a neutral oil is best for high-heat cooking.
- Green Onion – Thinly sliced for garnish; offers a fresh color and taste contrast.
- Sesame Seeds – Optional but adds pleasant texture and visual appeal.
- Cooked Rice – A satisfying base that absorbs all the delicious sauce, making it a perfect pairing.
Feel free to explore the various flavor combinations this Soy Chicken Garlic Ginger recipe can offer!
Step‑by‑Step Instructions for Soy Chicken Garlic Ginger
Step 1: Prepare Marinade
In a medium bowl, whisk together low-sodium soy sauce, rice vinegar, grated ginger, minced garlic, brown sugar, sesame oil, red pepper flakes, and cornstarch until the mixture is smooth and well-combined. This marinade will infuse the chicken with flavor, so take a moment to ensure everything is fully incorporated.
Step 2: Marinate Chicken
Place the cut boneless, skinless chicken thighs into a resealable bag or a bowl and pour the marinade over the chicken. Seal the bag or cover the bowl, ensuring all pieces are coated evenly. Refrigerate for at least 30 minutes, preferably 2-4 hours, allowing the flavors of the Soy Chicken Garlic Ginger to penetrate the meat.
Step 3: Combine Sauce Ingredients
In a separate bowl, whisk together another batch of low-sodium soy sauce, chicken broth, honey or maple syrup, rice vinegar, grated ginger, and minced garlic. Set this sauce aside, as it will be used later to create a glossy coating for the chicken, enhancing the overall flavor profile of the dish.
Step 4: Prepare Slurry
In a small bowl, mix cornstarch with a few tablespoons of water, stirring until smooth to create a slurry. This mixture will help thicken your sauce later, so it’s important to dissolve it completely to avoid any clumps. Set it aside for later use.
Step 5: Heat Oil
In a large skillet or wok, heat 2 tablespoons of vegetable oil over medium-high heat. Allow the oil to heat until it shimmers, indicating that it’s hot enough for searing the chicken. This step is crucial for achieving that golden crust on the chicken, enhancing both texture and flavor.
Step 6: Cook Chicken
Add the marinated chicken pieces to the skillet, ensuring not to overcrowd the pan. Cook the chicken for about 3-4 minutes on each side, or until it’s thoroughly browned and the internal temperature reaches 165°F. This will secure the juicy tenderness of the chicken in your Soy Chicken Garlic Ginger.
Step 7: Remove Chicken
Once cooked, carefully transfer the chicken onto a plate and set it aside. This quick step allows the chicken to rest while you develop the rich sauce that will complement its savory taste. Keep any remaining juices in the skillet, as they will add richness to the sauce.
Step 8: Add Sauce to Skillet
Pour the previously prepared sauce into the same skillet, scraping up any browned bits left behind from cooking the chicken. These flavorful bits will enhance your soy sauce mixture, ensuring that every bite of the Soy Chicken Garlic Ginger is bursting with flavor.
Step 9: Simmer Sauce
Bring the sauce to a gentle simmer over medium heat for about 2-3 minutes. Allow it to bubble slightly, which will help thicken the sauce and unite the flavors. It should become aromatic and glossy, ready to embrace the chicken pieces.
Step 10: Thicken Sauce
Whisk the cornstarch slurry into the simmering sauce, stirring constantly until the sauce reaches your desired thickness. You’ll notice the sauce becoming silky and rich, a perfect coating for the beautiful chicken. This step is essential to achieving that delicious, clingy sauce characteristic of your Soy Chicken Garlic Ginger.
Step 11: Adjust Seasoning
Taste the sauce and adjust the flavors according to your preference. You may want to add a little more soy sauce, honey, or even red pepper flakes for additional warmth. This personalization ensures that your Soy Chicken Garlic Ginger hits just the right note for your taste buds.
Step 12: Combine Chicken and Sauce
Return the cooked chicken to the skillet, tossing it gently in the thickened sauce to ensure every piece is well-coated. The chicken will absorb the delicious flavors, making it even more irresistible. This step marks the final blend of your succulent dish.
Step 13: Heat Through
Let the chicken simmer in the sauce for another 1-2 minutes, ensuring it heats through completely. As it warms, the enticing aromas will fill your kitchen, promising a delightful meal ahead. This final touch ensures the chicken is piping hot and ready to serve.
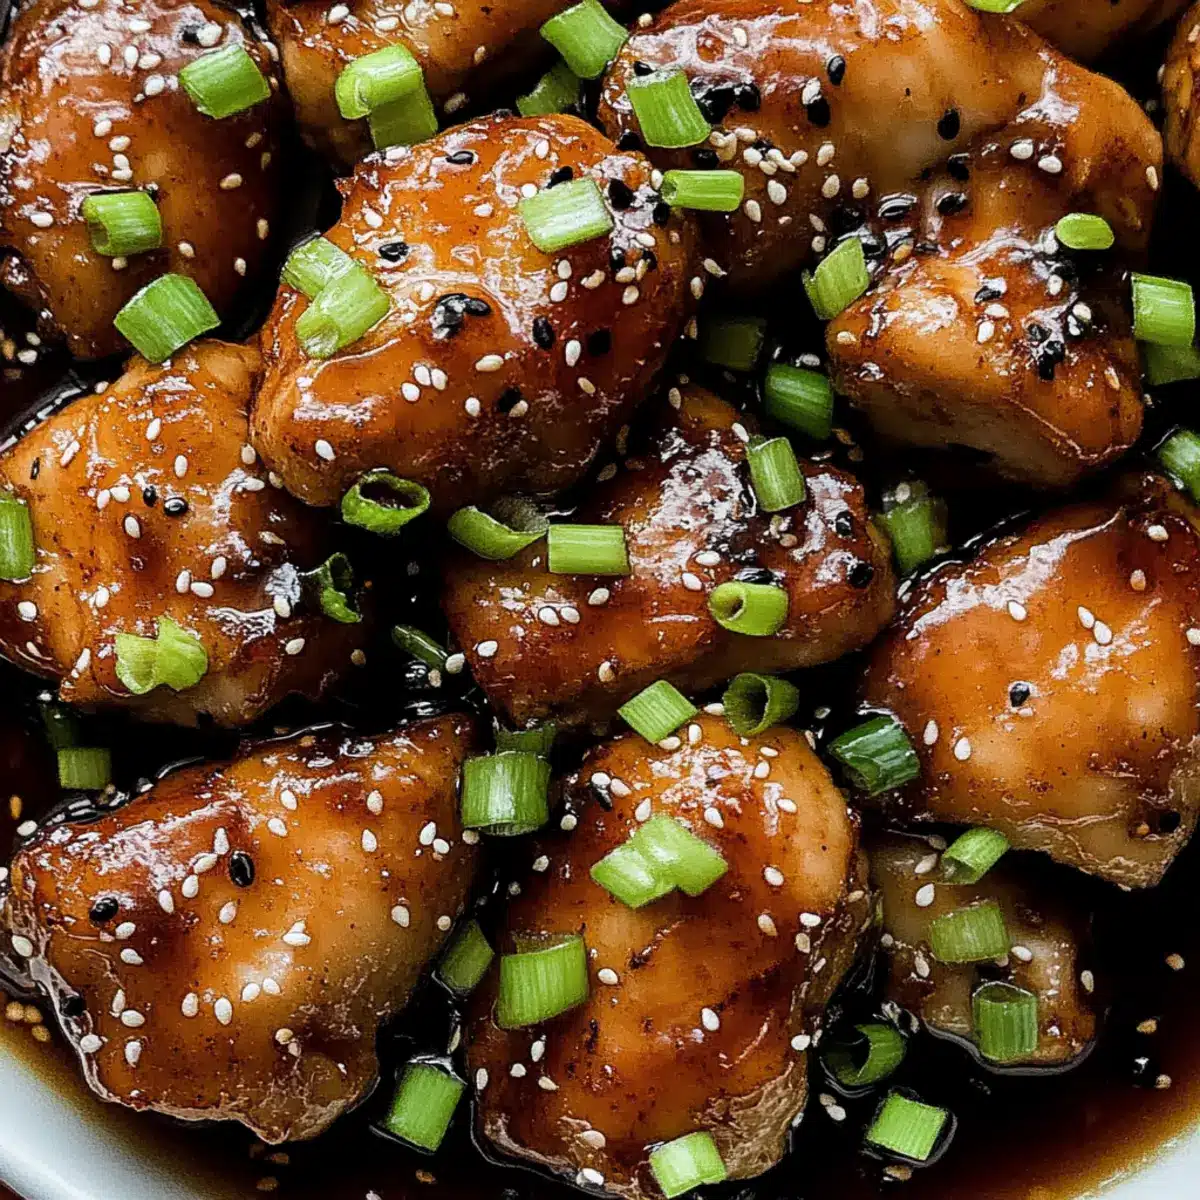
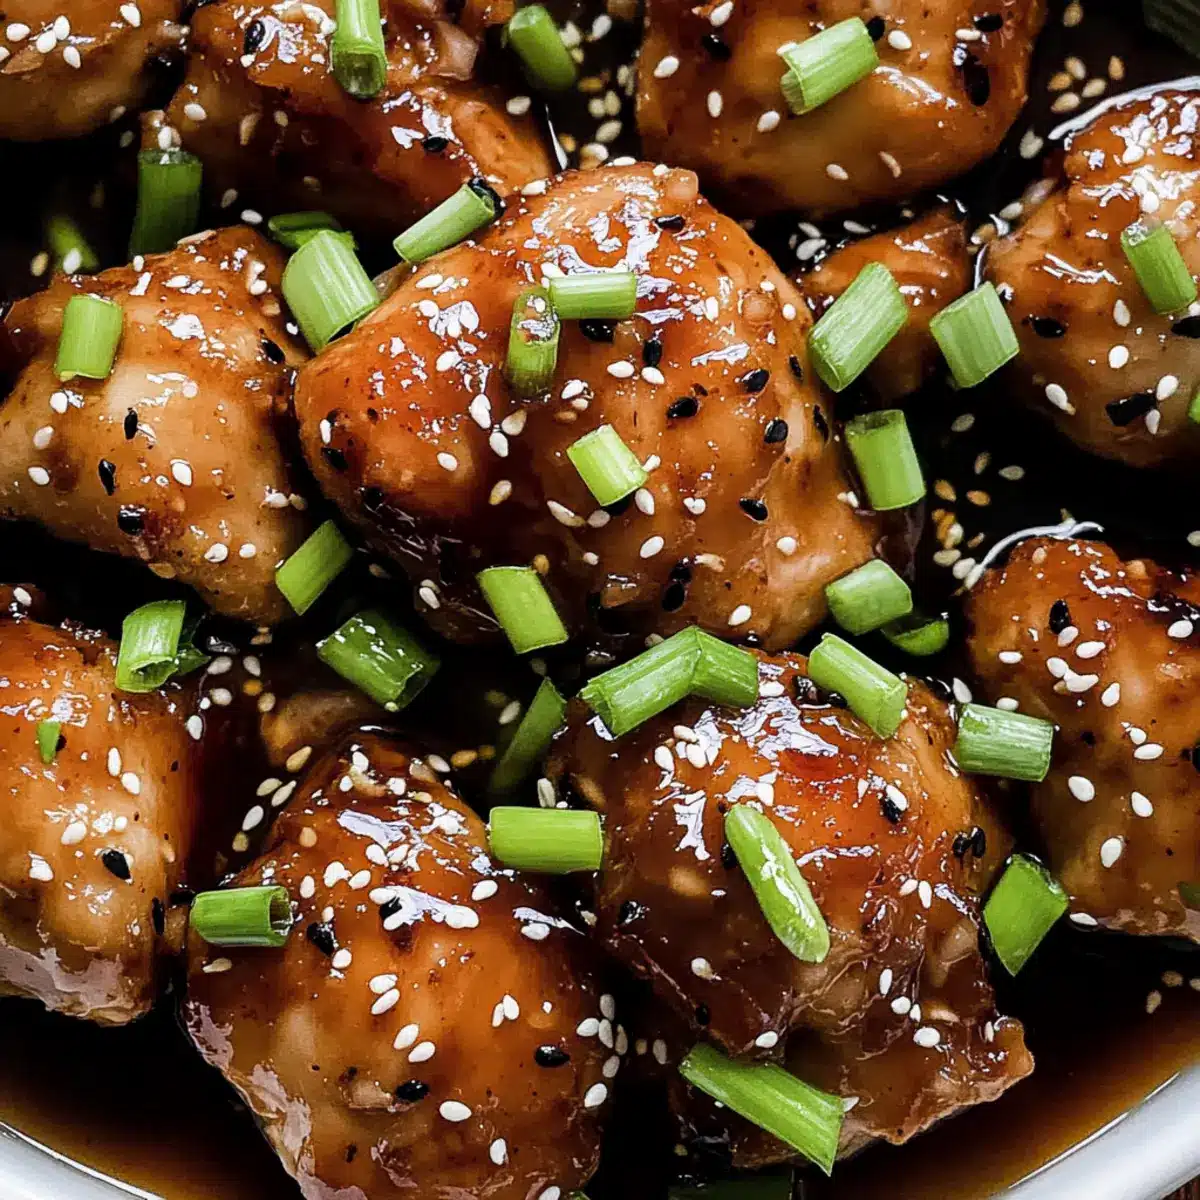
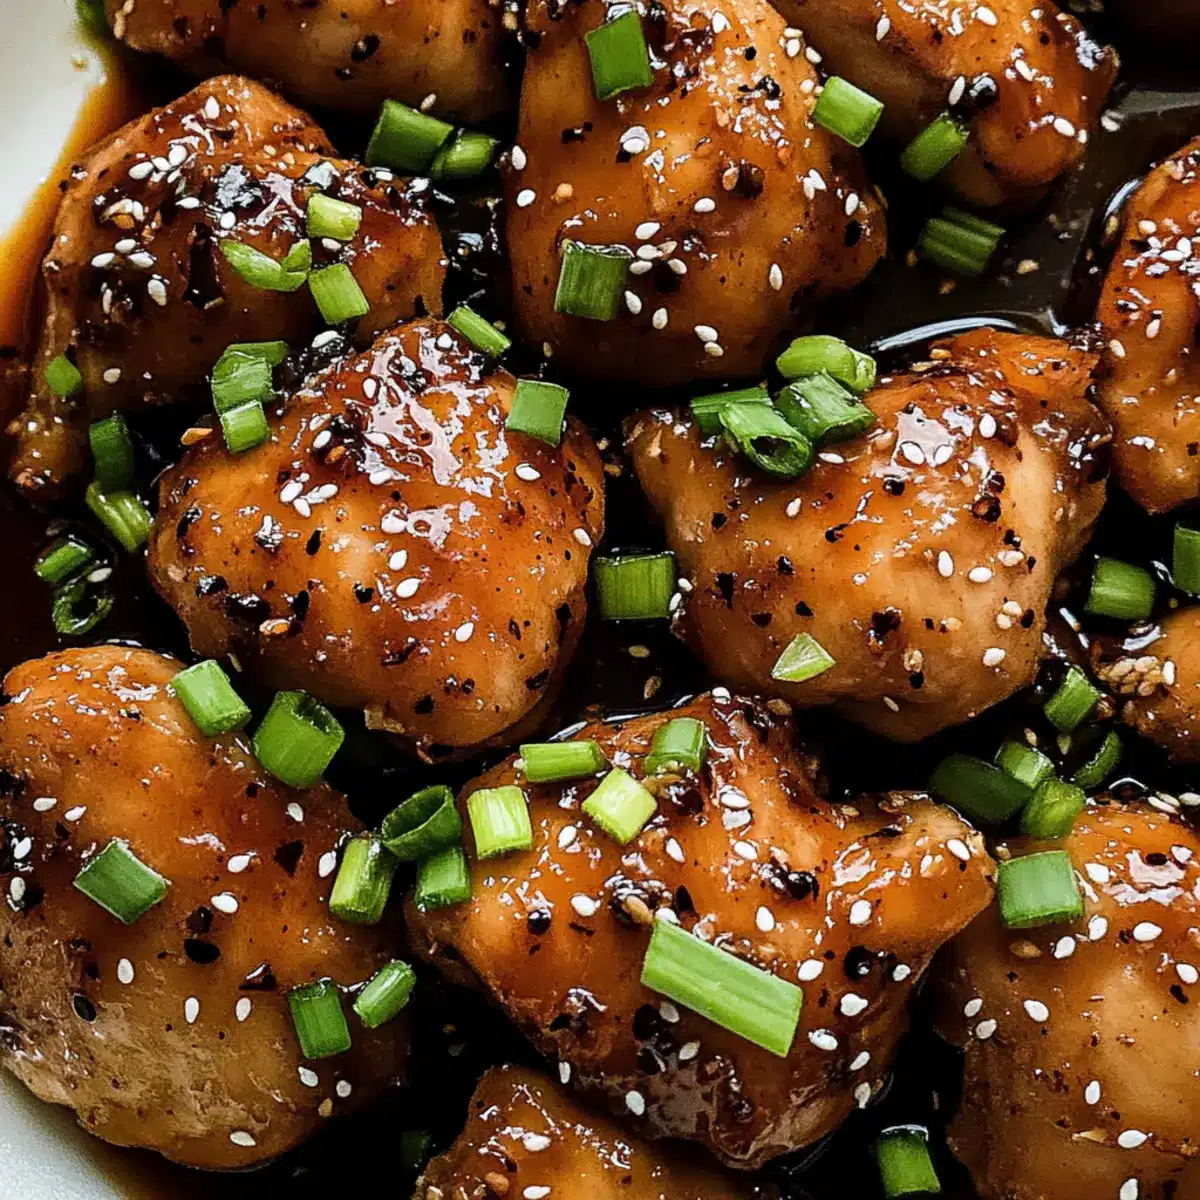
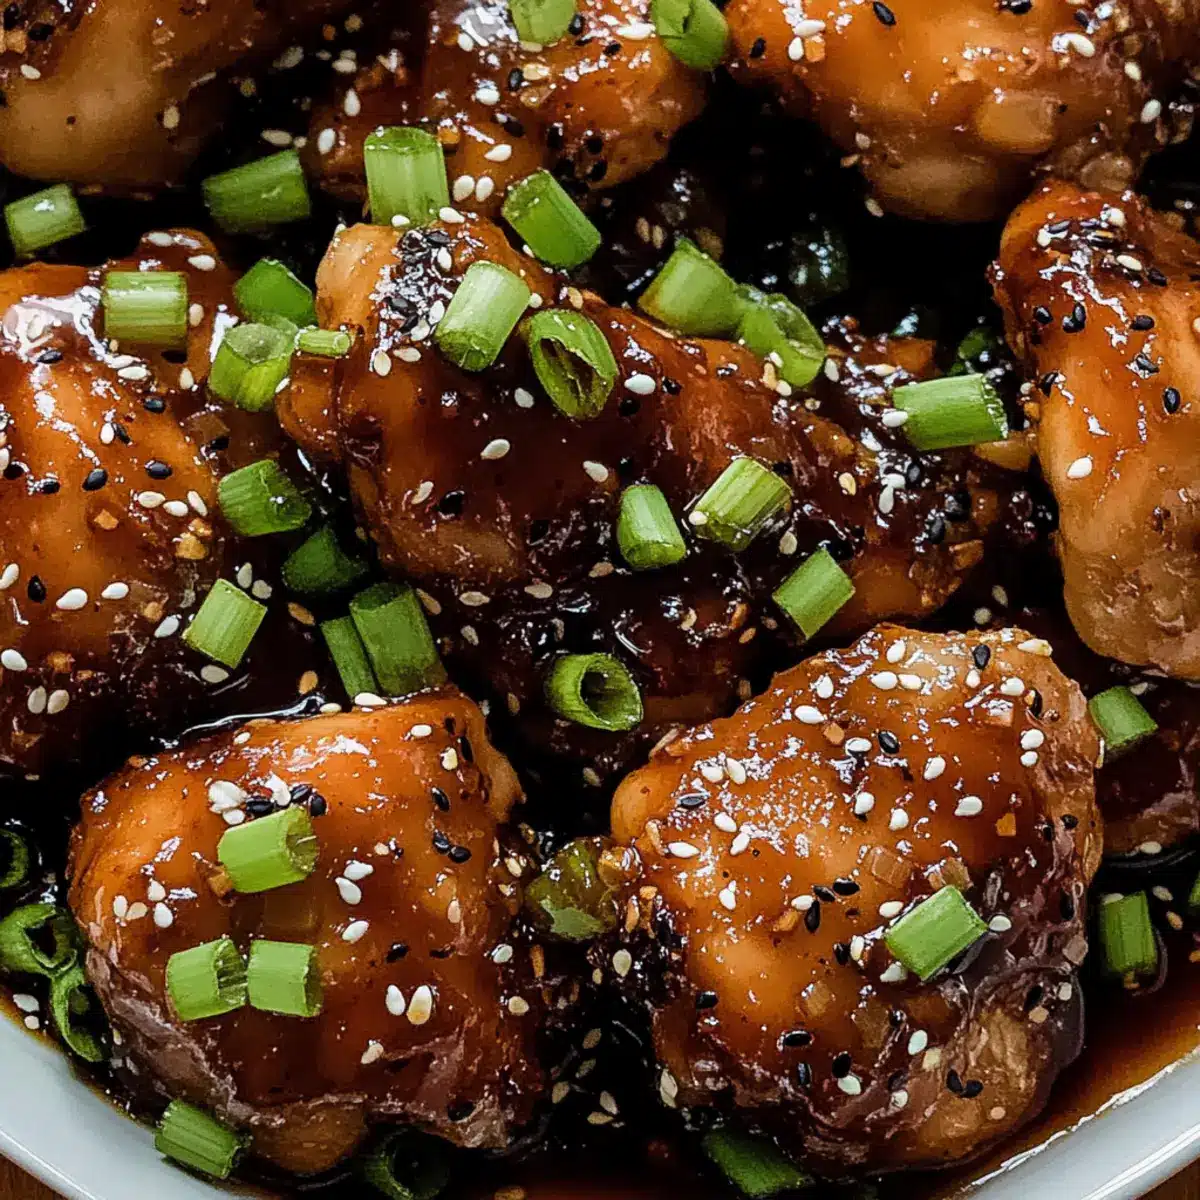
Step 14: Garnish and Serve
Stir in a splash of sesame oil for added depth and aroma. Serve your Soy Chicken Garlic Ginger immediately over a bed of cooked rice, garnished with freshly sliced green onions and a sprinkle of sesame seeds. This not only enhances the presentation but adds a fresh crunch, making your dish irresistible.
Make Ahead Options
These Soy Chicken Garlic Ginger is perfect for meal prep, saving you time on busy weeknights! You can marinate the chicken up to 24 hours in advance, allowing the flavors to meld beautifully. Simply combine the marinade ingredients, coat the chicken, and refrigerate it. For the sauce, prepare it up to 3 days ahead and store it in an airtight container in the refrigerator. To maintain quality, be sure to reheat the chicken and sauce gently to avoid drying them out. When you’re ready to serve, cook the marinated chicken until browned, add the sauce, and simmer for a restaurant-quality meal in minutes!
How to Store and Freeze Soy Chicken Garlic Ginger
Fridge: Store leftovers in an airtight container in the refrigerator for up to 3-4 days. When ready to eat, reheat in a skillet over medium heat until warmed through.
Freezer: You can freeze the Soy Chicken Garlic Ginger in an airtight container for up to 3 months. To reheat, thaw overnight in the fridge and reheat gently on the stove or microwave.
Reheating: For best results, reheat in a skillet to restore the sauce’s glossiness. If the sauce thickens too much, add a splash of water or chicken broth while heating.
Avoid Spoilage: Always ensure the chicken is cooled before storing to maintain freshness and prevent condensation in the container.
Soy Chicken Garlic Ginger Variations
Feel free to play around with these tasty twists to make this dish your own!
-
Spicy Kick: Add red pepper flakes or chili oil to ramp up the heat and wake up your taste buds. Spice levels can be a personal touch—just start small and taste as you go!
-
Sweet-Tangy Delight: Incorporate pineapple chunks into the dish to create a bright contrast. The sweetness beautifully balances the savory flavors, making every bite a delightful surprise.
-
Vegetarian Friendly: Replace chicken with tofu or tempeh for a vegetarian version. Just be sure to press the tofu beforehand to remove excess moisture and enhance its texture!
-
Creative Wraps: Serve the Soy Chicken in lettuce wraps or tacos for fun dining options. These can be a hit for gatherings or a casual dinner with friends.
-
Nutty Flavor: Drizzle in some peanut or almond butter while cooking for a nutty infusion. This not only adds creaminess but also makes the dish richer and heartier!
-
Vibrant Veggies: Toss in seasonal veggies like bell peppers or broccoli during cooking. They’ll not only add color but also enhance the nutritional value of your meal.
-
Citrus Zing: Squeeze in some fresh lime or lemon juice at the end for a zesty finish. The acidity brightens the dish and elevates all the flavors beautifully.
For more culinary inspiration, explore other delicious chicken recipes like my Garlic Parmesan Crockpot Chicken and Potatoes or try out Aromatic Garlic Chilli Noodles to add variety to your meal repertoire!
What to Serve with Soy Chicken Garlic Ginger?
Elevate your Soy Chicken Garlic Ginger meal with delicious sides and pairings that will excite the palate and complete the dining experience.
-
Steamed Broccoli:
Its crisp texture and slight bitterness provide a vibrant contrast to the savory, rich chicken, balancing out the flavors perfectly. -
Jasmine Rice:
This fragrant rice absorbs the flavorful sauce beautifully, making every bite a delightful blend of tastes and textures. -
Crispy Spring Rolls:
These crunchy bites add texture and a delightful touch of freshness, making them a fun starter or side dish to your meal. -
Stir-Fried Mixed Vegetables:
A colorful mix of bell peppers, carrots, and snap peas enliven the plate while introducing freshness and crunch to accompany the dish. -
Cucumber Salad:
The cool, refreshing crunch of cucumbers tossed in rice vinegar vinaigrette offers a delightful counterpoint to the warm, savory chicken. -
Mango Chutney:
A sweet and tangy accompaniment that enhances the rich flavors of the dish with fruity brightness, elevating each bite to new heights. -
Green Tea:
Its light earthy notes make for a perfect beverage pairing, cleansing the palate and enhancing the meal’s flavors without overwhelming them.
Dive into these pairings and experience a full-flavored family feast that brings the essence of Asian culinary delights right to your table!
Expert Tips for Soy Chicken Garlic Ginger
-
Fresh Ingredients Matter: Use fresh garlic and ginger for maximum flavor and aroma. Dried versions can’t replicate the vibrant taste of fresh ingredients.
-
Avoid Overcrowding: Cook the chicken in batches if necessary. Overcrowding the pan can steam the chicken rather than sear it, leaving it less flavorful.
-
Marinate Longer for Flavor: If time allows, marinate the chicken overnight. This enhances the flavor, making your Soy Chicken Garlic Ginger even more delicious.
-
Taste as You Go: Don’t hesitate to adjust the sauce while cooking. Adding a touch more honey or soy sauce can perfect the flavor according to your preference.
-
Thickening Is Key: Make sure the cornstarch slurry is fully dissolved before adding it to the sauce. Undissolved cornstarch can lead to clumps in your sauce.
Soy Chicken Garlic Ginger Recipe FAQs
How do I choose the best chicken for this recipe?
Opt for boneless, skinless chicken thighs for their juicy texture and flavor retention during cooking. When selecting, ensure the chicken pieces are uniform and free from any dark spots or unpleasant odor. Freshness is key, so ask your butcher for the freshest cut available.
How should I store leftovers of Soy Chicken Garlic Ginger?
Store any leftovers in an airtight container in the refrigerator for up to 3-4 days. It’s important to let the dish cool to room temperature before sealing it to avoid moisture buildup, which can cause spoilage. When ready to enjoy, simply reheat in a skillet over medium heat until warmed through.
Can I freeze Soy Chicken Garlic Ginger?
Absolutely! You can freeze the dish in an airtight container for up to 3 months. For the best texture, make sure to cool the chicken completely before freezing. When you’re ready to eat, thaw it overnight in the refrigerator, then reheat gently in a skillet, adding a bit of water or chicken broth if the sauce has thickened too much.
What can I do if the sauce turns out too thick?
If your sauce ends up thicker than desired, don’t worry! Just add a splash of water or chicken broth while gently reheating it in a skillet. Stir it in gradually until you achieve your desired consistency, allowing the flavors to blend again beautifully.
Are there any dietary considerations for this recipe?
Yes, the recipe is adaptable! For those with gluten sensitivities, use tamari instead of soy sauce. If you want a vegan version, substitute the chicken with tofu or tempeh and switch out the honey for maple syrup. Always check ingredients for allergens if serving to others, particularly anything related to soy or sesame.
How can I adjust the heat level in the Soy Chicken Garlic Ginger?
To customize the spice level, simply adjust the amount of red pepper flakes or opt for chili oil during cooking. If you’re looking for a milder version, start with fewer flakes and gradually add until you reach your desired level of warmth. The more the merrier for heat enthusiasts!
Savory Soy Chicken Garlic Ginger: Your Weeknight Flavor Fix
Ingredients
Equipment
Method
- Prepare Marinade: Whisk together soy sauce, rice vinegar, grated ginger, minced garlic, brown sugar, sesame oil, red pepper flakes, and cornstarch until smooth.
- Marinate Chicken: Place chicken thighs in a resealable bag or bowl, pour marinade over, seal or cover, and refrigerate for at least 30 minutes.
- Combine Sauce Ingredients: In a separate bowl, whisk together soy sauce, chicken broth, honey or maple syrup, rice vinegar, grated ginger, and minced garlic.
- Prepare Slurry: Mix cornstarch with a few tablespoons of water until smooth.
- Heat Oil: In a skillet, heat vegetable oil over medium-high heat until shimmering.
- Cook Chicken: Add marinated chicken to skillet, cook for 3-4 minutes per side until browned and cooked through.
- Remove Chicken: Transfer cooked chicken to a plate and let it rest.
- Add Sauce to Skillet: Pour sauce into the same skillet, scraping up browned bits.
- Simmer Sauce: Bring sauce to a gentle simmer for 2-3 minutes.
- Thicken Sauce: Whisk in the cornstarch slurry, stirring until desired thickness is reached.
- Adjust Seasoning: Taste sauce and adjust flavors as needed.
- Combine Chicken and Sauce: Return chicken to skillet and toss to coat.
- Heat Through: Simmer for 1-2 minutes to heat the chicken.
- Garnish and Serve: Stir in sesame oil and serve over cooked rice, garnished with green onions and sesame seeds.
Leave a Reply