
As I watched my daughter devour yet another store-bought candy, I felt a creative spark. It was time to dive into the kitchen and whip up a healthier alternative—my homemade strawberry gummies! Bursting with real fruit flavor, these delightful candies aren’t just a treat; they also provide a fun and nutritious twist that your family will love. The best part? They’re incredibly quick to make, requiring less than five minutes of hands-on time. Whether you’re a busy parent looking for an easy snack or someone who enjoys homemade treats, this recipe will become your go-to. With options for both traditional gelatin and a vegan alternative, everyone can indulge in this chewy goodness. Could you imagine the joy of sharing these vibrant, fruity snacks with your loved ones? Let’s get started!
Why Make Homemade Strawberry Gummies?
Healthier Option: These homemade strawberry gummies are made with real fruit, offering a nutritious alternative to store-bought candies packed with sugar and preservatives.
Quick and Easy: Whip them up in less than 5 minutes of active time, making them perfect for busy households or spontaneous snack cravings.
Versatility Galore: Customize your gummies with different fruits or sweeteners to suit your taste and dietary needs, whether vegan or gluten-free.
Endless Fun: Kids will delight in popping out these vibrant snacks from silicone molds, turning snack time into a fun kitchen activity!
Satisfying Sweetness: Bursting with authentic strawberry flavor, they provide that enjoyable chewy texture we all love, leaving you and your family completely satisfied.
If you love fruity treats, make sure to check out our Strawberry Crunch Cookies or treat yourself to a refreshing Strawberry Banana Pudding.
Homemade Strawberry Gummies Ingredients
• • Discover the essentials for your homemade strawberry gummies!
For the Strawberry Layer
- Fresh Strawberries – The star of the show, delivering natural sweetness and vibrant color; feel free to swap in other berries for a tasty twist!
- Gelatin or Agar Agar Powder – This ingredient is crucial for setting the gummies; use gelatin for the classic option or agar agar for a vegan-friendly treat.
- Honey or Sweetener – Adds just the right touch of sweetness; try maple syrup or agave if you prefer a vegan alternative.
For the Cream Layer
- Cream (Coconut Cream or Yogurt) – Provides a luscious texture and rich flavor; dairy or non-dairy options work beautifully, depending on your preference.
Step‑by‑Step Instructions for Homemade Strawberry Gummies
Step 1: Prepare the Strawberry Puree
Begin by washing 2 cups of fresh strawberries and removing the stems. Place the strawberries in a blender, blend until smooth, and if desired, strain the mixture through a fine mesh sieve to achieve a clearer puree. You’ll need about 1 cup of pureed strawberries as the base for your delicious homemade strawberry gummies.
Step 2: Heat the Mixture
In a medium saucepan over low heat, combine the strawberry puree, 2 tablespoons of gelatin (or agar agar for a vegan option), and 1 to 2 tablespoons of honey (or the sweetener of your choice). Stir gently for about 3–5 minutes until the mixture thickens and the gelatin completely dissolves. The mixture should be smooth and glossy, with no lumps remaining.
Step 3: Mold the Gummies
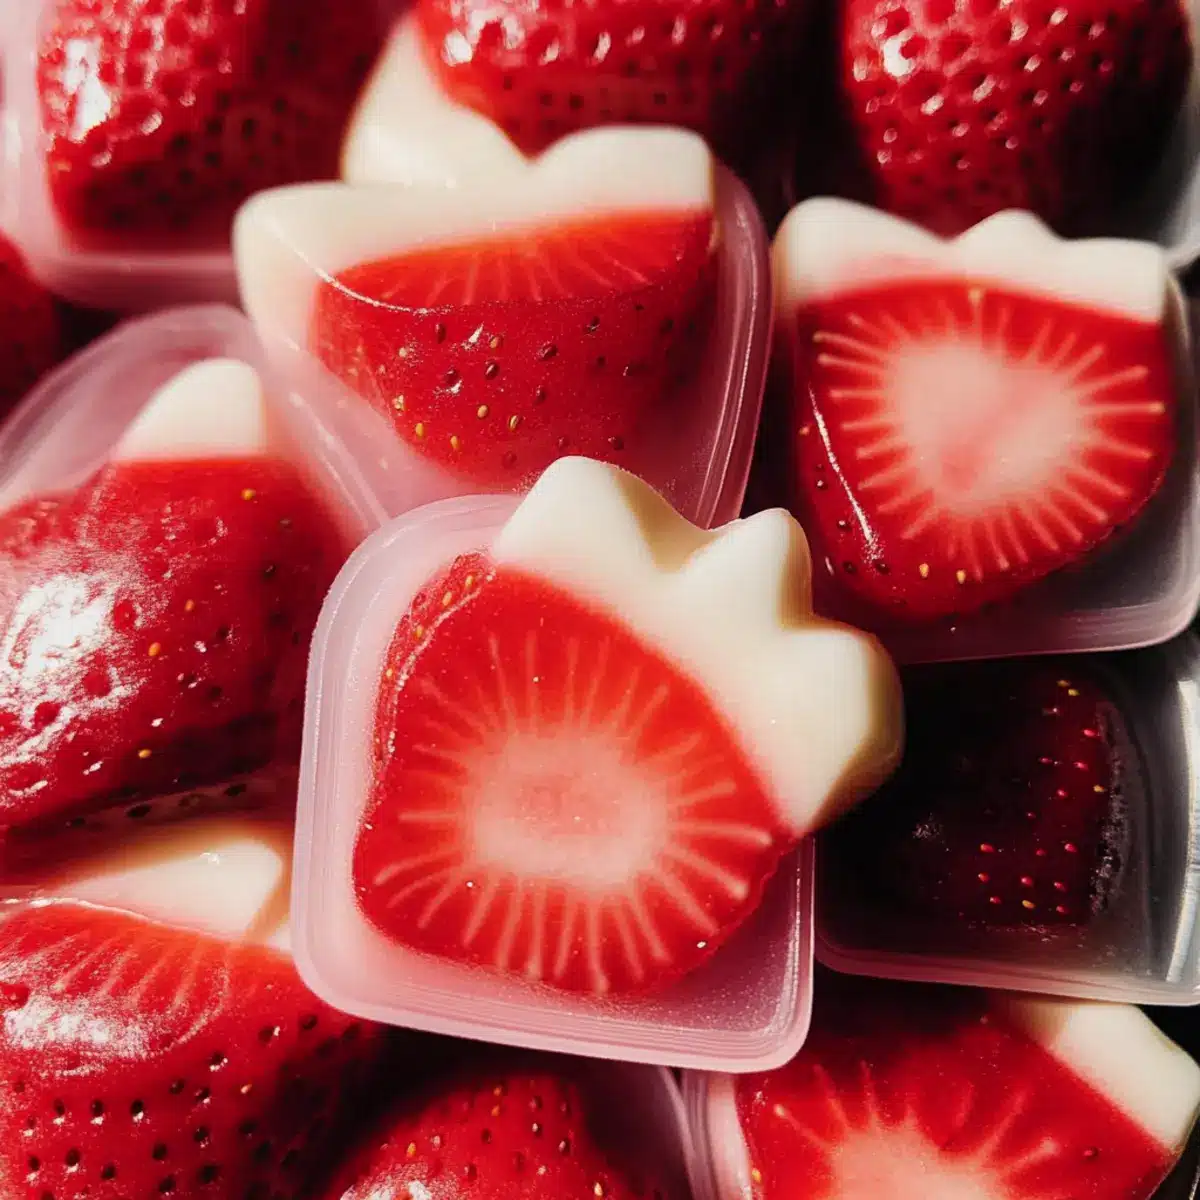
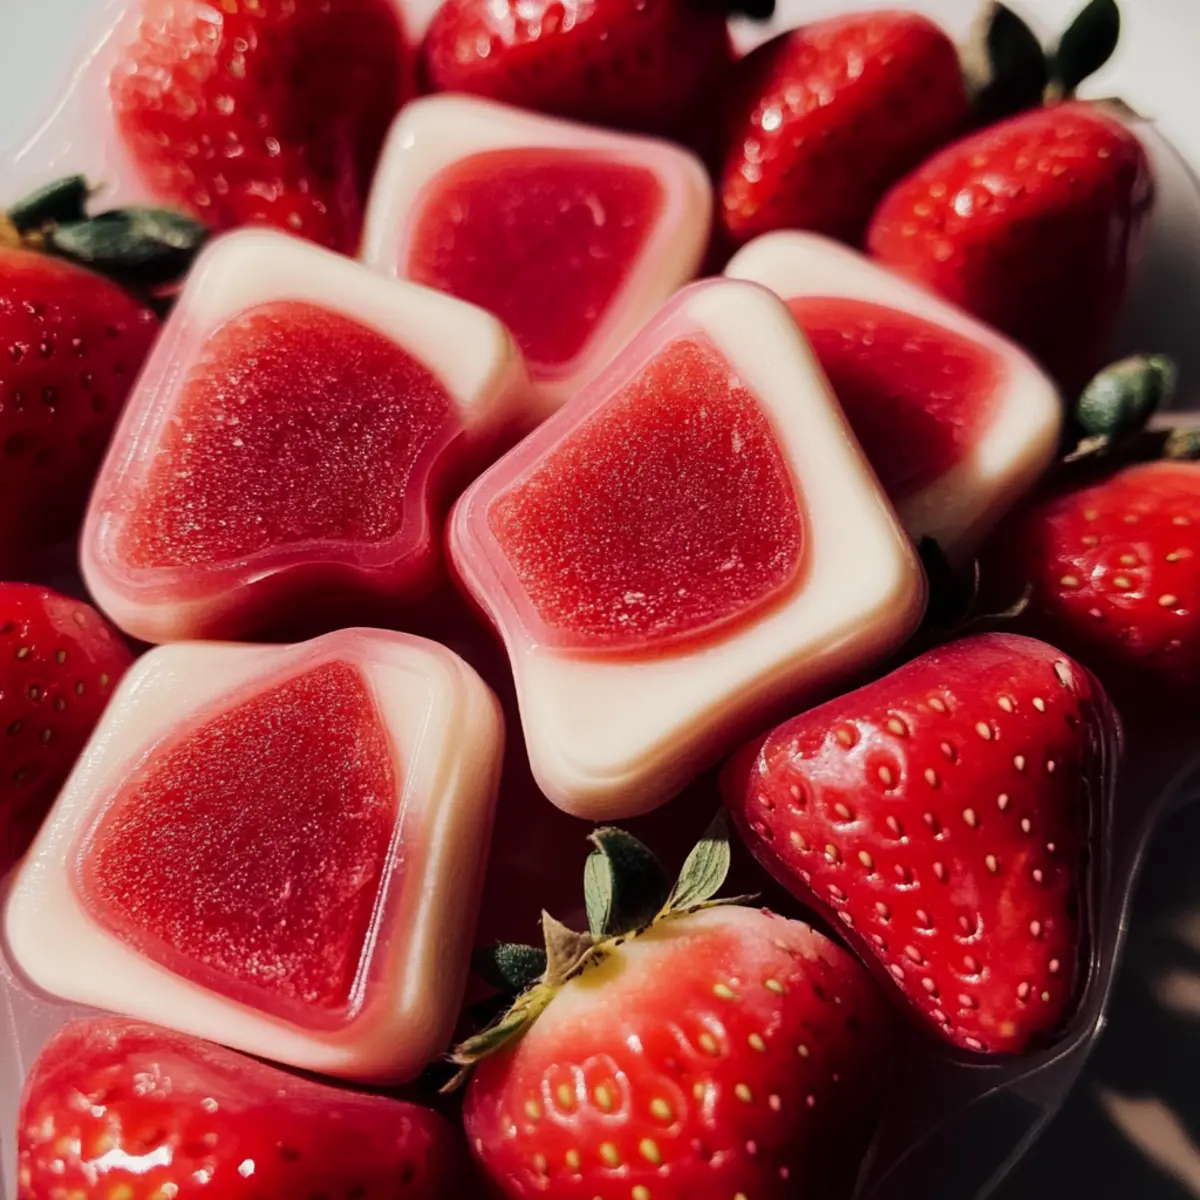
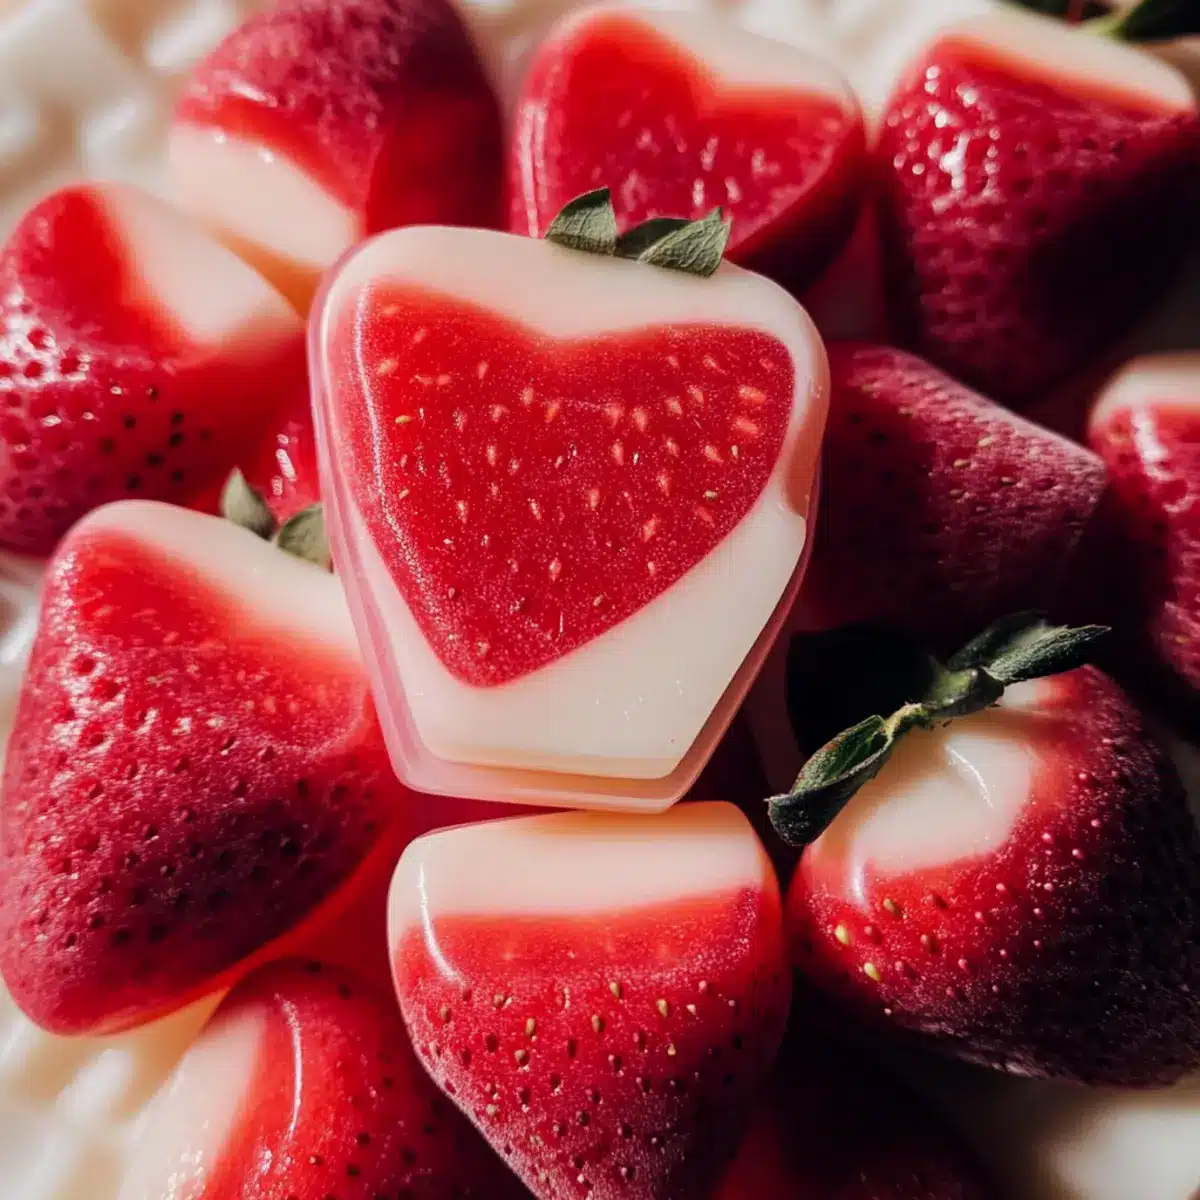
Once your strawberry mixture is ready, carefully pour it into silicone molds, filling each cavity to the top. Gently tap the molds on the counter to remove any air bubbles and ensure an even distribution. Pop these into the refrigerator and allow them to set for about 4 hours until firm and chewy—this will be the scrumptious strawberry layer of your gummies.
Step 4: Create the Cream Layer
While the strawberry layer is setting, prepare the cream layer. In a bowl, mix ½ cup of coconut cream (or yogurt) with 1 tablespoon of sweetener of your choice and whisk until blended. If you’d like, you can add a bit of vanilla extract for extra flavor. Return to the saucepan to warm over low heat, stirring for about 2–3 minutes until everything is combined and smooth.
Step 5: Pour and Set the Cream Layer
Once the strawberry layer has set, carefully pour the cream mixture on top of each gummy mold, filling just to the top. Gently shake the molds to remove any air bubbles and create a smooth surface. Return the molds to the refrigerator and let them chill for another 3 to 4 hours, ensuring both layers are perfectly set.
Step 6: Unmold and Enjoy
After both layers have fully set, gently remove the gummies from the silicone molds by pressing up from the bottom. They should pop out easily, revealing your vibrant homemade strawberry gummies. Place them on a plate and let them sit at room temperature for a few minutes before serving. Now, enjoy these delightful and nutritious treats with your loved ones!

Homemade Strawberry Gummies Variations
Explore the endless possibilities to make these homemade strawberry gummies your own!
-
Berry Blend: Combine strawberries with blueberries or raspberries for a vibrant mix of flavors.
-
Citrus Zing: Add a splash of lime or lemon juice to your strawberry puree for a refreshing tang.
-
Creamy Delight: Substitute regular cream with whipped coconut cream for a dairy-free, light texture that everyone will adore.
-
Honey-Free Option: Use agave syrup or stevia to sweeten your gummies for a sugar-free treat that’s perfect for any diet.
-
Nutty Flavor: Sprinkle in a touch of almond or vanilla extract for an extra layer of warmth and depth in your gummies.
-
Layered Look: Alternate purees in the molds using different fruits for a colorful, eye-catching treat that catches the eye as much as the taste buds.
-
Spicy Kick: For the adventurous, add a pinch of chili powder to the strawberry layer for a surprising and delightful heat.
Who can resist a fun twist like these? If you enjoy fruity delights, don’t forget to try out our delightful Strawberry Shortcake Sushi for dessert inspiration!
Storage Tips for Homemade Strawberry Gummies
Fridge: Store your homemade strawberry gummies in an airtight container in the refrigerator to keep them fresh for up to 2 weeks.
Freezer: For longer storage, freeze the gummies in a single layer on a baking sheet, then transfer them to a freezer-safe bag for up to 3 months.
Room Temperature: If you plan to enjoy the gummies within a day, they can be left at room temperature in a cool, dry place, but they may lose their chewy texture over time.
Reheating: If the gummies become too firm after freezing, let them sit at room temperature for about 10 minutes before enjoying for the best texture.
What to Serve with Easy Strawberry Gummies?
Create a delightful feast that complements your vibrant, chewy treats, perfect for sharing with loved ones.
-
Creamy Coconut Yogurt:
Pair your gummies with a bowl of creamy coconut yogurt for a refreshing contrast, offering a perfect balance of sweetness and creaminess. -
Fruit Salad Medley:
A colorful fruit salad with a combination of berries and tropical fruits enhances the fruity flavor of the gummies while bringing a delicious, juicy texture. -
Nut Butter Dippers:
Serve with almond or peanut butter for a comforting dip. The nutty flavors combined with the sweet gummies create an irresistible snack duo. -
Homemade Granola Bars:
Crunchy, chewy granola bars provide a hearty complement, taking snack time to the next level with textures and flavors that harmonize beautifully. -
Sparkling Lemonade:
A glass of refreshing sparkling lemonade brightens the palate and adds a fizzy twist that will delight friends and family. -
Chocolate-Dipped Strawberries:
These luxurious bites will elevate your dessert table, pairing rich chocolate with the vibrant strawberry flavor of your gummies for a heavenly experience.
Expert Tips for Homemade Strawberry Gummies
-
Quality Ingredients: Use fresh, ripe strawberries for the best flavor. This makes your homemade strawberry gummies irresistibly sweet and vibrant.
-
Dissolve Completely: Ensure your gelatin or agar agar is fully dissolved while heating. This prevents lumps and guarantees a smooth texture in your gummies.
-
Choose the Right Molds: Opt for high-quality silicone molds, as they allow for easy removal and maintain the gummies’ shape without sticking.
-
Cooling Time: Don’t rush the chilling process; letting them set for the full 4 hours ensures the perfect chewy consistency throughout your homemade strawberry gummies.
-
Storing Wisely: Keep your gummies in an airtight container in the fridge. This helps maintain their freshness and deliciousness for up to 2 weeks.
Make Ahead Options
These homemade strawberry gummies are perfect for meal prep enthusiasts! You can prepare the strawberry layer up to 24 hours in advance by blending the fresh strawberries and combining them with gelatin or agar. Once the mixture is fully set in the molds, store the molds in the refrigerator until you’re ready to add the cream layer. For the cream layer, mix it up and refrigerate separately for up to 3 days before pouring it over the already set strawberry layer. Just be sure to keep everything in airtight containers to maintain freshness and prevent any flavors from mingling. When ready to serve, simply pour the cream layer and allow it to set as directed, ensuring that you have delicious, chewy treats with minimum effort!
Homemade Strawberry Gummies Recipe FAQs
What type of strawberries should I use for my homemade strawberry gummies?
Absolutely! Using fresh, ripe strawberries is key for the best flavor in your homemade strawberry gummies. Look for bright red strawberries that are firm and free from blemishes. If strawberries aren’t in season, you can also substitute them with other berries like raspberries or blueberries for exciting flavor variations.
How should I store my homemade strawberry gummies?
Great question! Store your homemade strawberry gummies in an airtight container in the fridge, and they’ll stay fresh for up to 2 weeks. If you want to keep them for longer, consider freezing them in a single layer on a baking sheet. Once they’re firm, transfer them to a freezer-safe bag where they’ll be good for about 3 months!
Can I freeze my homemade strawberry gummies?
Yes, indeed! To freeze your gummies, first, lay them out in a single layer on a baking sheet and pop them in the freezer until they’re firm. After that, transfer them to a freezer-safe bag or container for long-term storage. When you’re ready to enjoy them, just let them sit at room temperature for about 10 minutes to regain their delightful chewiness.
What should I do if my gummies are too sticky?
No worries at all! If your homemade strawberry gummies turn out too sticky, it often means the gelatin or agar agar was not fully dissolved or the mixture may need a bit more time to set. I recommend heating the mixture gently and stirring continuously, then allowing them to chill for the full 4 hours. If they’re still sticky once set, try dusting them lightly with cornstarch or powdered sugar to help reduce the stickiness.
Are homemade strawberry gummies safe for kids with allergies?
Very important question! These homemade strawberry gummies can be made allergy-friendly by selecting ingredients carefully. Use vegan gelatin or agar agar for a gluten-free option, and ensure that any sweeteners are suitable for your child’s dietary needs. Always double-check the ingredient list for allergens, especially if sharing with friends. If in doubt, consult with a healthcare provider to ensure they’re safe!
Homemade Strawberry Gummies: Sweet, Chewy, and Fun!
Ingredients
Equipment
Method
- Prepare the Strawberry Puree: Wash 2 cups of fresh strawberries, remove the stems, and blend until smooth. Strain if desired to achieve a clearer puree.
- Heat the Mixture: In a saucepan over low heat, combine strawberry puree, 2 tablespoons of gelatin (or agar agar), and 1 to 2 tablespoons of honey. Stir for 3–5 minutes until thickened.
- Mold the Gummies: Pour the strawberry mixture into silicone molds, fill to the top, and refrigerate for about 4 hours until firm.
- Create the Cream Layer: Mix 1/2 cup of coconut cream with 1 tablespoon of sweetener in a bowl and whisk until blended. Warm in the saucepan for 2–3 minutes.
- Pour and Set the Cream Layer: Once the strawberry layer has set, pour the cream mixture on top and refrigerate for another 3 to 4 hours.
- Unmold and Enjoy: Gently remove the gummies from the molds and let sit at room temperature before serving.
Leave a Reply