
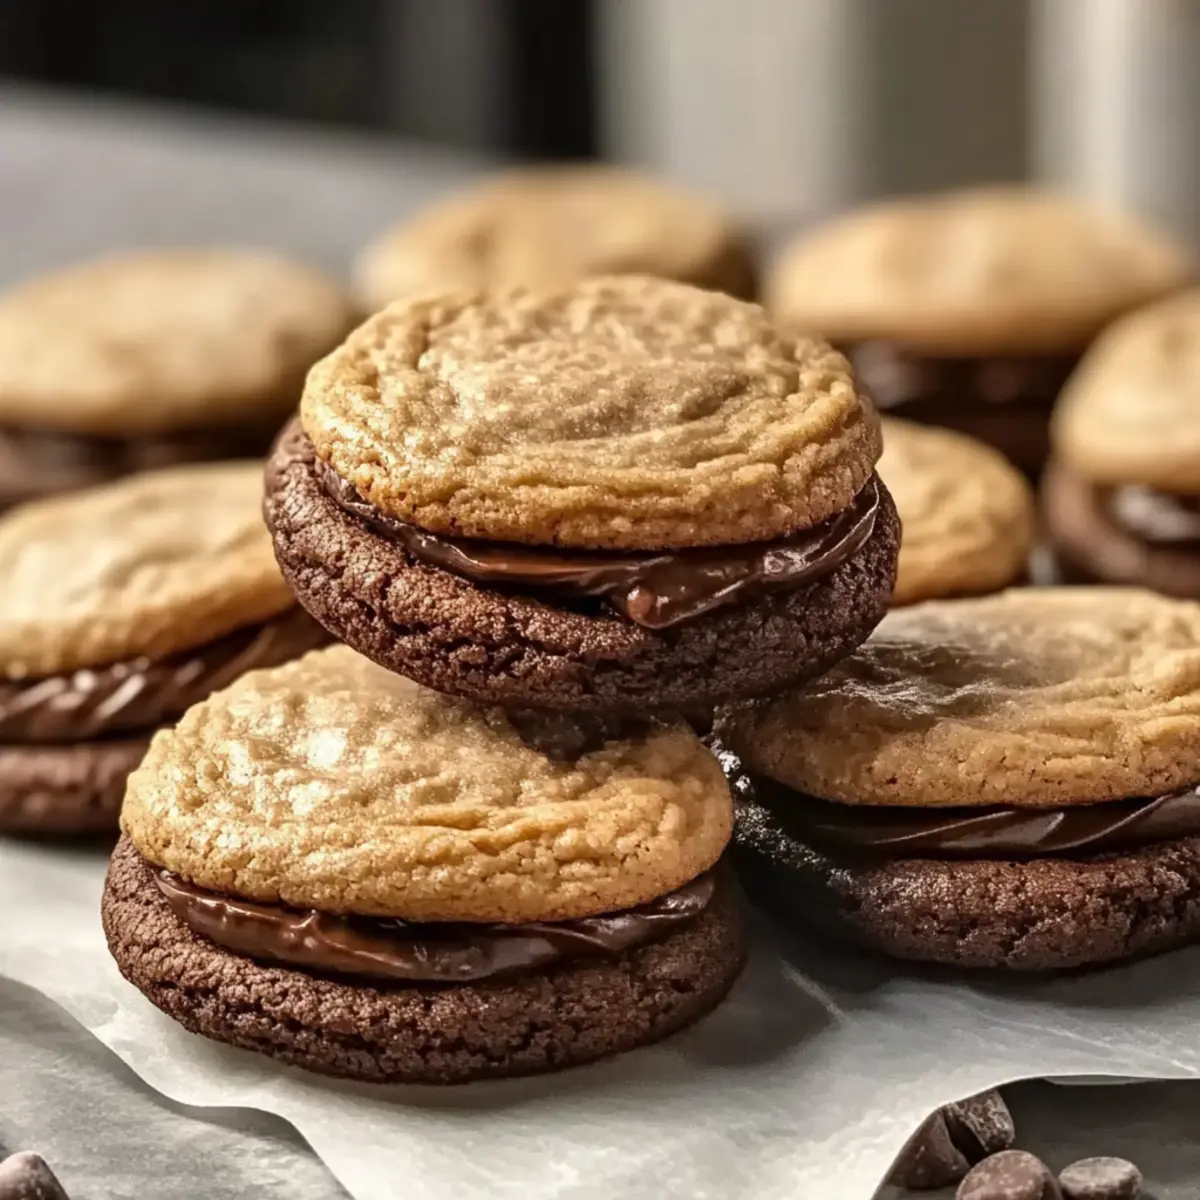
As the scent of freshly baked cookies fills my kitchen, I can’t help but feel a wave of nostalgia wash over me. Today, I’m thrilled to share my recipe for Vegan Chocolate Chip Cookies—a delightful treat that proves indulgence doesn’t have to sacrifice health. These cookies are not only gluten-free and nut-free, making them suitable for various dietary needs, but they also require minimal prep time, allowing you to enjoy homemade goodness without the hassle. Each bite offers a soft and chewy texture combined with rich chocolatey bliss, perfect for anyone sharing them around the family table or enjoying solo with a warm cup of tea. Curious about how to whip up these delectable cookies in no time? Let’s dive right into the recipe!
Why Are These Cookies a Must-Try?
Irresistible Flavor: Each cookie is perfectly infused with rich chocolate goodness, making them a treat everyone will love.
Quick and Easy: With a straightforward recipe that takes only minutes to prepare, you’ll have warm cookies ready in no time!
Diet-Friendly Options: Whether you’re vegan, gluten-free, or nut-free, these cookies can adapt to your needs without compromising taste.
Mouthwatering Texture: Enjoy the delightful balance of softness and chewiness that reminds you of traditional chocolate chip cookies.
Versatile Add-Ins: Feel free to get creative! Add chopped nuts or dried fruits for an extra layer of flavor, or check out my Brown Butter Coffee cookies for a different twist.
You’ll find these vegan treats are not just cookies; they’re the perfect companion to your afternoon coffee or a sweet dessert for gatherings!
Chocolate Chip Cookie Ingredients
• Dive into baking with this simple yet delightful recipe today!
For the Cookie Base
- Almond Flour – Provides a gluten-free base with a light texture; swap for oat flour for a nut-free option.
- Coconut Sugar – Adds sweetness with a hint of caramel flavor; brown sugar works as a substitute for a similar result.
- Coconut Oil – Acts as the fat component for moisture; feel free to use any neutral oil in a pinch.
- Flaxseed Meal – Serves as a binder in place of eggs; mix with water to activate or use ground chia seeds instead.
- Baking Soda – Essential for that soft and chewy texture; ensure it’s fresh for optimal results.
- Vegan Chocolate Chips – Bursting with rich chocolate flavor; dark chocolate chips or chopped chocolate bars are fantastic alternatives.
- Vanilla Extract – Elevates overall flavor; using pure vanilla extract will bring out the best taste.
For Serving Suggestions
- Almond Milk – Pairs perfectly with these cookies for a refreshing treat.
- Dairy-Free Ice Cream – Serve them alongside a scoop of ice cream for an indulgent dessert experience.
With these ingredients in hand, you’re just moments away from delicious chocolate chip cookies that everyone can enjoy!
Step‑by‑Step Instructions for Vegan Chocolate Chip Cookies
Step 1: Preheat the Oven
Begin by preheating your oven to 350°F (175°C). This step is crucial as it ensures the perfect baking environment for your Vegan Chocolate Chip Cookies. While the oven is heating up, prepare your baking sheet by lining it with parchment paper to prevent the cookies from sticking.
Step 2: Mix Dry Ingredients
In a large mixing bowl, whisk together the almond flour, coconut sugar, baking soda, and flaxseed meal. Make sure there are no lumps for an even mixture, as this will contribute to the light texture of your cookies. Take a moment to enjoy the aroma of these wholesome ingredients coming together!
Step 3: Combine Wet Ingredients
In another bowl, melt the coconut oil until it’s liquid and mix it with the vanilla extract. Stir until well combined, allowing the flavors to meld. This step is essential as the melted oil will help achieve the moist, rich texture we’re aiming for in our Vegan Chocolate Chip Cookies.
Step 4: Combine Wet and Dry
Pour the wet mixture into the dry ingredients and stir until the batter is well combined. Don’t overmix—just fold gently until you see no more dry flour. Once combined, fold in the vegan chocolate chips which will add those irresistible chocolatey bursts to your delightful cookies.
Step 5: Shape Cookies
Using a cookie scoop or tablespoon, drop generous dollops of the cookie batter onto the prepared baking sheet, ensuring they are spaced apart. Flatten them slightly with the back of the scoop or your hand, as they will spread a little while baking.
Step 6: Bake
Place the baking sheet in the preheated oven and bake for 10 to 12 minutes, or until the edges are lightly golden. Keep an eye on them—once they puff up and start to crack, they’re almost ready! This is when the delicious aroma of Vegan Chocolate Chip Cookies will fill your kitchen.
Step 7: Cool
Once baked, remove the cookies from the oven and allow them to cool on the baking sheet for 5 minutes. This resting time helps them firm up a bit more. Afterward, transfer them to a wire rack to cool completely. As they cool, you’ll notice they become soft and chewy, just as everyone loves!
Make Ahead Options
These Vegan Chocolate Chip Cookies are a fantastic choice for meal prep enthusiasts! You can prepare the dough up to 24 hours in advance and refrigerate it in an airtight container to keep it fresh and prevent browning. Alternatively, you can scoop the cookie dough onto a baking sheet lined with parchment paper and freeze them for up to 3 months. Just be sure to separate the cookies to avoid sticking. When you’re ready to bake, simply place the frozen dough straight into the oven (adding an extra minute or two to the baking time), and you’ll have delicious, freshly baked cookies in no time. These make-ahead tips save you precious moments on busy weeknights while ensuring your cookies are just as indulgent and chewy.
Storage Tips for Vegan Chocolate Chip Cookies
-
Room Temperature: Store cookies in an airtight container at room temperature for up to 1 week. This keeps them fresh and chewy, perfect for sharing or enjoying solo.
-
Freezer: For longer storage, freeze baked cookies in a single layer on a baking sheet. Once frozen solid, transfer them to a freezer-safe bag or container for up to 3 months.
-
Reheating: To enjoy your Vegan Chocolate Chip Cookies warm, simply microwave for 10–15 seconds. This brings back that fresh-baked taste, making them a delightful treat any time!
-
Airtight Guidance: For best results, make sure your storage containers are completely airtight to prevent moisture and maintain the optimal texture of your cookies.
Expert Tips for Vegan Chocolate Chip Cookies
-
Accurate Measurements: Use a kitchen scale to measure almond flour accurately; too much can lead to dry cookies.
-
Cooling Time: Allow cookies to cool on the baking sheet for at least 5 minutes before transferring them. This prevents them from breaking apart.
-
Baking Sheet Prep: Line your baking sheet with parchment paper to avoid sticking and make cleanup a breeze. A well-prepared surface is key for perfect cookies.
-
Substitution Caution: When swapping ingredients, ensure you use quantities suggested for alternatives; this helps maintain the balance of flavors and textures in your vegan chocolate chip cookies.
-
Storage Tips: Store in an airtight container at room temperature for up to a week and freeze for longer shelf life to enjoy later!
Chocolate Chip Cookie Variations
Feel free to take this recipe to new heights by adding your personal touch!
- Nut-Free: Substitute almond flour with oat flour to make a delicious nut-free version that everyone can enjoy.
- Brown Sugar: Replace coconut sugar with brown sugar for a richer, more caramel-like sweetness in every bite.
- Chia Seeds: Swap flaxseed meal with ground chia seeds for a different binding option that works equally well.
- Spice it Up: Add a pinch of cinnamon or nutmeg for a warm, cozy flavor that pairs beautifully with chocolate.
- Chunky Style: Incorporate chopped nuts or dried fruits alongside the chocolate chips for exciting textures and flavors.
- Coconut Delight: For a tropical twist, incorporate unsweetened shredded coconut for a chewy texture that complements the chocolate.
If you’re looking for more baking inspiration, check out my recipe for Brown Butter Coffee cookies—it’s a delightful way to elevate your dessert game!
- Sea Salt Garnish: Sprinkle flaky sea salt on top right before baking for that beautiful sweet and salty combination.
With these variations, you’re set to create cookies that are not only delicious but uniquely yours! Enjoy experimenting!
What to Serve with Vegan Gluten-Free Chocolate Chip Cookies
Indulging in freshly baked cookies opens up a world of delightful pairings to elevate your snack time experience.
-
Creamy Almond Milk: This nutty beverage complements the cookies’ sweetness perfectly, adding a refreshing contrast to each bite.
-
Dairy-Free Ice Cream: Serve a scoop of your favorite dairy-free flavor alongside. The cold, creamy texture contrasts beautifully with the warm cookies.
-
Fresh Berries: A handful of juicy strawberries or blueberries brings a burst of tartness that balances the rich chocolate perfectly.
-
Coconut Whipped Cream: Light and airy, this dairy-free topping adds a tropical twist that enhances the cookie’s coconut undertones.
Savor the delightful sweetness of these cookies alongside a cup of robust coffee for an indulgent afternoon treat. The bitterness of the coffee wonderfully contrasts with the rich chocolate, making each bite irresistible!
Vegan Chocolate Chip Cookies Recipe FAQs
How do I choose the right almond flour?
Absolutely! When selecting almond flour, look for finely ground almond flour, as it provides the best texture for your cookies. Check the packaging for freshness, and avoid any brands with dark spots, which indicate that the flour may be rancid. If you need a nut-free option, oat flour is a fantastic substitute.
What is the best way to store these cookies?
To keep your Vegan Chocolate Chip Cookies fresh, store them in an airtight container at room temperature for up to 1 week. For long-term storage, freeze them in a single layer on a baking sheet until solid, then transfer to a freezer-safe bag or container. They can last up to 3 months frozen, making them a quick treat to defrost!
Can I freeze the cookie dough before baking?
Yes, you can! To freeze the dough, scoop individual cookie portions onto a lined baking sheet and freeze until solid. Once frozen, transfer the dough balls to a freezer-safe bag. When you’re ready to bake, simply add a couple of extra minutes to the baking time when using frozen dough!
Why are my cookies spreading too much?
Very important! If your cookies are spreading excessively, it could be due to a couple of reasons: either the dough is too warm when it goes into the oven or the flour measurement is off. To avoid this, chill the cookie dough for about 30 minutes before baking, and always use a kitchen scale to measure your almond flour accurately!
Are these cookies safe for people with allergies?
Absolutely! This recipe is vegan, gluten-free, and nut-free if you use oat flour instead of almond flour. However, always double-check the labels on your ingredients, especially the chocolate chips, for any potential allergens. If you’re serving others, it’s a great idea to ask about their dietary restrictions beforehand!
How do I know when my cookies are done baking?
To tell if the cookies are perfectly baked, look for a lightly golden edge, and they should have puffed up and slightly cracked on top. Bake them for 10-12 minutes, but keep a close eye in the last couple of minutes to avoid overbaking. A little underbaked is often better, as they’ll firm up while cooling!
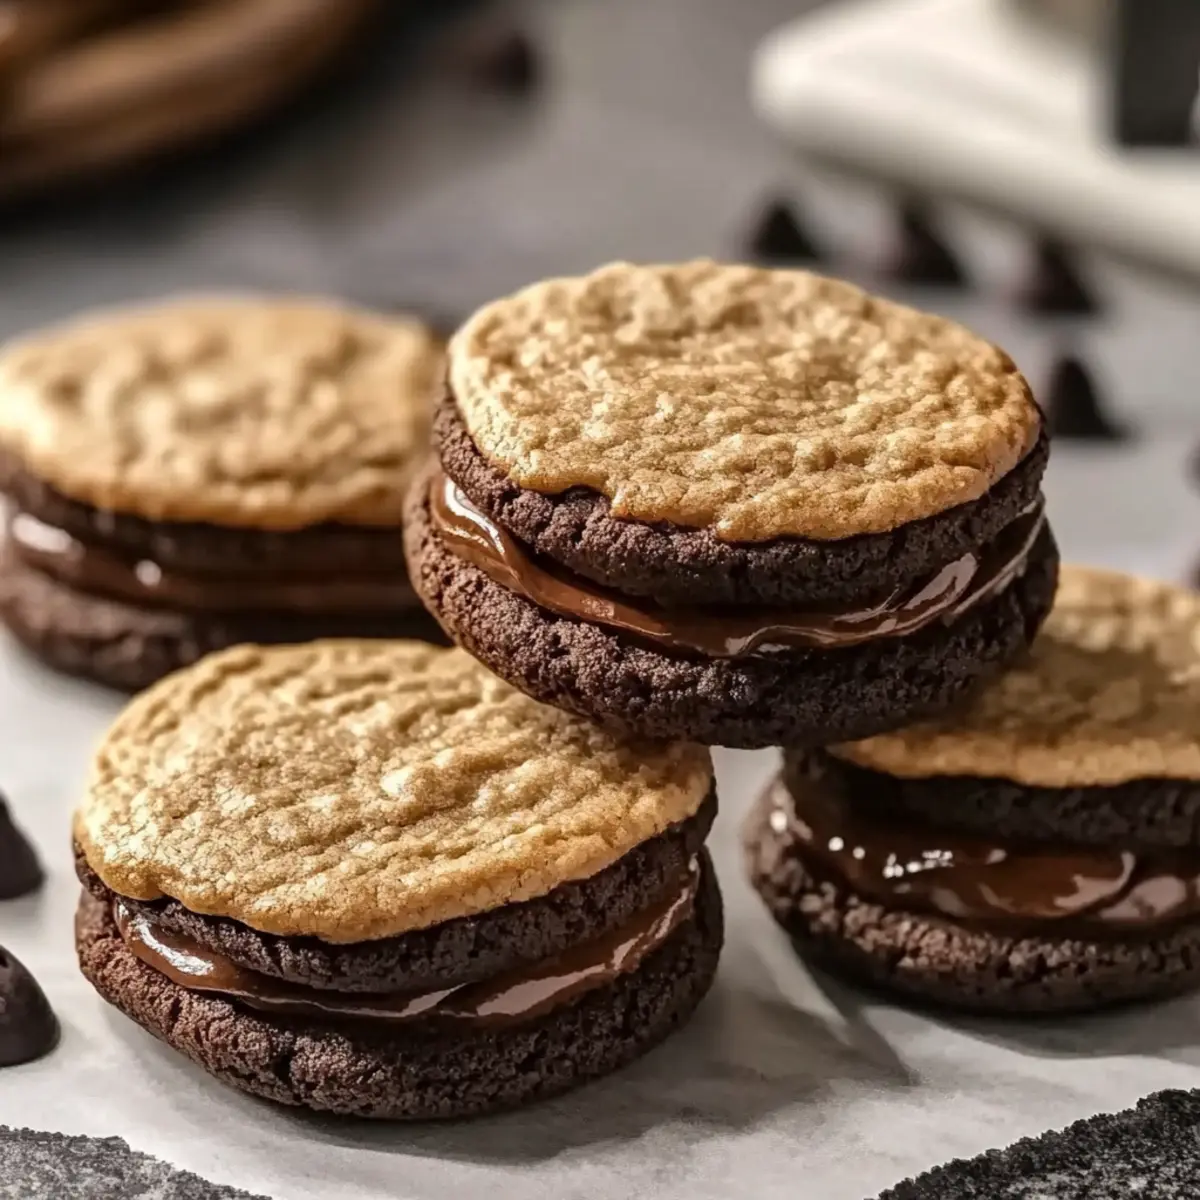
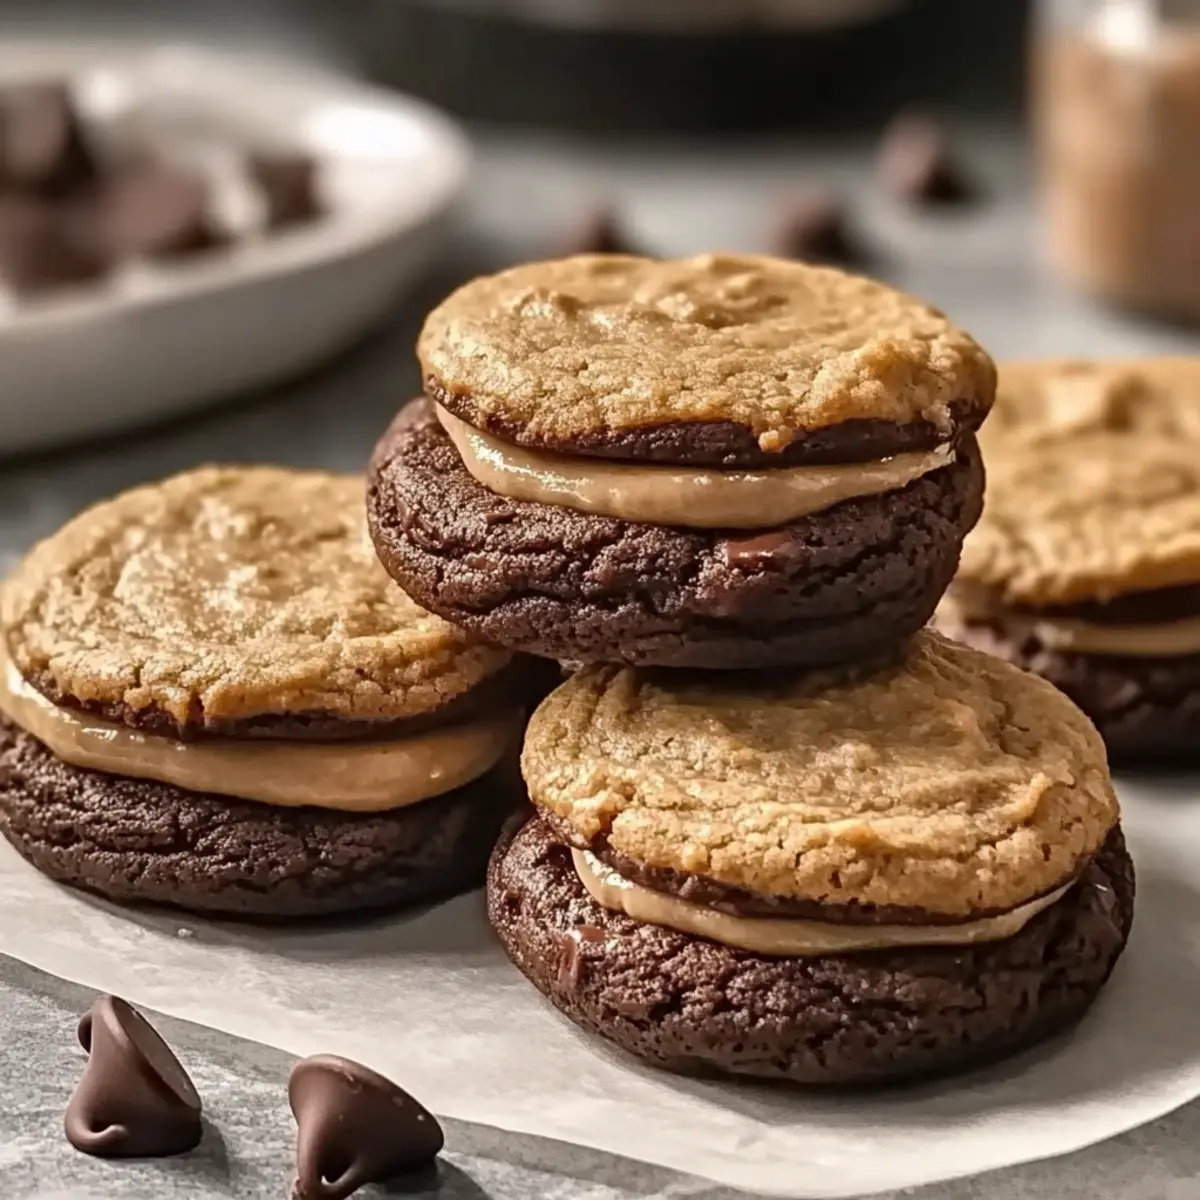
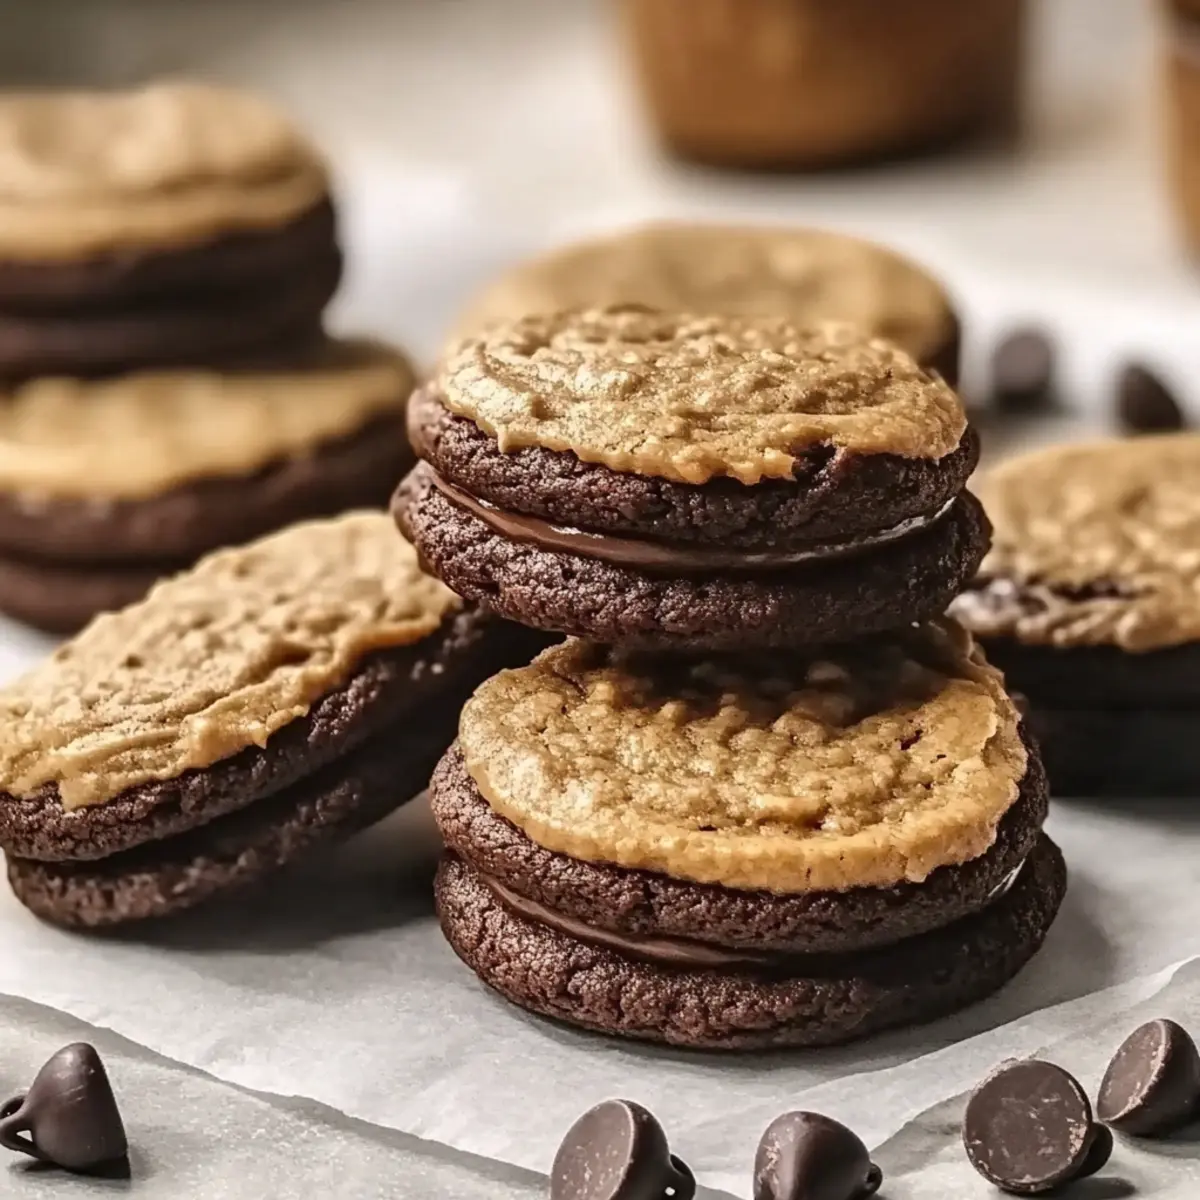
Moist Chocolate Coffee Whoopie Pies to Delight Your Taste Buds
Ingredients
Equipment
Method
- Preheat your oven to 350°F (175°C) and prepare your baking sheet with parchment paper.
- In a large mixing bowl, whisk together almond flour, coconut sugar, baking soda, and flaxseed meal until well combined.
- In another bowl, melt coconut oil and mix it with vanilla extract.
- Combine the wet mixture into the dry ingredients and fold in the vegan chocolate chips gently.
- Drop the cookie batter onto the baking sheet, ensuring they have space to spread, and flatten slightly.
- Bake for 10 to 12 minutes until the edges are golden and let cool for 5 minutes on the sheet before transferring to a wire rack.
Leave a Reply