
On sweltering summer afternoons, nothing beats the call of a sweet and icy treat. That’s where my 3-Ingredient Healthy Peanut Butter Buster Bars come to the rescue! These delightful bars not only satisfy those chocolate and peanut butter cravings without the guilt—they’re also packed with over 15 grams of protein and are gluten-free to boot. With just three primary ingredients, this no-bake marvel makes indulging feel effortless and speedy. You can enjoy them as a refreshing dessert on hot days or a post-workout boost. Have dietary restrictions? No problem! I’ve included variations for vegan and keto options, ensuring everyone can partake in the joy. Ready to whip up a batch and treat yourself? Let’s dive in!
Why Are These Buster Bars a Must-Try?
Simplicity at its Finest: With just three ingredients, you can whip up a batch of these delicious Buster Bars in no time.
High-Protein Treat: Each bar offers over 15 grams of protein, making them perfect for post-workout replenishment or a guilt-free dessert.
Customizable Variations: Whether you’re vegan, gluten-free, or simply looking for healthier options, this recipe has you covered with easy substitutions.
No-Bake Convenience: No oven required! Just freeze them until firm for an effortless treat that won’t heat up your kitchen, making it ideal for those hot summer days.
Crowd-Pleasing Delight: Kids and adults alike will love these bars—just like the classic Dairy Queen version, but healthier! Try serving them alongside Banana Oatmeal Bars for a fun dessert spread!
Buster Bars Ingredients
For the Base
• Yogurt – Provides the creamy base; try using vegan yogurt for a plant-based option.
• Peanut Butter – Adds flavor and protein; almond butter can be a great substitute for nut allergies.
• Sweetener – Balances flavor; consider omitting if your yogurt is sweetened already.
For the Coating
• Chocolate Chips – Coating for the bars; use dairy-free chocolate chips for a vegan version.
• Coconut Oil (optional) – Helps create a smoother coating; omit if you prefer a sturdier texture.
For Extra Crunch
• Chopped Peanuts (optional) – Adds delightful texture and crunch; try mixing in other nuts for variety.
These Buster Bars are not only a guilt-free indulgence but also a treat that can cater to various dietary preferences!
Step‑by‑Step Instructions for 3-Ingredient Healthy Peanut Butter Buster Bars
Step 1: Prepare the Base
In a mixing bowl, whip together 1 cup of yogurt, ½ cup of peanut butter, and your choice of sweetener until the mixture is smooth and creamy. This should take about 2-3 minutes with a hand mixer or a whisk. Look for a velvety texture, ensuring no lumps remain. This creamy blend is the heart of your Buster Bars!
Step 2: Add Chocolate Chips
Fold in ½ cup of mini chocolate chips into the peanut butter mixture gently using a spatula. This provides delightful pockets of chocolate in your Buster Bars. Mix just until evenly distributed; don’t overblend. Set your work area with a parchment-lined tray ready for the next step, which will give your bars a solid base.
Step 3: Shape the Bars
Using a spoon, drop blobs of the mixture onto the prepared parchment-lined tray, approximately 2 tablespoons each. If you’re using popsicle sticks, press one into the center of each blob to create pop-style Buster Bars. Make sure they’re evenly spaced for easy handling later on. This step should take around 5 minutes.
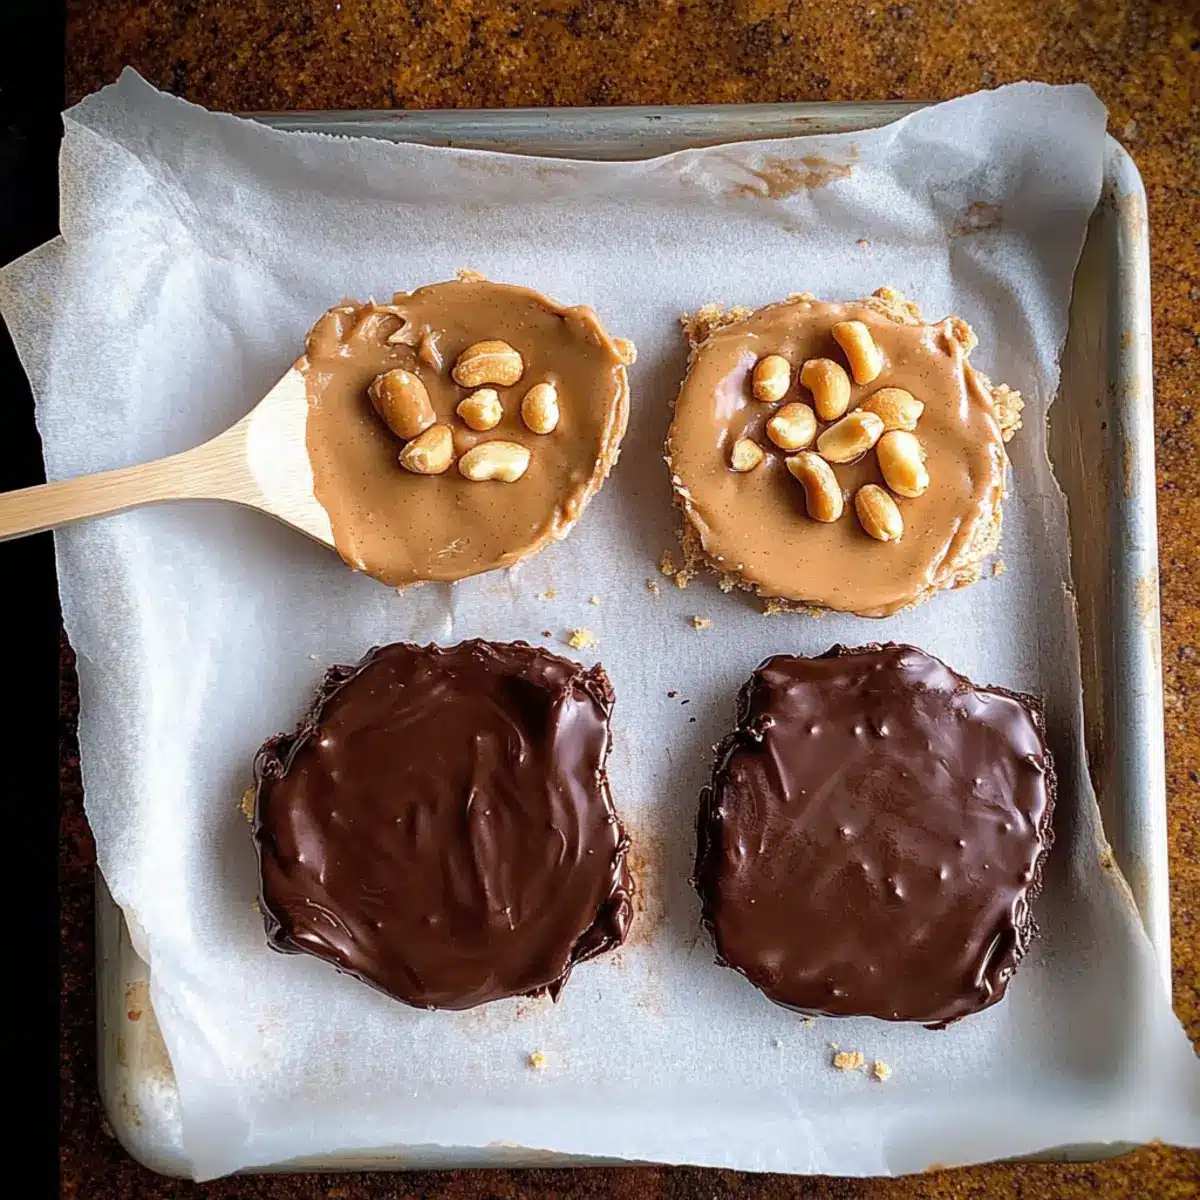
Step 4: Smooth and Top
Once all the blobs are on the tray, use a spatula to smooth the tops, creating nice, even surfaces. If using chopped peanuts for extra crunch, sprinkle them on top lightly and press them into the mixture to help them adhere. This will add great texture to your final Buster Bars, making them visually appealing as well!
Step 5: Freeze the Base
Place the tray in the freezer and allow the bars to set for 1-2 hours until they are firm and hold their shape. Keep an eye on them as they freeze; you want them to be solid enough for dipping without being frozen rock-solid. Double-check by gently pressing a finger on the top—if it holds its shape, they’re ready!
Step 6: Melt the Chocolate Coating
While waiting for the bars to set, melt 1 cup of chocolate chips in a double boiler or microwave on low power. If you’re using coconut oil for a smoother finish, mix in about 1 tablespoon when the chocolate is nearly melted. Stir until completely smooth and shiny, ensuring not to overheat the chocolate, which could cause it to seize.
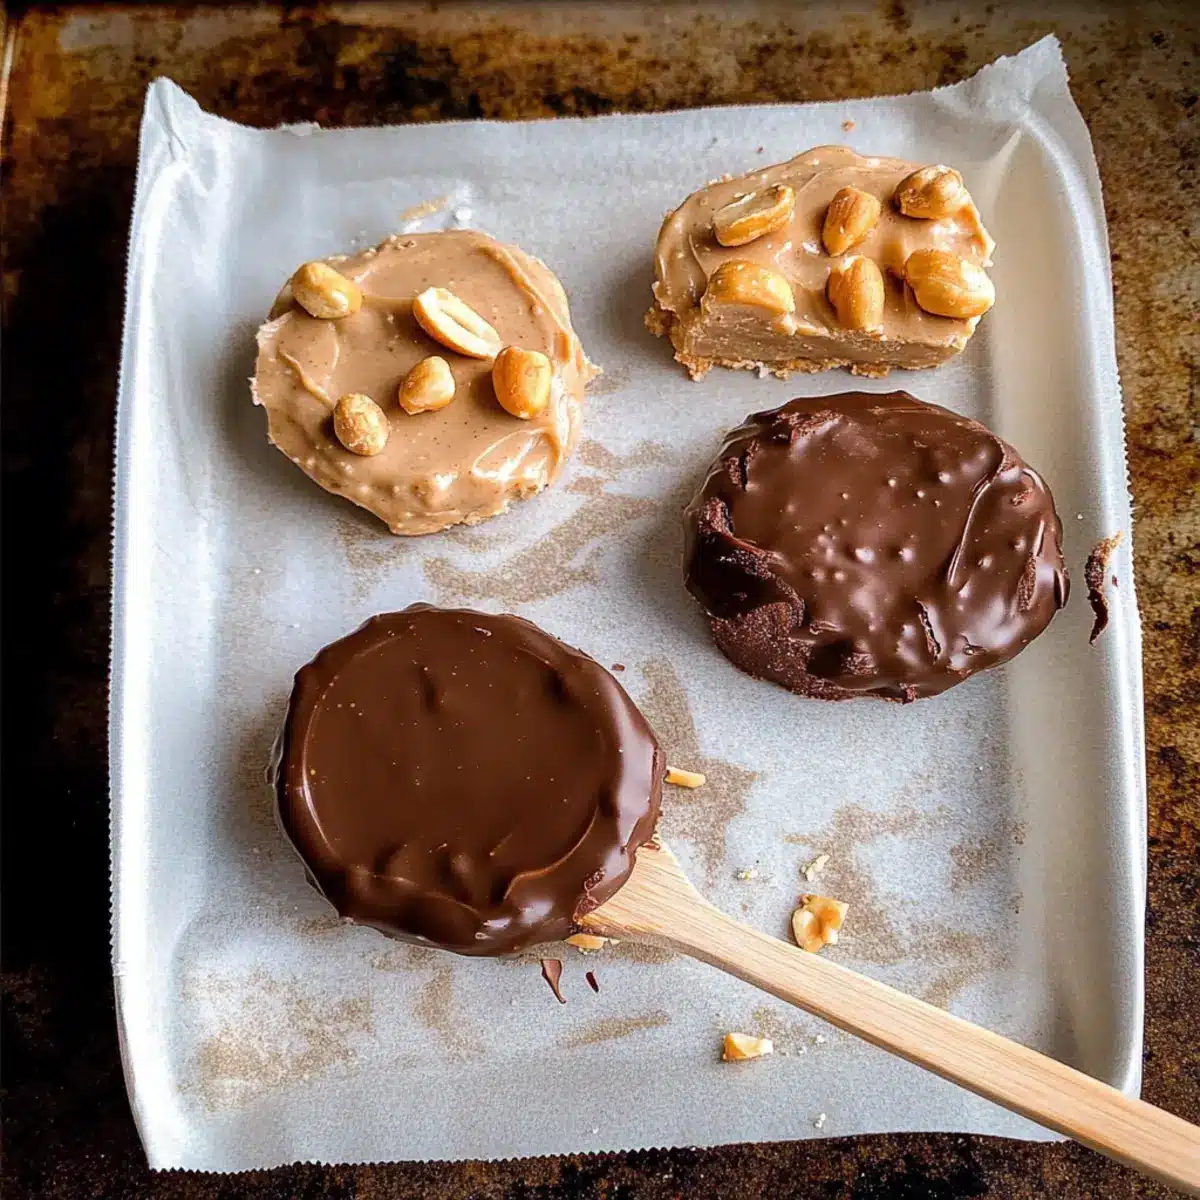
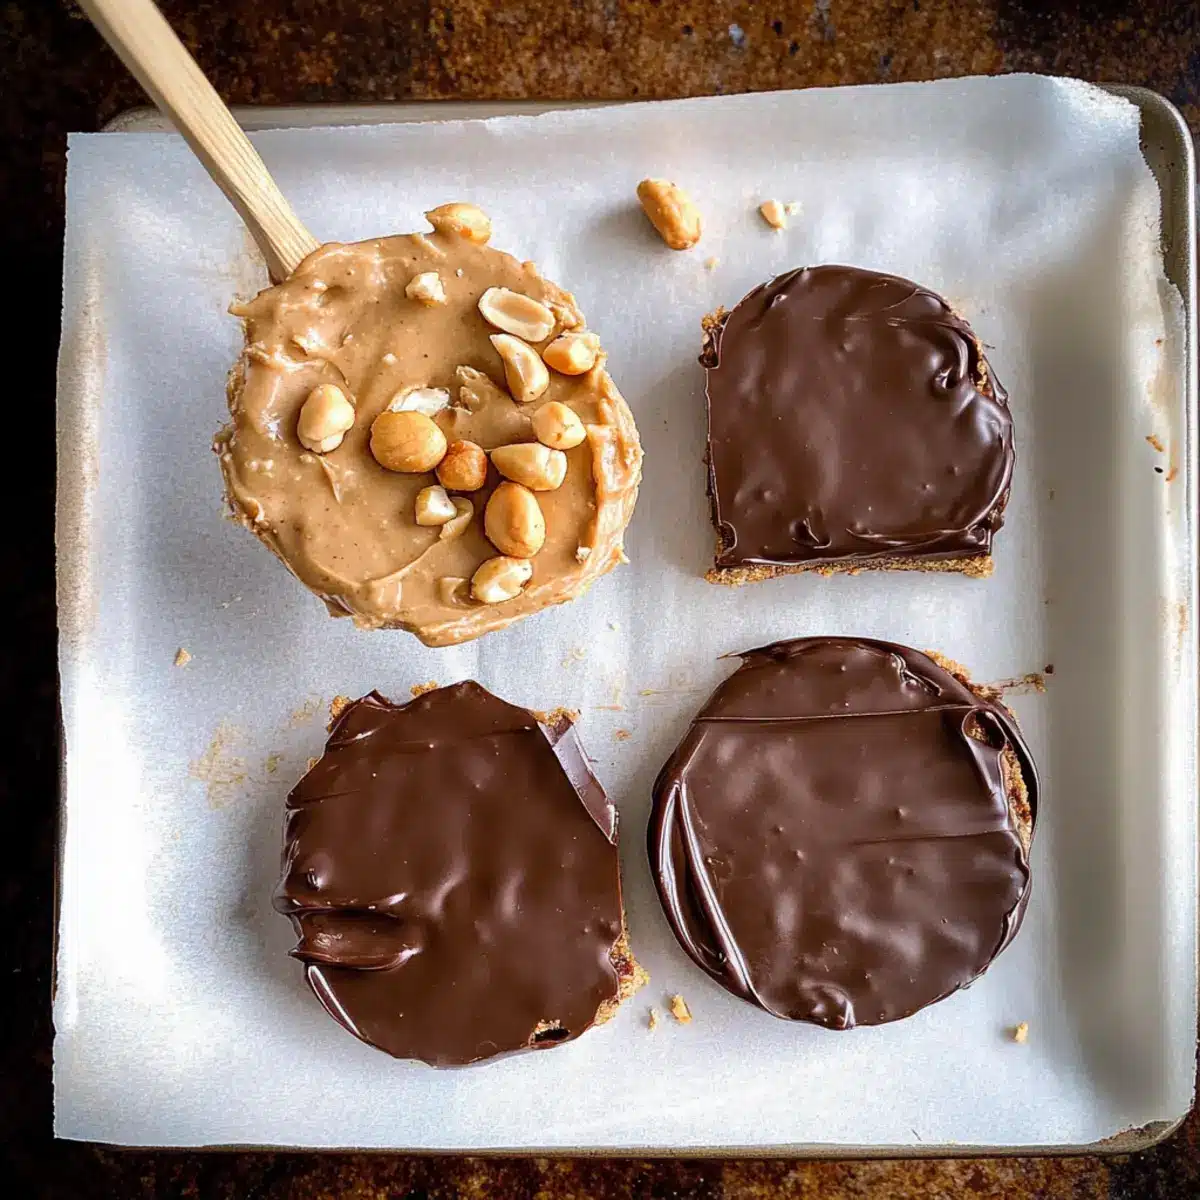
Step 7: Dip the Bars
Once the bars are fully frozen, take them out of the freezer and carefully dip each bar into the melted chocolate. Using a fork or your hands, let excess chocolate drip off before placing them back onto the parchment-lined tray. Aim for a fully coated bar, as this will be your delicious outer shell!
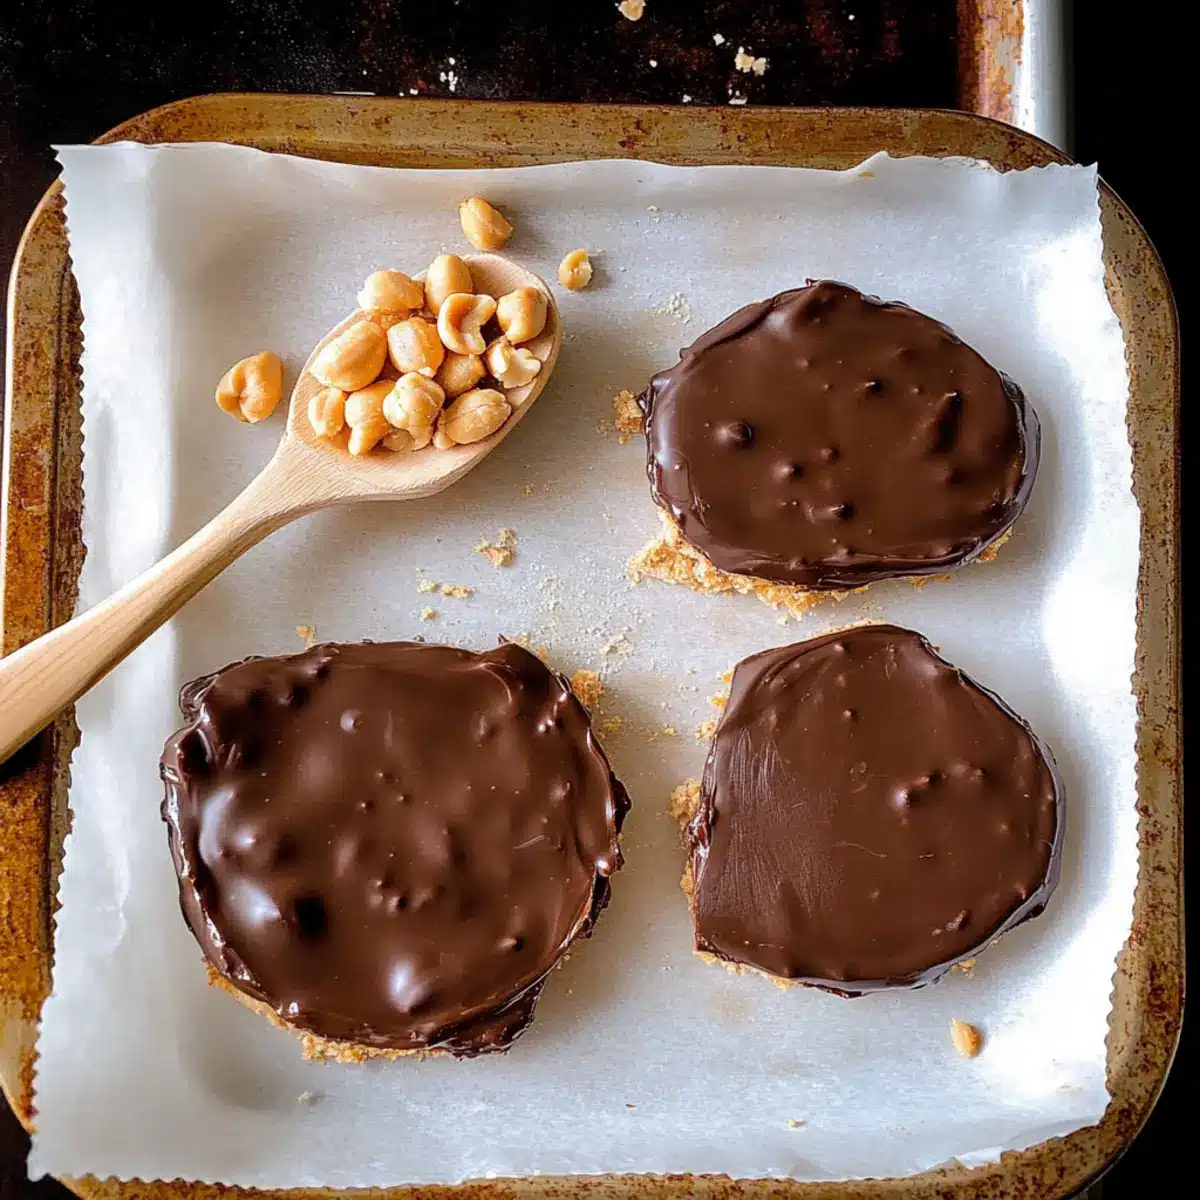
Step 8: Final Freeze
Return the dipped bars to the freezer for another 30-60 minutes to set the chocolate shell completely. During this time, the chocolate will harden, creating a lovely crunchy coat around your creamy peanut butter center. Check occasionally; once solid, they are ready to savor!
What to Serve with 3-Ingredient Healthy Peanut Butter Buster Bars
Bring your dessert game to the next level by pairing these creamy delights with complementary treats and flavors.
-
Fresh Fruit Salad: A colorful mix of seasonal fruits adds a refreshing burst that offsets the rich chocolate and peanut butter.
-
Creamy Yogurt Parfait: Layering your Buster Bars with a Greek yogurt parfait gives a cool, creamy contrast and an extra protein boost.
-
Chocolate Almond Milkshake: This velvety shake harmonizes with the peanut butter flavor while making for a delightful drinkable treat.
-
Coconut-Water Slush: Serve alongside this refreshing slush for a tropical twist, making hot days feel extra special.
-
Crunchy Granola: Crumble some of your favorite granola on top of the bars for an added crunch that pairs beautifully with their smooth texture.
-
Decadent Espresso: A bold espresso serves as an invigorating companion to the sweet bars, perfect for after dinner or an afternoon pick-me-up.
-
Mint Chocolate Chip Ice Cream: The coolness and minty flavor create an exciting contrast with the creamy bars, offering a unique dessert experience.
-
Chilled Chai Latte: Spicy and aromatic, a chilled chai latte balances the sweetness of your Buster Bars perfectly, making for a delightful pairing.
-
Chocolate Sauce Drizzle: For an indulgent touch, a drizzle of rich chocolate sauce on top elevates the experience and adds an elegant finish.
-
Peanut Butter Cookie Crumble: Sprinkle crushed peanut butter cookies on the side for an extra treat that complements the bars’ nutty flavor while adding depth.
Expert Tips for Buster Bars
Whip it Right: Ensure the yogurt is well-whipped for a creamy texture; this is crucial for the smooth consistency of your Buster Bars.
Gentle Melting: Use a double boiler or microwave on low power to melt the chocolate gently; burning it can ruin the coating.
Firm Freeze: Make sure to freeze the bars until completely firm to maintain their shape during dipping; soft bars will lose their structure.
Nutty Variations: If allergies are a concern, consider alternatives like sunflower seed butter or almond butter for your Buster Bars.
Don’t Rush the Dipping: Let excess chocolate drip off after dipping the bars to avoid a too-thick coating that can lead to a messy bite!
Make Ahead Options
These Healthy Peanut Butter Buster Bars are a stellar choice for meal prep enthusiasts! You can prepare the base mixture—yogurt, peanut butter, and sweetener—up to 24 hours in advance by storing it in an airtight container in the refrigerator. When ready to serve, simply follow steps 3 through 8 for shaping, freezing, and dipping the bars in chocolate. To maintain their delightful quality, ensure the mixture is well-whipped and the bars are frozen until firm before dipping. Once assembled, these bars can stay frozen for up to a month, so you can enjoy them as a quick, guilt-free treat anytime without the hassle!
Buster Bars Variations & Substitutions
Feel free to personalize your Buster Bars with these fun and delicious twists that will elevate your treat experience!
- Vegan Option: Substitute yogurt with coconut yogurt to create a dairy-free delight.
- Nut-Free Alternative: Use sunflower seed butter in place of peanut butter for a allergy-friendly choice.
- Sugar-Free: Swap sweeteners with stevia or erythritol for a guilt-free indulgence.
- Flavor Burst: Add a teaspoon of vanilla extract or sea salt for an extra zing and depth of flavor.
- Crunchy Mix-Ins: Consider folding in chopped dried fruits or shredded coconut to enhance texture and taste.
- Chocolate Lovers: Try melting dark chocolate or adding cacao powder to the base for a chocolatey twist.
- Protein Boost: Mix in a scoop of your favorite protein powder to boost the nutritional value without changing the taste.
- Extra Decadence: Instead of chocolate coating, drizzle homemade caramel sauce over the tops for a scrumptious finish.
These variations not only cater to different dietary preferences, but they also allow you to have a little fun while whipping up a batch! If you’re looking for more delightful treats, try pairing these bars with some deliciously filling Banana Oatmeal Bars or relish the flavors of classic Apple Pie Bars for a sweet spread that’s sure to please!
Storage Tips for Buster Bars
Fridge: Store leftover Buster Bars in an airtight container for up to 3 days. This will help keep them fresh and creamy, perfect for quick cravings.
Freezer: For longer storage, keep the bars in a covered container in the freezer for up to a month. Just remember to separate layers with parchment paper to prevent sticking!
Reheating: When you’re ready to enjoy, let a bar sit at room temperature for a few minutes or microwave it for 10-15 seconds to soften slightly before indulging.
Texture Tips: Ensure the Buster Bars are completely firm before dipping in chocolate to maintain their shape and texture while storing.
Healthy Buster Bars Recipe FAQs
How should I choose the yogurt for my Buster Bars?
Absolutely! For the creamiest texture, look for thick, Greek yogurt. If you’re aiming for a vegan alternative, opt for a full-fat coconut or almond yogurt—these provide a rich base without compromising on flavor.
What’s the best way to store leftover Buster Bars?
Very! Store your leftover Buster Bars in an airtight container in the fridge for up to 3 days. For longer storage, place them in a covered container in the freezer where they can last for up to 1 month. Just be sure to layer them with parchment paper to avoid sticking!
Can I freeze the Buster Bars? If so, how?
The more the merrier! To freeze your Buster Bars, first ensure they are completely firm. After coating them with chocolate, place each bar in a single layer in a freezer-safe container. Layer with parchment paper as needed, and freeze for up to 3 months. When ready to enjoy, let them thaw in the fridge or at room temperature.
What if my Buster Bars turn out too soft or mushy?
If your Buster Bars aren’t setting well, it’s crucial to check if the yogurt mixture was adequately whipped and to ensure they were frozen adequately before dipping in chocolate. If they’re too soft after initial freezing, consider placing them back in the freezer for additional time—aim for 1-2 hours, ensuring they’re solid enough.
Can I make the Buster Bars nut-free?
Of course! If you need to make these Buster Bars nut-free, substitute peanut butter with sunflower seed butter or pumpkin seed butter. Both alternatives provide a delightful taste while catering to nut allergies. Just double-check that your chocolate chips are also nut-free!
Are the Buster Bars suitable for pets?
No, please! While these bars are delicious for humans, the ingredients like chocolate and peanut butter can be harmful to pets, particularly chocolate, which is toxic to dogs and cats. Always keep treats like these out of reach from your furry friends!
Healthy Buster Bars: Guilt-Free Indulgence You’ll Love
Ingredients
Equipment
Method
- In a mixing bowl, whip together yogurt, peanut butter, and sweetener until smooth.
- Fold in chocolate chips gently using a spatula.
- Drop blobs of the mixture onto a parchment-lined tray and press in popsicle sticks if desired.
- Smooth the tops with a spatula, sprinkle with chopped peanuts and press them in.
- Freeze the tray for 1-2 hours until the bars are firm.
- Melt chocolate chips and coconut oil in a double boiler or microwave until smooth.
- Dip each bar into the melted chocolate, letting excess drip off.
- Return dipped bars to the freezer for another 30-60 minutes to set the chocolate.
Leave a Reply