
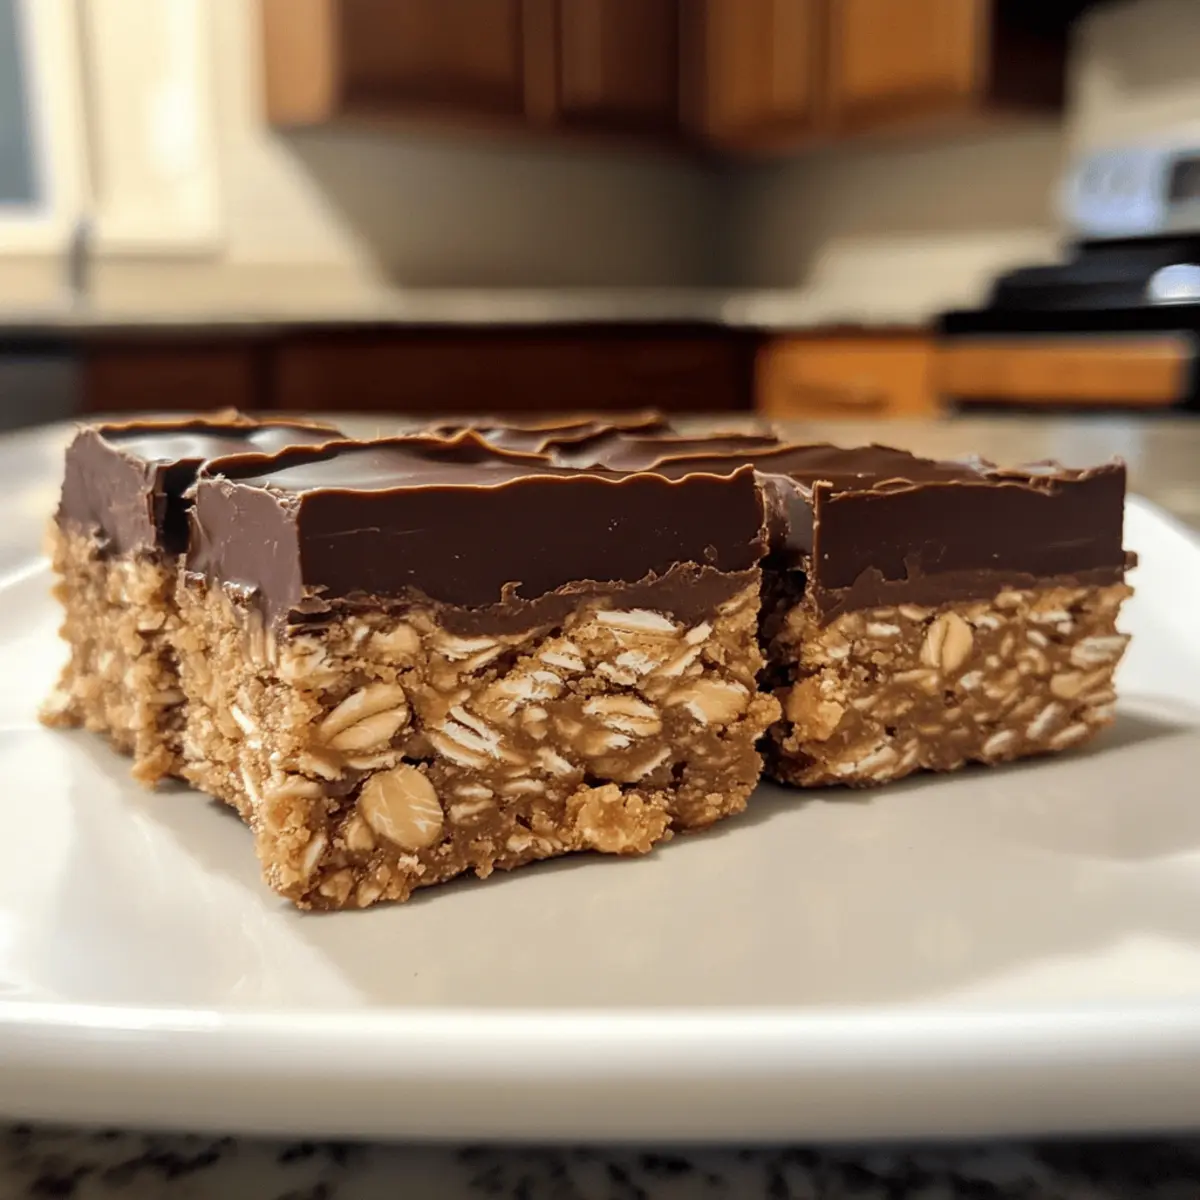
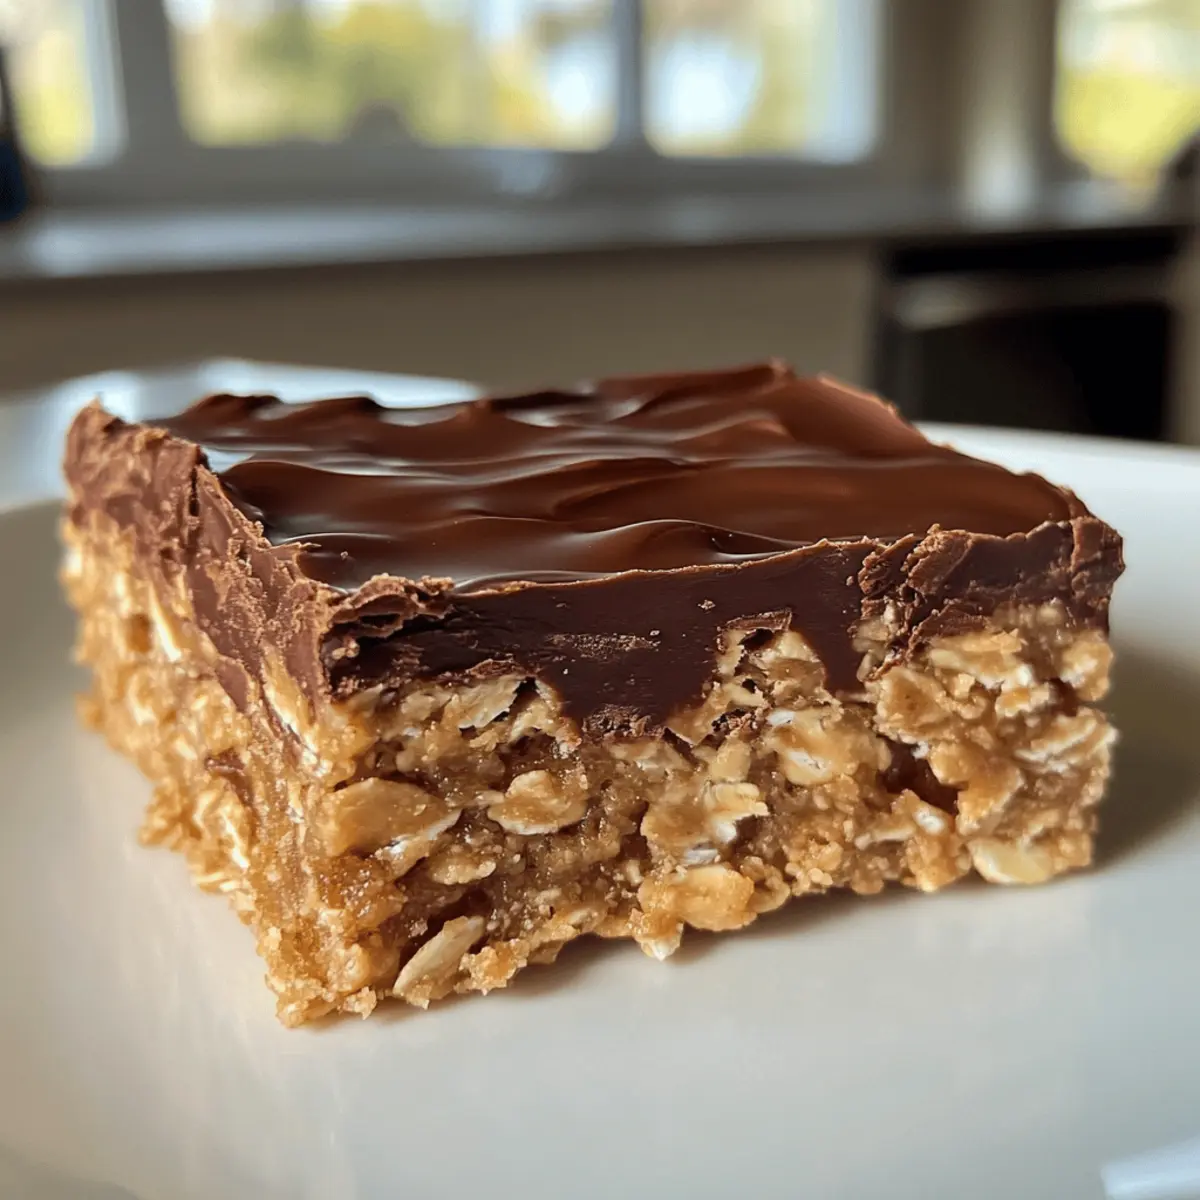
There’s something magical about the simplicity of a no-bake dessert—especially when it combines the irresistible flavors of chocolate and peanut butter. As I dove into my afternoon snack cravings, I found myself crafting these No-Bake Chocolate Peanut Butter Oat Bars, a delightfully quick and satisfying treat. Coming together in under 30 minutes, these bars are not only a breeze to whip up but can also cater to various dietary needs, making them a great addition to your healthy snacking repertoire. Packed with wholesome oats and customizable ingredients, they provide the perfect guilt-free indulgence when sugar cravings hit. Ready to elevate your snack game with a recipe that’s creamy, crunchy, and oh-so-delicious? Let’s get started!
Why are no-bake bars a snack favorite?
Convenience: Say goodbye to complex baking! These no-bake chocolate peanut butter oat bars are a quick solution for your snack cravings, taking less than 30 minutes from start to finish.
Customizable Ingredients: This versatile recipe allows for easy swaps, whether you need it gluten-free with Baked Banana Oatmeal or nut-free with different butters.
Rich Flavor: The decadent combination of chocolate and peanut butter creates a delightful treat that satisfies even the strongest sweet tooth.
Crowd-Pleaser: Perfect for parties or family gatherings, these bars will have everyone coming back for more without the guilt.
Nutritional Boost: Packed with oats, they offer fiber and protein for sustained energy, making them a snack you can feel good about.
With these delicious bars, you can enjoy a treat that’s both satisfying and nourishing.
No-Bake Chocolate Peanut Butter Oat Bar Ingredients
• Dive into the world of healthy snacking with these essential components!
For the Base
- Rolled Oats – The hearty backbone of the bars, providing texture and making them chewy. Can be substituted with gluten-free oats to accommodate dietary needs.
- Peanut Butter – Adds a creamy, rich flavor and binds everything together; almond or sunflower seed butter works for nut-free options.
For Sweetening
- Honey or Maple Syrup – A natural sweetener that complements the chocolate flavor beautifully; agave syrup is a great vegan alternative.
For Flavor Enhancement
- Cocoa Powder – This ingredient gives the bars their rich chocolate taste; consider using carob powder as a caffeine-free substitute.
- Choc Chips (optional) – For those who crave extra sweetness and chocolatey goodness; opt for dark chocolate or dairy-free chips for a fully vegan friendly treat.
With these key ingredients, you’ll be on your way to creating delectable no-bake chocolate peanut butter oat bars that won’t just satisfy your cravings, but also keep you feeling energized and full!
Step‑by‑Step Instructions for No-Bake Chocolate Peanut Butter Oat Bars
Step 1: Combine Dry Ingredients
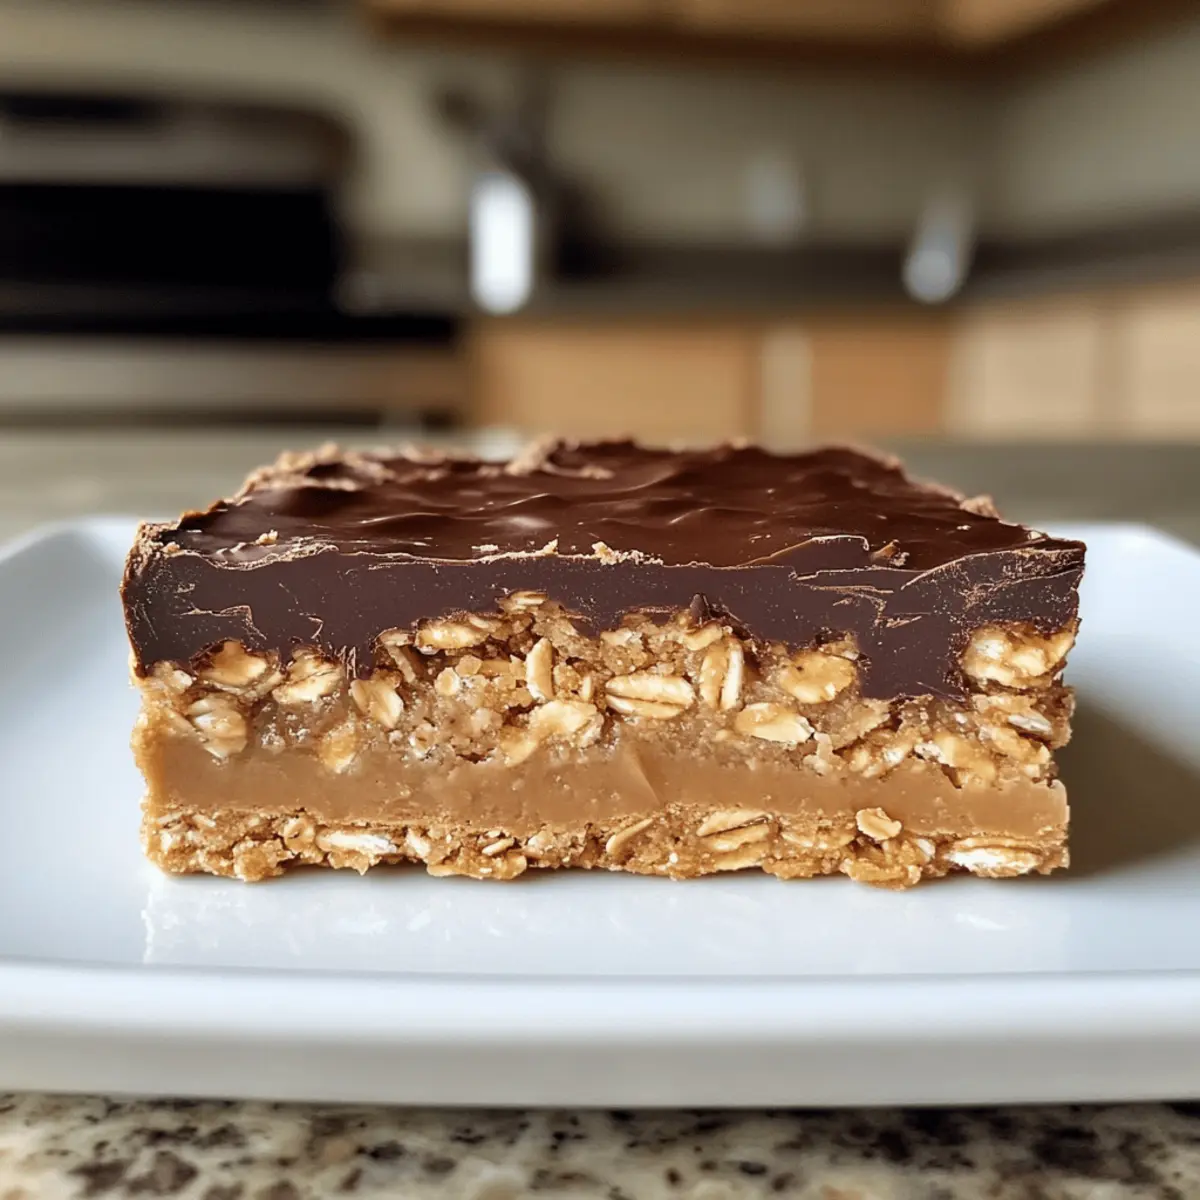
In a large mixing bowl, add 2 cups of rolled oats and 1/2 cup of cocoa powder. Stir them together until evenly mixed, ensuring the cocoa powder is well distributed throughout the oats. This step sets the foundation for your no-bake chocolate peanut butter oat bars, nicely blending textures and flavors.
Step 2: Mix Wet Ingredients
In a separate bowl, whisk together 1 cup of peanut butter and 1/2 cup of honey (or maple syrup) until smooth and creamy. This should take about 1-2 minutes. The mix should be free of lumps, creating a luscious consistency that will bind everything together beautifully.
Step 3: Combine Ingredients
Pour the peanut butter mixture into the bowl of dry ingredients. Stir vigorously until the rolled oats are evenly coated and the mixture is fully combined—this should take about 2-3 minutes. You’re aiming for a thick, sticky texture that will hold the bars together when pressed into the baking dish.
Step 4: Add Optional Chocolate Chips
If you’re using chocolate chips for an extra treat, fold in 1/2 cup of choc chips at this point. Mix gently, ensuring the chips are evenly distributed throughout the oat mixture, giving your no-bake chocolate peanut butter oat bars that delightful burst of chocolate in every bite.
Step 5: Prepare the Baking Dish
Line an 8×8-inch baking dish with parchment paper, leaving a bit of overhang for easy removal later. This helps keep your bars from sticking. Transfer the mixture to the lined dish and, using your hands or a spatula, firmly press it down in an even layer, ensuring there are no gaps or air pockets.
Step 6: Chill to Set
Place the baking dish in the refrigerator for at least 30 minutes to allow the bars to firm up. This chilling period is crucial for achieving the perfect texture in your no-bake chocolate peanut butter oat bars, making them easier to cut later.
Step 7: Cut and Serve
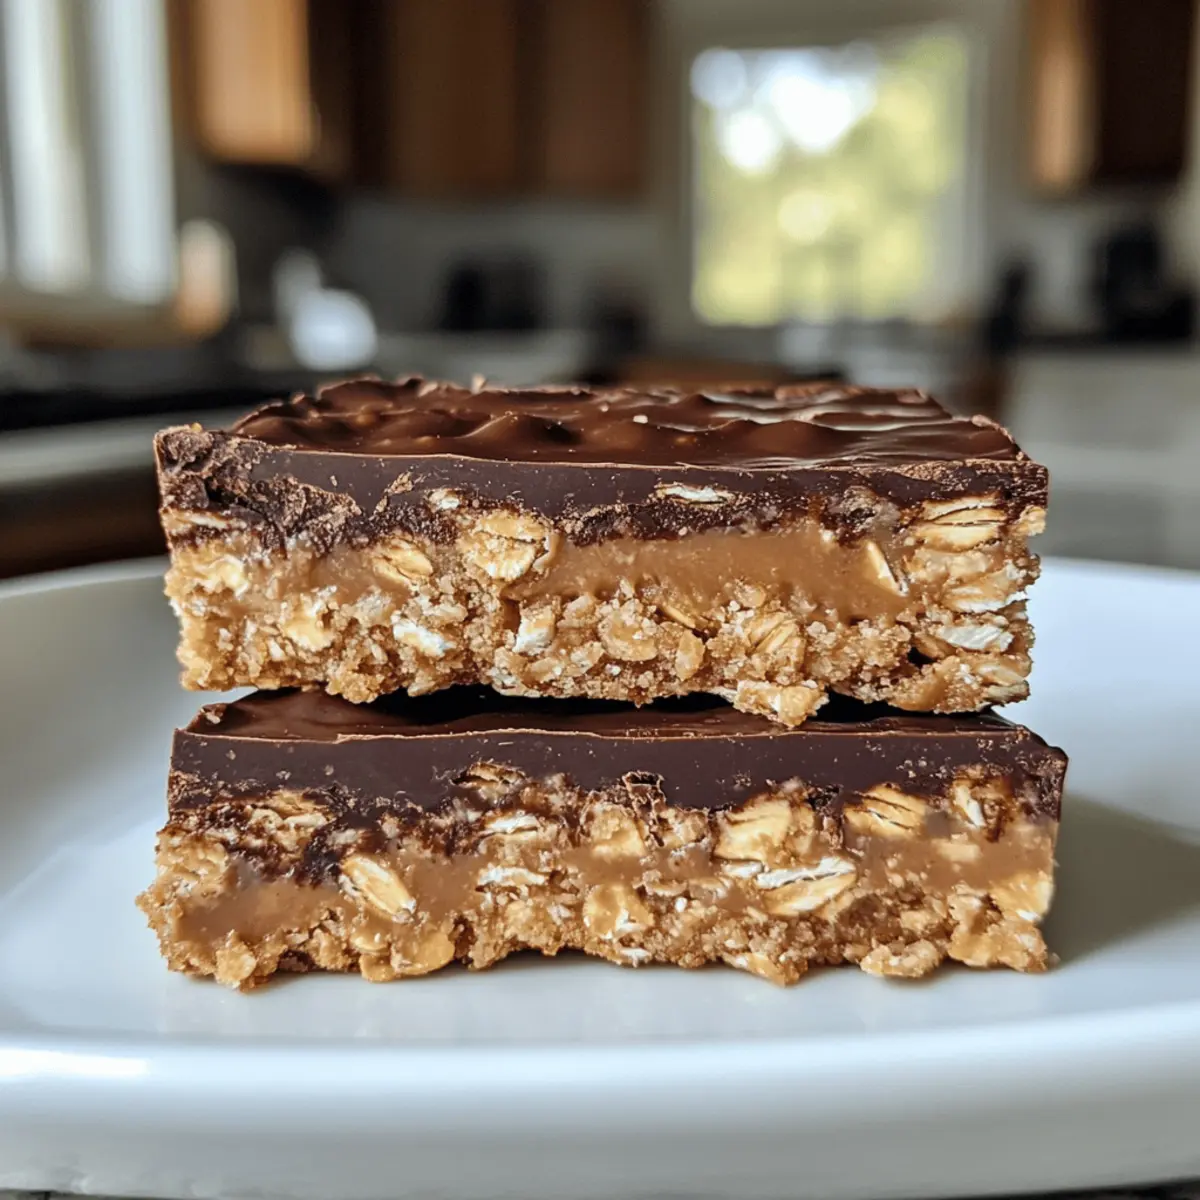
Once chilled, remove the bars from the dish using the parchment paper overhang. Place on a cutting board and slice into rectangles or squares of your desired size. These bars are now ready to serve as a wholesome snack or dessert, nourishing you with every delightful bite!
Healthy Banana Oatmeal Muffins Variations
Feel free to get creative with these muffins—your kitchen, your rules! Each variation brings a new twist, adding an element of fun to your healthy snacks.
- Gluten-Free: Substitute regular flour with almond or coconut flour for a gluten-free treat that doesn’t compromise on taste.
- Nut-Free: Use sunflower seed butter instead of nut butter to keep it nut-free without losing that creamy texture.
- Sweetener Swap: Replace honey with agave syrup or a sugar substitute for a vegan-friendly muffin.
- Fruit Boost: Add in chopped berries or banana slices for an extra burst of natural sweetness and freshness in every bite.
- Spice it Up: Incorporate cinnamon, nutmeg, or vanilla extract into your batter for deeper flavor notes that will have your taste buds dancing!
- Protein-Packed: Mix in a scoop of protein powder or Greek yogurt for an additional protein punch—perfect for a post-workout snack.
- Choco-Peanut Twist: Throw in some dark chocolate chips and a dollop of peanut butter for a decadent treat that fits into your health regimen.
For more delightful inspirations, why not check out Cinnamon Roll Muffins or explore the delights of Pumpkin Streusel Muffins? Whatever your choice, these muffins are sure to brighten your day with wholesome goodness!
Expert Tips for No-Bake Chocolate Peanut Butter Oat Bars
-
Pack Firmly: Ensure the mixture is packed tightly in the dish to prevent crumbling when you cut into bars. This will help maintain their shape and consistency.
-
Avoid Overmixing: Once you combine the wet and dry ingredients, mix just until incorporated. This keeps the texture delightful and chewy, which is essential for no-bake chocolate peanut butter oat bars.
-
Cool Completely: Allow the bars to chill for at least 30 minutes. This step is crucial for achieving the perfect texture and ensures they set up well before cutting.
-
Use a Sharp Knife: To cut your bars into clean edges, use a sharp knife. Warming the knife slightly can also help make the process smoother.
-
Experiment with Add-Ins: Feel free to customize your bars with nuts, seeds, or dried fruits for extra nutrients and flavors. Just keep an eye on the texture as you do!
Enjoy these expert tips and create your perfect batch of no-bake chocolate peanut butter oat bars!
How to Store and Freeze No-Bake Chocolate Peanut Butter Oat Bars
Fridge: Store the bars in an airtight container for up to one week. This keeps them fresh while maintaining their chewy texture, perfect for a quick snack anytime.
Freezer: For longer storage, freeze these bars for up to three months. Wrap each bar in parchment paper and place them in a freezer-friendly container to prevent freezer burn.
Reheating: When you’re ready to enjoy, simply thaw them in the fridge overnight or at room temperature for about 30 minutes before serving.
Packaging: If you’re taking them on-the-go or sharing, cut and place individual bars in small bags or lunch boxes to keep them fresh and easy to grab!
What to Serve with No-Bake Chocolate Peanut Butter Oat Bars
These delectable bars are perfect for building a balanced and delightful meal.
- Fresh Fruit Salad: Bright, juicy fruits like berries or melon add a refreshing touch, complementing the richness of the bars.
- Greek Yogurt Parfait: Layer creamy yogurt with honey and granola for a satisfying, protein-rich breakfast that pairs beautifully with the bars.
- Nutty Trail Mix: A handful of mixed nuts and seeds offers crunch and healthy fats, enhancing the wholesome feel of your snack.
- Iced Herbal Tea: A chilled blend of hibiscus or mint brings a refreshing contrast to the creamy chocolate, making it a perfect pairing.
- Smoothie Bowl: A fruity, blended smoothie topped with coconut and chia seeds provides a vibrant, healthful edge that complements your treats.
Adding chart-topping flavors of banana and spinach creates a nutritional boost everyone will enjoy. - Dark Chocolate Dipped Strawberries: The sweet and slightly tart berries dipped in dark chocolate can elevate your snacking moment to indulgent heights.
With these delightful pairings, you can create a well-rounded experience that satisfies every craving!
Make Ahead Options
These No-Bake Chocolate Peanut Butter Oat Bars are a fantastic meal prep solution for busy home cooks! You can prepare the bar mixture up to 24 hours in advance by following the first five steps: combining your dry ingredients and mixing in the wet components. Once mixed, simply press the mixture into the baking dish, cover tightly, and refrigerate until you’re ready to chill (which can be done the same day or the following day). Just remember to cut the bars just before serving to maintain their fresh texture. They’ll be just as delicious, ready to grab as a quick snack or dessert throughout the week!
No-Bake Chocolate Peanut Butter Oat Bars Recipe FAQs
How do I choose the right oats for this recipe?
Absolutely! Use rolled oats as they provide the best texture for these bars. If you’re looking for a gluten-free option, simply swap them with certified gluten-free oats to ensure you can enjoy this delicious treat without worries.
How should I store the no-bake bars?
Keep these bars in an airtight container in the refrigerator, and they will stay fresh for up to one week. This is the simplest way to maintain their delightful chewy texture, making them easy to grab when you need a quick snack.
Can I freeze the no-bake chocolate peanut butter oat bars?
Yes, you can freeze these bars for up to three months! Here’s how: Wrap each bar in parchment paper to prevent them from sticking together, then place them in a freezer-friendly container. When you’re ready to enjoy, thaw them in the fridge overnight or let them sit at room temperature for about 30 minutes.
What if my mixture is too crumbly?
If your mixture ends up crumbly and not holding together, it often means you need more binding agents! Add a little more peanut butter or honey to the mix and stir well. If it’s still not holding up, try pressing it into the dish more firmly.
Are these bars suitable for my allergy considerations?
Yes! This recipe is quite flexible—you can easily make it nut-free by substituting peanut butter with sunflower seed butter. Furthermore, opt for agave syrup instead of honey if you need a vegan alternative. Always check the labels of the ingredients you use to avoid any allergens.
How do I know when the bars are ready to cut?
Your no-bake bars should chill in the refrigerator for at least 30 minutes before cutting. You’ll know they are ready when they feel firm to the touch and hold their shape when you gently press them. Enjoy your creation!
Savory Healthy Banana Oatmeal Muffins for a Guilt-Free Snack
Ingredients
Equipment
Method
- Combine Dry Ingredients: In a large mixing bowl, add rolled oats and cocoa powder. Stir until evenly mixed.
- Mix Wet Ingredients: In a separate bowl, whisk together peanut butter and honey (or maple syrup) until smooth.
- Combine Ingredients: Pour the peanut butter mixture into the bowl of dry ingredients. Stir until fully combined.
- Add Optional Chocolate Chips: Fold in choc chips if desired, mixing gently.
- Prepare the Baking Dish: Line an 8x8-inch baking dish with parchment paper and press mixture evenly into the dish.
- Chill to Set: Place the baking dish in the refrigerator for at least 30 minutes.
- Cut and Serve: Once chilled, remove bars from dish and slice into bars.
Leave a Reply