
There’s nothing quite like the sound of sizzling butter as your sandwich caramelizes to perfection. This experience brings me back to lazy Saturdays, where I would whip up my go-to, the Perfectly Crispy Grilled Cheese and Vegetable Sandwich. Combining gooey, melty cheese with the vibrant freshness of roasted veggies, it’s a meal that never disappoints. The best part? This quick and easy recipe takes less than 10 minutes, making it an absolute lifesaver for those busy weeknight dinners or a satisfying lunch that can be on the table in no time. Plus, the flexibility allows you to use whatever veggies you have on hand, ensuring every bite is a delightful surprise. Are you ready to transform your lunch game with this elevated comfort food? Let’s dive in!
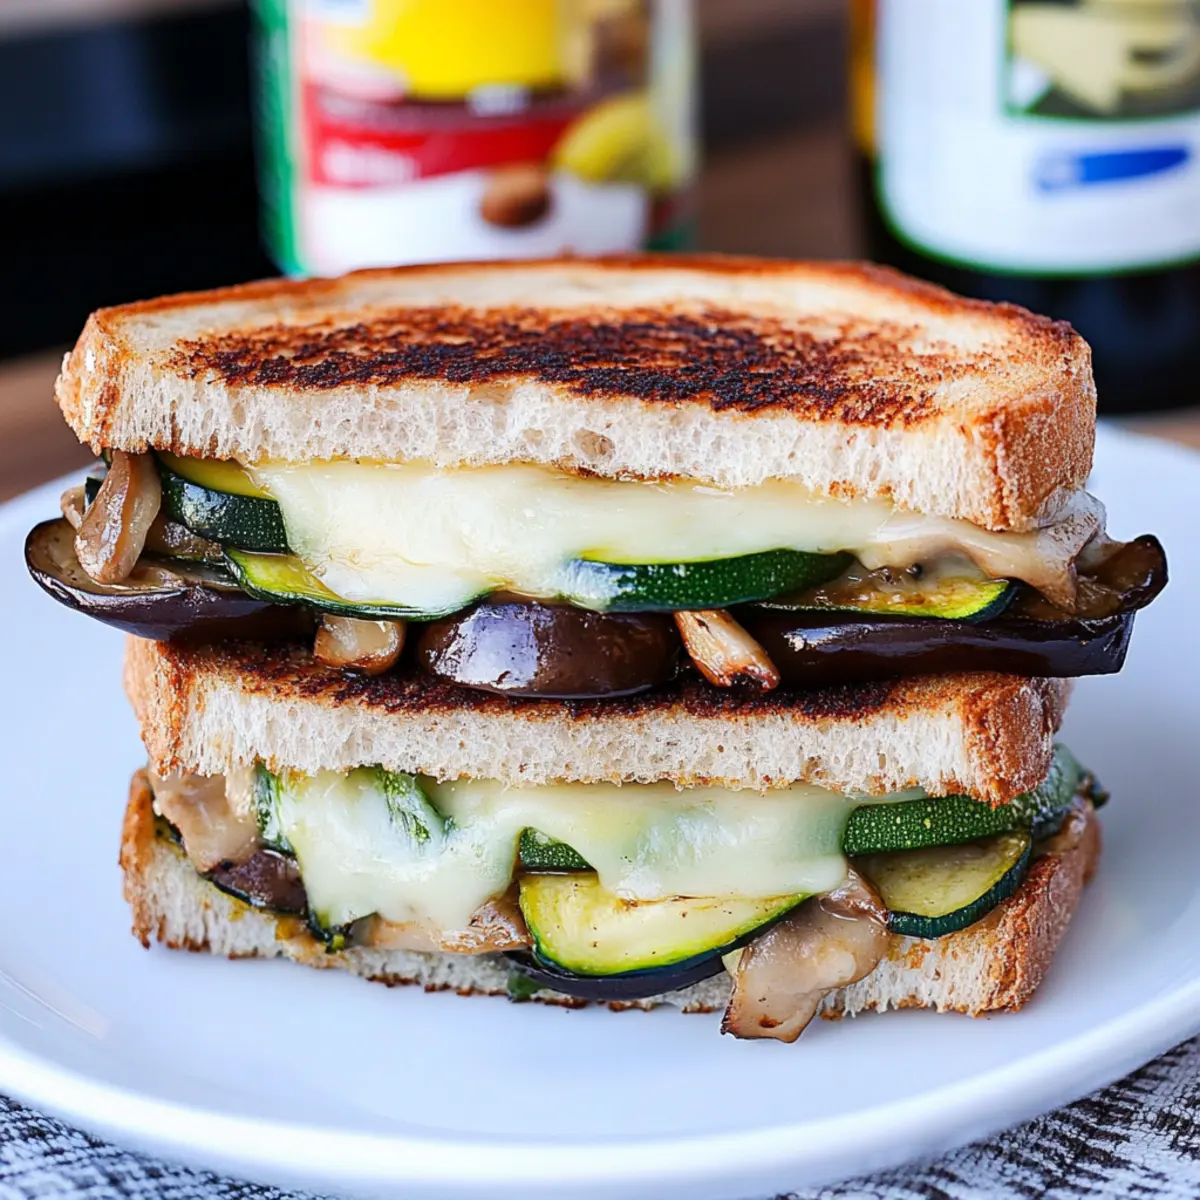
Why is This Grilled Cheese Special?
Crispy Perfection: This recipe promises a golden-brown crust that’s perfectly crispy on the outside while remaining gooey and cheesy inside.
Versatile Veggies: You have the power to customize—swap the roasted veggies to suit your taste or whatever you have on hand—zucchini, eggplant, or even bell peppers!
Quick and Easy: With a prep time of under 10 minutes, you’ll have a satisfying meal ready in no time, ideal for busy weeknights or a lazy lunch.
Crowd-Pleasing: Whether serving family or impressing friends, this grilled cheese and veggie sandwich will leave everyone wanting more and more—pair it with a side of tomato soup or a fresh salad for the perfect combo!
Creamy and Flavorful: The addition of Hellmann’s mayonnaise elevates the flavor and enhances the crispiness, making each bite an exciting surprise. Enjoy your take on this comforting classic and discover why it’s quickly become a household favorite!
Grilled Cheese and Vegetable Sandwich Ingredients
- For the Sandwich
- Hellmann’s® or Best Foods® Real Mayonnaise – Adds a rich flavor and enhances crispiness when toasted. Tip: Feel free to experiment with other brands for different tastes.
- Crusty Whole Grain Bread – Provides structure and a nutty taste. Substitute with sourdough or gluten-free bread if preferred.
- Low Fat White Cheddar Cheese – Offers creamy texture and flavor. Consider swapping for mozzarella or pepper jack for varied taste profiles.
- Sliced Roasted Vegetables (zucchini, eggplant, mushrooms) – Enhances nutritional value and adds depth of flavor. Feel free to use your favorite roasted or grilled vegetables for a personal touch.
Step‑by‑Step Instructions for Perfectly Crispy Grilled Cheese & Veggies
Step 1: Preheat the Skillet
Begin by heating a non-stick skillet over medium heat for about 2 minutes. It’s essential to achieve the right temperature to ensure your grilled cheese and vegetable sandwich crisps to golden perfection. A properly heated skillet will help seal in the flavors while creating that irresistible crunchy exterior.
Step 2: Prepare the Bread
While the skillet preheats, take your crusty whole grain bread and spread a generous layer of Hellmann’s mayonnaise evenly on one side of each slice. This rich layer enhances both flavor and crispiness. Make sure to cover the entire surface for maximum crunch, setting the stage for your delicious grilled cheese and vegetable sandwich.
Step 3: Assemble the Sandwich
Place one slice of bread, mayo-side down, in the preheated skillet. Layer it with your choice of low-fat white cheddar cheese and your colorful sliced roasted vegetables—like zucchini, eggplant, or mushrooms. Don’t be shy; pile on those veggies for added flavor and nutrition, creating a beautiful and hearty filling.
Step 4: Top the Sandwich
Next, take the second slice of bread, with the mayonnaise side facing up, and carefully place it on top of the layered cheese and veggies. Press down gently to ensure a nice seal that will hold all of your ingredients together while cooking. The combination of creamy cheese and the vibrancy of vegetables makes for a delightful grilled cheese and vegetable sandwich.
Step 5: Cook the First Side
Now it’s time to cook! Keep the sandwich in the skillet for about 3-4 minutes, or until the bottom is a deep golden brown and crisp. Use a spatula to gently peek underneath if needed. The aromas of melting cheese and toasting bread will fill your kitchen, creating anticipation for this comforting meal.
Step 6: Flip and Finish Cooking
Carefully flip the sandwich over using your spatula, easing it into the skillet with the other side facing down. Cook for another 3-4 minutes until that side also turns golden brown and the cheese is melty and gooey. Keep an eye on it to avoid burning, ensuring that your grilled cheese and vegetable sandwich comes out perfectly crispy all around.
Step 7: Slice and Serve
Once both sides are beautifully golden and the cheese has melted to your liking, remove the sandwich from the skillet. Allow it to cool slightly before slicing it diagonally into halves or quarters. Serve immediately while warm, perhaps alongside your favorite dipping sauce or a comforting bowl of tomato soup to complement this delightful sandwich experience.
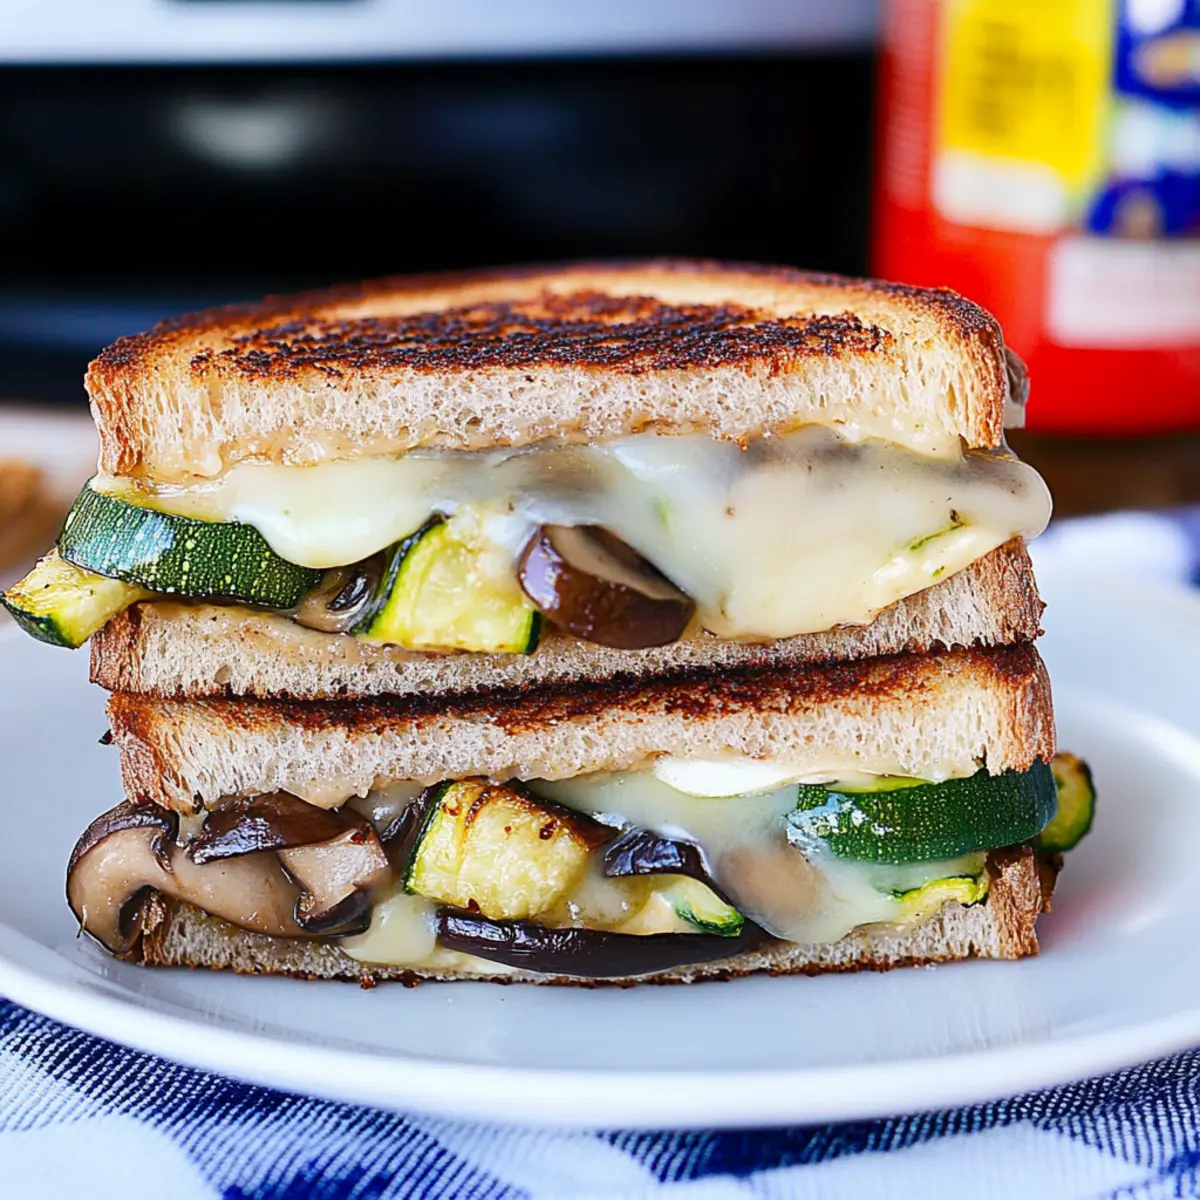
What to Serve with Perfectly Crispy Grilled Cheese & Veggies
Nothing pairs better with this delightful sandwich than complementary sides and drinks that enhance every delicious bite.
- Tomato Soup: A classic combination that perfects the comfort food experience, providing warmth and richness to your meal.
- Fresh Garden Salad: Crisp, vibrant greens add a refreshing crunch, balancing the richness of the melted cheese beautifully.
- Sweet Potato Fries: These crispy, slightly sweet fries offer a delightful contrast to your savory grilled cheese, making each bite exciting.
- Pickles or Jalapeños: A tangy kick from pickles or spicy jalapeños elevates the flavor profile and adds an unexpected zest.
- Chips and Salsa: Crunchy tortilla chips with zesty salsa create a fun texture contrast, perfect for a casual lunch.
- Iced Herbal Tea: A refreshing herbal iced tea balances the richness of the sandwich with its vibrant flavors.
- Chocolate Chip Cookies: End your meal on a sweet note with warm, gooey cookies that provide nostalgia and comfort.
These delightful pairings are sure to transform your experience with the grilled cheese and vegetable sandwich from tasty to extraordinary!
Grilled Cheese and Vegetable Sandwich Variations
Feel free to make this grilled cheese and veggie delight your own, transforming it into the dish of your dreams!
-
Dairy-Free: Substitute the cheese with a dairy-free alternative like cashew cheese for a creamy texture without the dairy.
-
Herb-Infused: Add fresh herbs like basil or thyme to the veggies before roasting for an aromatic twist that elevates the flavors.
-
Spicy Kick: Incorporate some sliced jalapeños or a drizzle of sriracha inside the sandwich for a spicy flavor explosion. Your taste buds will thank you for this bold enhancement!
-
Protein Boost: Include a protein element such as grilled chicken or chickpeas to make your sandwich heartier and more satisfying.
-
Smoky Flavor: Use smoked gouda or a sprinkle of smoked paprika on the veggies for a deliciously smoky twist that adds depth.
-
Sweet Surprise: Toss in some caramelized onions or roasted red peppers to introduce a subtle sweetness that beautifully contrasts with the savory elements.
-
Crunch Factor: For added texture, layer in some fresh spinach or arugula right before serving. This extra crunch pairs fantastically with the soft cheese and cooked veggies.
-
Mediterranean Vibe: Swap in feta cheese and add olives and sun-dried tomatoes for a delightful Mediterranean spin. It’s a flavor journey you won’t forget!
For some additional inspiration, consider trying out the irresistibly crispy Grilled Cheese Burrito or indulge in a creamy and flavorful Chicken Mac Cheese that will surely warm your heart!
How to Store and Freeze Grilled Cheese and Vegetable Sandwich
Fridge: Store any leftover grilled cheese and vegetable sandwich in an airtight container for up to 2 days. This will help maintain its flavor and prevent it from becoming soggy.
Freezer: If you’ve made extra sandwiches, wrap them tightly in plastic wrap or aluminum foil, then place them in a freezer-safe bag. They can be frozen for up to 3 months.
Reheating: To revive that crispy texture, reheat the sandwich in a skillet over medium heat until warmed through, about 3–4 minutes per side. Avoid the microwave to keep it from getting soggy.
Making Ahead: You can prepare the vegetables in advance and assemble the sandwiches just before cooking, ensuring they’ll taste fresh when you’re ready to enjoy your delicious grilled cheese and vegetable sandwich!
Make Ahead Options
These Perfectly Crispy Grilled Cheese & Vegetable Sandwiches are a fantastic option for meal prep! You can slice and roast your vegetables up to 3 days in advance, storing them in an airtight container in the fridge to keep them fresh and flavorful. Additionally, you can spread the mayonnaise on your bread slices and assemble the sandwiches (without cooking) up to 24 hours ahead of time; just be sure to refrigerate them between layers of parchment paper to prevent sogginess. When you’re ready to enjoy your grilled cheese and vegetable sandwich, simply cook it in a preheated skillet for about 3-4 minutes on each side, and it will taste just as delicious as if it were made fresh! This way, you can savor a comforting meal with minimal effort on busy weeknights.
Expert Tips for Grilled Cheese and Vegetable Sandwich
-
Preheat Thoroughly: Ensure the skillet is well-heated before cooking. This step prevents your grilled cheese and vegetable sandwich from turning soggy, allowing a perfect golden crust.
-
Mayo Magic: Use Hellmann’s mayonnaise generously on the bread’s exterior to achieve a wonderfully crispy texture, outperforming traditional butter in flavor and crunch.
-
Watch the Clock: Cooking times matter! Keep an eye on your sandwich as it cooks; if it’s overly browned, reduce the heat slightly to maintain that delicious crisp without burning.
-
Veggie Variations: Don’t hesitate to mix and match your favorite roasted vegetables, but ensure they’re well-drained before cooking to avoid excess moisture in the sandwich.
-
Cheese Choices: Choose your cheese wisely. While low-fat white cheddar works beautifully, experimenting with other cheeses can create new and delightful flavors to enhance your grilled cheese and vegetable sandwich experience.

Grilled Cheese and Vegetable Sandwich Recipe FAQs
How do I choose ripe vegetables for my grilled cheese and vegetable sandwich?
Absolutely! When selecting your vegetables, look for ones that are firm and vibrant in color. For zucchini and eggplant, avoid any with dark spots all over, and go for ones with smooth, shiny skin. Choosing fresh vegetables not only enhances the flavor of your sandwich but also ensures a delightful crunch!
What is the best way to store leftover grilled cheese and vegetable sandwiches?
Very! Store any leftover grilled cheese and vegetable sandwich in an airtight container in the refrigerator for up to 2 days. This helps to maintain the flavor and texture. When you want to eat them again, I recommend reheating in a skillet over medium heat for about 3-4 minutes on each side to bring back the delicious crispy exterior.
Can I freeze grilled cheese and vegetable sandwiches?
Absolutely! If you have extras, you can wrap the sandwiches tightly in plastic wrap or aluminum foil and place them in a freezer-safe bag, ensuring they’re protected from freezer burn. They can be frozen for up to 3 months. When ready to enjoy, allow them to thaw in the fridge overnight and then reheat in a skillet for the best results.
I’m worried about soggy bread. Any tips?
Great question! To prevent sogginess, make sure all your vegetables are well-drained before placing them in the sandwich. Excess moisture can lead to a less-than-ideal texture. Additionally, preheating your skillet thoroughly and using mayonnaise instead of butter will help achieve that golden, crispy crust you’re aiming for.
Is this sandwich suitable for those with specific dietary restrictions?
Very! This grilled cheese and vegetable sandwich is adaptable for various dietary needs. You can easily substitute low-fat white cheddar with dairy-free cheese options for lactose intolerance or use gluten-free bread for those with gluten sensitivities. Just ensure that your mayonnaise choice aligns with any allergies or dietary preferences. Enjoy the flexibility and make it your own!

Irresistibly Crispy Grilled Cheese and Vegetable Sandwich
Ingredients
Equipment
Method
- Preheat a non-stick skillet over medium heat for about 2 minutes.
- Spread a layer of Hellmann’s mayonnaise evenly on one side of each slice of bread.
- Place one slice of bread, mayo-side down, in the skillet and layer with cheese and vegetables.
- Top with the second slice of bread, mayonnaise side facing up, and press down gently.
- Cook for about 3-4 minutes until the bottom is golden brown and crisp.
- Carefully flip the sandwich and cook for another 3-4 minutes until golden and cheese is melty.
- Remove from skillet, let cool slightly, then slice and serve immediately.
Leave a Reply