
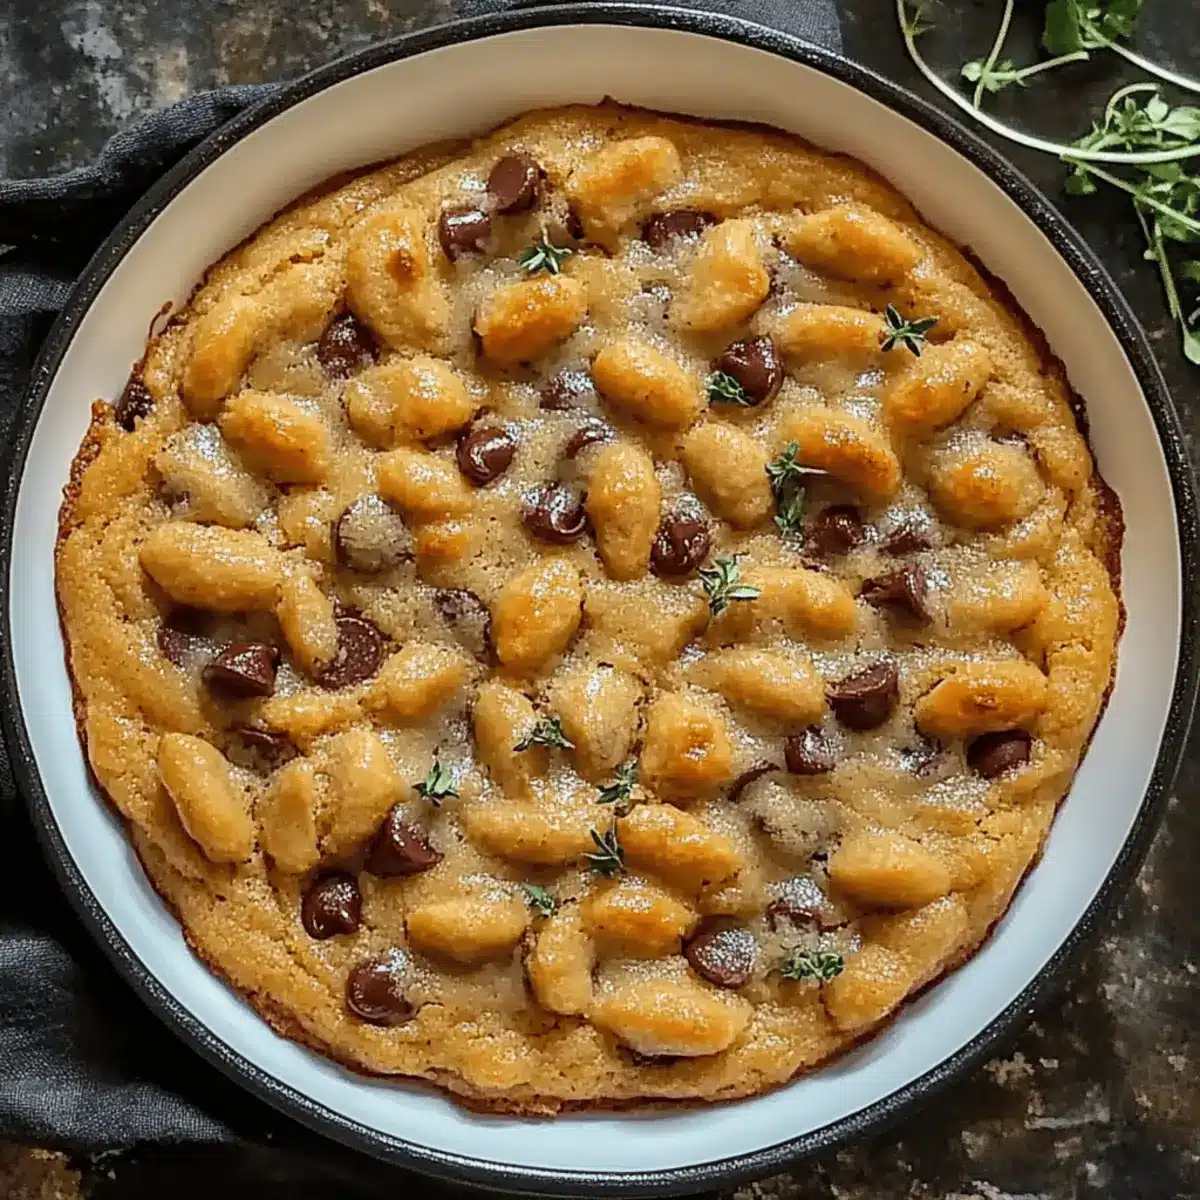
The warm, inviting aroma of freshly baked chocolate chip cookies wafts through my kitchen, instantly sparking memories of childhood and cozy afternoons. There’s something magical about these classic cookies, where a crispy edge meets a soft, chewy center, making them a go-to for any occasion. This recipe for Classic Chocolate Chip Cookies is not only incredibly easy to whip up, but it’s also customizable, allowing you to cater to various dietary needs, from vegan to gluten-free! Whether you’re a novice baker or a seasoned pro, these cookies promise effortless joy with every bite. Wondering how to make them your own? Let’s explore the options together!
Why are chocolate chip cookies a classic?
Nostalgic Flavor: Every bite of these cookies brings back memories of home, childhood, and family gatherings.
Customizable Options: Easily adapt this recipe for gluten-free or vegan diets, ensuring everyone can enjoy a warm treat.
Quick and Easy: Incredibly simple to make, these cookies come together in under 30 minutes, perfect for busy weeknights!
Crowd-Pleaser: Perfect for parties or bake sales, they’re sure to impress friends and family alike. Once you master these, you might even want to explore other delightful recipes like Brown Butter Coffee Cookies for a unique twist!
Chocolate Chip Cookie Ingredients
For the Dough
• All-Purpose Flour – Provides the structure needed for a perfectly chewy cookie; substitute with a gluten-free blend for a gluten-free version.
• Baking Soda – Acts as a leavening agent to create a light and airy texture; make sure it’s fresh for optimum results.
• Salt – Enhances the overall flavor of the cookies; adjust to taste, especially if using salted butter.
• Unsalted Butter – Adds richness and a delicious buttery flavor; can be swapped with coconut oil for a dairy-free option.
• Brown Sugar – Contributes moisture and a wonderful chewiness; light or dark can be used depending on the flavor depth you desire.
• Granulated Sugar – Adds sweetness and helps create that perfect cookie texture; can reduce for a lighter sweetness.
• Egg – Binds the ingredients and keeps the cookies moist; replace with flaxseed meal mixed with water or a commercial egg replacer for a vegan option.
• Vanilla Extract – Boosts the overall flavor profile; always choose pure extract for the best results.
• Chocolate Chips – The star ingredient that provides rich flavor and texture; consider dairy-free chips for a vegan version or add nuts for extra crunch.
Optional Add-Ins
• Nut Variations – Chopped walnuts or pecans can be stirred in for added texture and delightful crunch.
• Alternative Chips – Swap chocolate chips for white chocolate or butterscotch chips for a unique twist.
• Spices – Introduce a hint of cinnamon or nutmeg for a warm seasonal flavor that elevates your cookies.
Explore these creamy, customizable chocolate chip cookies and experience the many delicious possibilities!
Step‑by‑Step Instructions for Classic Chocolate Chip Cookies
Step 1: Preheat Your Oven
Begin by preheating your oven to 350°F (175°C). This step is crucial as it ensures your cookies will bake evenly and achieve that perfect golden-brown color. While the oven warms up, grab your baking sheets and line them with parchment paper for easy cleanup and uniform baking.
Step 2: Mix Dry Ingredients
In a medium mixing bowl, whisk together 2 ¼ cups of all-purpose flour, 1 teaspoon of baking soda, and ½ teaspoon of salt. This process helps to aerate the flour and evenly distribute the baking soda and salt, which are vital for the texture of your Classic Chocolate Chip Cookies. Set the bowl aside once well combined.
Step 3: Cream Butter and Sugars
In a large mixing bowl, beat together 1 cup of softened unsalted butter, ¾ cup of brown sugar, and ¾ cup of granulated sugar using a handheld mixer or a stand mixer. Cream until the mixture is light and fluffy, about 2-3 minutes. This step is key to achieving a rich and tender cookie, so don’t rush it!
Step 4: Add Egg and Vanilla
Next, beat in 1 large egg and 1 teaspoon of pure vanilla extract to the creamed butter and sugars. Continue mixing until everything is well blended. You’ll want the mixture to appear smooth and glossy, which indicates that the egg and vanilla have fully incorporated into the batter, enhancing the flavor of your Classic Chocolate Chip Cookies.
Step 5: Combine Wet and Dry Ingredients
Gradually add the dry ingredient mixture into the wet batter, mixing on low speed until just combined. Avoid overmixing, as this can lead to a denser cookie. You want your dough to be thick and slightly sticky, indicating that everything is perfectly melded together without being overworked.
Step 6: Fold in Chocolate Chips
Now it’s time to stir in 2 cups of chocolate chips. Gently fold them into the dough using a spatula or wooden spoon until evenly distributed. The chocolate chips are the star of your Classic Chocolate Chip Cookies, ensuring each bite is packed with melty goodness.
Step 7: Scoop the Dough
Using a cookie scoop or a tablespoon, drop spoonfuls of dough onto the prepared baking sheets, spacing them about 2 inches apart. This space allows the cookies to spread while baking evenly. You should see the little mounds of dough ready for their time in the oven!
Step 8: Bake the Cookies
Place the baking sheets in your preheated oven and bake for 10-12 minutes. Keep an eye on them; the edges should turn golden brown while the centers remain soft. Remember, they will continue to firm up after you remove them from the oven, so don’t worry if they look a bit underbaked.
Step 9: Cool the Cookies
Once baked, let the cookies cool on the baking sheets for about 5 minutes. This step allows them to set and makes it easier to transfer them without breaking. After cooling, gently move the cookies to wire racks to cool completely, or enjoy them warm for that ultimate indulgent experience!
Expert Tips for Classic Chocolate Chip Cookies
Soft Butter: Ensure your unsalted butter is soft but not melted; it’s crucial for achieving the right texture during creaming.
Uniform Size: Use a cookie scoop for evenly sized cookies to ensure they bake consistently; this avoids some cookies being overcooked while others are underbaked.
Chill the Dough: For thicker cookies, consider chilling the dough for at least 30 minutes before baking. This helps avoid excessive spreading, resulting in a delightful, chewy cookie.
Keep an Eye: Watch your cookies closely while they bake. They should look slightly underdone when you take them out; they will continue to firm up as they cool.
Explore Variations: Feel free to incorporate mix-ins, like nuts or different types of chocolate, into your classic chocolate chip cookies, allowing for delightful and customizable flavors!
Customizable Chocolate Chip Cookie Variations
Feel free to let your creativity shine as you adapt these classic cookies to your taste and dietary preferences!
- Vegan Option: Replace the egg with flaxseed meal mixed with water or a commercial egg replacer for a dairy-free delight.
- Gluten-Free: Swap all-purpose flour with a gluten-free flour blend to cater to gluten-sensitive friends without compromising flavor.
- Nutty Crunch: Add chopped walnuts or pecans for a delightful texture contrast that adds even more richness to each bite!
- Spicy Twist: Introduce a pinch of cinnamon or nutmeg to the batter for a warm, cozy flavor that’ll remind you of holiday baking.
- Different Chips: Use butterscotch or white chocolate chips instead of regular chocolate for a sweet twist on the traditional flavor.
- Dairy-Free: Opt for dairy-free chocolate chips if you’re going vegan, ensuring every chocolate-loving friend can enjoy these treats.
- Chilled Dough: For thicker cookies, chill your dough for 30 minutes before baking. This this will help you achieve the perfect chewy texture.
- Mix-Ins Galore: Consider adding shredded coconut or dried fruits like cranberries to create a cookie that’s truly your own.
Once you’re feeling adventurous, don’t hesitate to try some of our other delightful recipes like Garlic Butter Beef Cheeseburger Rollups for a savory twist! You’ll be delighted at how customizable home cooking can be!
What to Serve with Classic Chocolate Chip Cookies
The sweet aroma of freshly baked chocolate chip cookies invites you to create a delightful meal that embraces warmth and comfort.
- Cold Milk: A classic pairing that enhances the cookie’s flavors and provides a refreshing contrast to the warm, gooey texture.
- Creamy Vanilla Ice Cream: Serve cookies warm with a scoop on top for an indulgent dessert perfect for sharing.
- Fresh Fruit Salad: A vibrant mix of seasonal fruits offers a refreshing balance to the richness of the cookies. Sweet, juicy bites complement the chewy texture beautifully.
- Hot Coffee or Espresso: The rich, bold flavors of coffee elevate your chocolate chip experience, making each cookie taste even more divine.
- Chocolate Ganache Dip: For a chocolate lover’s dream, warm ganache adds an elegant touch and a decadent richness to every bite.
- Nutty Granola: Sprinkling some on top of the cookies or having it on the side introduces a delightful crunch and earthy flavor, perfect for textures.
- Chai Tea: The warm spices of chai harmonize wonderfully with the sweetness of chocolate chip cookies, creating a cozy afternoon snack sensation.
- S’mores Dip: For a fun twist, serve cookies with a warm, gooey s’mores dip made from melted chocolate and marshmallows, encouraging indulgent dipping!
- Peanut Butter Spread: A thick layer of peanut butter on top of a cookie enhances flavor combinations, merging salty and sweet. This offers a different dimension to the classic cookie.
Storage Tips for Classic Chocolate Chip Cookies
Room Temperature: Store cookies in an airtight container at room temperature for up to 1 week to maintain freshness and prevent drying out.
Freezer: For long-term storage, freeze cookies in a single layer on a baking sheet, then transfer to a freezer-safe bag for up to 3 months.
Reheating: To enjoy warm cookies, reheat in a microwave for about 10-15 seconds or in the oven at 350°F (175°C) for 5-7 minutes.
Customization Note: Remember, these storage tips for Classic Chocolate Chip Cookies apply whether you make them with gluten-free or vegan variations!
Make Ahead Options
These Classic Chocolate Chip Cookies are perfect for meal prep enthusiasts! You can prepare the cookie dough up to 72 hours in advance, storing it in an airtight container in the refrigerator. To maintain the quality and prevent drying out, ensure it’s well-wrapped. When you’re ready to bake, simply scoop the chilled dough onto a baking sheet and add an extra minute to the baking time if baking directly from the fridge. Alternatively, you can roll the dough into balls and freeze them for up to 3 months. Just bake straight from frozen, adding a couple of minutes to the bake time for those fresh-out-of-the-oven, irresistible cookies anytime!
Classic Chocolate Chip Cookies Recipe FAQs
How do I choose the best chocolate chips for my cookies?
When selecting chocolate chips, look for high-quality brands that use real chocolate for the best flavor. You can choose semi-sweet for a classic taste or opt for dark chocolate for a richer experience. If you have dietary needs, there are many excellent dairy-free chocolate chips available that work beautifully in this recipe.
How should I store my chocolate chip cookies?
To keep your cookies fresh, place them in an airtight container at room temperature, which will maintain their soft and chewy texture for up to 1 week. If you want to enjoy them later, you can freeze them. Just ensure they are fully cooled, then place them in a single layer on a baking sheet to freeze for about 1 hour. After they are frozen, transfer them to a freezer-safe bag and store for up to 3 months.
Can I freeze cookie dough before baking?
Absolutely! You can scoop the cookie dough onto a baking sheet and freeze the mounds until firm, then transfer them to a freezer-safe bag. They can be frozen for up to 3 months. When you’re ready to bake, no need to thaw; simply bake the frozen dough for an additional 2-3 minutes, adjusting the total baking time as needed.
What should I do if my cookies come out too flat?
If your cookies spread too much, it could be due to melted butter or not enough flour. Ensure your butter is just softened, not melted, as this will help maintain structure. Additionally, consider chilling the dough for at least 30 minutes before baking, as this cools the fat and can help prevent excessive spreading.
Are there any dietary considerations for these chocolate chip cookies?
Yes! This recipe is highly customizable. For a dairy-free option, substitute unsalted butter with coconut oil or vegan butter. Additionally, eggs can be replaced with a flaxseed meal mixed with water (1 tablespoon of flaxseed meal combined with 2.5 tablespoons of water equals 1 egg). For gluten-free needs, simply swap the all-purpose flour with a gluten-free flour blend, ensuring all other ingredients meet your dietary requirements.
How long do chocolate chip cookies last after baking?
Once baked, these cookies will stay fresh at room temperature in an airtight container for about 5 to 7 days. For optimal storage, keep them in a cool, dry place away from direct sunlight. If stored properly in the freezer, they can last for up to 3 months, retaining their delicious flavor.
Creamy Tuscan Marry Me Butter Beans for Irresistible Flavor
Ingredients
Equipment
Method
- Preheat your oven to 350°F (175°C) and line baking sheets with parchment paper.
- In a bowl, whisk together the flour, baking soda, and salt.
- In another bowl, cream together the butter, brown sugar, and granulated sugar until light and fluffy.
- Beat in the egg and vanilla until combined.
- Gradually add the dry ingredients to the wet mixture, mixing until just combined.
- Fold in the chocolate chips.
- Scoop dough onto baking sheets, spacing them 2 inches apart.
- Bake for 10-12 minutes until edges are golden brown.
- Allow cookies to cool for 5 minutes on sheets before transferring to wire racks.
Leave a Reply