
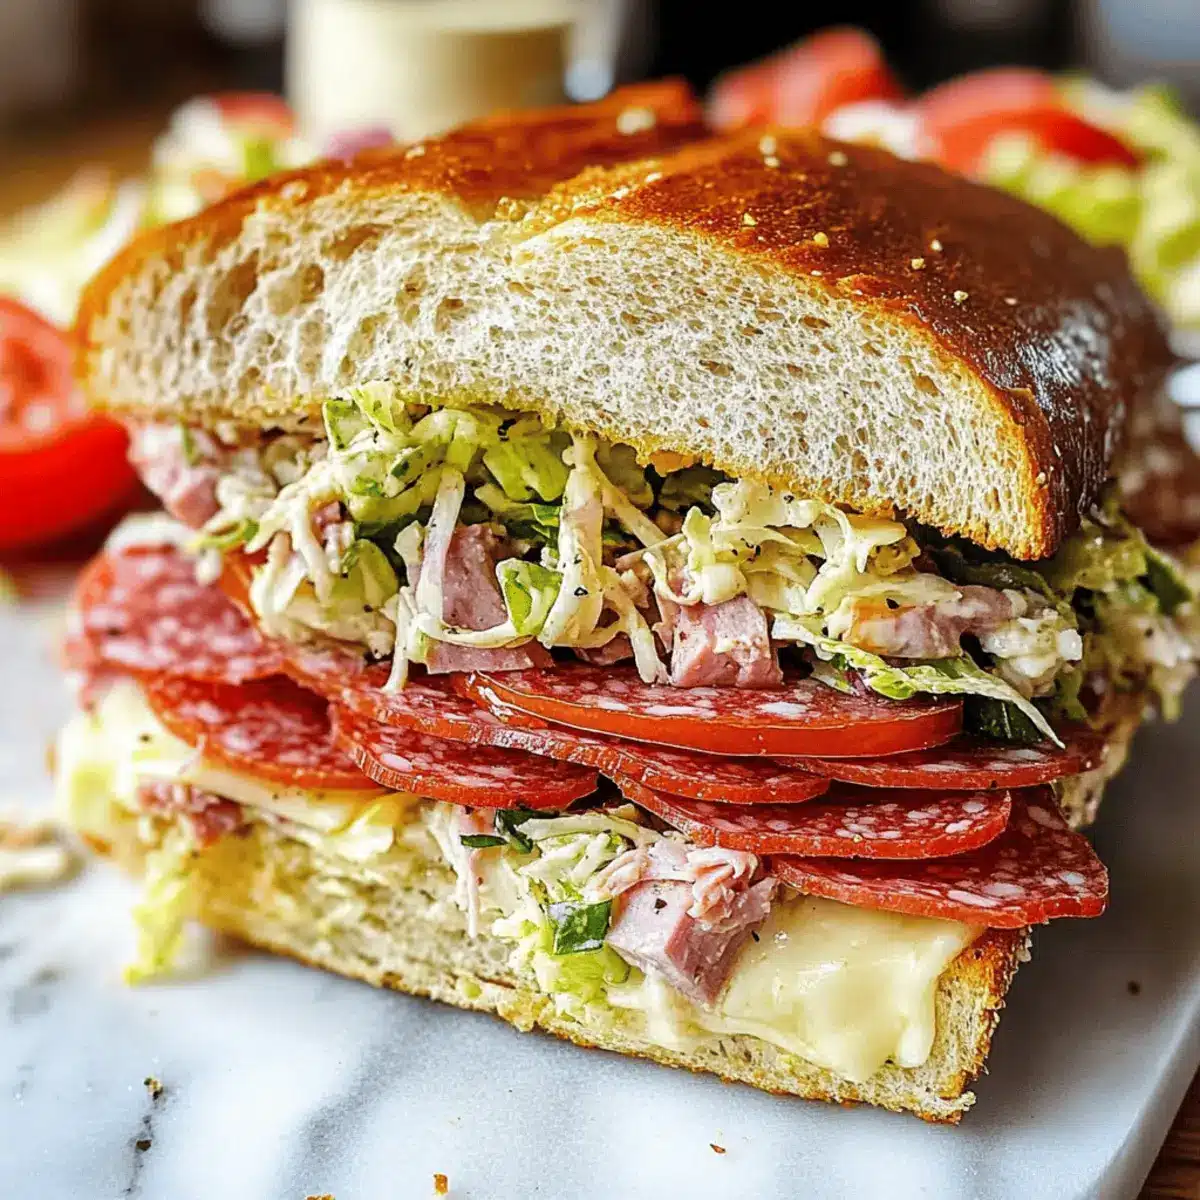
As I savored each bite of my latest culinary obsession, a wave of nostalgia washed over me—this was no ordinary sandwich; it was the Italian Grinder Salad Sandwich, a delightful spin on classic Italian flavors that’s taking kitchens by storm. This irresistible combination of savory meats, creamy cheeses, and a zesty salad packs a hearty punch, making it perfect for everything from a quick lunch to a festive party platter. Plus, it’s incredibly customizable and easy to prepare, so even on the busiest days, you can whip up a meal that feels special. Whether you’re looking for a new favorite in your meal prep rotation or just a fresh way to impress at your next gathering, this viral sensation offers satisfying crunch and flavor that will have everyone asking for seconds. What twist will you put on this delicious creation?

Why is this sandwich so popular?
Simplicity at its best: The Italian Grinder Salad Sandwich is a breeze to prepare, making it accessible for both novice cooks and experienced chefs.
Bold flavors: This sandwich combines zesty marinated ingredients with savory meats, resulting in a mouthwatering medley that’s sure to impress.
Customizable: Personalize it to your liking—swap in your favorite vegetables or cheeses, just like with my Toasted Italian Sandwich options!
Meal prep friendly: Whip up a batch ahead of time, ensuring you always have a satisfying meal ready to go, much like the beloved Chicken Caesar Sandwich.
Crowd pleaser: With its colorful presentation and fantastic flavor, it’s perfect for gatherings or casual lunches, leaving everyone in awe of your culinary skills!
Italian Grinder Salad Sandwich Ingredients
Explore the essential ingredients behind this viral sensation!
For the Dressing
• Mayonnaise – Creaminess; substitute with Greek yogurt for a lighter option.
• Red Wine Vinegar – Adds tanginess; apple cider vinegar can be used as an alternative.
• Garlic Powder – Enhances flavor; fresh minced garlic can provide a stronger taste.
• Oregano – Bring in herby aroma; dried basil or Italian seasoning can be used instead.
• Salt – Enhances overall taste; use kosher salt for a coarse texture.
• Pepper – Adds spice; freshly cracked black pepper works best for flavor.
For the Salad
• Shredded Lettuce – Provides crunch and freshness; substitute spinach or arugula if desired.
• Sliced Red Onion – Adds sharpness; use green onions for a milder taste.
• Banana Peppers – Offers zesty heat; jalapeños can substitute for more spice.
For the Meats
• Salami – Introduces saltiness and rich flavor; prosciutto or turkey can be leaner options.
• Pepperoni – Adds spiciness and texture; replace with sliced ham for a different flavor.
• Turkey – Serving as lean protein; chicken can be a substitute here.
For the Cheeses
• Provolone Cheese – Provides creaminess and melting quality; mozzarella can be a milder option.
• Grated Parmesan Cheese – Adds a nutty finish; Romano cheese can be used instead.
For the Assembly
• Tomato Slices – Delivers juiciness; use romaine lettuce leaves for a gluten-free option.
This Italian Grinder Salad Sandwich is not just a meal; it’s a canvas for your creativity!
Step‑by‑Step Instructions for Italian Grinder Salad Sandwich
Step 1: Make the Dressing
In a large bowl, whisk together mayonnaise, red wine vinegar, garlic powder, oregano, salt, and pepper until the mixture is smooth and well combined. This creamy dressing forms the flavorful base for your Italian Grinder Salad Sandwich. Aim for a slightly tangy note, and set aside for the flavors to meld while you prep the salad.
Step 2: Prepare the Salad
Add the shredded lettuce, sliced red onion, and banana peppers to the dressing in the bowl. Gently stir until the vegetables are evenly coated with the dressing. This vibrant mixture will enhance your sandwich with crunch and zest, making it a delightful addition. Let it sit for a few moments to absorb the flavors while you get the bread ready.
Step 3: Assemble the Meats
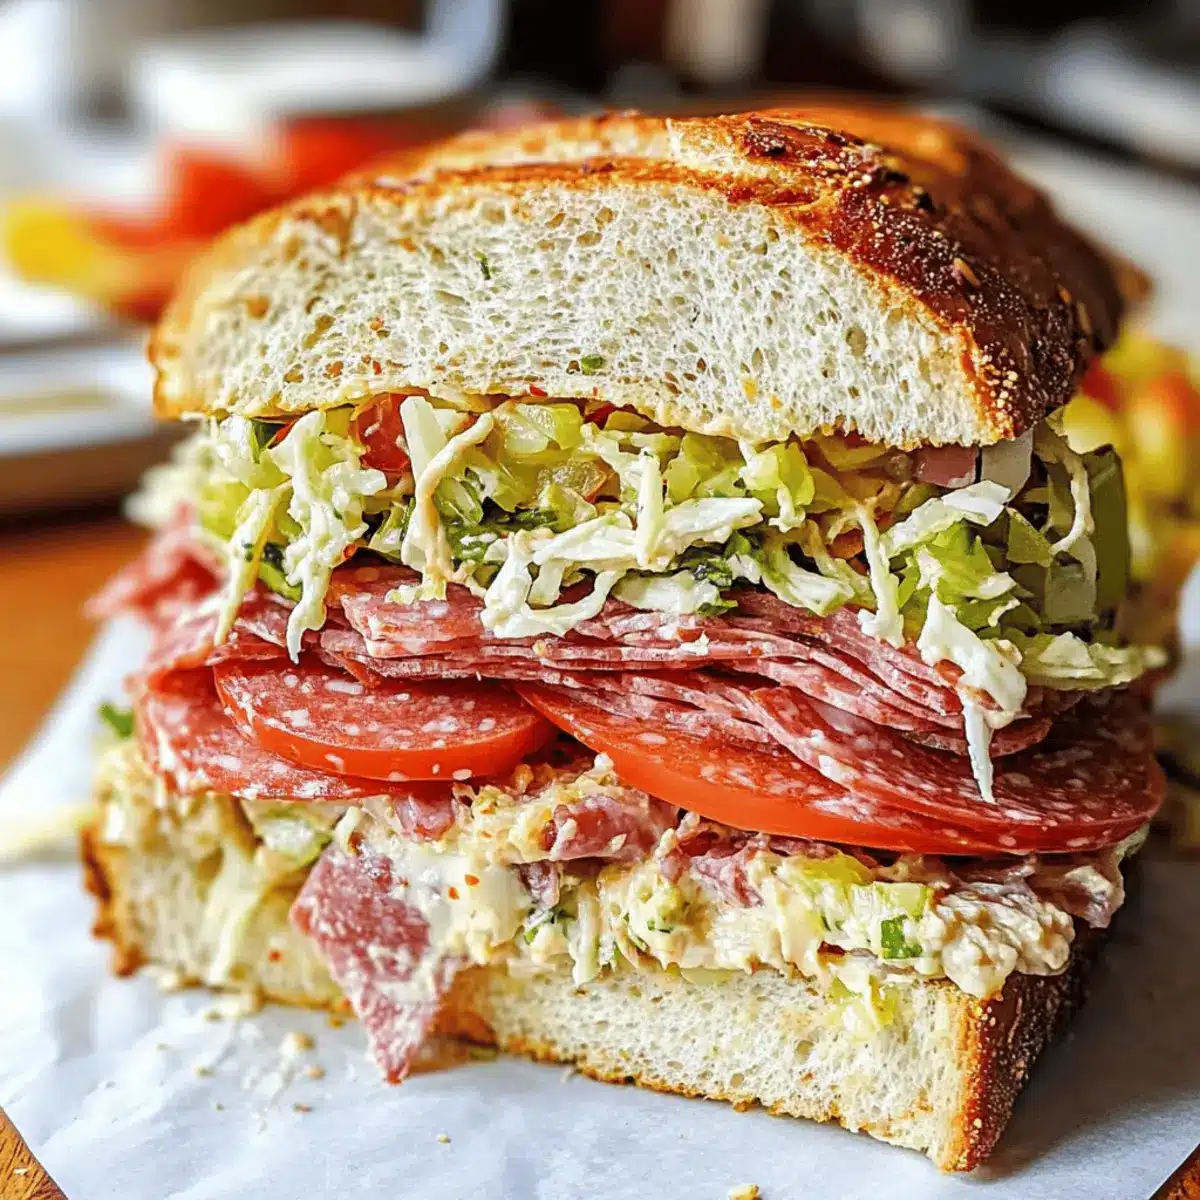
Take your sub rolls and layer in the salami, pepperoni, and turkey evenly in each roll. Build each Italian Grinder Salad Sandwich with care, ensuring the meats create a hearty foundation for all the delicious toppings to follow. The combination of flavors from these savory meats is crucial for an appetizing sandwich.
Step 4: Add the Cheese
Place slices of provolone cheese generously over the stacked meats in each sub roll. This will melt beautifully, adding creaminess that complements the meats and salad. Preheat your oven’s broiler to high, and prepare to give your sandwiches that mouthwatering melt that everyone loves.
Step 5: Broil the Sandwiches
Carefully place the assembled sandwiches on a baking sheet and broil them in the preheated oven for 2-3 minutes. Watch closely until the cheese is bubbly and slightly golden, while the edges of the meats and bread crisp up just right. This step is crucial for that satisfying contrast in textures.
Step 6: Add the Tomato and Season
Remove the sandwiches from the oven and top each with fresh tomato slices. Season the tomatoes with a sprinkle of salt and pepper for extra flavor, elevating your Italian Grinder Salad Sandwich with juicy freshness. Feel free to adjust the seasoning to taste for the perfect finish.
Step 7: Finish with the Grinder Salad
Spoon the prepared grinder salad generously atop each sandwich, allowing the delicious mixture to cascade over the sides. For a delightful finish, sprinkle grated Parmesan cheese over the salad, adding an indulgent touch that ties all the flavors together beautifully.
Step 8: Serve and Enjoy
Close the sandwiches carefully, cutting them in half if desired for easier handling. Serve these Italian Grinder Salad Sandwiches immediately for a delightful, flavor-packed meal. The combination of textures and tastes promises a satisfying experience that will make this recipe a favorite in your home kitchen.
Make Ahead Options
The Italian Grinder Salad Sandwich is perfect for busy home cooks looking to save precious time during the week! You can prepare the dressing and salad mixture up to 24 hours in advance. Store the blender salad in an airtight container in the refrigerator to keep it fresh and crispy. As for the meats and cheeses, you can layer them in the sub rolls and wrap tightly, refrigerating them for up to 3 days before assembly. When you’re ready to enjoy your sandwich, simply broil until the cheese is bubbly and top with fresh tomato and grinder salad before serving. This way, you’ll still get a delicious meal with minimal effort!
What to Serve with Italian Grinder Salad Sandwich
The perfect pairing can elevate your Italian Grinder Salad Sandwich, creating a meal that delights all the senses and satisfies your cravings.
-
Crispy Potato Chips: The crunch and salty goodness of chips offer a delightful contrast to the hearty sandwich.
-
Zesty Pickles: Their crispness and tangy flavor cut through the richness, enhancing the overall experience.
-
Simple Garden Salad: A light, fresh salad with a lemon vinaigrette complements the bold sandwich flavors effortlessly. Adding colorful veggies can brighten up the meal!
-
Sweet Potato Fries: The sweetness balances the savory elements of the sandwich and provides a satisfying crunch.
-
Roasted Veggies: Caramelized veggies like bell peppers and zucchini offer a warm side that pairs perfectly with the cold grinder salad.
-
Italian Pasta Salad: A cold pasta option loaded with fresh ingredients mirrors the sandwich’s flavors, perfect for gatherings.
-
Chilled Sparkling Water: Stay refreshed with a bubbly drink that cleanses the palate between each scrumptious bite of your sandwich.
-
Gelato for Dessert: Finish off with a scoop of creamy gelato for a sweet contrast that will leave you craving more of this delightful combo!
How to Store and Freeze Italian Grinder Salad Sandwich
Fridge: Store assembled sandwiches in an airtight container for up to 3 days. Keep the grinder salad separate to prevent sogginess.
Freezer: Wrap individual sandwiches tightly in plastic wrap and aluminum foil for freezing. They can be frozen for up to 2 months for optimal freshness.
Reheating: Thaw frozen sandwiches overnight in the refrigerator for best results. Reheat in the oven at 350°F (175°C) for about 10–15 minutes or until heated through and cheese is melted.
Make-Ahead Tips: Prepare the grinder salad in advance and store it in the fridge for up to 3 days. Assemble sandwiches as needed for meals or gatherings.
Italian Grinder Salad Sandwich Variations
Feel free to let your creativity shine by customizing this delightful sandwich to suit your taste buds!
-
Vegetarian Twist: Replace all meats with a mix of grilled vegetables, feta, and fresh mozzarella for a satisfying plant-based option. This twist allows you to enjoy the zesty flavors in a lighter way while still capturing the essence of the original.
-
Spice It Up: Add sliced jalapeños or a dash of hot sauce for those who love an extra kick. Transforming the heat level will bring excitement and customize your sandwich to your spice preference.
-
Gluten-Free Friendly: Opt for gluten-free sub rolls or lettuce wraps instead of traditional bread. This adaptation ensures that everyone can enjoy this delicious creation while sticking to their dietary needs.
-
Cheesy Delight: Go wild with cheese by layering different types like gouda, cheddar, or even a spicy pepper jack for an explosion of flavor. The rich, creamy textures will elevate the overall experience.
-
Herb Garden: Incorporate fresh herbs like basil or parsley into your salad for an aromatic touch. Not only do they add flavor, but they’ll also bring a lovely freshness that makes each bite a little brighter!
-
Savory Additions: Experiment with toppings such as sliced pickles, olives, or roasted red peppers. These ingredients will introduce new layers of taste and texture, making your sandwich crave-worthy.
-
Substitution Shift: Use turkey or chicken breast in place of salami and pepperoni for a leaner alternative. This brings a different flavor profile and caters to those looking for a lighter meal.
If you’re feeling inspired by other classic sandwiches, consider trying the delicious Cod Fish Sandwich for some crispy goodness or the timeless Chicken Caesar Sandwich for another zesty option!
Expert Tips for Italian Grinder Salad Sandwich
-
Prep Ingredients: Ensure all your ingredients are chopped and ready before starting. This makes the assembly process quick and enjoyable, preventing any last-minute dilemmas.
-
Mind the Broil: Keep a close watch while broiling the sandwiches. They can go from golden to burnt in seconds, so stay nearby to achieve that perfect melt without any charred edges.
-
Customize with Care: Feel free to swap ingredients to suit your taste, but be mindful of textures. Adding soggy ingredients can lead to a less enjoyable sandwich experience, so choose crunchy or fresh options.
-
Avoid Sogginess: Drain your grinder salad thoroughly to prevent it from making your bread soggy. A well-drained salad keeps the sandwich crisp and delightful until the last bite.
-
Storage Savvy: If you have leftovers, store the salad and sandwiches separately. This way, you can maintain freshness and crunch when you’re ready to enjoy them again.
Italian Grinder Salad Sandwich Recipe FAQs
How do I choose ripe ingredients for my Italian Grinder Salad Sandwich?
Absolutely! When selecting your vegetables, ensure that lettuce is crisp and vibrant, while tomatoes should be firm with a bright color. Avoid any veggies with dark spots or wilting. For the meats, look for freshly sliced options from your deli, and choose cheese that feels slightly soft to the touch and smells fresh.
What’s the best way to store leftover Italian Grinder Salad Sandwich?
Very! Store your assembled sandwiches in an airtight container in the fridge for up to 3 days. To keep the bread from getting soggy, I recommend storing the grinder salad separately until you’re ready to enjoy the leftovers. This helps maintain that delightful crunch!
Can I freeze the Italian Grinder Salad Sandwich?
Of course! To freeze, wrap each sandwich tightly in plastic wrap and then in aluminum foil for added protection. They can be kept in the freezer for up to 2 months. When you’re ready to enjoy, thaw them overnight in the fridge, then reheat in the oven at 350°F (175°C) for about 10–15 minutes until heated through.
How do I prevent my Italian Grinder Salad Sandwich from becoming soggy?
Certainly! Make sure to drain your grinder salad well before assembling the sandwiches. This reduces moisture, keeping your bread crisp. You can also consider adding cheese or lettuce between the salad and bread as an extra barrier against sogginess.
Are there any dietary considerations for the Italian Grinder Salad Sandwich?
Definitely! If you’re catering to dietary restrictions, consider using gluten-free bread for a gluten-free version. For those allergic to certain meats, you can easily substitute with grilled vegetables or omit the meats altogether. Just remember to check for any allergies related to specific cheeses or condiments too!
Can I customize the ingredients for my Italian Grinder Salad Sandwich?
Very much so! One of the best things about this recipe is its versatility. Feel free to swap in your favorite veggies, use different meats, or try a selection of cheeses. Just like my favorite variations, the combination can be endless, so let your creativity shine!

Italian Grinder Salad Sandwich: TikTok's Zesty Delight
Ingredients
Equipment
Method
- In a large bowl, whisk together mayonnaise, red wine vinegar, garlic powder, oregano, salt, and pepper until smooth.
- Add shredded lettuce, sliced red onion, and banana peppers to the dressing. Stir until coated.
- Layer salami, pepperoni, and turkey in each sub roll.
- Place provolone cheese slices over the meats in each roll.
- Broil the assembled sandwiches for 2-3 minutes until cheese is bubbly and golden.
- Remove sandwiches and top with tomato slices, seasoning with salt and pepper.
- Spoon the grinder salad over each sandwich, topping with grated Parmesan cheese.
- Close the sandwiches, cutting them in half if desired, and serve immediately.
Leave a Reply