
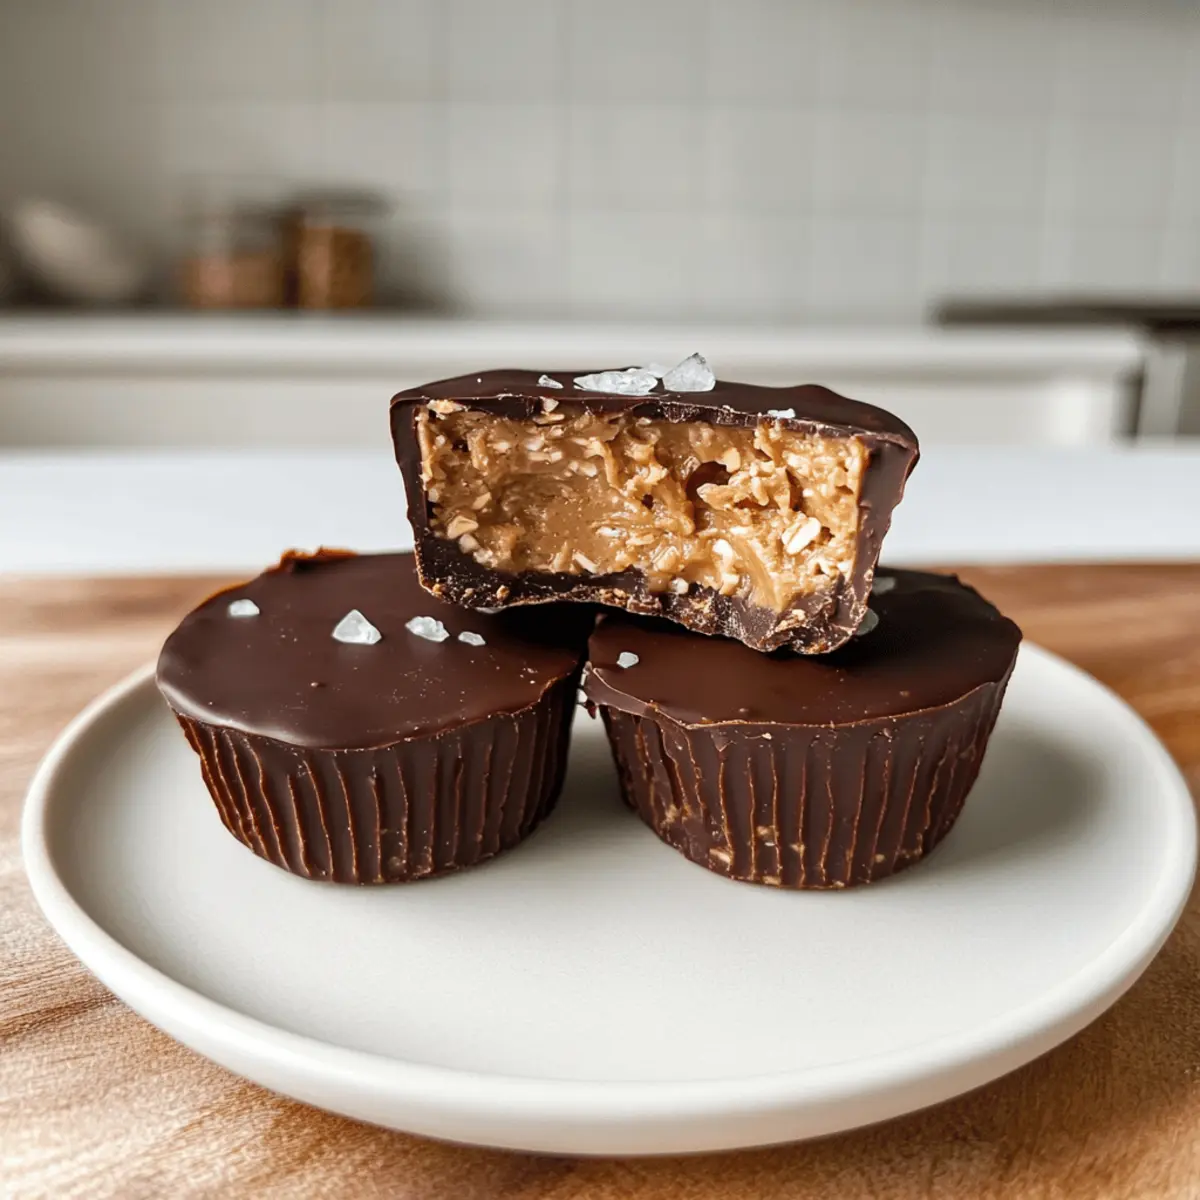
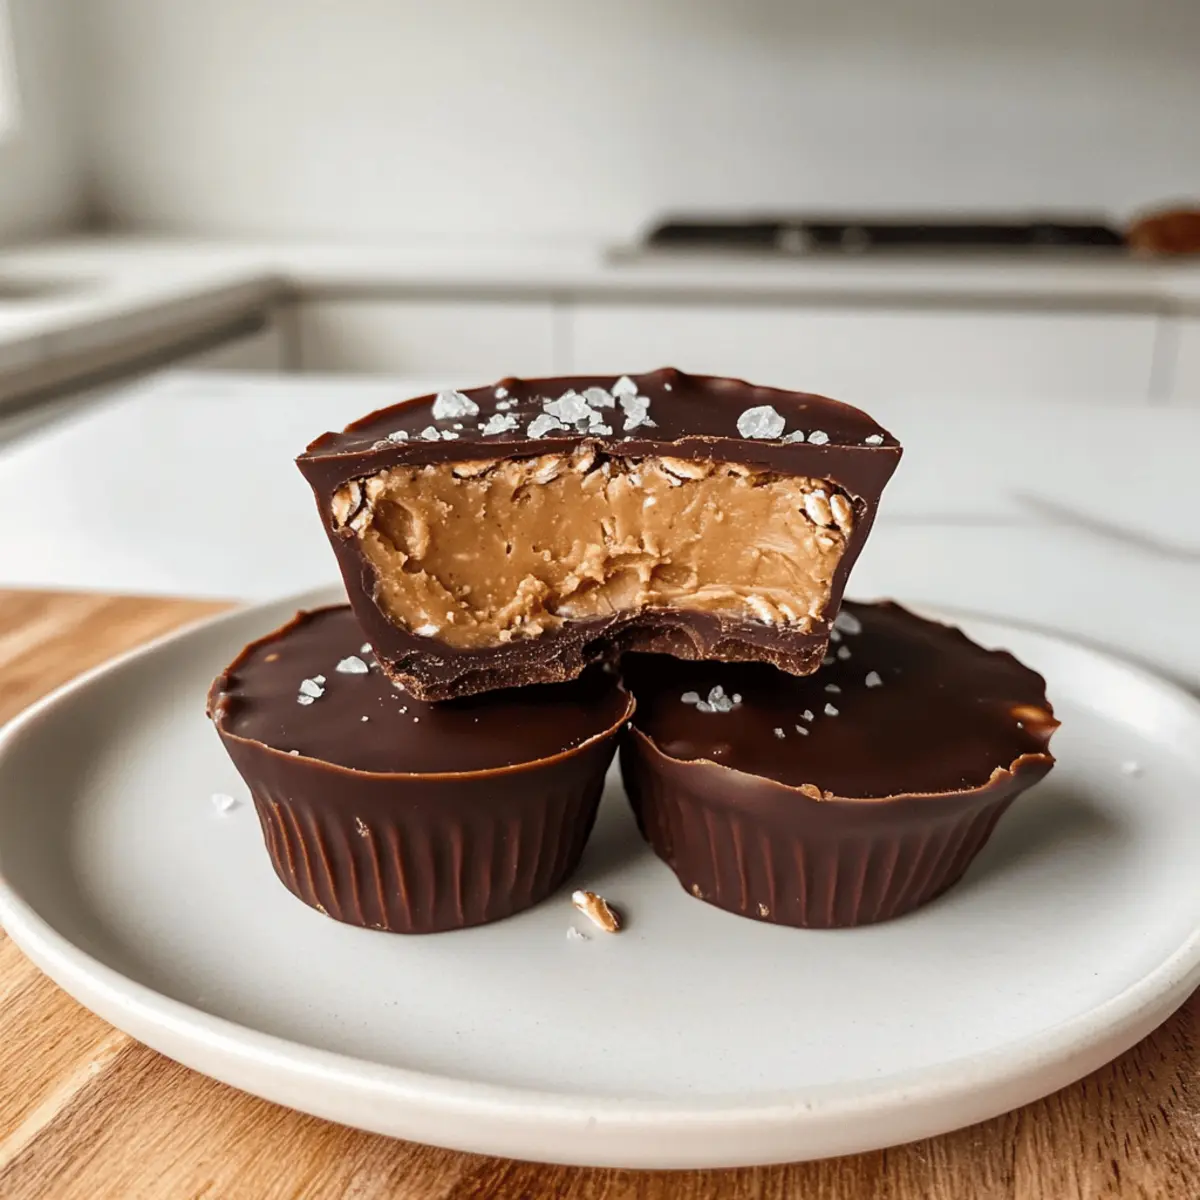
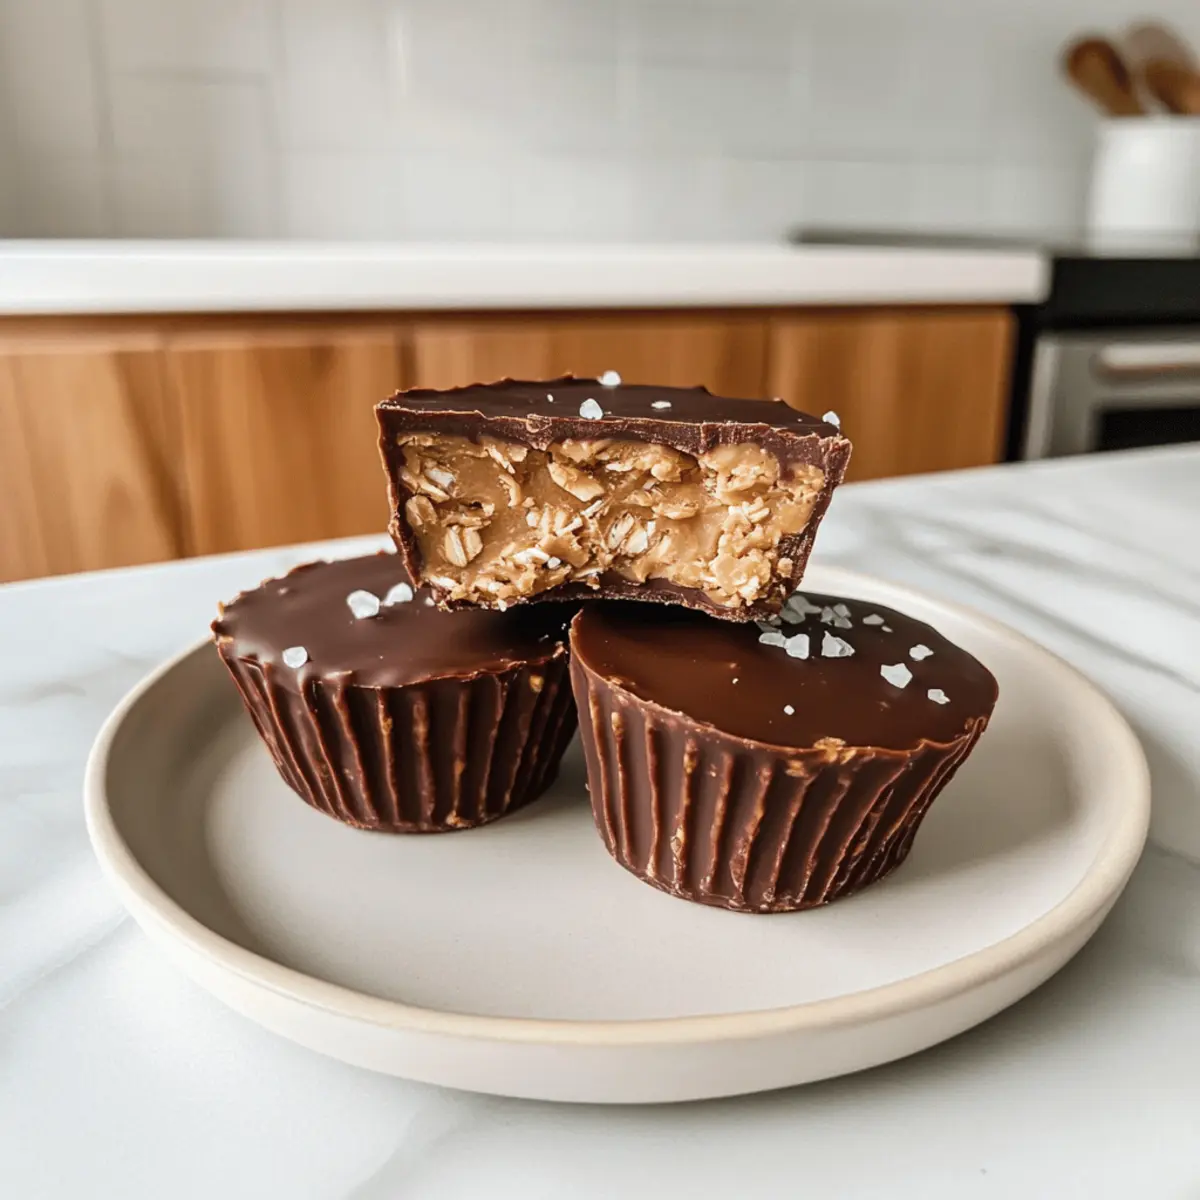
There’s a delightful sense of satisfaction when you whip up a treat that’s not just easy but brings a heartwarming smile to your face—the kind of smile you get from these Peanut Butter Oat Cups. This no-bake delight blends the wholesome goodness of rolled oats with the rich creaminess of peanut butter, topped off with a silky chocolate layer. They’re not only a quick treat to prepare but also cater to those embracing dairy-free and gluten-free lifestyles. Plus, you can whip these up in a flash, avoiding the fast-food trap entirely. Ready to indulge in a healthy snack that satisfies your cravings and makes your kitchen feel like a cozy retreat? Let’s dive into the recipe!

Why Are Peanut Butter Oat Cups Amazing?
Irresistible Taste: The combination of creamy peanut butter and rich chocolate captivates the taste buds, making these cups an instant favorite.
Quick & Easy: With minimal prep time, these no-bake treats fit perfectly into your busy lifestyle—ideal for those looking to steer clear of fast food.
Healthy Indulgence: Packed with rolled oats and natural sweeteners, they cater to vegan, dairy-free, and gluten-free diets without compromising flavor.
Versatile: Swap out peanut butter for almond or sunflower seed butter, and toss in your favorite nuts or dried fruits for extra texture and variety!
Crowd-Pleaser: Perfect as a snack or dessert, these delightful oat cups will leave your family and friends eagerly asking for more. Make sure to check out Garlic Butter Beef for another deliciously easy recipe!
Peanut Butter Oat Cups Ingredients
For the Base
• Peanut Butter – Use all-natural peanut butter for optimal creaminess; sunflower seed butter is a nut-free alternative.
• Rolled Oats – The structural base of the cups; choose certified gluten-free oats for a gluten-free option.
• Maple Syrup – Acts as a binding agent and sweetener; substitute with agave syrup or honey if preferred.
For the Topping
• Chocolate Chips – Use vegan dark chocolate for a decadent, dairy-free topping; ensure they melt smoothly!
• Flaky Sea Salt – A pinch on top enhances the flavor contrast, providing a delightful finish to the peanut butter oat cups.
With these simple and wholesome ingredients, you’re all set to create these delicious Peanut Butter Oat Cups that will have your family coming back for more!
Step‑by‑Step Instructions for Peanut Butter Oat Cups
Step 1: Mix Base
In a medium bowl, combine 1 cup of all-natural peanut butter and 1/2 cup of maple syrup. Using a spatula, mix until the mixture is smooth and well-blended, about 1-2 minutes. This creamy base will be the heart of your Peanut Butter Oat Cups, so ensure there are no lumps before moving on.
Step 2: Incorporate Oats
Add 2 cups of rolled oats to the peanut butter mixture and gently fold them in until they are evenly coated. This process should take about 1-2 minutes, and the oats should be fully combined with the peanut butter and syrup mixture. You’ll notice the mixture becoming thicker and sturdier as you mix.
Step 3: Mold Mixture
Prepare your silicone muffin molds by placing them on a sturdy baking sheet for support. Using about 2 tablespoons of the oat mixture for each cup, press the mixture firmly into the molds. Ensure each cup is tightly packed, creating a solid base that will hold together once set. Aim for even distribution and a nice, flat top.
Step 4: Add Filling
For added richness, take 1/2 cup of peanut butter and place a dollop on top of each molded oat cup. Alternatively, mix a scoop of protein powder into the peanut butter before spreading, if desired. Once they’re topped, place the baking sheet in the freezer and let it chill for about 20 minutes, allowing the cups to firm up.
Step 5: Melt Chocolate
While the oat cups are chilling, prepare the chocolate. In a microwave-safe bowl, combine 1 cup of chocolate chips with 1 tablespoon of oil. Heat the mixture in the microwave in 30-second intervals, stirring in between, until it’s completely melted and smooth. This should take about 1-2 minutes total, creating a luscious topping for your Peanut Butter Oat Cups.
Step 6: Choco Topping
After the oat cups have frozen and are firm to the touch, carefully remove them from the molds and place them back on the baking sheet. Drizzle or pour the melted chocolate over each cup, ensuring they are well-coated. Return them to the freezer again for another 20 minutes, allowing the chocolate to harden completely.
Step 7: Serve
Once the chocolate topping is set, your Peanut Butter Oat Cups are ready to enjoy! If desired, sprinkle a pinch of flaky sea salt on top for an added flavor contrast. These delightful cups can be served cold or at room temperature; just let them soften a bit if removed from the freezer.
How to Store and Freeze Peanut Butter Oat Cups
Airtight Container: Store your Peanut Butter Oat Cups in an airtight container to ensure they remain fresh and flavorful for up to 1 week in the fridge.
Freezer Friendly: For longer storage, feel free to freeze the cups! They can last in the freezer for up to 3 months. Just wrap each cup in plastic wrap before placing them in a freezer-safe bag.
Softening Tips: When ready to enjoy, remove your oat cups from the freezer and allow them to soften at room temperature for about 15–20 minutes prior to serving—this will enhance their creamy texture.
Reheating Guidance: There’s no need to reheat these treats; enjoy them cold or let them sit out a bit to come to room temperature for the best flavor experience!
What to Serve with Peanut Butter Oat Cups
Looking to create a delightful spread that beautifully complements your creamy no-bake treats?
- Fresh Fruit: Slices of banana or apple add a refreshing crunch and natural sweetness that balance the rich flavors of the cups.
- Almond Milk: A chilled glass of almond milk mirrors the nuttiness of the Peanut Butter Oat Cups and provides a creamy sip that’s dairy-free.
- Chocolate Dipped Strawberries: These fruity bites offer a perfect touch of elegance and playfulness, enhancing the chocolatey goodness of the oat cups.
- Coconut Yogurt: A scoop of dairy-free coconut yogurt adds a luscious, creamy layer to your snack while keeping it vegan and refreshing.
- Trail Mix: A handful of homemade trail mix brings crunchy textures and savory flavors, creating a delightful contrast to the soft oat cups.
- Homemade Granola Bars: Pairing with chewy, homemade granola bars expands your snack options while echoing the wholesome oats in the cups.
- Iced Coffee: A refreshing iced coffee will awaken your taste buds and create an indulgent treat for an afternoon pick-me-up.
- Cacao Nib Sprinkles: Just a sprinkle on top of your oat cups can add a bitter crunch that contrasts beautifully with their sweetness while enhancing the chocolate notes.
Make Ahead Options
These Peanut Butter Oat Cups are a fantastic solution for busy home cooks looking to save time! You can prepare the base mixture and mold them up to 24 hours in advance; simply cover the molded cups with plastic wrap and refrigerate. When it’s time to enjoy these treats, add the peanut butter filling and chocolate topping just before serving—this ensures that the flavors remain fresh and vibrant. If you want to extend their shelf life, store the completed oat cups in an airtight container in the freezer for up to 3 months. Just allow them to soften at room temperature for a few minutes before savoring, and you’ll have delightful snacks ready whenever you need them!
Peanut Butter Oat Cups Variations
Feel free to get creative and customize these delicious Peanut Butter Oat Cups to suit your tastes and dietary needs!
-
Nut-Free Swap: Replace peanut butter with sunflower seed butter for a nut-free alternative that’s just as creamy and delightful.
-
Sweetener Substitution: If you prefer a different sweetness, swap maple syrup for honey or agave syrup, adjusting the flavor profile to your liking.
-
Add a Crunch: Mix in chopped nuts, like almonds or walnuts, or seeds for an extra bite and texture. The added crunch will make each bite more satisfying!
-
Chocolate Coating Options: Try using white or milk chocolate for a twist! These options can create a different flavor experience, catering to different chocolate lovers.
-
Protein Boost: Increase the nutritional value by mixing in your favorite protein powder into the peanut butter before adding it to the cups. This creates a more filling snack!
-
Fruity Enhance: Incorporate dried fruits like cranberries or raisins into the mix for a chewy sweetness that beautifully complements the peanut butter and chocolate.
-
Spice It Up: Add a pinch of cinnamon or a splash of vanilla extract for an exciting flavor boost. These spices can provide warmth and depth to your oat cups.
-
Different Shapes: Use cookie cutters or muffin tins to create fun shapes instead of traditional cups. Perfect for kids, these creative versions make snacking more fun!
With these variations, you can make these Peanut Butter Oat Cups uniquely yours while enjoying the wholesome goodness they offer. And if you’re in the mood for more delectable delights, don’t forget to check out Brown Butter Coffee for another irresistible recipe!
Expert Tips for Peanut Butter Oat Cups
-
Use Quality Ingredients: Always opt for all-natural peanut butter without added sugars or oils. This ensures a creamy and flavorful base for your peanut butter oat cups.
-
Correct Oats: Stick with rolled oats rather than quick oats; the texture will provide the perfect chewiness in your no-bake treats.
-
Check Consistency: If your peanut butter is too runny, your oat cups may not hold together well. Choose a thicker variety for best results.
-
Silicone Molds: For easy removal, use silicone molds to shape your peanut butter oat cups. They’ll pop out effortlessly, leaving you with neatly formed treats.
-
Customize Wisely: Feel free to add in dried fruits or nuts, but remember to adjust the binding ingredients if you add more solids to the mixture.
Peanut Butter Oat Cups Recipe FAQs
How do I select ripe ingredients for my Peanut Butter Oat Cups?
Absolutely! Use all-natural peanut butter that is creamy and smooth. Check for no added sugars or oils for the best flavor. Opt for certified gluten-free rolled oats; avoid quick oats as they won’t provide the same lovely chewy texture. Fresh maple syrup is ideal and gives the right amount of sweetness and binding to the mixture.
How should I store Peanut Butter Oat Cups, and how long do they last?
Very! Keep your Peanut Butter Oat Cups in an airtight container in the fridge for up to 1 week. If you want to store them longer, consider freezing them. Just make sure to wrap each cup individually in plastic wrap, then place them in a freezer-safe bag. They can stay fresh for up to 3 months in the freezer!
What’s the best way to freeze Peanut Butter Oat Cups?
Certainly! To freeze your Peanut Butter Oat Cups, first ensure they are completely set in the freezer after adding the chocolate topping. Once they are firm, wrap each cup in plastic wrap. Place them into a freezer-safe bag or container, squeezing out as much air as possible. When ready to enjoy, simply remove a cup from the freezer and let it sit at room temperature for 15-20 minutes to soften before indulging!
What if my Peanut Butter Oat Cups don’t hold together?
No worries! If your oat cups fall apart, it may be due to using runny peanut butter or not combining the oats well. For best results, ensure your peanut butter has a thick consistency. If you find the mixture crumbly, try incorporating a bit more maple syrup or pressing the mixture more firmly into the molds before freezing.
Are Peanut Butter Oat Cups safe for people with allergies?
Absolutely! You can modify these cups to be allergy-friendly. Substitute peanut butter with sunflower seed butter for a nut-free option, and double-check all added ingredients (like chocolate chips) to ensure they are free from allergens. Always be cautious about cross-contamination if serving those with severe allergies.
Can I customize my Peanut Butter Oat Cups?
Very! The beauty of Peanut Butter Oat Cups lies in their versatility. Feel free to customize them by adding in your favorite mix-ins, like dried fruit, seeds, or nuts. Just remember to adjust the peanut butter and syrup slightly if you’re adding a lot of solids to maintain the right texture!
Peanut Butter Oat Cups for a Creamy No-Bake Treat
Ingredients
Equipment
Method
- In a medium bowl, combine 1 cup of all-natural peanut butter and 1/2 cup of maple syrup. Mix until smooth, about 1-2 minutes.
- Add 2 cups of rolled oats and gently fold them in until coated, about 1-2 minutes.
- Prepare silicone molds on a baking sheet. Press about 2 tablespoons of oat mixture into each mold.
- Top each cup with 1/2 cup of peanut butter or protein powder mixed in. Chill in the freezer for 20 minutes.
- In a microwave-safe bowl, mix 1 cup of chocolate chips with 1 tablespoon of oil. Microwave until melted, about 1-2 minutes.
- Remove cups from freezer, drizzle melted chocolate over each cup, and return to freezer for another 20 minutes.
- Sprinkle with flaky sea salt and enjoy cold or at room temperature.
Leave a Reply