
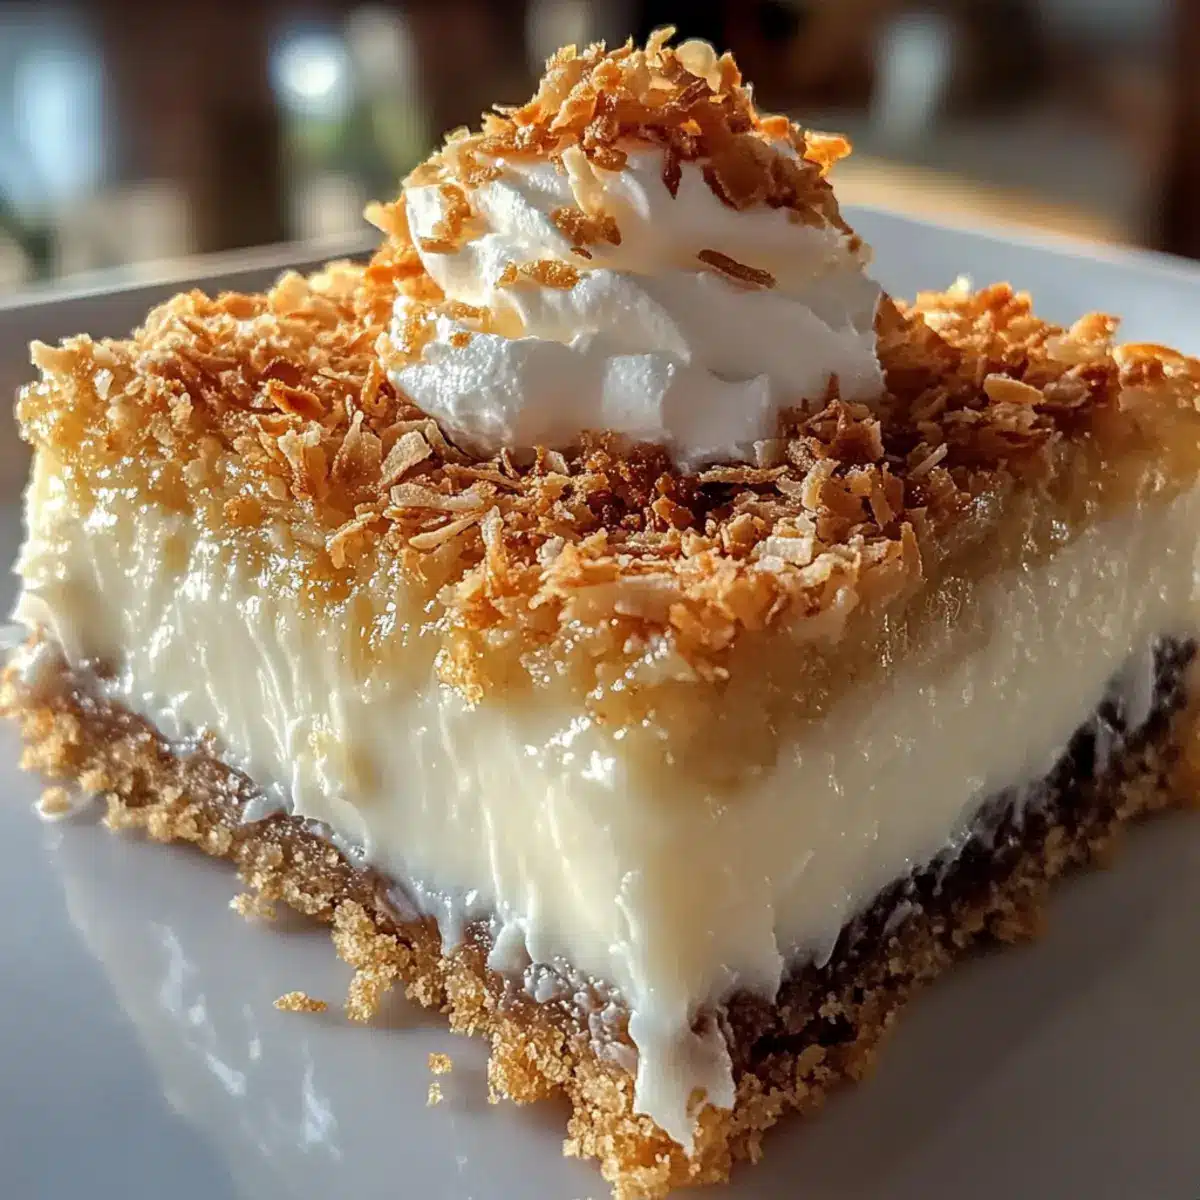
The sun-drenched beaches of summer never fail to evoke thoughts of sweet coconut treats, and these Coconut Cream Dream Bars bring that tropical bliss right into your kitchen. With their velvety filling and a crunchy graham cracker crust, these bars make for an effortless dessert that’s perfect for summer gatherings or simply satisfying your craving for something sweet. What I love most is how easy they are to whip up—no fuss, just deliciousness that your friends and family will adore. Plus, they’re vegetarian and can be made dairy-free, making them a delightful option for any occasion. Ready to make this dreamy dessert? Let’s dive into the recipe!
Why are Coconut Cream Dream Bars irresistible?
Indulgent, creamy texture: The velvety filling coupled with a crunchy graham cracker crust creates an unforgettable dessert experience. Easy to make: Simple ingredients and minimal effort make this recipe accessible for everyone, even busy home cooks. Vegetarian-friendly: A delightful option for all, ensuring no one misses out on dessert. Customizable toppings: Experiment with fresh fruits or chocolate for a unique twist, just like my Banana Pudding Dream bars! Perfect for gatherings: Impress your friends and family with a tropical treat that’s bound to be a hit at summer parties.
Coconut Cream Dream Bars Ingredients
For the Crust
• Graham Cracker Crumbs – Ideal for creating a sturdy base; substitute with digestive biscuits for a gluten-free option.
• Melted Butter – Binds the crust ingredients together, adding richness; coconut oil can be used for a dairy-free alternative.
For the Filling
• Sweetened Condensed Milk – Provides sweetness and creamy texture; you can use coconut milk for a lighter version.
• Shredded Coconut – Amplifies the coconut flavor and texture in the filling; opt for unsweetened for a less sweet taste.
• Powdered Sugar – Ensures a smooth consistency while sweetening the filling; erythritol is a great low-carb alternative.
For the Topping
• Heavy Cream – Whipped to create a light and fluffy topping; coconut cream can replace it for a lighter option.
• Vanilla Extract – Adds a warm depth of flavor to the whipped cream; consider almond extract for a unique twist.
• Toasted Coconut Flakes – Adds a crunchy texture on top; feel free to substitute with chopped nuts for additional flavor.
Enjoy making these Coconut Cream Dream Bars and get ready to treat your loved ones to a slice of paradise!
Step‑by‑Step Instructions for Coconut Cream Dream Bars
Step 1: Preheat the Oven
Begin by preheating your oven to 350°F (175°C). This creates the perfect baking environment for your Coconut Cream Dream Bars. Meanwhile, gather your ingredients and a 9×9-inch baking pan, greasing it lightly with butter or non-stick spray to ensure easy removal after baking.
Step 2: Prepare the Crust
In a mixing bowl, combine graham cracker crumbs and melted butter until the mixture resembles wet sand. Press this mixture firmly into the bottom of the greased pan, ensuring an even layer. Bake the crust in the preheated oven for 8-10 minutes until it turns golden brown and has a delightful aroma wafting through your kitchen.
Step 3: Make the Filling
While the crust is baking, prepare the filling. In a separate bowl, mix sweetened condensed milk, shredded coconut, and powdered sugar together until the mixture is smooth and creamy. Pour this luscious filling over the warm, baked crust, spreading it evenly using a spatula to ensure every bite is delicious.
Step 4: Bake Again for a Set Filling
Return the pan to the oven and bake for another 15-20 minutes. You’ll know the Coconut Cream Dream Bars are done when the filling is set and the surface is lightly golden. Once baked, remove the pan from the oven and allow it to cool completely at room temperature, filling your home with sweet coconut scent.
Step 5: Prepare the Whipped Topping
In a clean mixing bowl, whip the heavy cream and vanilla extract together until soft peaks form, making sure to stop before it becomes butter. This light, fluffy topping adds a perfect finish to your Coconut Cream Dream Bars. Spread the whipped cream generously over the cooled filling, creating a cloud of cream on top.
Step 6: Add Finishing Touches
Sprinkle toasted coconut flakes evenly over the whipped cream, adding a delightful crunch that contrasts beautifully with the creamy layers below. For an added touch, you can use a dollop of additional whipped cream to enhance the visual appeal.
Step 7: Chill Before Serving
Refrigerate the Coconut Cream Dream Bars for at least 2 hours to allow the flavors to meld and the texture to set. Once chilled, the bars will slice beautifully, making them perfect for serving.
Step 8: Slice and Serve
Using a sharp knife, cut the bars into squares and serve them chilled. This delightful dessert is ideal for warm summer gatherings, so be prepared to share your Coconut Cream Dream Bars with friends and family for a taste of tropical bliss!
Coconut Cream Dream Bars Variations
Feel free to explore these delightful twists on the classic Coconut Cream Dream Bars that will tantalize your taste buds!
- Dairy-Free: Substitute heavy cream with coconut cream for a rich and creamy topping that’s entirely dairy-free.
- Gluten-Free: Use gluten-free graham crackers or crushed almond flour for the crust to keep it friendly for those avoiding gluten.
- Chocolate Lovers: Mix in chocolate chips into the filling instead of shredded coconut for a decadent chocolate coconut twist.
- Fruity Flair: Top with fresh fruits like sliced mango or strawberries for a burst of color and flavor that brings summer to your table.
- Reduced Sugar: Replace sweetened condensed milk with a homemade coconut milk blend for a lighter, lower-sugar version that still boasts flavor.
- Nutty Addition: Sprinkle chopped nuts, such as almonds or pecans, on top for an added crunch and earthy flavor that complements the coconut beautifully.
- Tropical Mix: Incorporate crushed pineapple into the filling for an extra fruity punch that enhances the tropical vibe.
- Spicy Kick: Add a pinch of cayenne pepper to the filling for those who enjoy a bit of heat in their desserts, transforming the flavor profile altogether.
Feel free to enjoy a slice of pure happiness along with some Banana Oatmeal Bars, and let your creativity shine in the kitchen!
Make Ahead Options
These Coconut Cream Dream Bars are a fantastic choice for busy home cooks looking to simplify their meal planning! You can prepare the crust and the filling up to 24 hours in advance. Simply bake the crust and let it cool completely before adding the filling, which can also be mixed and poured onto the crust the day before serving. To maintain their luscious texture, refrigerate the assembled bars tightly covered. When you’re ready to serve, whip the cream, top the bars, and chill for at least 2 hours before slicing. With these prep tips, you’ll enjoy the delightful taste of Coconut Cream Dream Bars with minimal effort on the day of your gathering!
What to Serve with Coconut Cream Dream Bars
Indulging in these dreamy bars is just the beginning—let’s build a delightful meal around them!
-
Fresh Fruit Salad: A medley of sweet, juicy fruits adds a refreshing contrast to the creamy bars. Strawberries, pineapple, and mango create a tropical vibe that complements the coconut flavor beautifully.
-
Crispy Spring Rolls: Light and crunchy, these savory bites are a perfect appetizer that balance the sweetness of the dessert. Filled with crisp vegetables or shrimp, they offer a delightful texture that makes meal time special.
-
Vanilla Ice Cream: A scoop of creamy vanilla ice cream adds an extra layer of richness when served alongside the bars. The cold, smooth texture creates a heavenly pairing that elevates this sweet treat.
-
Iced Coconut Lemonade: This thirst-quenching drink captures summer’s essence, blending zesty lemon with tropical coconut. It’s a refreshing complement that balances the creaminess of the bars, making for a vibrant dessert experience.
-
Toasted Almonds: Sprinkle some toasted almonds for a nutty crunch that contrasts delightful with the smooth filling. Their rich flavor accentuates the bar’s tropical notes while adding a satisfying texture.
-
Chocolate Dipped Strawberries: Juicy strawberries coated in chocolate add an elegant touch to your dessert spread. The sweet and tart fruit pairs beautifully with the coconut bars, satisfying all taste buds.
-
Sweet Tea or Iced Coffee: Refreshing beverages like sweet tea or iced coffee complete the meal, providing a warm beverage counterpart to the cold treat. Opt for a hint of vanilla in your coffee to tie your flavors together!
How to Store and Freeze Coconut Cream Dream Bars
Fridge: Keep leftover Coconut Cream Dream Bars in an airtight container for up to 1 week. This will maintain their creamy texture and freshness for delightful snacking.
Freezer: For longer storage, wrap individual bars tightly in plastic wrap and place them in a freezer-safe container. They can be frozen for up to 3 months while retaining their delicious taste.
Thawing: When ready to enjoy, transfer the bars from the freezer to the fridge to thaw overnight. This ensures they retain their creamy, dreamy consistency before serving.
Serving After Freezing: For the best experience, enjoy the bars chilled straight from the fridge; they’ll be refreshing and satisfy your sweet tooth!
Expert Tips for Coconut Cream Dream Bars
-
Cool Completely: Ensure the filling has fully cooled before slicing, as this prevents the bars from being runny and ensures perfect squares.
-
Chill Time: Refrigerate the bars for at least 2 hours. This enhances the flavors and helps with the texture, making them easier to cut.
-
Whipping Cream Perfection: Use an electric mixer to whip the cream to soft peaks. This ensures a light, fluffy topping that complements the creamy filling.
-
Quality Ingredients: Use sweetened condensed milk or coconut milk that is fresh for optimal flavor. Old or nearly expired ingredients can affect the overall taste.
-
Customizable Layers: Feel free to swap toppings; toasted coconut can be replaced with chocolate chips or fresh tropical fruits for a personalized touch in your Coconut Cream Dream Bars.
Coconut Cream Dream Bars Recipe FAQs
How do I choose the right coconut for my Coconut Cream Dream Bars?
I recommend looking for unsweetened shredded coconut for a more balanced flavor in your bars. Check the packaging for freshness—ensure there are no signs of moisture or bad odor. If you prefer a sweeter taste, go for sweetened shredded coconut.
How should I store my Coconut Cream Dream Bars?
Store any leftover Coconut Cream Dream Bars in an airtight container in the fridge for up to 1 week. This will keep the bars fresh and maintain that delightful creamy texture we all love!
Can I freeze my Coconut Cream Dream Bars?
Absolutely! To freeze, wrap each individual bar tightly in plastic wrap and place them in a freezer-safe container. They can be frozen for up to 3 months. When you’re ready to enjoy them, simply transfer the bars to the fridge to thaw overnight for the best results!
What should I do if my bars are too runny after baking?
If your Coconut Cream Dream Bars turn out runny, it’s likely that the filling didn’t set properly. Ensure you bake the filling until it’s set and slightly golden, about 15-20 minutes. Allow it to cool completely before slicing. If you encounter issues, refrigerating them for an additional hour can help solidify them!
Are there any dietary considerations I should keep in mind while making these bars?
Yes, if you’re cooking for anyone with dietary restrictions, you can make these Coconut Cream Dream Bars dairy-free by substituting melted butter with coconut oil and replacing heavy cream with coconut cream. Always double-check labels for allergens—especially if including toppings like nuts or chocolate!
Can I make these bars ahead of time?
Definitely! You can prepare these delightful Coconut Cream Dream Bars a day in advance. Just store them covered in the fridge until serving; this not only saves you time but also enhances the flavor as they chill and set.

Coconut Cream Dream Bars: A Slice of Tropical Happiness
Ingredients
Equipment
Method
- Preheat your oven to 350°F (175°C) and gather your ingredients.
- Combine graham cracker crumbs and melted butter in a mixing bowl.
- Press the mixture firmly into the bottom of a greased 9x9-inch baking pan and bake for 8-10 minutes until golden brown.
- In a separate bowl, mix sweetened condensed milk, shredded coconut, and powdered sugar until smooth.
- Pour the filling over the crust and bake again for another 15-20 minutes until the filling is set.
- Allow the pan to cool completely at room temperature.
- Whip the heavy cream with vanilla extract until soft peaks form, then spread over the cooled filling.
- Sprinkle toasted coconut flakes on top.
- Refrigerate for at least 2 hours to set before slicing.
- Slice into squares and serve chilled.
Leave a Reply