
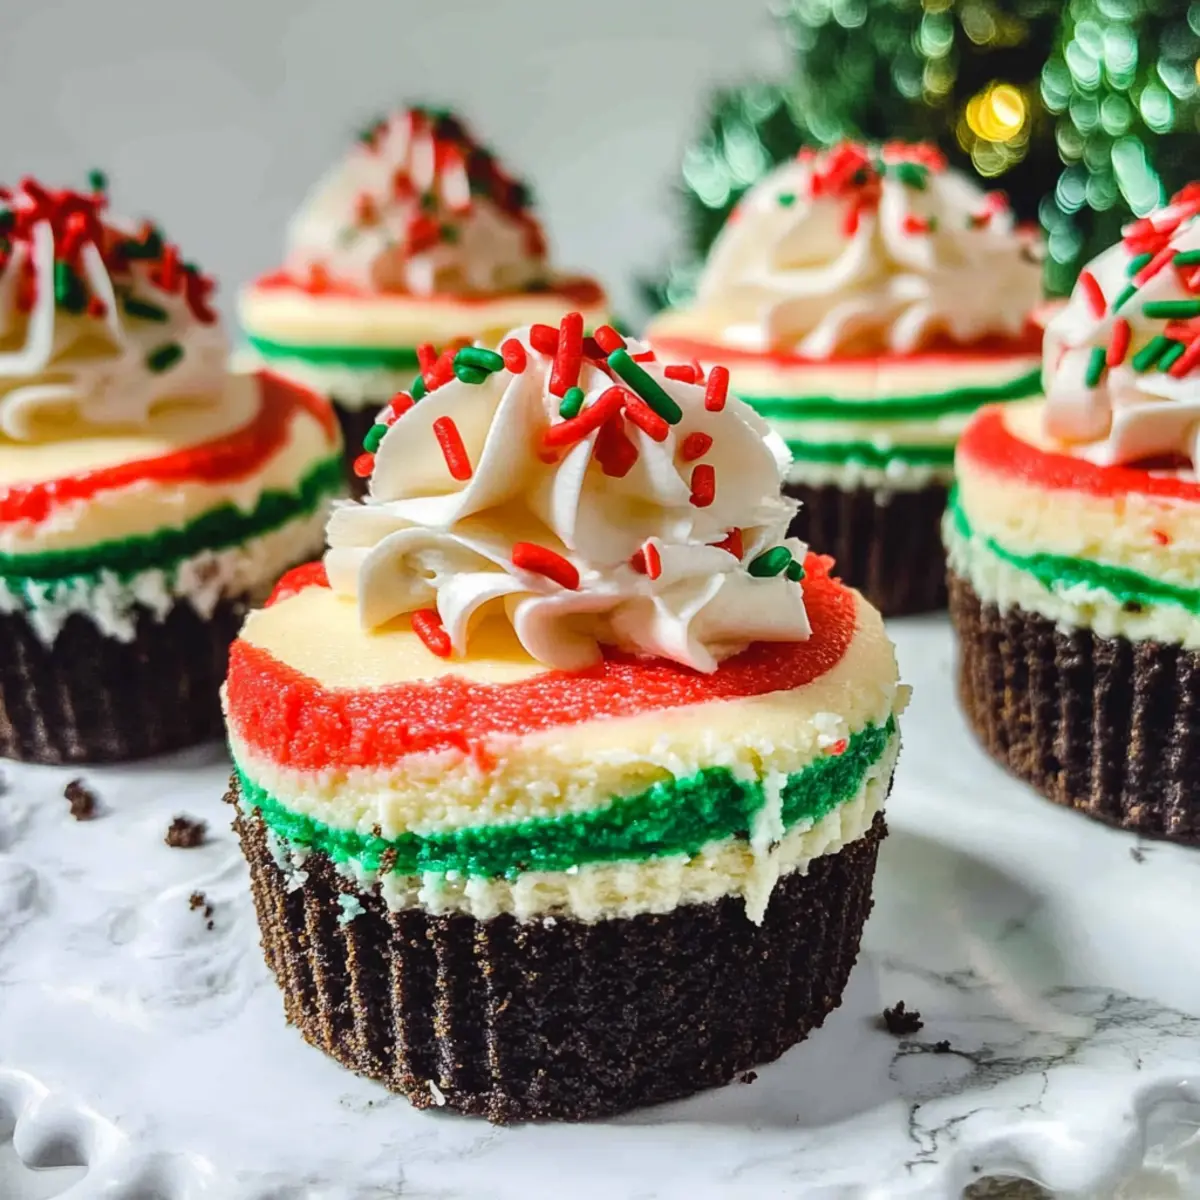
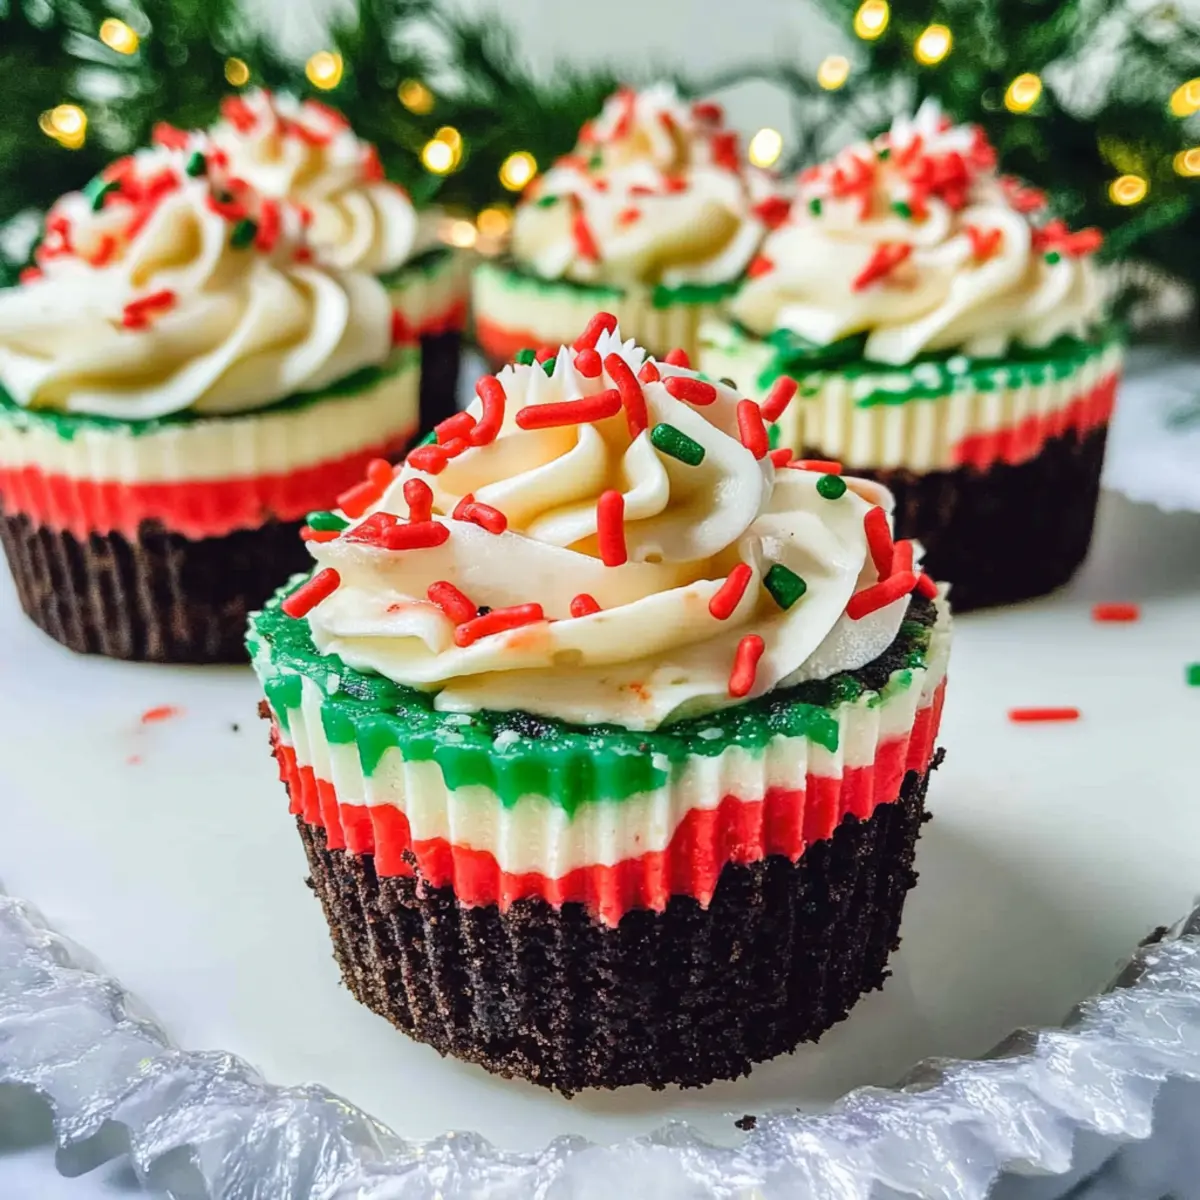
The sweet aroma of melting chocolate and rich cream cheese filled the air as I prepared for our annual holiday gathering. Nothing brings cheer like these Mini Christmas Cheesecakes with Oreo Crust, a festive dessert that never fails to dazzle friends and family. Each mini cheesecake, with its vibrant red and green swirls, sits elegantly on a crunchy Oreo base, making it a showstopper at any holiday table. Not only are they incredibly easy to whip up, but they also offer a delightful indulgence without the fuss of a traditional cake. Whether you’re looking for a fun project to share with loved ones or a memorable treat for an upcoming party, these mini goodies are sure to impress. Curious about how to create this festive dessert magic? Let’s dive into the recipe!
Why are These Mini Cheesecakes a Must-Try?
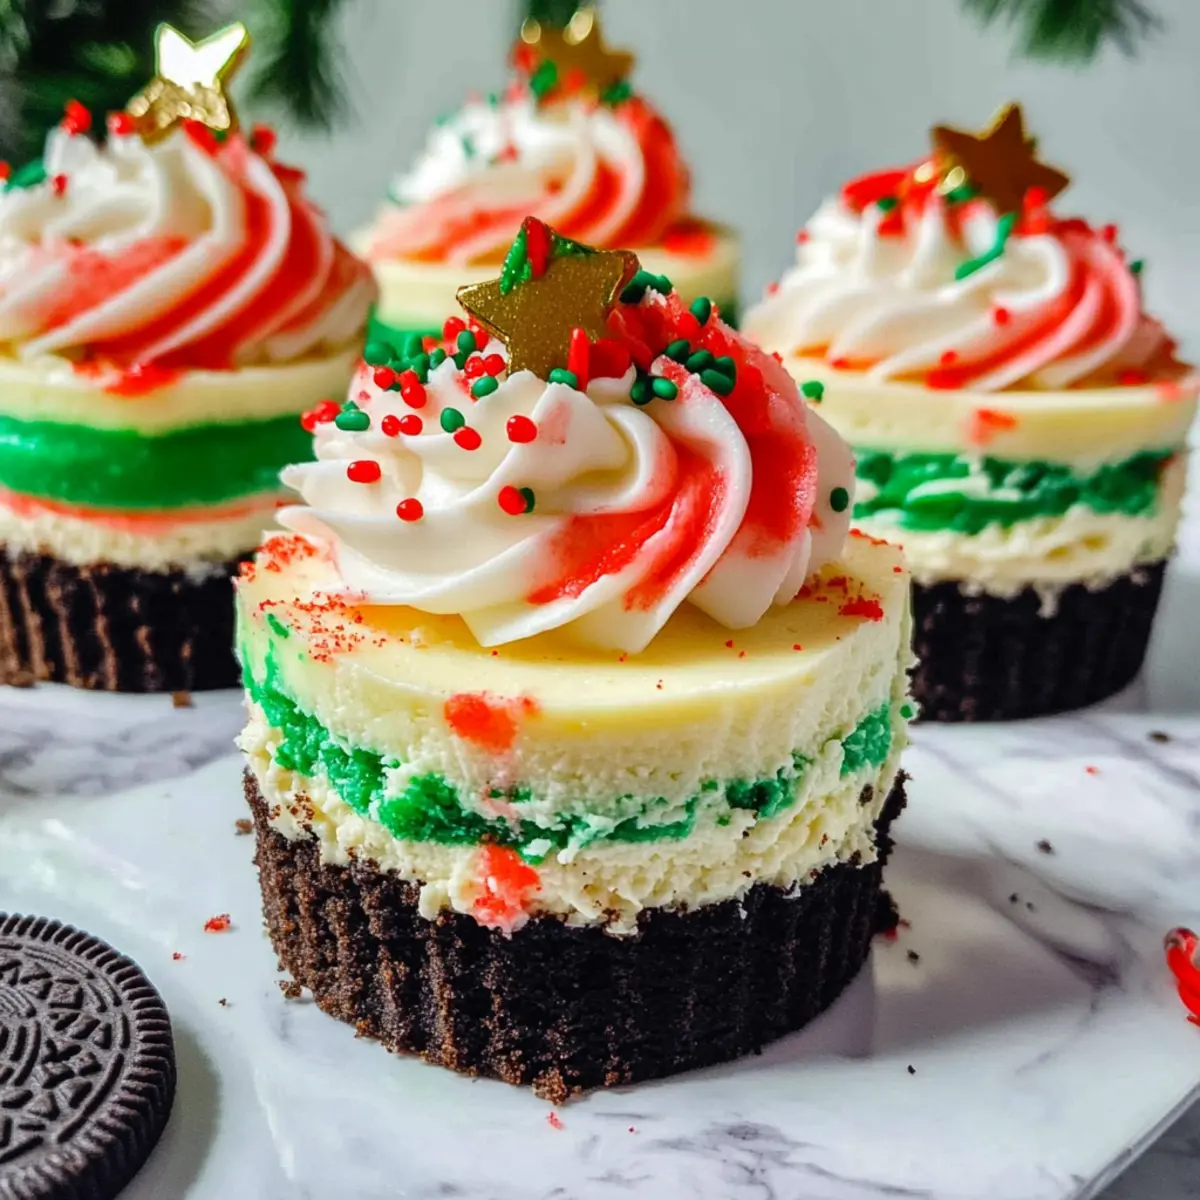
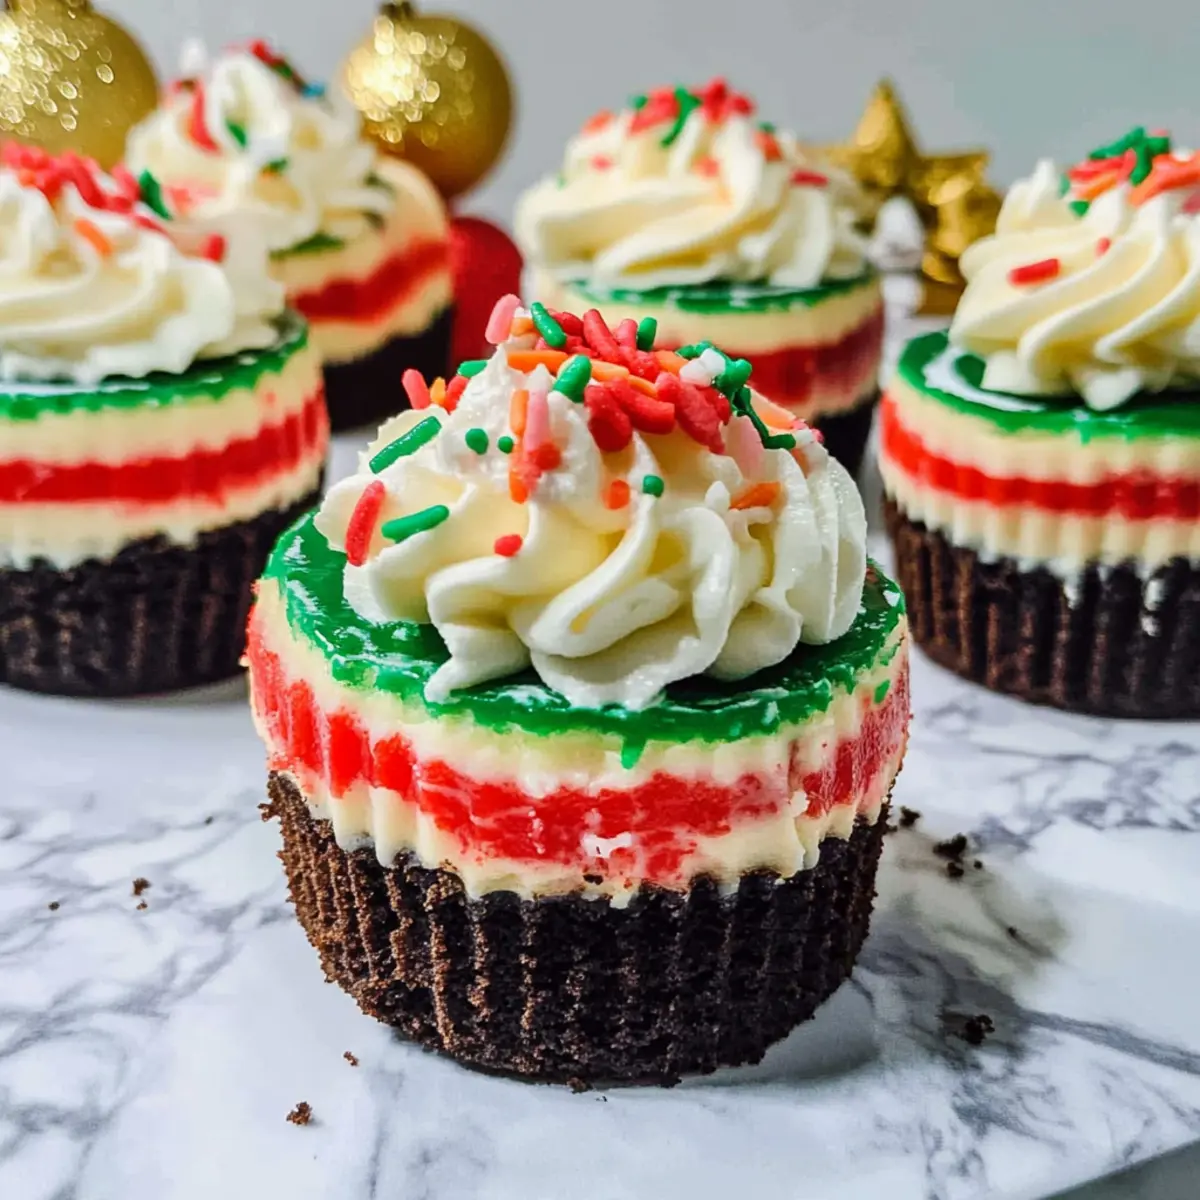
Delectable Presentation: The vibrant red and green swirls make these cheesecakes a stunning centerpiece for your holiday table.
Rich, Creamy Texture: Each bite boasts a smooth cream cheese filling that melts in your mouth, perfectly balanced by the crunchy Oreo crust.
Easy to Make: With simple ingredients and straightforward steps, even novice bakers can create a festive masterpiece that impresses.
Crowd-Pleasing Flavor: These cheesecakes cater to all taste buds—rich, sweet, and utterly satisfying, they’ll leave your guests wanting more!
Versatile Options: Want a single cheesecake instead? Check out my variations to transform this into a delectable large cheesecake perfect for sharing.
Perfect Make-Ahead Dessert: They can be prepared in advance, allowing you to enjoy the holiday festivities without stress. Your family will adore this festive treat, and so will the friends you serve at your upcoming gathering!
Mini Christmas Cheesecake Ingredients
For the Oreo Crust
- Oreo Cookies – Crush these to create a rich chocolate base for your mini cheesecakes.
- Butter – Binds the crust together; use margarine as a tasty substitute if needed.
For the Cheesecake Filling
- Cream Cheese – The main element for creaminess and structure; Neufchâtel offers a lighter alternative.
- Granulated Sugar – Sweetens the filling; try brown sugar for a richer flavor.
- All-Purpose Flour – Stabilizes the filling; gluten-free flour works as a suitable substitute.
- Vanilla Extract – Enhances the flavor; opt for pure vanilla for the best results.
- Lemon Zest – Brightens the cheesecake; swap with lime zest for a refreshing twist.
- Heavy Cream – Adds richness to the batter and whipped topping; coconut cream is a dairy-free option.
- Eggs – Provides the necessary structure; aquafaba can be experimented with for a vegan version.
- Red & Green Food Coloring – Create that festive marbling; consider using natural food coloring for a healthier choice.
For the Topping
- Whipped Cream – Adds an airy touch on top; whether homemade or store-bought works perfectly!
- Sprinkles – Choose festive colors to elevate the visual appeal of your mini cheesecakes.
Dive into these Mini Christmas Cheesecakes this holiday season for a delightful dessert experience that everyone will cherish!
Step‑by‑Step Instructions for Mini Christmas Cheesecake
Step 1: Preheat and Prepare
Begin by preheating your oven to 150°C (300°F). While it’s warming up, gather a standard cupcake tray and place cupcake casings inside each cup. This will keep your Mini Christmas Cheesecakes tidy as they bake and make serving them effortless.
Step 2: Make the Oreo Crust
To craft the rich Oreo crust, crush the Oreo cookies in a food processor or ziplock bag until finely crumbled. Mix the crushed cookies with melted butter in a bowl until the mixture resembles wet sand. Press about 1 tablespoon of this mixture into the bottom of each cupcake casing, firmly packing it down to create a sturdy base for your cheesecakes.
Step 3: Mix the Cheesecake Filling
In a mixing bowl, beat the cream cheese with an electric mixer on medium speed until it’s smooth and creamy, about 2-3 minutes. Gradually add in the granulated sugar and continue mixing until fully combined. Then, add the eggs one at a time, blending on low speed after each addition. Lastly, stir in the vanilla extract and ensure the mixture is completely smooth without overmixing.
Step 4: Prepare the Colored Batter
Once your filling is smooth, divide one-third of the mixture into two separate bowls to create the festive red and green layers for your Mini Christmas Cheesecakes. Add red food coloring to one bowl and green to the other, mixing until the colors are vibrant. This will lend a beautiful marbled look to your cheesecakes when layered.
Step 5: Layer the Batter
Starting with the regular cheesecake batter, fill each cupcake casing with a layer, then add a spoonful of the red batter, followed by the green batter. Continue alternating between the layers, creating a marbled effect. Aim for around two-thirds full in each casing to allow room for the cheesecakes to rise during baking.
Step 6: Bake the Cheesecakes
Place the filled cupcake tray in the preheated oven and bake for approximately 20 minutes. Keep an eye on your Mini Christmas Cheesecakes; they’re done when the edges are firm while the centers still have a slight wobble. This ensures a creamy texture in every bite. Once done, carefully remove them from the oven.
Step 7: Cool and Chill
After removing the cheesecakes, let them cool in the tray for about 10 minutes. Then, transfer them to a cooling rack to cool completely. Once they have cooled to room temperature, refrigerate the Mini Christmas Cheesecakes for at least 4 hours—or overnight for the best flavor and texture—before serving.
Step 8: Decorate and Serve
When ready to serve, whip up some heavy cream until it forms soft peaks, or you can use store-bought whipped cream for convenience. Generously top each Mini Christmas Cheesecake with whipped cream and add colorful festive sprinkles. It not only enhances the visual appeal but adds a delightful creaminess to each bite.
Mini Christmas Cheesecake: Customization Ideas
Feel free to add your own personal touch to these delightful Mini Christmas Cheesecakes, turning them into a festive treat tailored just for you!
- Single Large Cheesecake: Transform this recipe into a 7-inch round cheesecake using the same ingredients, adjusting the bake time to 35-40 minutes.
- Flavorful Extracts: Swap vanilla extract with almond or peppermint extract for an unexpected twist that’ll tickle your taste buds.
- Different Crusts: Replace the Oreo crust with a graham cracker crust or a nut-based crust for unique textures and flavors.
- Sugar Alternatives: Use maple syrup or honey instead of granulated sugar for a natural sweetener with a deliciously unique flavor.
- Dairy-Free Option: Substitute cream cheese and heavy cream with vegan alternatives like cashew cream and coconut whipped cream for a dairy-free delight.
- Citrus Zing: Switch the lemon zest with orange zest for a fresh, citrusy punch that brightens each bite.
- Fruit Toppings: Experiment with fresh berries or a fruit compote on top of the whipped cream for a delightful burst of flavor and freshness.
- Spicy Kick: Add a pinch of cinnamon or nutmeg to the batter for a warm spice that perfectly complements the cheesecake’s sweetness.
These fun variations allow you to create a festive dessert that fits your family’s preferences beautifully. You can even try pairing these mini cheesecakes with a delicious cup of hot cocoa to elevate the holiday spirit. Enjoy your baking adventure!
What to Serve with Mini Christmas Cheesecakes?
The joyful ambiance of the holiday season comes alive when you serve these delightful treats alongside the perfect accompaniments.
-
Hot Cocoa: The rich, chocolaty depths of hot cocoa complement the sweet creaminess of the cheesecakes, making for a cozy indulgence after dinner. Picture yourself and your loved ones nestled by the fireplace, sipping cocoa while indulging in festive desserts!
-
Fresh Berries: A handful of vibrant mixed berries adds a refreshing note to the rich cheesecakes. Their tartness brings a delightful contrast, enhancing the flavors and providing a burst of color.
-
Coffee: The robust flavor of coffee balances the sweetness of the mini cheesecakes wonderfully. It’s the perfect way to keep the energy flowing during holiday gatherings, sparking conversation and laughter.
-
Gingerbread Cookies: The warm spices of freshly baked gingerbread cookies harmonize beautifully with the creamy vanilla and Oreo crust of the cheesecakes, creating a holiday-inspired snack pairing.
-
Spiced Apple Cider: A warm cup of spiced apple cider, with its notes of cinnamon and clove, enhances the festive experience, inviting everyone to savor the season’s best flavors together.
-
Mint Chocolate Chip Ice Cream: Serve a scoop of mint chocolate chip ice cream for a playful twist—the cool mint flavors pair perfectly with the rich cheesecakes, adding a fun chilly contrast.
-
Pecan Pie Bars: The buttery crunch and nutty sweetness of pecan pie bars create a delightful texture contrast beside the smooth mini cheesecakes, making for a heavenly dessert platter.
Each of these pairings complements the lovely flavors of the Mini Christmas Cheesecakes, turning your holiday dessert into a true feast for the senses. Enjoy this beautiful combination that will surely create lasting memories!
Expert Tips for Mini Christmas Cheesecakes
-
Avoid Overbaking: Keep an eye on your cheesecakes while baking. The edges should be firm, but the centers should still have a slight wobble to ensure a creamy texture.
-
Measure Precisely: Use a digital kitchen scale for measuring ingredients to achieve the perfect consistency in your mini Christmas cheesecakes. This prevents a dry or overly dense filling.
-
Cool Gradually: Allow your cheesecakes to cool slowly at room temperature before refrigerating. This helps avoid cracks and enhances the flavors.
-
Moist Baking Environment: To retain moisture during baking, place a baking dish filled with water on the rack below your cheesecakes. This creates a steamy environment, preventing them from drying out.
-
Festive Color Alternatives: Consider using natural food coloring if you’re looking for a healthier option. They can still provide that stunning red and green marbling for your mini Christmas cheesecakes.
Make Ahead Options
These Mini Christmas Cheesecakes are perfect for meal prep and can save you time on busy holiday days! You can prepare the Oreo crust and the cheesecake filling up to 24 hours in advance. To do this, simply make the crust and press it into the cupcake casings, then cover and refrigerate. For the filling, mix everything together and store it in an airtight container in the fridge. On the day of serving, layer the red and green colored batters into the crusts, bake for around 20 minutes, and chill for at least 4 hours before topping with whipped cream and sprinkles. This method ensures your cheesecakes are just as delicious and ready to dazzle your guests!
Storage Tips for Mini Christmas Cheesecakes
Fridge: Store mini Christmas cheesecakes in an airtight container in the refrigerator for up to 3 days. This keeps them fresh while maintaining their creamy texture.
Freezer: For longer storage, these cheesecakes can be frozen without the whipped cream for up to 1 month. Place them in a freezer-safe container to prevent freezer burn.
Thawing: When ready to enjoy, thaw the mini cheesecakes in the refrigerator for several hours or overnight for the best texture before serving.
Reheating: If you prefer to enjoy them slightly warm, gently reheat by placing them in a warm oven (about 150°F) for a few minutes. This will not compromise the integrity of the cheesecake.
Mini Christmas Cheesecakes Recipe FAQs
How do I select ripe ingredients for my mini cheesecakes?
Absolutely! For the best flavor, choose cream cheese that’s fresh and at room temperature for easy mixing. When selecting eggs, look for ones with clean shells and check the expiration date for freshness. For the lemon zest, opt for fragrant lemons with smooth peels.
How should I store the mini cheesecakes?
To keep your mini Christmas cheesecakes fresh, place them in an airtight container in the refrigerator. They will stay delightful for up to 3 days. If you want to enjoy them later, freeze them without the whipped cream for up to 1 month—just ensure they’re in a freezer-safe container to avoid freezer burn!
What’s the best way to freeze my mini cheesecakes?
Freezing your mini cheesecakes is simple! Once they’ve cooled completely, place them in a single layer in a freezer-safe container. For extra protection against freezer burn, wrap each cheesecake in plastic wrap before sealing the container. When you’re ready to enjoy them, let them thaw in the refrigerator for several hours or overnight.
What if my cheesecake filling cracks while baking?
Very! If you notice cracks in your fillings, it may be due to overbaking or overmixing the batter. Aim for a slight wobble in the centers when you take them out of the oven. Also, ensure you mix the batter just until combined to avoid incorporating too much air, which can lead to cracks. Maintaining a moist baking environment by placing a dish of water in the oven can also help.
Are these mini cheesecakes suitable for people with dietary restrictions?
Absolutely! If you’re catering to guests with dietary restrictions, consider using Neufchâtel for a lighter cream cheese option, gluten-free flour for those avoiding gluten, and coconut cream to make it dairy-free. For a vegan twist, substitute eggs with aquafaba and use plant-based ingredients throughout. Always check labels for any gluten or dairy presence, especially in store-bought items!
Can I make these mini cheesecakes ahead of time?
The more the merrier! Yes, these mini Christmas cheesecakes are perfect for making ahead. Prepare them up to two days in advance and keep them covered in the refrigerator until you’re ready to serve. This not only saves you time on the day of your gathering, but it also enhances the flavors as they chill!
Mini Christmas Cheesecake: Festive Bites of Joy
Ingredients
Equipment
Method
- Preheat your oven to 150°C (300°F) and prepare the cupcake tray with cupcake casings.
- Crush the Oreo cookies and mix with melted butter, then press into each cupcake casing to form the crust.
- Beat the cream cheese until smooth, adding sugar, eggs, and other filling ingredients gradually.
- Divide the mixture for color, adding red and green food coloring to create layers.
- Layer the colored batter in the casings, alternating between colors.
- Bake for approximately 20 minutes until edges are firm and centers wobble slightly.
- Cool for 10 minutes in the tray, then transfer to a rack to cool completely before refrigerating.
- Whip cream and decorate the cheesecakes before serving.
Leave a Reply