
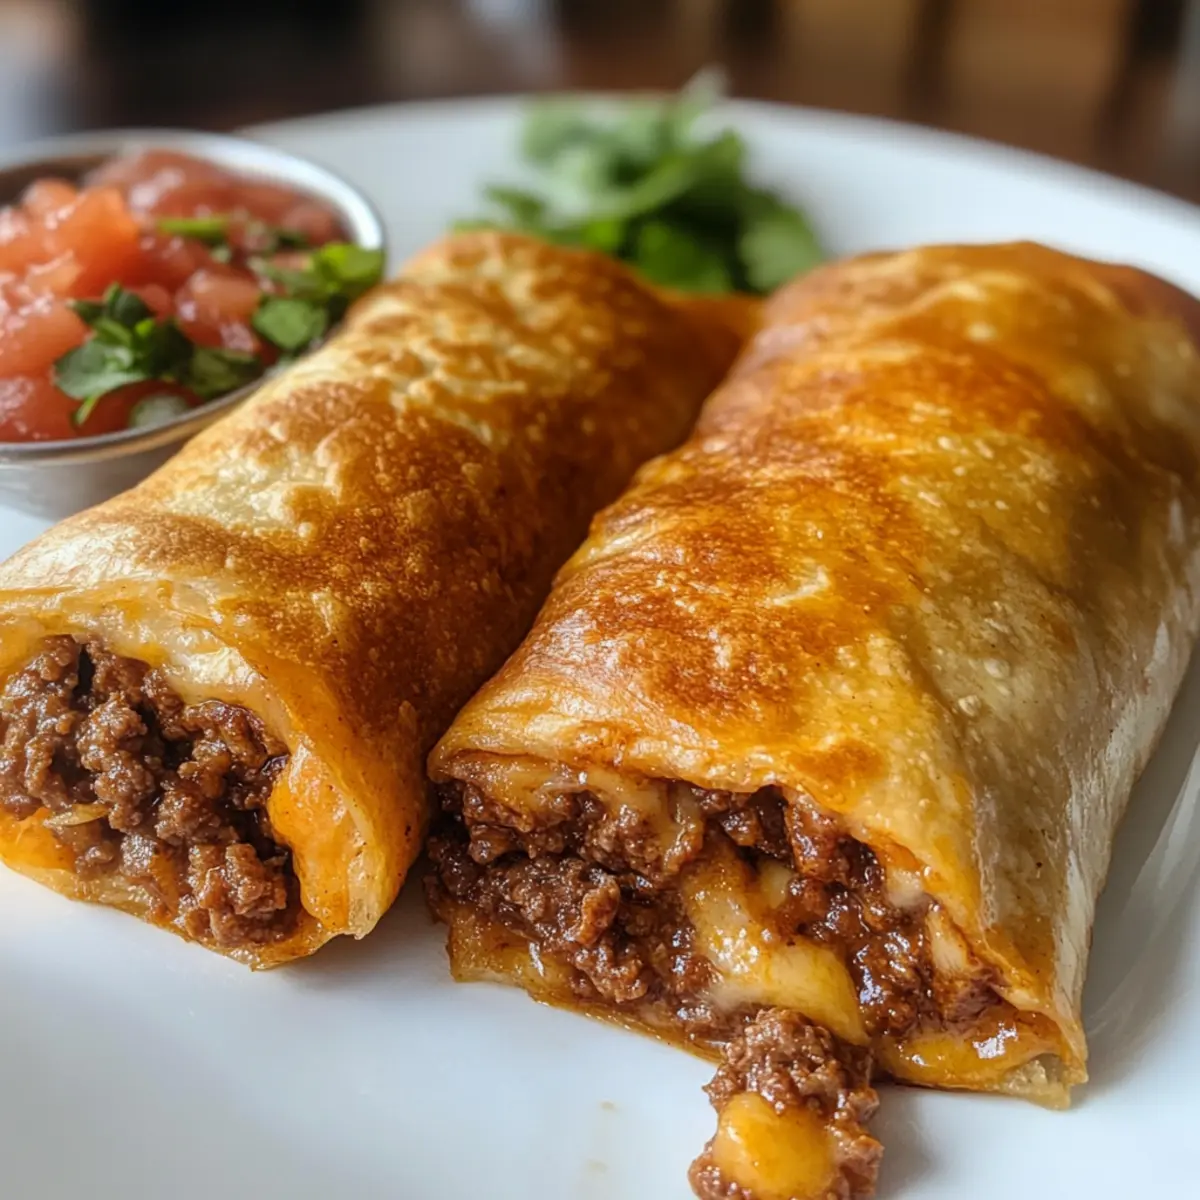
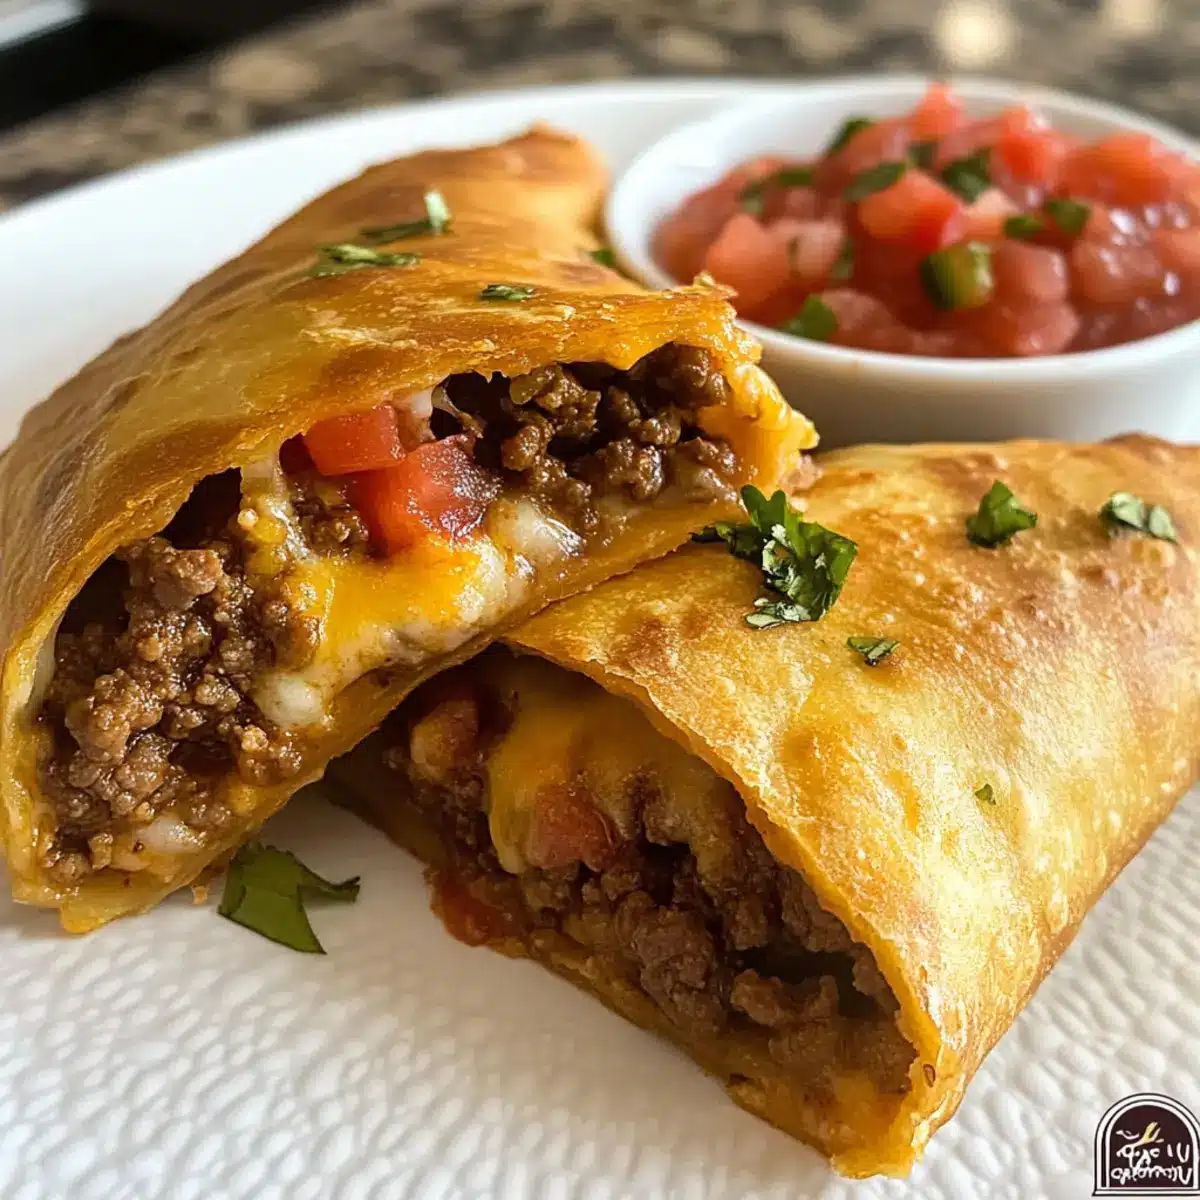
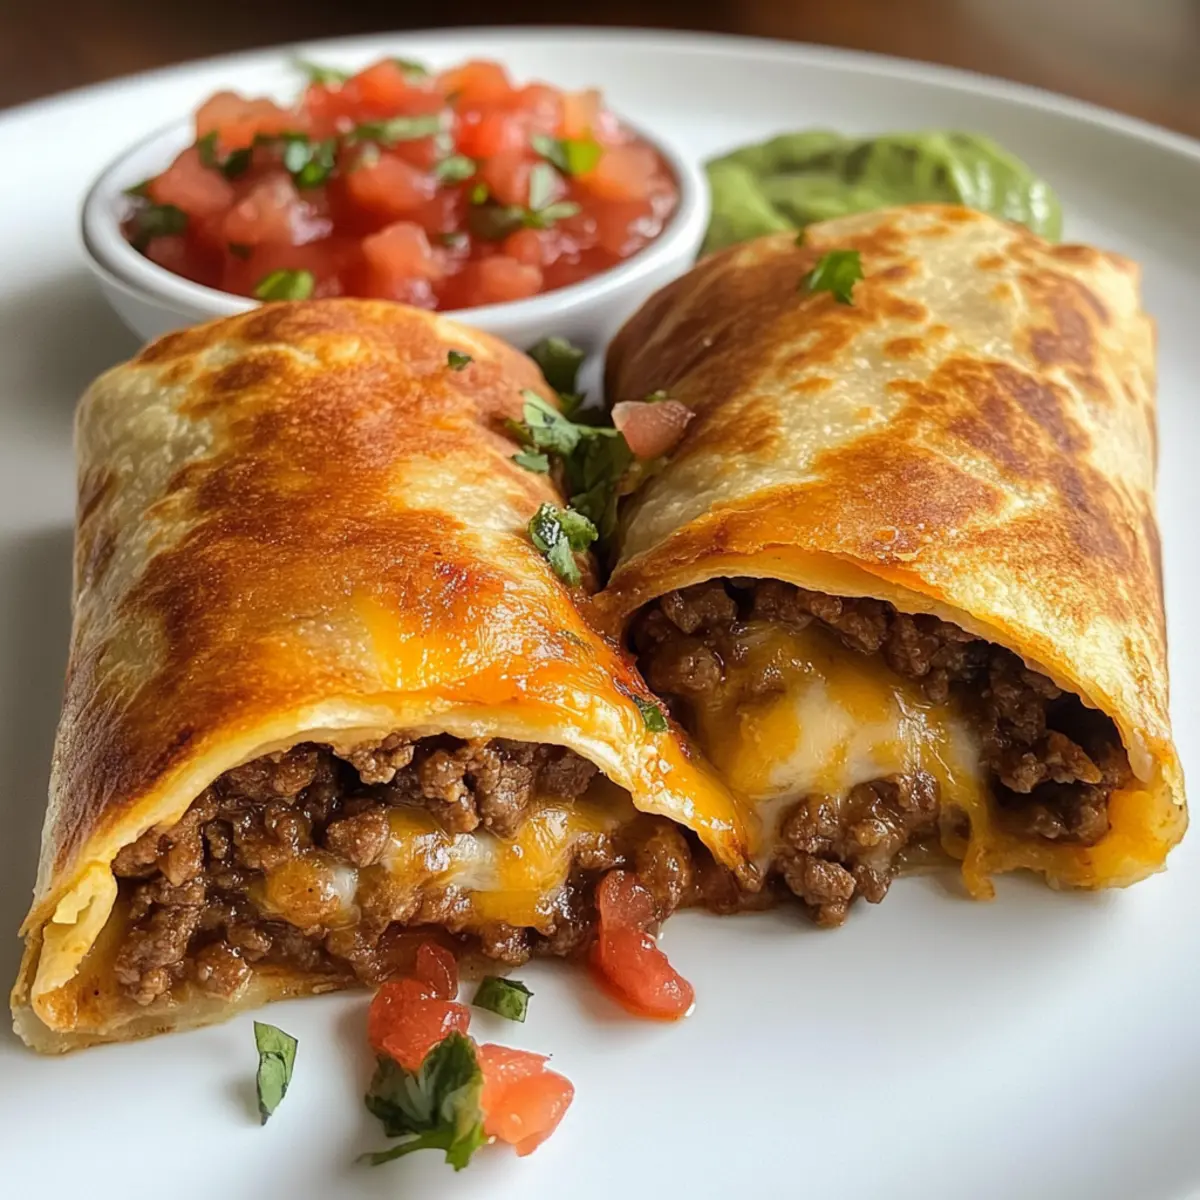
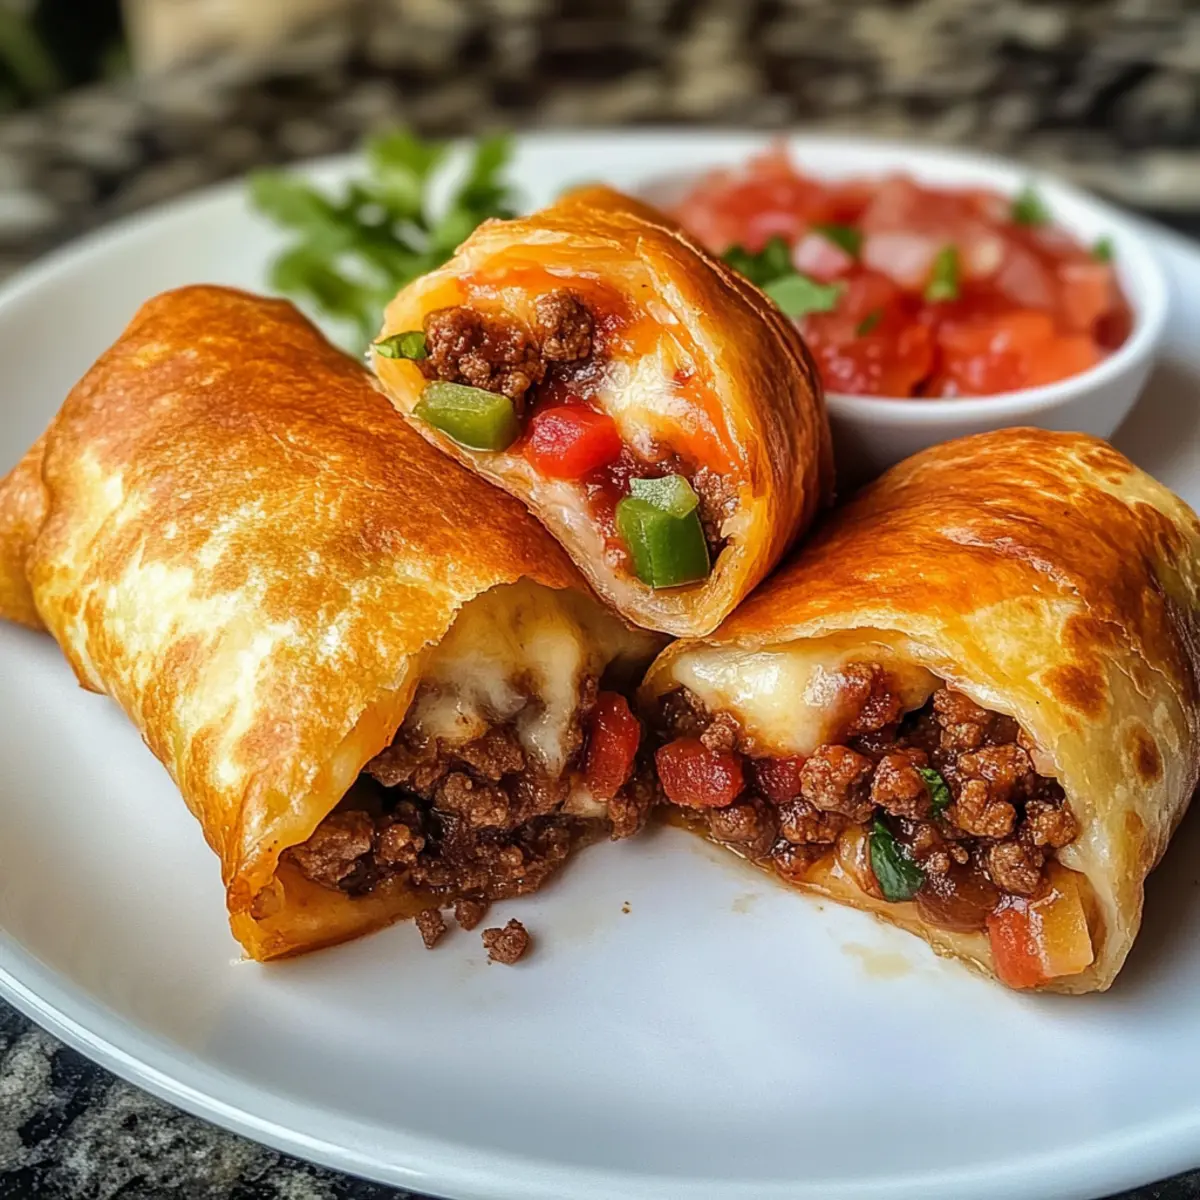
As I stood in my kitchen, the irresistible aroma of spices began to fill the air, reminding me that the best meals start with a bit of love and a whole lot of flavor. One of my family’s favorites? Crispy Beef and Cheese Chimichangas! These Tex-Mex treasures are a delightful combination of crunchy tortillas wrapped around seasoned ground beef and gooey cheese. Not only are they a hit at our dinner table, but they’re also incredibly quick to prepare and perfect for customizing to everyone’s taste buds—from cheesy vegetarian versions to spicy chicken options. Whether baked for a healthier twist or fried for the ultimate crunch, these chimichangas are perfect for weeknight meals or gatherings with friends. Curious about how to make this comforting dish at home? Let’s dive in!
Why are Chimichangas so Delicious?
Crispy Tortilla Perfection: The texture of these chimichangas is simply irresistible—golden and crunchy on the outside, and bursting with gooey filling on the inside.
Quick and Easy: Even if you’re short on time, this recipe is a breeze to whip up, making it ideal for busy weeknights.
Customizable for Everyone: Whether you’re craving something meaty, vegetarian, or a bit spicy, adjusting the filling can cater to every palate in the family. Check out the variation ideas for more inspiration!
Freezer-Friendly: Make a batch ahead of time and enjoy a homemade meal whenever you want—just pull them out, cook, and savor the flavors!
Family Fun: These chimichangas are a hit with kids and adults alike, making them perfect for casual dinners or festive gatherings.
Beef and Cheese Chimichanga Ingredients
-
For the Filling
• Ground Beef – Provides the main protein and flavor base; lean is best for texture.
• Onion – Adds depth and sweetness; finely diced ensures even cooking.
• Garlic – Enhances savory taste; use fresh minced for maximum flavor.
• Taco Seasoning – Infuses beef with Tex-Mex spices; consider a homemade blend for personalized flavor.
• Salsa – Keeps the filling moist and adds acidity; pick your favorite style for variety.
• Refried Beans – Adds creaminess and helps bind the filling; substitute with black beans for a healthier option.
• Shredded Cheese – Provides melty texture; cheddar or Monterey Jack are perfect choices. -
For the Wrapping
• Flour Tortillas – Essential for wrapping; opt for large (10-inch) for easier rolling. -
For Cooking
• Vegetable Oil – Used for frying; select a neutral oil, or brush on baked chimichangas for crispiness.
These Beef and Cheese Chimichanga ingredients come together beautifully to create a dish that’s quick, comforting, and ideal for any family fun night!
Step‑by‑Step Instructions for https://theferventmama.com/wp-content/uploads/2025/08/0_3-2025-08-29T122018.026.png
Step 1: Cook the Filling
In a large skillet over medium heat, add 1 pound of lean ground beef and 1 diced onion. Brown the beef for about 5–7 minutes, stirring often until fully cooked and the beef is no longer pink. Drain any excess grease, then mix in 2 minced garlic cloves, 1 packet of taco seasoning, and 1/2 cup of salsa. Let this mixture simmer for 2–3 minutes until thickened, stirring occasionally.
Step 2: Assemble Chimichangas
Lay out a large flour tortilla on a clean surface. Spread 1/4 cup of refried beans in the center of the tortilla, then spoon a generous amount of the beef filling on top, followed by a handful of shredded cheese. Fold the sides of the tortilla inwards and roll it tightly from the bottom up to form a sealed chimichanga. Repeat this process with the remaining tortillas and filling.
Step 3: Cooking Method
For frying, heat about 1 inch of vegetable oil in a deep skillet over medium-high heat until it reaches 350°F (175°C). Carefully place the chimichangas seam-side down in the hot oil, frying them for about 2–3 minutes per side until they are golden brown and crispy. For a healthier alternative, preheat your oven to 400°F (200°C), arrange chimichangas seam-side down on a greased baking sheet, brush them lightly with oil, and bake for 20–25 minutes until golden and crisp.
Step 4: Serve
Allow the chimichangas to cool for about 2 minutes on a paper towel-lined plate to absorb any excess oil if fried. Serve them warm, topped with your favorites like sour cream, guacamole, or salsa for an extra Tex-Mex flair! Enjoy the savory beef and cheese chimichangas with your family for a fun weeknight dinner.
What to Serve with Crispy Beef and Cheese Chimichangas
As you savor the crunch of beef and cheese chimichangas, why not complete your meal with delightful sides and drinks that truly elevate the experience?
-
Spanish Rice: This fluffy, seasoned rice pairs perfectly with chimichangas, offering a mild flavor that complements their savory filling.
-
Guacamole: Creamy and fresh, this avocado dip brings a luscious texture and zesty taste, adding brightness to each crispy bite.
-
Refried Black Beans: Creamy and rich, they offer a delicious contrast to the crunch of the chimichangas while enhancing the Tex-Mex vibe.
-
Mexican Street Corn Salad: With its sweet corn, tangy lime, and creamy dressing, this fresh salad balances the richness of the chimichangas beautifully.
-
Pico de Gallo: This vibrant salsa provides a burst of freshness and acidity, cutting through the heaviness of the chimichangas and pairing expertly with each crispy piece.
-
Crisp Lettuce and Tomato Salad: A light salad dressed with a tangy vinaigrette will help freshen up your meal and provide a refreshing crunch.
-
Margaritas: Nothing beats the classic pairing of chimichangas and a refreshing margarita. The tangy and sweet flavors elevate the Tex-Mex experience.
-
Chocolate Flan: To round out your meal, serve this soft and rich dessert—its creamy texture and hint of chocolate provide the perfect sweet finish.
Expert Tips for Crispy Beef and Cheese Chimichangas
-
Warm Tortillas: Ensure tortillas are slightly warmed before filling. This prevents tearing and makes rolling easier, leading to perfectly crispy beef and cheese chimichangas.
-
Avoid Grease: When frying, make sure to drain excess grease after browning the beef. This keeps your chimichangas from becoming soggy and ensures a delicious crunch.
-
Seal Carefully: Tightly roll chimichangas and secure seams with toothpicks if needed. This prevents the filling from leaking out during frying or baking.
-
Bake for Health: For a healthier version, remember that baking works wonderfully. Brush with oil and monitor closely for that ideal golden crispiness without the extra fat.
-
Mix and Match: Feel free to get creative with fillings. Try mixing in vegetables or using different proteins to customize your beef and cheese chimichangas to suit everyone’s tastes!
How to Store and Freeze Beef and Cheese Chimichangas
-
Fridge: Store leftover chimichangas in an airtight container for up to 3 days to keep them fresh and delicious.
-
Freezer: To freeze uncooked chimichangas, wrap them tightly in plastic wrap and then in aluminum foil. They can be stored for up to 2 months.
-
Reheating (Fried): For crispiness, reheat fried chimichangas in an air fryer at 350°F (175°C) for about 5-7 minutes or until heated through.
-
Reheating (Baked): If baked, place chimichangas on a baking sheet and warm them in a 350°F (175°C) oven for 10-15 minutes until crisp. Enjoy your comforting beef and cheese chimichangas!
Make Ahead Options
These Beef and Cheese Chimichangas are perfect for meal prep, saving you valuable time during busy weeknights! You can assemble the chimichangas and store them tightly wrapped in the refrigerator for up to 2 days. Alternatively, freeze the uncooked chimichangas for up to 2 months. To ensure they maintain quality, tightly seal them in freezer bags or containers to avoid freezer burn. When you’re ready to enjoy, simply cook them from frozen by frying directly or baking at 400°F (200°C) for 25-30 minutes, keeping an eye on them for that golden, crispy finish. With these make-ahead options, you’ll have a delicious homemade meal ready with minimal effort!
Beef and Cheese Chimichanga Variations
Feel free to explore these delightful twists on the classic recipe—after all, cooking is all about letting your creativity shine!
-
Vegetarian Delight: Substitute the beef with sautéed bell peppers, onions, and black beans for a hearty, meatless option.
This version brings a vibrant medley of colors and tastes that even the most dedicated meat lovers will enjoy. -
Spicy Kick: Add diced jalapeños to the filling or choose pepper jack cheese for a spicy version.
Each bite will ignite your taste buds, adding an exciting layer of flavor to these already mouthwatering chimichangas. -
Breakfast Bliss: Swap the beef for scrambled eggs, crispy bacon, and cheese for a hearty breakfast treat.
Perfect for brunch gatherings, these chimichangas are sure to impress family and friends. -
Baked or Fried: For a healthier option, try baking instead of frying. Brush the assembled chimichangas with olive oil and bake until golden.
You’ll still achieve that satisfying crunch, just with fewer calories! -
Queso Smothered: Top your chimichangas with melted queso or enchilada sauce before serving for an indulgent twist.
It’s a cheesy, flavorful upgrade that will make your chimichangas feel like a restaurant experience right at home. -
Creamy Avocado: Incorporate diced avocado or guacamole into the filling for a creamy texture burst.
It enhances the overall flavor and adds a touch of freshness that balances the hearty filling. -
Different Proteins: Feel free to use shredded chicken or pulled pork in place of beef for variety in your chimichangas.
Both proteins mesh beautifully with the existing flavors, giving you a new favorite in no time.
Looking for more ideas? Don’t miss the chance to check out these other delicious Tex-Mex delights that will leave your family wanting more!
Beef and Cheese Chimichangas Recipe FAQs
What type of ground beef should I use for the filling?
I recommend using lean ground beef for the best texture and flavor. It helps avoid excess grease while still providing that rich, savory taste that complements the cheesy filling perfectly.
How should I store leftover chimichangas?
Store your leftover chimichangas in an airtight container in the refrigerator for up to 3 days. This keeps them fresh and ready for a quick meal. If you want to enjoy them later, freezing is a great option!
Can I freeze uncooked chimichangas?
Absolutely! To freeze uncooked chimichangas, tightly wrap them in plastic wrap and then in aluminum foil. They can be stored in the freezer for up to 2 months. When you’re ready to cook them, there’s no need to thaw; just fry or bake directly from frozen, adding an extra minute or two to the cooking time.
What if my chimichangas are leaking during cooking?
If your chimichangas are leaking, it might be due to a loose roll or too much filling. Ensure to tightly roll them and seal the edges with a bit of water before frying or baking. You can also use toothpicks to hold them together during cooking—just remember to remove them before serving!
Are there any dietary considerations for chimichangas?
Yes! For those with dietary restrictions, you can easily modify this recipe. For a vegetarian option, substitute the ground beef with sautéed vegetables and black beans. If anyone in your family has allergies, be sure to check the ingredients in your taco seasoning and salsa, and choose brands that meet their needs!
How should I reheat leftover chimichangas?
To keep them crispy when reheating, place fried chimichangas in an air fryer at 350°F (175°C) for about 5-7 minutes, or until heated through. If they were baked, warm them in a 350°F (175°C) oven for 10-15 minutes. Enjoy revived, crispy beef and cheese chimichangas!
Savory Beef and Cheese Chimichangas for Family Fun Nights
Ingredients
Equipment
Method
- In a large skillet over medium heat, add the ground beef and diced onion. Brown the beef for about 5–7 minutes, then mix in minced garlic, taco seasoning, and salsa. Let simmer for 2–3 minutes until thickened.
- Lay out a flour tortilla on a clean surface. Spread refried beans in the center, add beef filling, then sprinkle shredded cheese. Fold sides of the tortilla inwards and roll tightly from the bottom.
- For frying, heat 1 inch of vegetable oil in a deep skillet until it reaches 350°F (175°C). Fry chimichangas seam-side down for about 2–3 minutes per side until golden brown. For baking, preheat oven to 400°F (200°C), brush with oil, and bake for 20–25 minutes.
- Allow chimichangas to cool on a paper towel-lined plate for about 2 minutes. Serve warm with toppings like sour cream or guacamole.
Leave a Reply