
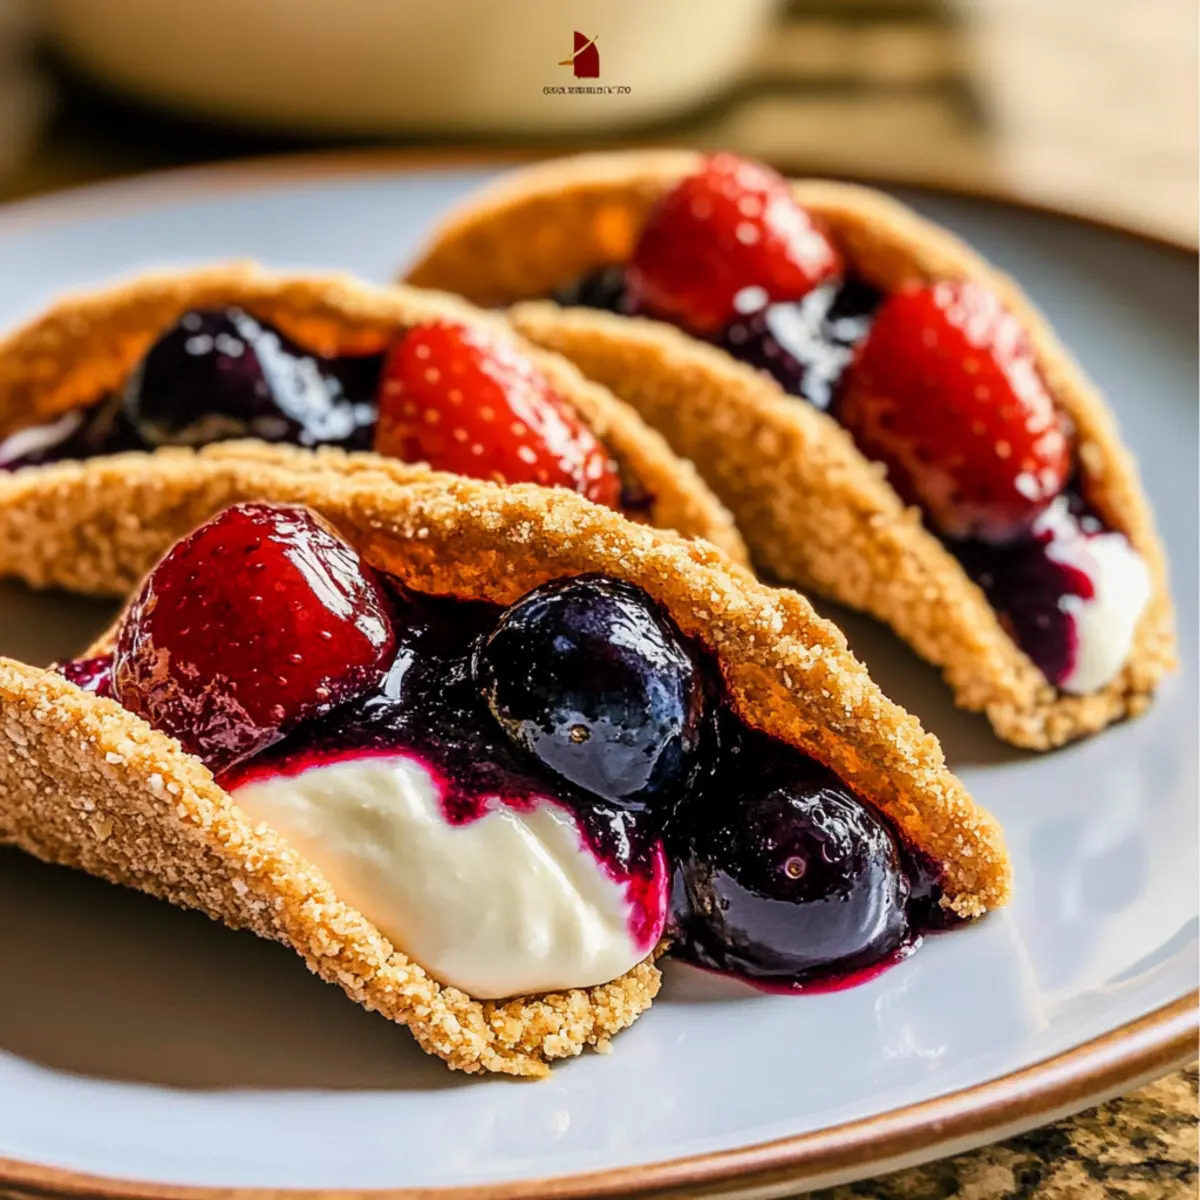
Summer barbecues can often feel like a battleground for dessert choices—do you go for cake, pie, or something else entirely? Let me introduce you to a unique contender, the Berrylicious Cheesecake Tacos! These delightful creations are not only bursting with fruity flavor but also bring a playful twist to traditional taco night. With a crispy graham cracker shell cradling creamy cheesecake and topped with vibrant blueberry and strawberry jams, they’re an effortless crowd-pleaser that’s both easy to make and entertaining-friendly. Whether you’re hosting a casual gathering or craving a sweet treat for yourself, these dessert tacos will satisfy your sweet tooth and add a fun touch to any occasion. Ready to treat your taste buds to something truly special?
What Makes This Dessert Taco Special?
Uniquely Fun: These Berrylicious Cheesecake Tacos are a playful twist on both tacos and desserts, making them a standout option for summer gatherings.
No Fuss Required: With just a few simple steps, you can whip up a crowd-pleaser that impresses without the stress.
Fresh and Fruity: The combination of creamy cheesecake and vibrant jams provides a fresh burst of flavor that will have everyone coming back for seconds.
Great for Entertaining: Perfect as a unique dessert for parties, they’re easy to serve and will definitely spark conversations—just like Chicken Street Tacos do!
Versatile Treat: Feel free to experiment with different jams or flavors for endless variations, appealing to all taste preferences.
Delightful Presentation: The eye-catching layers of flavor and color add an elegant touch that makes these dessert tacos memorable and Instagram-worthy!
Berrylicious Cheesecake Tacos Ingredients
For the Taco Shells
• Tortillas – Use 8-inch flour tortillas for a sturdy yet soft base that holds the filling beautifully.
• Graham Cracker Crumbs – Adds a sweet crunch and mimics the texture of traditional cheesecake crust.
• Unsalted Butter (⅓ cup, melted) – Coats the tortillas for a rich flavor and helps the crumbs stick.
For the Cheesecake Filling
• Cream Cheese (9 ounces, room temperature) – Provides a creamy and tangy base for the dessert.
• Heavy Cream (1 cup) – Whipped for a light and airy consistency that elevates the cheesecake texture.
• Powdered Sugar (⅓ cup) – Sweetens the filling while keeping it silky smooth.
• Lemon Juice (1 tsp) – Brightens up the filling and balances the sweetness perfectly.
• Vanilla Extract (1 tsp) – Enhances the overall flavor profile of the cheesecake filling.
For the Toppings
• Blueberry Jam – Adds a fruity burst on top, complementing the creamy filling of the cheesecake tacos.
• Strawberry Jam – For an extra layer of sweetness, harmonizing beautifully with blueberry jam.
These Berrylicious Cheesecake Tacos are designed to delight, combining easy preparation with a unique presentation that will leave your guests in awe!
Step‑by‑Step Instructions for Berrylicious Cheesecake Tacos
Step 1: Preheat the Oven
Begin by preheating your oven to 400℉ (200℃). This ensures a hot environment to create the perfect crispy taco shells. While the oven warms up, gather your equipment, including a cookie cutter and a cupcake pan, as you’ll need these for shaping the tortillas soon.
Step 2: Prepare the Tortillas
Stack your 8-inch flour tortillas and use a 1.5-inch cookie cutter to cut out circles. You’ll want to pierce each circle with a fork to prevent air bubbles during baking. This step is essential for achieving the desired shape and texture in your Berrylicious Cheesecake Tacos.
Step 3: Coat the Tortilla Circles
Dip each tortilla circle into the melted unsalted butter, ensuring they are fully coated. Then, roll the buttered circles into graham cracker crumbs, pressing lightly to adhere the crumbs. This flavorful coating will give your taco shells a sweet and crunchy texture that complements the creamy filling.
Step 4: Shape the Taco Shells
Next, invert a cupcake pan and place the coated tortilla circles in between the cups. This will create a taco shape as they bake. Make sure they fit snugly to maintain their shape while cooking, allowing for that fun taco experience when you fill them later.
Step 5: Bake the Taco Shells
Slide the cupcake pan into the preheated oven and bake for 10-12 minutes. Keep an eye on the shells; they should turn a lovely golden brown color, indicating they’re cooking nicely. Once done, remove from the oven and let them cool completely for the best texture.
Step 6: Prepare the Cheesecake Filling
In a large mixing bowl, blend the room-temperature cream cheese, lemon juice, and vanilla extract until smooth. This mixture should be creamy but well-combined with no lumps. The creamy filling is what makes these Berrylicious Cheesecake Tacos so decadent and delightful.
Step 7: Whip the Heavy Cream
In a separate bowl, whip the heavy cream with the powdered sugar until stiff peaks form. This process will create an airy texture, adding lightness to your cheesecake filling. Once achieved, gently fold the whipped cream into the cream cheese mixture, integrating both components until smooth and fluffy.
Step 8: Fill the Taco Shells
Using a piping bag, fill it with the delicious cheesecake mixture. Pipe the filling into each cooled taco shell, allowing them to be generously filled with creamy goodness. This step brings your Berrylicious Cheesecake Tacos to life with that luscious cheesecake texture everyone loves.
Step 9: Add the Toppings
Finally, top each dessert taco with a dollop of blueberry and strawberry jam. The vibrant colors of the jams not only enhance the visual appeal but also add a burst of fruity flavor that beautifully complements the creamy cheesecake filling. Serve these delightful tacos immediately for the best taste experience.
What to Serve with Berrylicious Cheesecake Tacos
Transform your summer gatherings with these delectable dessert tacos and the perfect pairings that enhance their delightful flavor!
-
Fresh Fruit Salad: Combine seasonal berries and melons for a refreshing complement, keeping the summer vibe alive. The bright colors and juicy textures contrast beautifully with the creamy tacos.
-
Coconut Whipped Cream: This light, airy topping adds a tropical twist, enhancing the dessert’s sweet profile while providing a luscious finish. It’s like a mini-vacation on your plate!
-
Chocolate Dipping Sauce: Drizzling warm chocolate over the tacos introduces a rich element that elevates the overall experience. It’s a decadent surprise that pairs perfectly with the fruity layers.
-
Sparkling Lemonade: Refreshing and fizzy, this drink offers a citrusy balance that cuts through the sweetness of the tacos, making each bite more enjoyable. Plus, it adds a festive touch to any gathering!
-
Vanilla Ice Cream: A scoop on the side creates a delightful contrast between cold and creamy. As the ice cream melts, it mingles beautifully with the flavors of the cheesecake tacos.
-
Mini Cheesecake Bites: For those who can’t get enough cheesecake, serving these alongside your tacos creates a fun tasting experience. Their classic flavor echoes the essence of the taco filling while adding variety to the dessert table.
These pairings promise to enhance the enjoyment of your Berrylicious Cheesecake Tacos!
How to Store and Freeze Berrylicious Cheesecake Tacos
Fridge: Keep assembled taco shells in an airtight container in the fridge for up to 1 day. However, for the best flavor and texture, it’s ideal to fill and serve them fresh.
Freezer: If you need to freeze, store the crispy taco shells separately in a freezer-safe bag for up to 2 months. Wrap them tightly to prevent freezer burn.
Reheating: To restore crispness, reheat the frozen taco shells in a preheated oven at 350℉ (175℃) for about 5 minutes. Avoid microwaving to retain their crunch.
Filling Storage: The cheesecake filling can be stored in the fridge for up to 3 days in a sealed container. Be sure to stir well before using to reintroduce its creamy texture for the Berrylicious Cheesecake Tacos.
Expert Tips for Berrylicious Cheesecake Tacos
-
Room Temperature Cream Cheese: Make sure the cream cheese is at room temperature for easier blending; this ensures a smooth filling without lumps.
-
Whip Cream Properly: When whipping the heavy cream, watch for stiff peaks—this lightness is key to achieving the ideal texture for your cheesecake filling.
-
Avoid Overbaking: Keep an eye on your taco shells as they bake. Remove them from the oven when they’re just golden brown; overbaking can lead to hard shells that are difficult to eat.
-
Experiment with Jams: While blueberry and strawberry jams are delightful, don’t hesitate to try raspberry or apricot as toppings for your Berrylicious Cheesecake Tacos for a new twist.
-
Serve Fresh: For the best flavor and texture, serve these tacos immediately after assembling. They can be prepped in advance, but the filling is best when fresh!
Berrylicious Cheesecake Tacos Variations
Looking to play around with your Berrylicious Cheesecake Tacos? Let your creativity soar and delight your taste buds with these fun twists!
-
Chocolate Delight: Add cocoa powder to the cream cheese mixture or use chocolate graham cracker crumbs for a rich flavor twist. Perfect for chocolate lovers looking for indulgence!
-
Fruit Fusion: Substitute the blueberry jam with raspberry or blackberry for a fruity sensation that will dance on your palate. Each variation brings its own vibrant color and taste.
-
Nutty Crunch: Incorporate finely chopped nuts, such as almonds or walnuts, into the graham cracker mix for an unexpected crunch that will surprise your guests.
-
Citrus Zing: Swap lemon juice with lime juice in the cheesecake filling to give it a refreshing citrus note, perfect for summer gatherings. This bright flavor will add a zesty touch to your tacos!
-
Flavorful Whip: Use flavored whipped cream, such as vanilla bean or lemon zest-infused cream, to elevate the whole recipe and add sophisticated nuance to each bite.
-
Frozen Treat: Freeze the assembled tacos for a cool summer dessert that is refreshing on a hot day and easy to grab when cravings strike!
-
Spicy Sweet: Drizzle a hint of chili-infused honey over your filled tacos for a spicy-sweet kick. It’s a unique flavor that can take your dessert tacos to a new level!
-
Taco Bar Fun: Set up a dessert taco bar with various jams, toppings, and mix-ins so guests can customize their own Berrylicious Cheesecake Tacos. Everyone loves options—imagine the delightful flavors they’ll create!
These delightful twists can elevate your berry-filled tacos, making them a versatile choice for any occasion, just like the irresistible Chicken Street Tacos!
Make Ahead Options
These Berrylicious Cheesecake Tacos are perfect for busy weeknights or gathering prep! You can prepare the taco shells up to 3 days in advance. Simply follow the shell-making instructions, then store them in an airtight container at room temperature to maintain their crunch. The cheesecake filling can also be made up to 24 hours ahead of time; refrigerate it in an airtight container to ensure it’s just as creamy when you’re ready to pipe it into the shells. When it’s time to serve, simply fill the cooled taco shells with the cheesecake mixture, top with blueberry and strawberry jams, and enjoy a delightful dessert that saves you time without compromising flavor!
Berrylicious Cheesecake Tacos Recipe FAQs
How do I choose ripe ingredients for my Berrylicious Cheesecake Tacos?
Absolutely! For the best results, select fresh fruits that are vibrant in color and firm to the touch. When opting for jams, look for those made with real fruit, as they’ll enhance the flavor. If using fresh berries, ensure they are free from mold or dark spots, indicating ripeness.
What’s the best way to store leftover Berrylicious Cheesecake Tacos?
To maintain their freshness, store the assembled tacos in an airtight container in the fridge for up to 1 day. However, for the best taste and texture, it’s advisable to fill and serve them fresh. If you have leftover filling, it can be kept in the fridge for up to 3 days.
Can I freeze the components of the Berrylicious Cheesecake Tacos?
Certainly! You can freeze the taco shells separately by placing them in a freezer-safe bag for up to 2 months. Make sure to wrap them tightly to avoid freezer burn. The cheesecake filling can be stored in a sealed container in the fridge for 3 days, but freezing isn’t recommended as it may alter the texture.
What should I do if my whipped cream doesn’t reach stiff peaks?
Very! If your whipped cream isn’t forming stiff peaks, ensure the heavy cream is cold and your mixing bowl is chilled. Whip on a medium-high speed until peaks start to form, and don’t rush the process. If it still isn’t thickening, you may need to add a little cornstarch or powdered sugar to help stabilize it.
Are there any dietary considerations with the Berrylicious Cheesecake Tacos?
Yes! If you’re accommodating allergies, please note that this recipe includes dairy products (cream cheese and heavy cream). For a dairy-free option, you could use vegan cream cheese and coconut whipped cream. It’s always best to check for any other allergies with your guests before serving.
Berrylicious Cheesecake Tacos for a Sweet Summer Treat
Ingredients
Equipment
Method
- Preheat your oven to 400℉ (200℃). Gather a cookie cutter and cupcake pan.
- Stack the tortillas and cut out circles using a cookie cutter. Pierce each circle with a fork.
- Dip each tortilla circle into melted butter, then roll in graham cracker crumbs.
- Invert a cupcake pan and place tortilla circles in between the cups to shape them.
- Bake in the oven for 10-12 minutes until golden brown. Let cool completely.
- Blend cream cheese, lemon juice, and vanilla until smooth.
- Whip heavy cream with powdered sugar until stiff peaks form. Fold into cream cheese mixture.
- Fill taco shells with cheesecake mixture using a piping bag.
- Top each taco with blueberry and strawberry jam. Serve immediately.
Leave a Reply