
As I was rummaging through my fridge one afternoon, I stumbled upon a tub of cottage cheese that had been sitting there a bit too long, and it sparked an idea. Enter these delightful Cottage Cheese Wraps, where ordinary ingredients transform into something extraordinary! Each wrap boasts over 21 grams of protein and is entirely free of flour, making them a high-protein, low-carb gem for any health-conscious eater. Perfect for meal prep or a quick lunch, these versatile wraps cater to all, whether you’re filling them with savory breakfast goodies or fresh veggies for a light dinner. With just a few simple steps—blend, bake, and roll—you’ll have a satisfying dish that makes fast food a thing of the past. Curious to see how easy it is? Let’s dive in!
Why Choose Cottage Cheese Wraps?
Health Benefits Galore: With over 21 grams of protein per serving, these wraps are a fantastic choice for anyone seeking a nutritious meal.
Easy Prep: Simply blend, bake, and roll—no complicated steps here! Perfect for busy days when you need a quick meal solution.
Versatility at Its Best: Fill with everything from scrambled eggs for breakfast to grilled chicken and veggies for dinner. The options are endless!
Low-Carb Delight: Enjoy a dish that fits seamlessly into keto and low-carb lifestyles, while providing the satisfaction of a hearty wrap.
Better than Fast Food: Say goodbye to greasy takeout and hello to homemade goodness—your taste buds and health will thank you!
For creative filling ideas, check out our Grilled Cheese Burrito or try a delightful twist with Peanut Chicken Wraps.
Cottage Cheese Wraps Ingredients
These tasty Cottage Cheese Wraps are made with simple, wholesome ingredients that pack a nutritional punch.
For the Wraps
• Full-fat cottage cheese – Provides moisture, protein, and richness; can be swapped with finely grated cheese for a different texture.
• Eggs – Acts as a binder for the mixture; using large eggs is recommended for the best results.
• Grated Parmesan cheese – Adds flavor and helps firm up the wraps; substitute with melting cheeses like mozzarella if desired.
• Garlic powder – Enhances flavor with a savory touch; fresh minced garlic can be used for a more vibrant taste.
• Italian seasoning – Offers a blend of herbs that deepen the flavor; other dried herbs like oregano or basil can be great alternatives.
For Serving (optional)
• Cream cheese – A creamy filling that pairs well with proteins like bacon or ham.
• Grilled chicken – Provides a hearty protein boost and pairs wonderfully with fresh veggies.
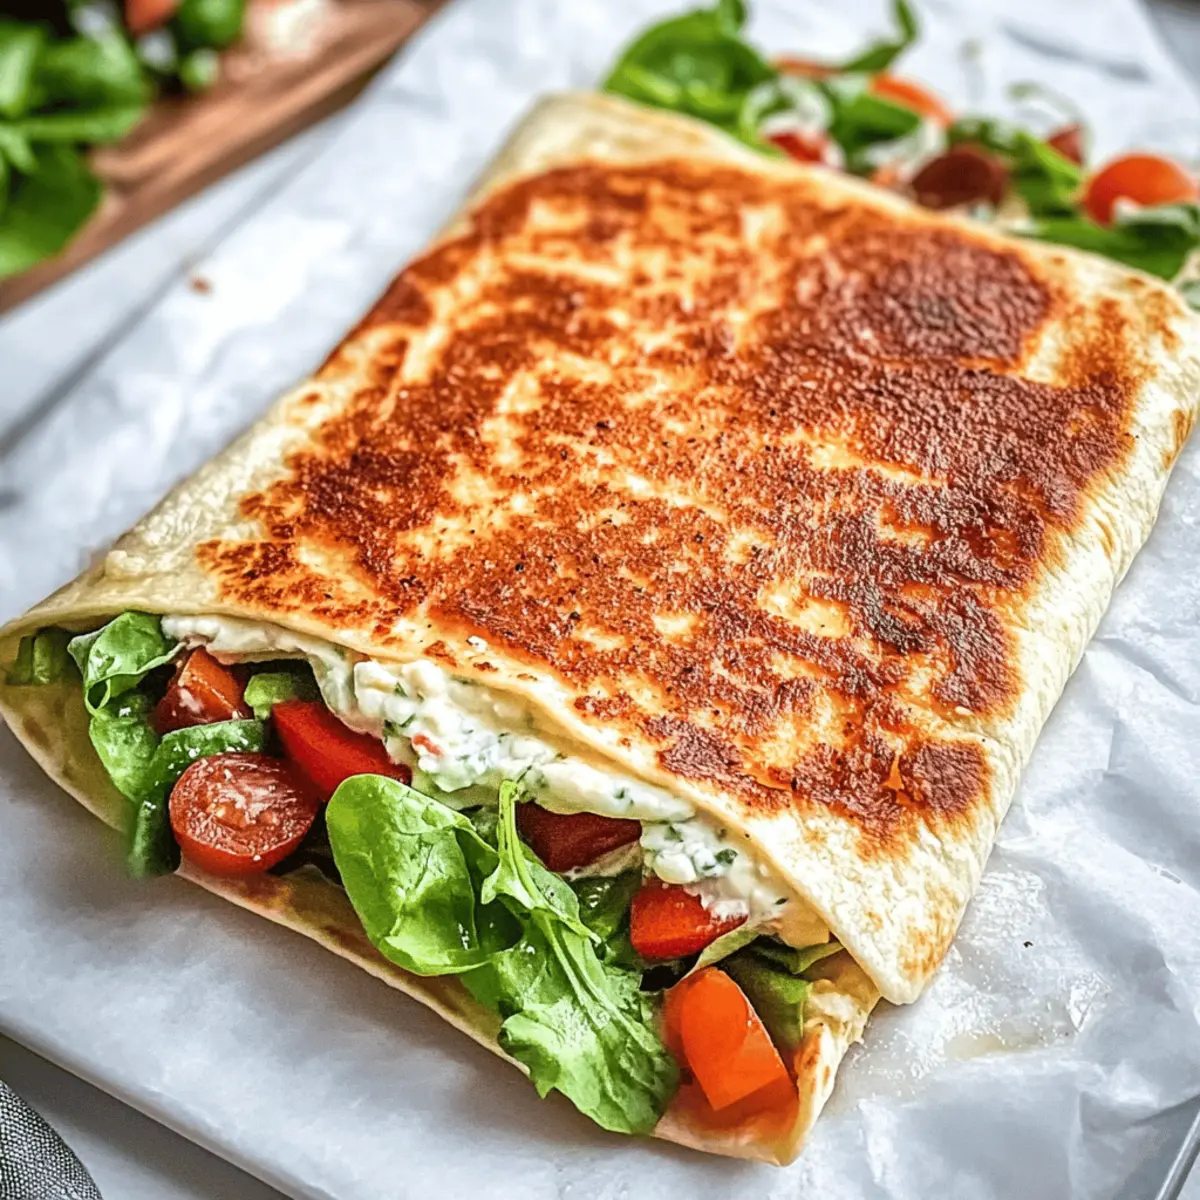
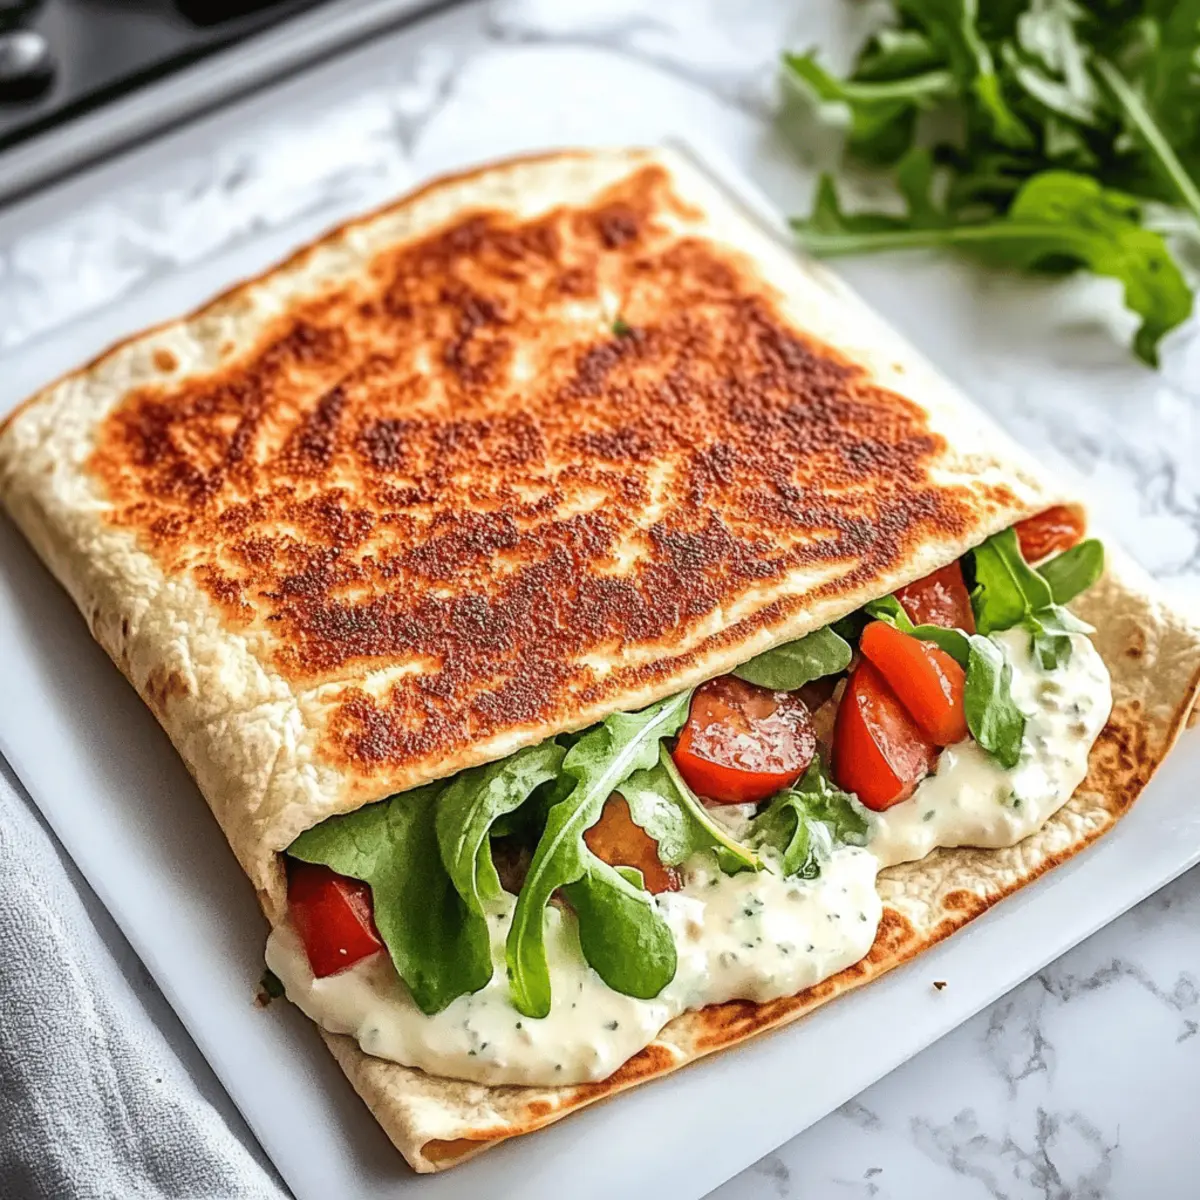
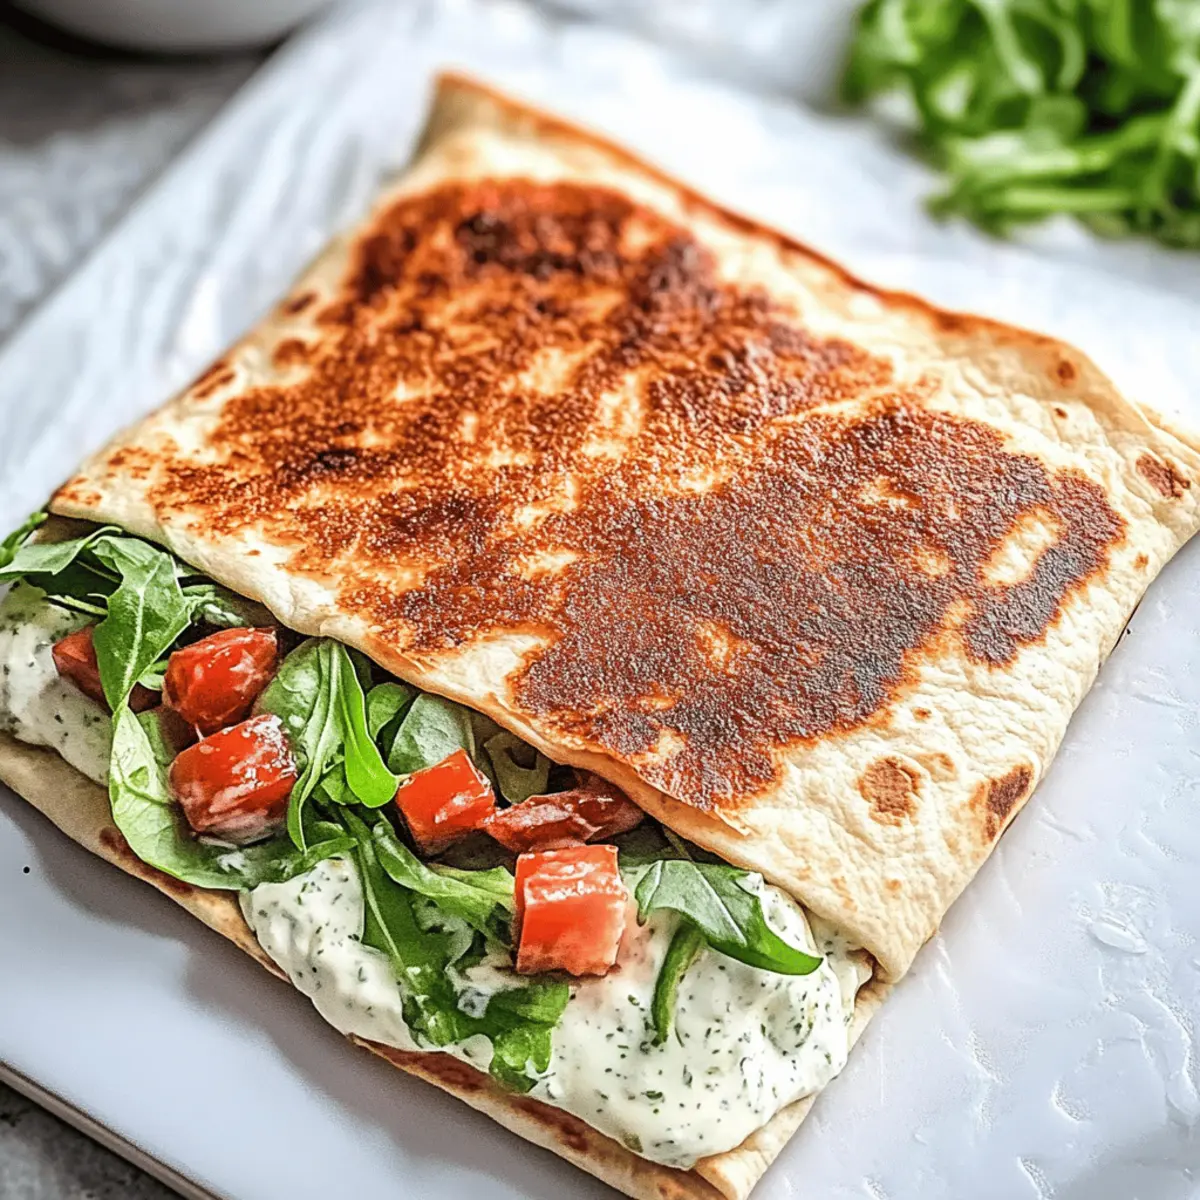
• Fresh veggies – Add crunch and nutrition; try cucumbers, bell peppers, or spinach for a delightful contrast.
Feel inspired to get creative with your fillings!
Step‑by‑Step Instructions for Cottage Cheese Wraps
Step 1: Preheat and Prepare the Baking Sheet
Begin by preheating your oven to 350°F (175°C). While it’s warming up, take a large baking sheet and line it with parchment paper. Ensure you grease the parchment lightly to prevent the wraps from sticking later on. This simple preparation step is key for achieving perfect Cottage Cheese Wraps that won’t tear during assembly.
Step 2: Blend the Ingredients
In a blender or food processor, combine the full-fat cottage cheese, large eggs, grated Parmesan cheese, garlic powder, and Italian seasoning. Blend until the mixture is completely smooth, about 1 minute. This creamy base will form the heart of your Cottage Cheese Wraps, packed with protein and full of flavor.
Step 3: Spread the Mixture
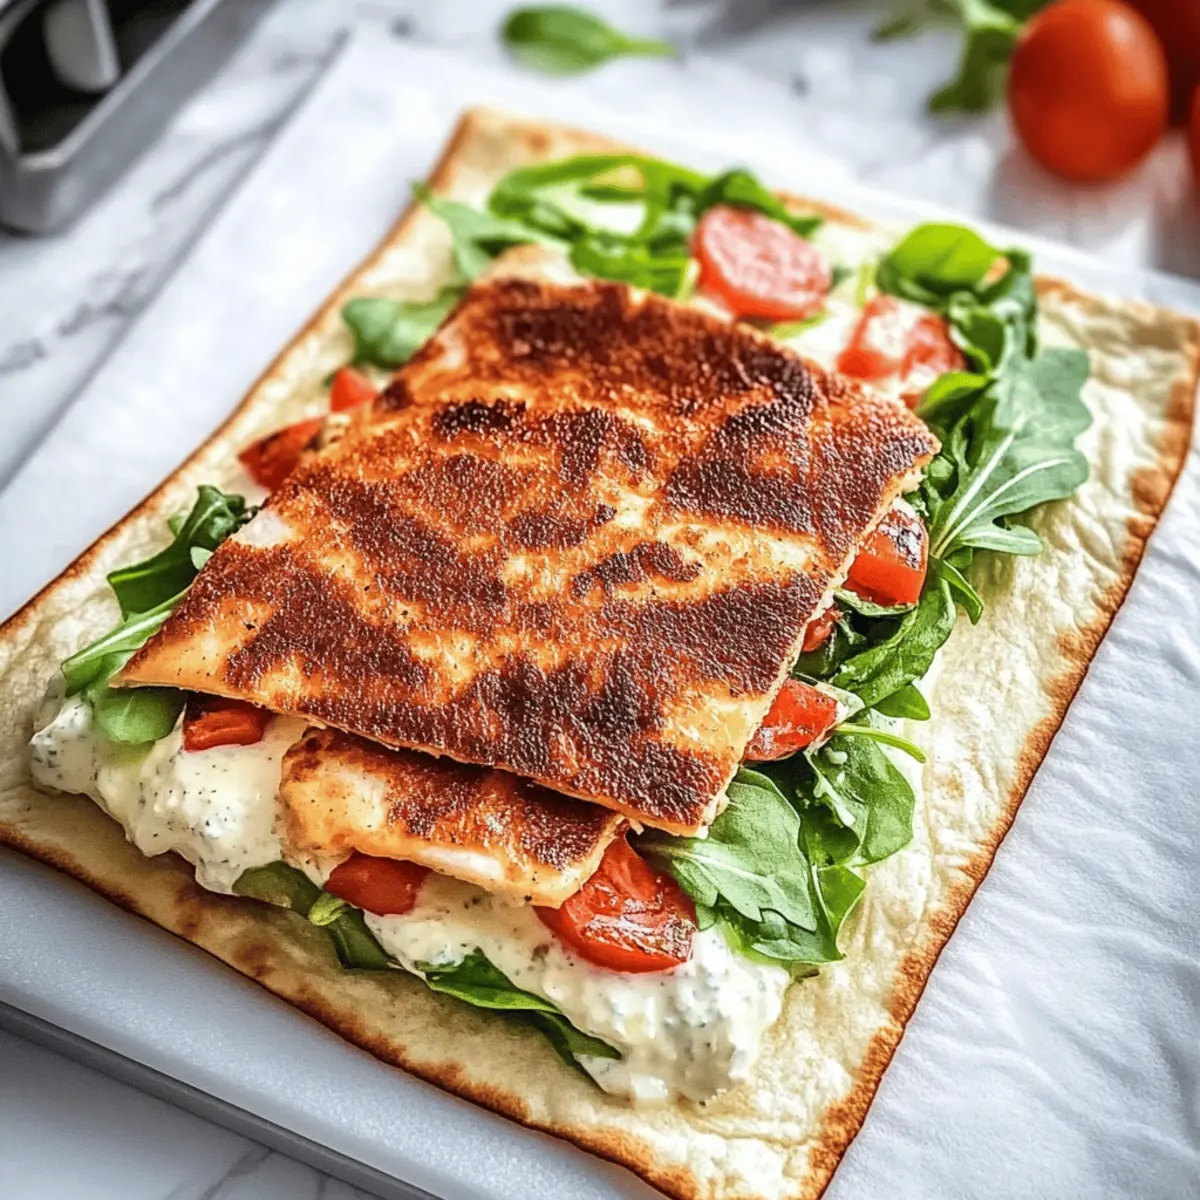
Pour the blended cottage cheese mixture onto the prepared baking sheet. Use a spatula to spread it evenly into a thin rectangle, ensuring it’s about ¼ inch thick for optimal results. A smooth, even surface will help the wrap set beautifully while baking, giving you that perfect structure when you roll it up later.
Step 4: Bake Until Set and Golden
Place the baking sheet in the preheated oven and bake for 30 to 35 minutes. Keep an eye on the edges; they should turn golden brown, while the top feels dry to the touch and does not jiggle. This is the ideal point for your Cottage Cheese Wraps to come out of the oven, guaranteeing a firm yet pliable texture.
Step 5: Cool the Wrap
Once baking is complete, allow the wrap to cool on the baking sheet for about 10 to 15 minutes. This cooling period is essential, as it helps the wrap firm up, making it easier to peel off and preventing any tearing when you’re ready to fill it with your favorite ingredients.
Step 6: Cut and Fill
After the wrap has cooled completely, use a sharp knife to cut it into your desired serving sizes. Now the fun begins—fill each piece with items like cream cheese and crispy bacon, or grilled chicken with fresh veggies. The Cottage Cheese Wraps are versatile and can hold a variety of fillings to suit any taste preference!
Step 7: Serve and Enjoy
Your delicious Cottage Cheese Wraps are ready to be enjoyed! Whether you serve them warm or cold, these wraps provide a hearty, nutritious alternative to fast food. They are perfect for meal prep or a quick lunch, and can easily cater to various filling combinations for a delightful meal every time.
Expert Tips for Cottage Cheese Wraps
-
Grease and Prepare: Always grease the parchment paper well; skipping this step will lead to sticking and tearing of your delicious Cottage Cheese Wraps.
-
Cooling Matters: Allow the wrap to cool completely before peeling it off, which prevents tearing and ensures it maintains its structure for filling.
-
Watch the Bake Time: For a crispier texture, extend the baking time slightly, but keep a close watch to avoid over-browning the edges.
-
Cooling Prevents Tears: Ensure the wrap cools adequately, as cutting it while warm can lead to messy, broken pieces.
-
Experiment with Fillings: Don’t hesitate to get creative with your fillings! Mix and match ingredients for a delightful culinary experience to suit your taste buds.
Cottage Cheese Wraps Variations
Feel free to get creative with these versatile wraps and indulge your taste buds in new ways!
- Gluten-Free: All ingredients are naturally gluten-free, making these wraps perfect for anyone with gluten sensitivities.
- Dairy-Free: Replace cottage cheese with a nut-based cheese or tofu for a dairy-free alternative that still holds well.
- Spicy Twist: Add crushed red pepper flakes or diced jalapeños to the batter for a zesty kick in every bite. Spicy flavor can elevate your meal and keep things interesting!
- Herb-Infused: Stir in fresh chopped herbs like basil or cilantro into the mixture for an aromatic touch that complements any filling.
- Sweet Option: Swap savory spices for cinnamon, and fill with cream cheese and fresh fruit for a delightful dessert wrap.
- Vegetarian Delight: Fill with roasted vegetables and hummus for a nutritious and flavorful vegetarian option that’s still packed with protein.
- Beefy Flavor: Brown some ground beef or turkey, season it, and add it to the wraps for a hearty, filling meal that satisfies your hunger.
- Texture Boost: Fold in some chia seeds or ground flaxseeds for added nutrition and a unique texture that makes each bite even more satisfying.
With so many delicious variations to try, you can enjoy a new twist on your Cottage Cheese Wraps anytime! For other creative meal ideas, explore our Baked Broccoli Cheese Balls or discover a cheesy delight with Cheese Bread Cozy.
How to Store and Freeze Cottage Cheese Wraps
Fridge: Keep your Cottage Cheese Wraps in an airtight container for up to 5 days. Layer parchment paper between wraps to prevent sticking and maintain freshness.
Freezer: For longer storage, freeze wraps in a well-sealed, airtight container or freezer bag for up to 2 months. Be sure to label with the date for easy tracking.
Reheating: When you’re ready to enjoy, thaw in the fridge overnight, then reheat in a skillet over low heat for 2-3 minutes on each side or microwave for 30 seconds until warm.
Serving Freshness: To keep the wraps flavorful, fill them just before serving, ensuring they taste as delightful as when they were freshly made!
Make Ahead Options
These Cottage Cheese Wraps are perfect for meal prep, allowing you to enjoy a nutritious, high-protein meal any day of the week! You can prepare the wraps up to 24 hours in advance by making the mixture and baking it. After cooling, wrap the baked layers in parchment paper and store them in an airtight container in the refrigerator. To maintain quality, avoid stacking them directly on top of each other, which can cause sticking. When you’re ready to enjoy, simply fill the wraps with your desired toppings and serve immediately, enjoying every flavorful bite without the hassle of starting from scratch!
What to Serve with Cottage Cheese Wraps
Imagine a flavorful, fulfilling spread that elevates your Cottage Cheese Wraps into a sensational meal experience for any occasion.
-
Zesty Salad: A fresh, vibrant salad with mixed greens and a lemon vinaigrette complements the savory flavors of the wraps beautifully.
-
Creamy Avocado Dip: This rich, creamy dip not only adds a delicious twist but also brings healthy fats that balance the wraps.
-
Sautéed Veggies: Lightly sautéed bell peppers and zucchini add a touch of sweetness and vibrant color, making every bite a delightful medley.
-
Spicy Salsa: A tangy salsa infused with herbs and spices enhances the wraps while adding an exciting pop of flavor.
-
Roasted Chickpeas: Crunchy roasted chickpeas provide a nutritious bite alongside your wraps, perfect for a satisfying textural contrast.
-
Herbed Quinoa: This light, fluffy quinoa dish adds a lovely floral note and pairs well with any savory filling you choose. It’s a wholesome addition to your meal.
-
Chilled Sparking Water: Refreshing and light, this drink cleanses the palate and complements the protein-packed wraps for a balanced meal experience.
Cottage Cheese Wraps Recipe FAQs
What type of cottage cheese should I use for the wraps?
Absolutely! I recommend using full-fat cottage cheese for its moisture, richness, and creaminess. However, if you’re looking for a lighter option, low-fat cottage cheese works too. Just keep in mind that the texture might change slightly.
How should I store Cottage Cheese Wraps?
To maintain their freshness, store your Cottage Cheese Wraps in an airtight container in the fridge for up to 5 days. I like to place parchment paper between each wrap to prevent sticking; it really helps keep them intact for a quick snack or meal later!
Can I freeze Cottage Cheese Wraps?
Yes, you can! To freeze your wraps, first ensure they are completely cooled. Then, place them in a well-sealed, airtight container or freezer bag, separating layers with parchment paper. They can be frozen for up to 2 months. Just label with the date, so you know when to enjoy them! When ready to eat, thaw in the fridge overnight, then reheat in a skillet or microwave.
What if my wraps are too thick and don’t cook properly?
No worries! If the wraps turn out too thick, they may not set properly during baking. Next time, make sure to spread the mixture evenly into a thin rectangle about ¼ inch thick on the baking sheet. If you ever find yourself with a thicker wrap, you could also add a few extra minutes to the baking time, checking frequently to avoid over-browning.
Can these wraps be made gluten-free?
Absolutely! These Cottage Cheese Wraps are naturally gluten-free, making them a great option for anyone avoiding gluten. Just be cautious with the additional fillings to ensure they’re gluten-free as well—many sauces or processed ingredients can contain hidden gluten.
Are Cottage Cheese Wraps suitable for pets?
While cottage cheese can be a nice treat for some pets in moderation, it’s best to consult your veterinarian before offering any human food to pets. If you’re feeding your pet, ensure that they’re not lactose intolerant or have any allergies to dairy.
Cottage Cheese Wraps: Your New Favorite High-Protein Meal
Ingredients
Equipment
Method
- Preheat oven to 350°F (175°C) and line a baking sheet with parchment paper, lightly greased.
- In a blender, combine cottage cheese, eggs, Parmesan, garlic powder, and Italian seasoning, blending until smooth.
- Spread the mixture evenly on the prepared baking sheet into a thin rectangle, about ¼ inch thick.
- Bake in the preheated oven for 30 to 35 minutes until the edges are golden and the top is dry.
- Allow the wraps to cool on the baking sheet for about 10 to 15 minutes.
- Cut the cooled wrap into desired sizes and fill with cream cheese, grilled chicken, or fresh veggies.
- Serve warm or cold and enjoy your nutritious Cottage Cheese Wraps!
Leave a Reply