
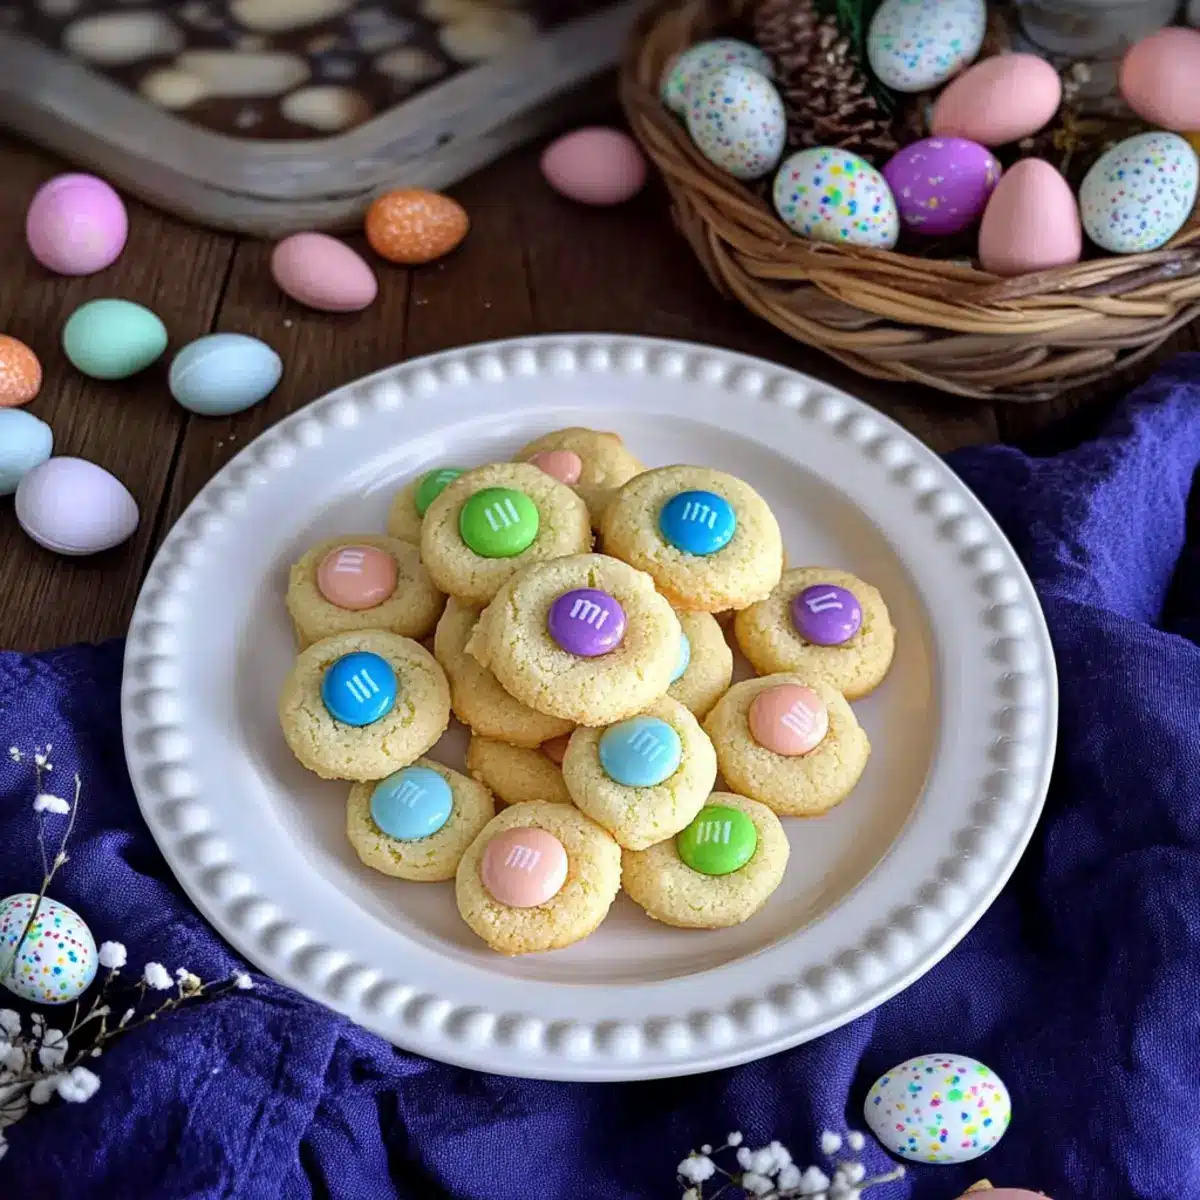
As the scent of sugary butter fills my kitchen, I can’t help but feel that familiar thrill of holiday baking. This season, I’m excited to share my delightful Easter Bunny Button Cookies, the perfect festive treat that will put a smile on everyone’s face. These bite-sized cookies feature a crisp exterior and a tender, melt-in-your-mouth center, adorned with colorful pastel chocolate candy. Not only are they visually appealing, but they’re also incredibly easy to whip up, making them ideal for last-minute gatherings or those cozy nights at home. Whether you’re looking to impress friends or simply indulge your sweet tooth, these cookies are sure to be a hit. Curious about how to make these charming little delights? Let’s dive into the recipe!
Why Are These Cookies So Irresistible?
Bite-Sized Bliss: Each Easter Bunny Button Cookie is a small, delightful snack that’s easy to pop in your mouth, making them perfect for sharing or savoring solo.
Festive Fun: Adorned with colorful chocolate centers, these treats add a cheerful touch to any gathering, instantly uplifting the mood.
Quick to Make: With simple ingredients and straightforward steps, you can have these cookies ready in no time, perfect for busy bakers looking to impress.
Perfect for Gifting: Wrapped in a cute box or tied up in a cellophane bag, they make thoughtful and delightful gifts for friends and family over the holiday.
Versatile Options: Feel free to experiment with different candy toppings, like mint chocolate M&Ms or seasonal varieties, for a unique twist that will surprise and delight.
Whether you’re enjoying them at home or sharing them at a gathering, these cookies will bring smiles to faces everywhere. If you’re looking for more festive ideas, check out my Strawberry Crunch Cookies for a fruity variation or the classic Chocolate Chip Cookies for timeless appeal!
Easter Bunny Button Cookies Ingredients
• These delightful cookies require just a few key ingredients for a festive treat!
For the Dough
- Butter – Provides richness and moisture; use softened butter for better mixing.
- Sugar – Adds sweetness and essential texture to the cookies.
- Egg Yolks – Enrich the dough; adding egg whites can help if the mixture feels dry.
- Vanilla Extract – Enhances the flavor, giving depth to your cookies.
- All-Purpose Flour – Forms the structure; it’s best to avoid substitutes for optimal texture.
For the Decoration
- Sanding Sugar – Adds a crunchy decorative finish; consider alternatives like pearl sugar, but avoid granulated sugar as it melts.
- Chocolate M&M Candy – Serves as a colorful and sweet center; feel free to substitute with similar candy-coated chocolates for variation.
Step‑by‑Step Instructions for Easter Bunny Button Cookies
Step 1: Preheat the Oven
Start by preheating your oven to 350°F (175°C). While the oven warms up, line a baking sheet with parchment paper or a silicone baking mat for easy cookie transfer later. This preparation ensures that your Easter Bunny Button Cookies will bake evenly and that their delightful, sweet aroma fills your kitchen in no time.
Step 2: Cream the Butter and Sugar
In a mixing bowl, combine softened butter and sugar. Use an electric mixer on medium speed to beat them together until the mixture becomes light and fluffy, about 2-3 minutes. This creaming process is crucial as it incorporates air into the dough, making the cookies tender and delightful.
Step 3: Add Egg Yolks and Vanilla
Once your butter and sugar are airy, incorporate the egg yolks and vanilla extract into the mix. Beat on low speed until everything is well combined and smooth. The richness from the yolks and the warm notes of vanilla will create a delightful base for your Easter Bunny Button Cookies, enhancing their flavor beautifully.
Step 4: Mix in the Dry Ingredients
Gently fold in the all-purpose flour using a spatula until just combined. Take care not to over-mix, as this could result in a denser cookie. You want a soft dough that holds together well but still has a slight tenderness; this is what makes your cookies melt in your mouth!
Step 5: Shape the Cookie Dough
Using a teaspoon, portion the dough into small balls, about the size of a marble. Roll each ball in sanding sugar to give it a sparkling finish. Place each coated dough ball on the prepared baking sheet, leaving about 2 inches of space between them to allow for spreading during baking.
Step 6: Add the Chocolate Centers
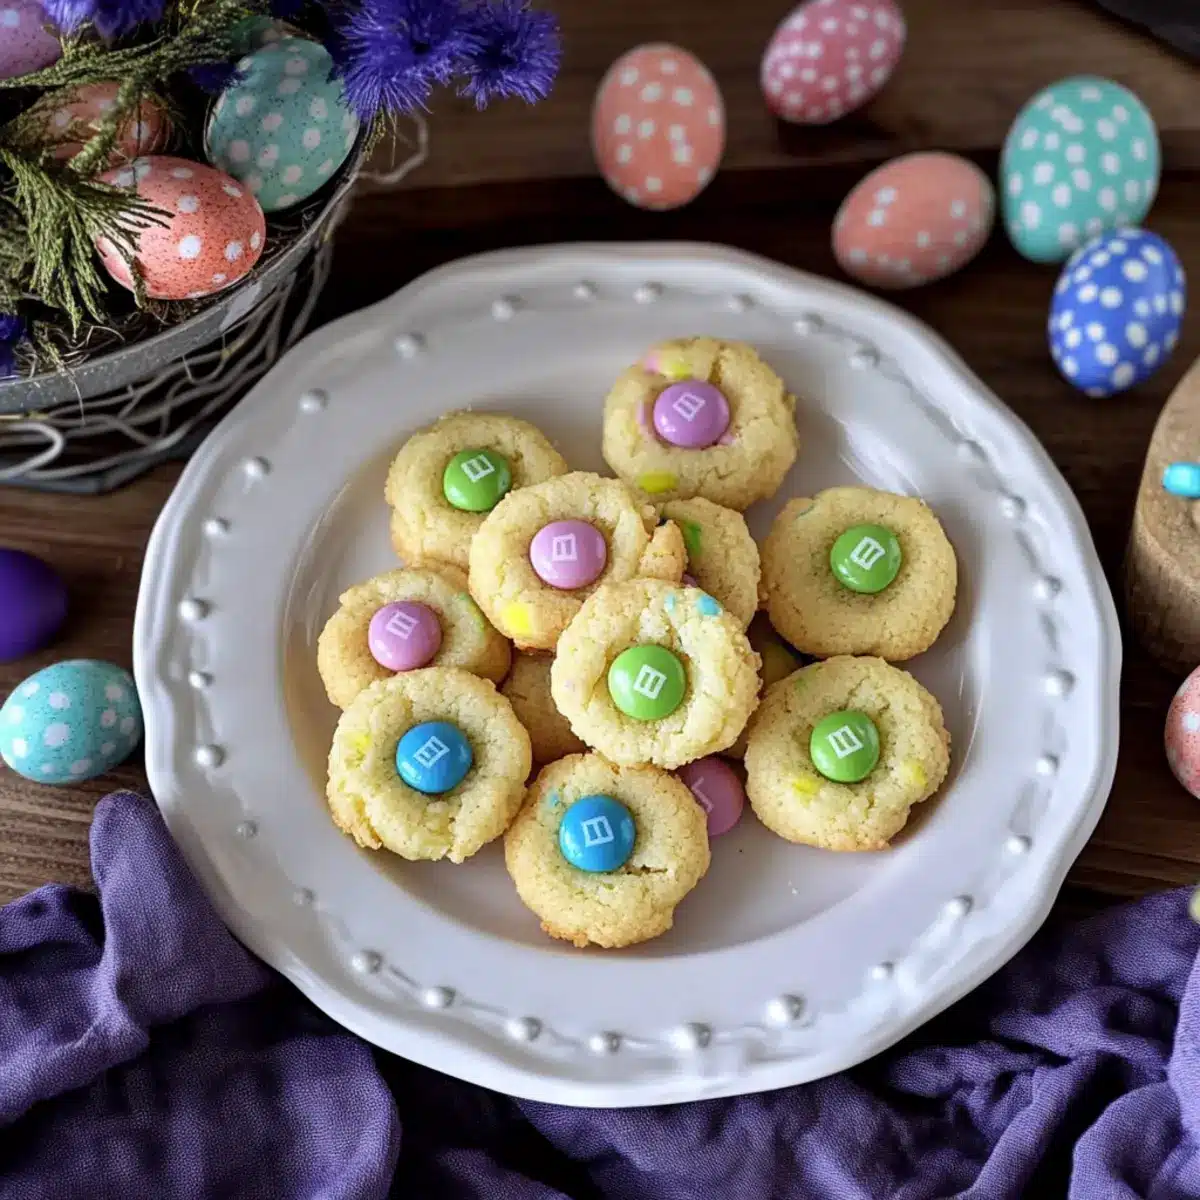
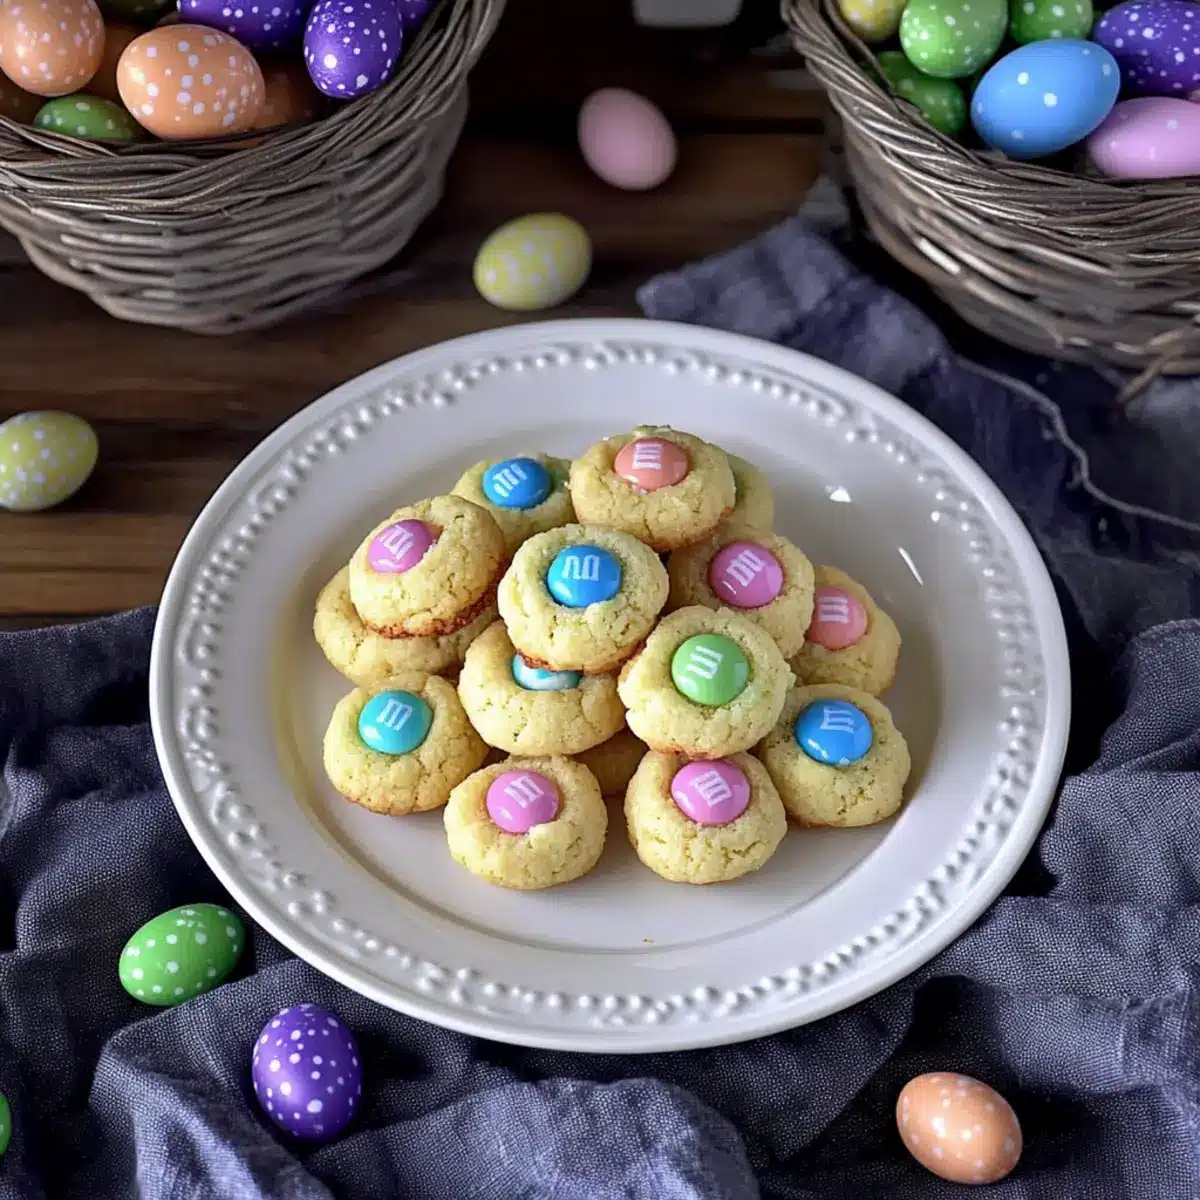
Gently press a chocolate M&M into the center of each dough ball, making sure it is nestled in nicely. This step not only adds a pop of color and sweetness but also makes your cookies visually appealing, transforming them into adorable Easter Bunny Button Cookies that are sure to impress.
Step 7: Bake the Cookies
Place the baking sheet in the preheated oven and bake for 10 minutes or until the edges of the cookies are lightly golden. Keep a close eye during this time, as baking them just right will ensure a crisp exterior while maintaining a soft, tender inside.
Step 8: Cool and Enjoy
After baking, allow the cookies to cool on the baking sheet for 3-5 minutes. This timing helps them set up before transferring them to a wire rack to cool completely. Your adorable Easter Bunny Button Cookies are now ready to be enjoyed—perfect for sharing or savoring all to yourself!
Storage Tips for Easter Bunny Button Cookies
Room Temperature: Store your cookies in an airtight container at room temperature for up to 3-5 days to retain their delightful texture.
Freezer: For longer storage, freeze the baked cookies in a single layer, then transfer to a sealed bag for up to 3 months. Thaw at room temperature before enjoying.
Cookie Dough: If you prefer to bake fresh cookies later, freeze the cookie dough balls on a baking sheet until firm, then transfer to a zip-top bag. Bake directly from the freezer, adding a couple of minutes to the baking time.
Reheating: To revive cookies, place them in a preheated oven at 300°F (150°C) for about 5-7 minutes. This will refresh them and bring back that melt-in-your-mouth goodness of the Easter Bunny Button Cookies.
Make Ahead Options
These Easter Bunny Button Cookies are perfect for meal prep enthusiasts! You can prepare the cookie dough up to 24 hours in advance by mixing all the ingredients and storing the dough in an airtight container in the refrigerator. To maintain that delightful texture, be sure to let the dough sit at room temperature for about 15 minutes before shaping and baking. Additionally, you can roll the dough balls and coat them in sanding sugar ahead of time, refrigerating them for up to 3 days. When you’re ready to surprise your family with fresh-baked cookies, simply press in the chocolate M&Ms and bake as directed for a delicious treat that’s just as cheerful and tasty!
What to Serve with Easter Bunny Button Cookies
As you gather your loved ones for Easter celebrations, think about delightful pairings that enhance the joy of these charming cookies.
- Fresh Fruit Salad: A vibrant mix of seasonal fruits adds a refreshing touch, balancing the sweetness of the cookies with natural flavors.
- Coffee or Tea: Serve with a warm cup of your favorite brew, as the soothing notes deepen the flavors and create a cozy atmosphere.
- Fluffy Whipped Cream: Light and airy, whipped cream can elevate these cookies, making for a delightful dip or dollop on your dessert plate.
- Mint Chocolate Chip Ice Cream: Cool and creamy, this ice cream offers a rich contrast to the crisp textures of the cookies, making every bite more indulgent.
Pairing the cookies with beverages or sides not only enhances their appeal but also creates a festive experience that everyone will cherish. Consider these suggestions to make your Easter gathering truly memorable!
Expert Tips for Easter Bunny Button Cookies
-
Room Temperature Butter: Make sure your butter is softened at room temperature for easy blending, resulting in a light and fluffy cookie dough.
-
Don’t Over-Mix: When incorporating flour, fold gently to keep the dough tender. Over-mixing can lead to denser cookies that lose their melt-in-your-mouth quality.
-
Watch the Baking Time: Keep a close eye on your cookies as they bake. Over-baking can dry them out, while perfect timing yields crisp edges and tender centers.
-
Sanding Sugar Crunch: Opt for coarse sanding sugar to maintain a crunchy surface. Avoid granulated sugar, which melts during baking and affects the texture.
-
Dough Consistency: If your dough feels too crumbly, adding a tablespoon of cream can help bind it together without altering the festive flavor of your Easter Bunny Button Cookies.
Easter Bunny Button Cookies Variations
Feel free to get creative with these Easter Bunny Button Cookies and make them your own delightful masterpiece!
-
Minty Twist: Use mint chocolate M&Ms for a refreshing flavor that adds a seasonal touch. These will not only be fun to eat but also a delightful surprise!
-
Dairy-Free Delight: Substitute butter with coconut oil and ensure the candy is dairy-free to create a perfect treat for those with dietary restrictions. These cookies will retain their melt-in-your-mouth appeal!
-
Nutty Crunch: Add chopped nuts like walnuts or pecans to the dough for an extra layer of texture and flavor. This twist can offer a satisfying crunch alongside the soft centers.
-
Spiced Up: Incorporate a pinch of cinnamon or nutmeg into the dough for a warm spice that merges beautifully with the sweetness of the cookies. This aromatic touch can elevate the overall flavor experience.
-
Fruity Fun: Swap the chocolate candy centers with pastel-colored fruit-flavored candies for a colorful and sweet alternative, bringing brightness to your Easter treat platter.
-
Extra Crunch: Try rolling the cookie dough balls in crushed graham crackers or pretzel crumbs for an added crunch that enhances the textural experience.
-
Chocolaty Surprise: Instead of M&Ms, use mini chocolate eggs to create a delightful Easter-themed surprise within each cookie. This fun change is sure to delight kids and adults alike!
-
Savory Option: For a unique twist, try adding a sprinkle of sea salt on top before baking to create a sweet and salty flavor combination that’s simply irresistible.
Explore these variations to find your favorite spin on these Easter Bunny Button Cookies, perfect for any celebration! And if you’re still looking for more baking inspiration, consider trying my Brown Butter Cookies or the lovely Lemon Raspberry Cookies for a refreshing change. Happy baking!
Easter Bunny Button Cookies Recipe FAQs
What is the best way to select ripe ingredients for my Easter Bunny Button Cookies?
Absolutely! When it comes to selecting ingredients, ensure your butter is fresh and at room temperature, which allows for proper blending into the dough. For eggs, fresher is always better to achieve a richer flavor; check the expiration date on the carton. The chocolate candies should be vibrant in color and free from any signs of damage, as they’ll be the focal point of your cookies!
How should I store my Easter Bunny Button Cookies, and how long do they last?
Very good question! Store your Easter Bunny Button Cookies in an airtight container at room temperature for up to 3-5 days. This helps maintain their tender, melt-in-your-mouth texture. If you notice any cookies becoming a bit stale, pop them in the oven at 300°F (150°C) for 5-7 minutes to refresh them.
Can I freeze my Easter Bunny Button Cookies? How do I do it?
You can absolutely freeze these cookies! To do so, let the baked cookies cool completely, then place them in a single layer on a baking sheet. Once frozen, transfer them to a sealed zip-top bag for up to 3 months. When you’re ready to enjoy, just thaw them at room temperature, or pop them directly from the freezer into a preheated oven for a quick refresh!
What should I do if my dough is too crumbly?
If your dough feels too crumbly, no worries! Just add a tablespoon of cream or milk to help bind the ingredients together. Mix it in gently until the dough holds together well without becoming overly sticky. This little step can save your cookies and maintain their delightful, melt-in-your-mouth texture!
Are there any dietary considerations I should keep in mind when making Easter Bunny Button Cookies?
Definitely! If you’re baking for others, be sure to check for common allergens such as eggs and dairy. You can substitute butter with coconut oil for a dairy-free version, and be mindful of your chocolate choices if you’re accommodating sensitivities—look for allergy-friendly chocolate brands. Always communicate these swaps when gifting cookies, ensuring everyone can enjoy these festive treats!

Easter Bunny Button Cookies That Melt in Your Mouth
Ingredients
Equipment
Method
- Preheat your oven to 350°F (175°C) and line a baking sheet with parchment paper.
- Cream softened butter and sugar together in a mixing bowl until light and fluffy, about 2-3 minutes.
- Add egg yolks and vanilla extract, mixing until well combined and smooth.
- Gently fold in all-purpose flour until just combined, being careful not to over-mix.
- Portion dough into small balls, roll in sanding sugar, and place on the baking sheet.
- Press a chocolate M&M into the center of each dough ball.
- Bake for 10 minutes or until edges are lightly golden.
- Cool on the baking sheet for 3-5 minutes before transferring to a wire rack.
Leave a Reply