
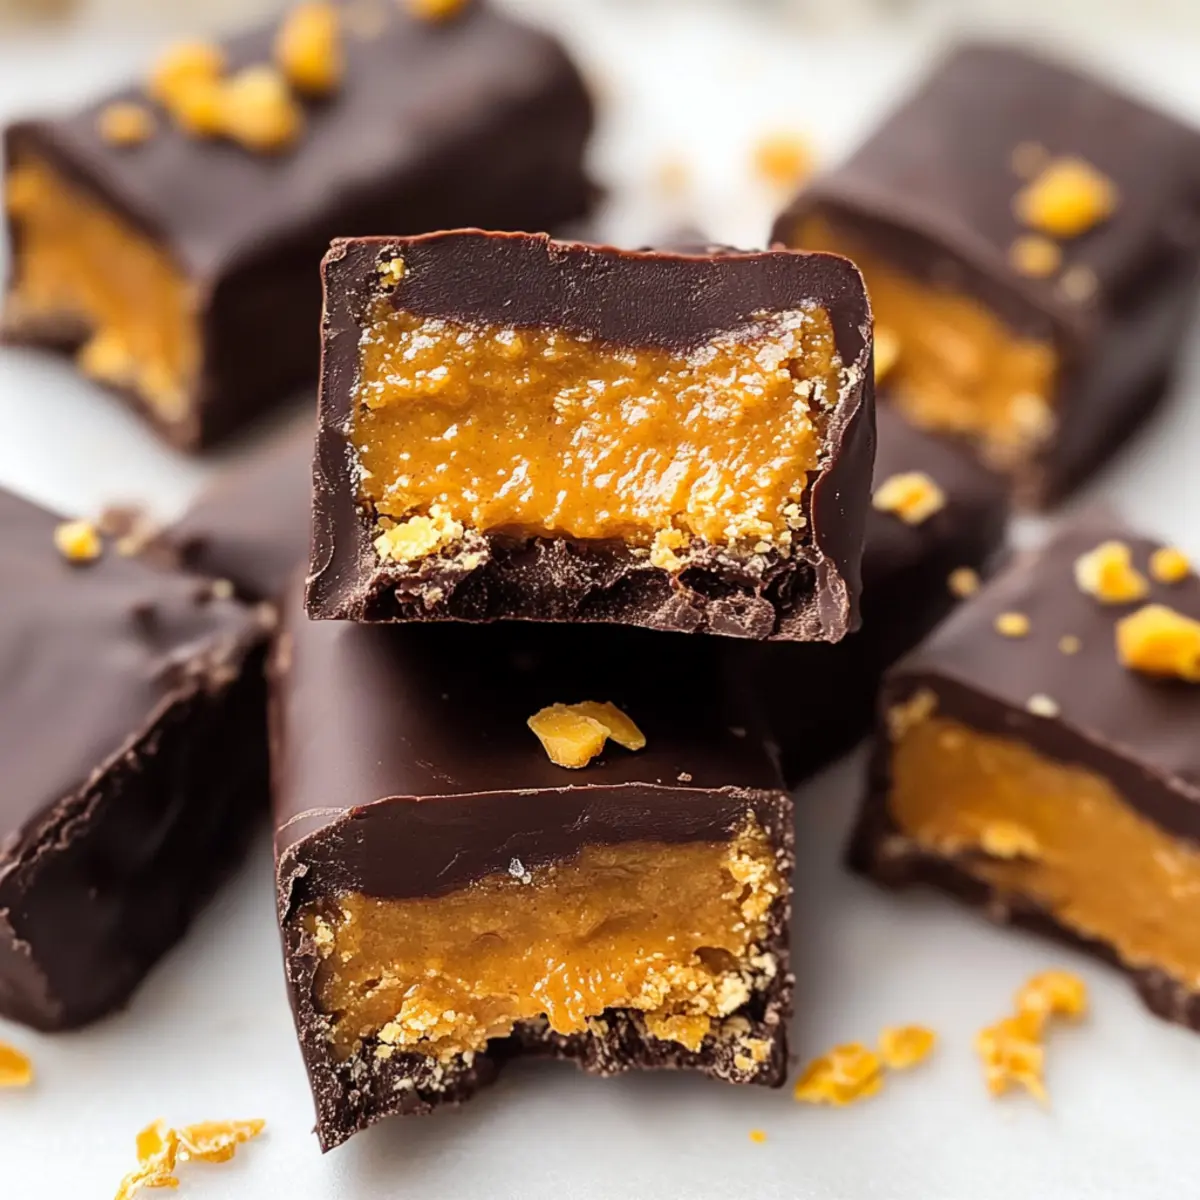
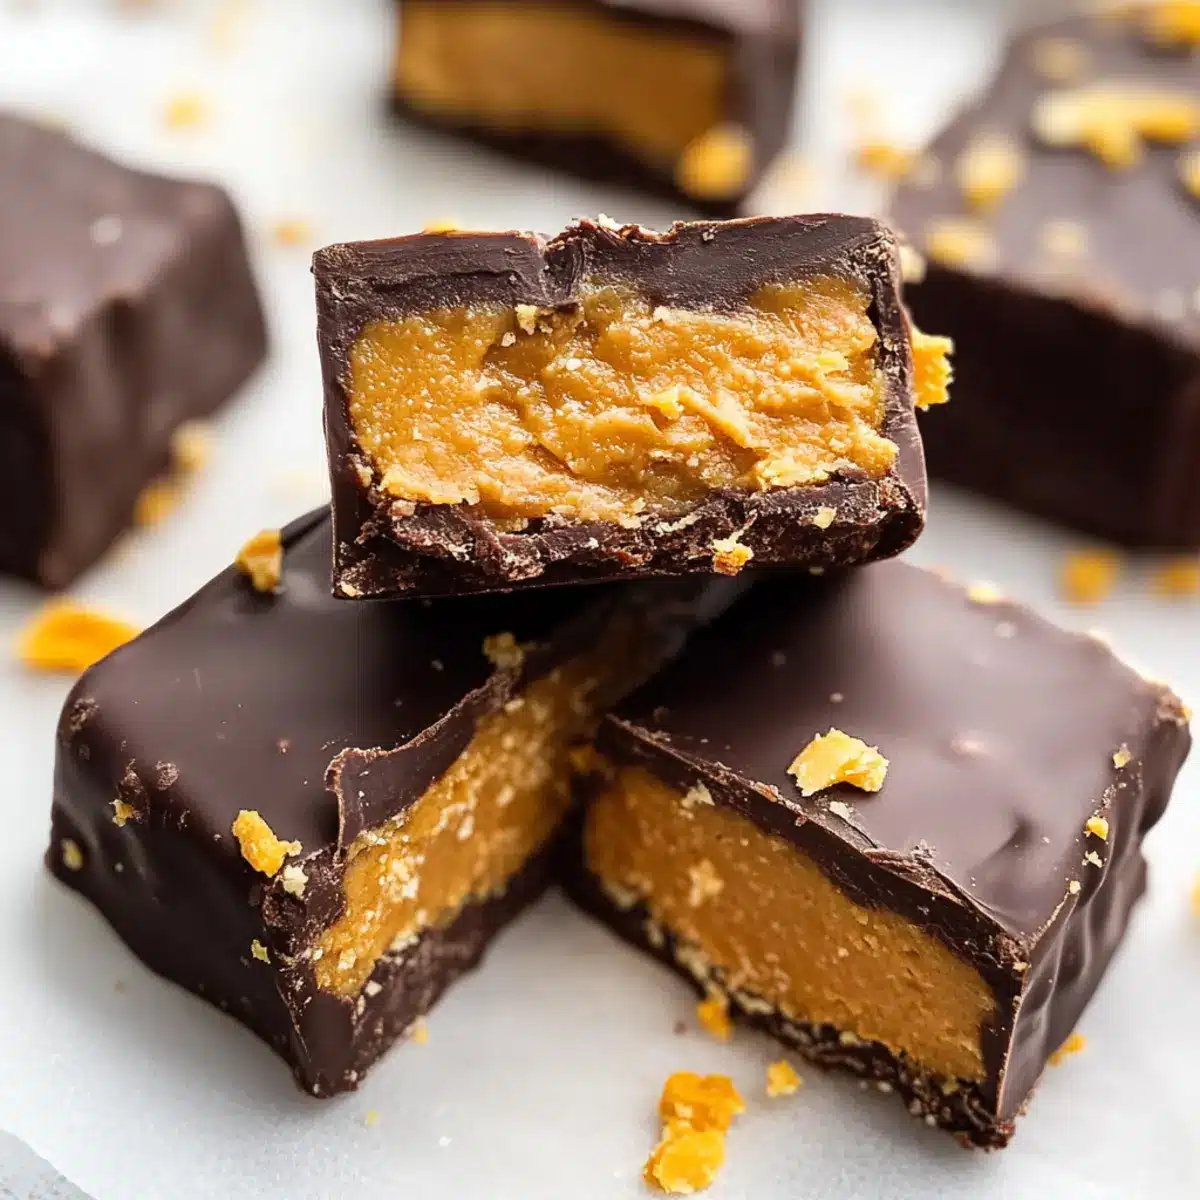
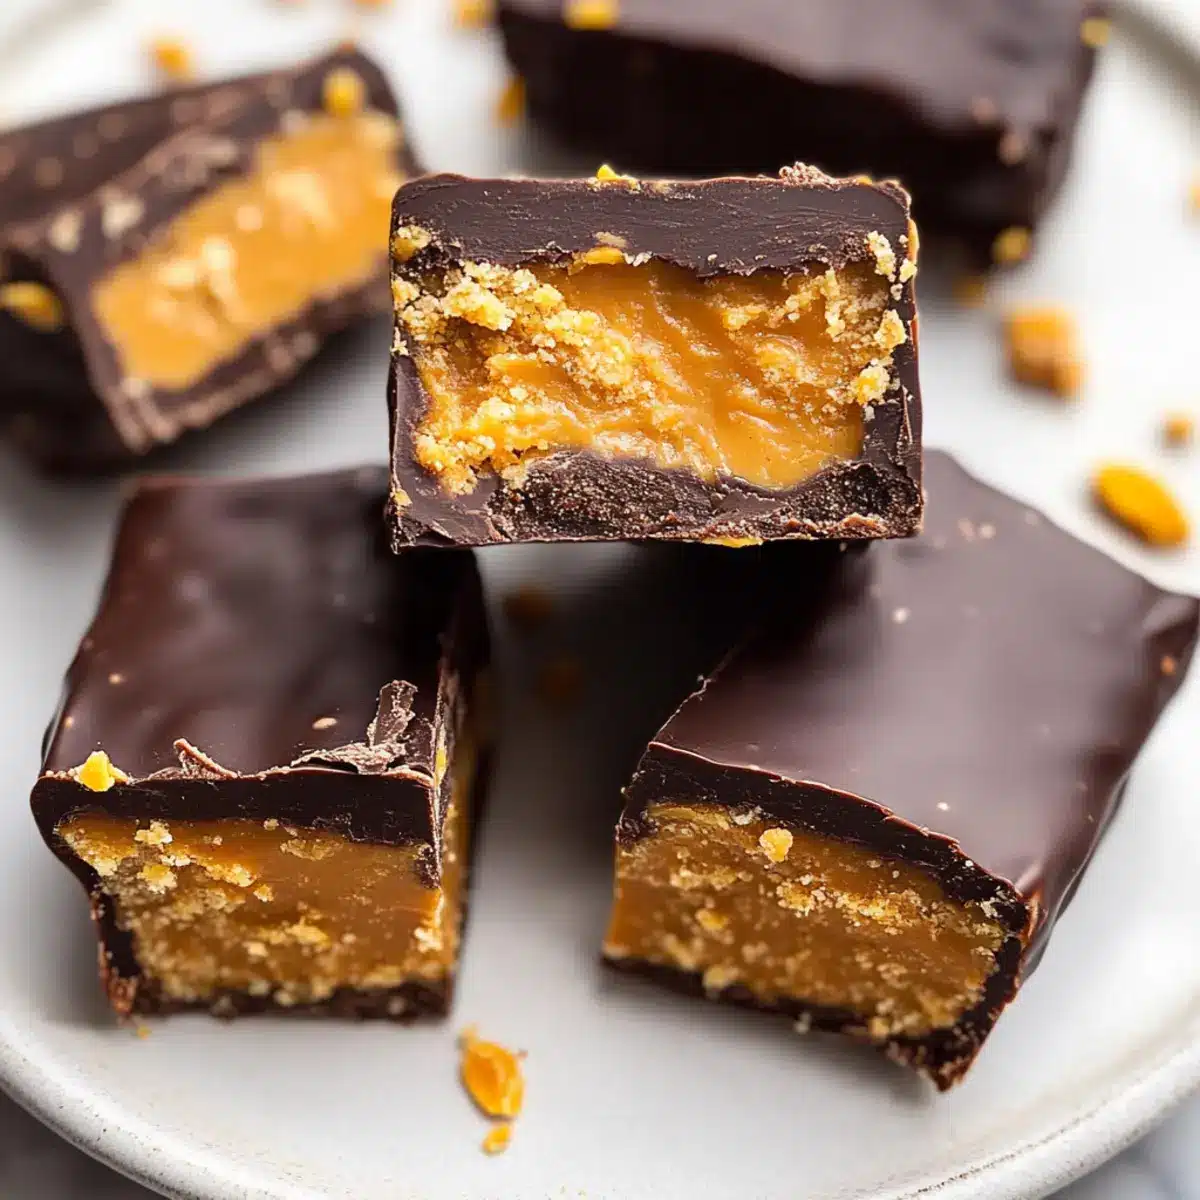
There’s something magical about transforming beloved childhood treats into healthier versions—like these 5-Ingredient Healthy Homemade Butterfingers! With a satisfying crunch from corn flakes and a creamy peanut butter blend, these bars are not only gluten-free and dairy-free but are also sweetened naturally. They make an ideal snack for those of us looking to satisfy cravings without the guilt. Plus, whipping them up takes hardly any time at all, making them perfect for busy days when you need a quick treat. Whether you’re indulging after dinner or sharing with friends, these bars are a delightful way to relive a sweet memory in a much healthier way. Curious how these simple ingredients come together to create a deliciously nostalgic candy bar? Let’s dive into the recipe!
Why Try Healthy Homemade Butterfingers?
Guilt-Free Indulgence: These homemade bars let you enjoy a nostalgic treat without the unhealthy additives.
Quick Preparation: With just five ingredients and minimal effort, you’ll have delicious snacks ready in no time.
Customizable Flavor: Switch up the nut butter or add sea salt for a personal touch—there are plenty of ways to make this recipe your own!
Perfect for Everyone: Gluten-free, dairy-free, and naturally sweetened, these bars cater to various dietary needs, making them a hit among friends and family.
Make-Ahead Convenience: Store them in your freezer for up to three months, ensuring you have a healthy snack on hand whenever cravings strike.
These Healthy Homemade Butterfingers are not just a treat; they’re a wonderful way to satisfy your sweet tooth while sticking to a healthier lifestyle! Give them a try, and consider pairing with a glass of almond milk for a delightful snack experience.
Healthy Homemade Butterfingers Ingredients
• Dive right into making these guilt-free treats with just five simple ingredients!
For the Base
- Peanut Butter – Binds everything together while adding a rich flavor; choose natural, unsweetened for the best taste.
- Maple Syrup or Honey – Provides natural sweetness and moisture; opt for maple syrup to keep it vegan.
- Corn Flakes – Adds satisfying crunch; make sure they are gluten-free if necessary.
For the Coating
- Chocolate Chips – This chocolaty layer makes it irresistible; dark chocolate chips create a healthier alternative.
- Coconut Oil – Aids in smooth melting of chocolate while adding a delightful coconut hint; you can skip it for a simpler texture.
Enjoy crafting these Healthy Homemade Butterfingers with ease, and relish in each delicious bite!
Step‑by‑Step Instructions for Healthy Homemade Butterfingers
Step 1: Crush the Corn Flakes
Begin by placing your corn flakes in a zip-top bag, sealing it tightly, and gently crush them using a rolling pin or your hands until they reach small, uniform pieces. This should take about 2-3 minutes. Make sure to keep an eye on the size; they should still have some texture for that delightful crunch in your Healthy Homemade Butterfingers.
Step 2: Combine Peanut Butter and Sweetener
In a large mixing bowl, add your creamy peanut butter and maple syrup (or honey). Using a spatula, stir them together until fully blended and smooth, which should take about 1-2 minutes. You’ll know it’s ready when it has a consistent, silky texture, and is well combined—this mixture will be the base of your bars.
Step 3: Mix in Crushed Corn Flakes
Once your peanut butter and sweetener mixture is ready, gently fold in the crushed corn flakes using your spatula. Ensure all the corn flakes are evenly coated with the peanut butter blend as you mix them together, about 2-3 minutes. The resulting mixture should be thick but cohesive, just right for forming into bars.
Step 4: Press Mixture into Pan
Line a loaf pan with parchment paper, allowing it to hang over the edges for easy removal later. Transfer the corn flake mixture into the pan, pressing it down firmly with the back of your spatula to create an even layer, about 1 inch thick. Freeze this mixture for at least 1 hour, or until solid to the touch.
Step 5: Cut Into Bars
After the mixture has set in the freezer, carefully remove it from the loaf pan using the parchment paper overhang. Place it on a cutting board and slice it into 12 equal-sized bars with a sharp knife. The Healthy Homemade Butterfingers should have a firm, cohesive texture, with visible layers of corn flakes throughout for that iconic crunch.
Step 6: Melt the Chocolate Coating
In a microwave-safe bowl, combine your chocolate chips and coconut oil. Heat in the microwave in 30-second intervals, stirring in between, until the mixture is completely melted and smooth, which should take about 1-2 minutes. Make sure no lumps remain for a glossy coating that enhances your Healthy Homemade Butterfingers.
Step 7: Coat Each Bar
One by one, dip each bar into the melted chocolate mixture, ensuring it is fully coated. Allow any excess chocolate to drip off before placing them on a parchment-lined baking sheet. Continue this process for all bars, creating a delicious chocolate layer that complements your peanut buttery filling perfectly.
Step 8: Set the Chocolate
After coating all the bars, place the baking sheet in the freezer for about 10 minutes to allow the chocolate to harden completely. Keep an eye on the chocolates; they should have a glossy finish once firm. Once set, your Healthy Homemade Butterfingers are ready to be enjoyed or stored!

What to Serve with Healthy Homemade Butterfingers?
As you savor these delightful bars, consider pairing them with dishes that enhance their sweet and crunchy flavors.
- Creamy Almond Milk: A soothing glass of almond milk complements the sweet and nutty flavors, making each bite a treat.
- Fresh Berries: The tartness of strawberries or blueberries balances the sweetness, adding a refreshing contrast to your snack.
- Coconut Yogurt: Creamy and slightly tangy, coconut yogurt adds a delightful creaminess that pairs beautifully with chocolate.
- Fruit Salad: A medley of seasonal fruits brings brightness and a variety of textures to your dessert experience.
- Dark Roast Coffee: The rich notes of dark coffee provide a perfect counterpoint to the sweetness of the bars, creating a satisfying treat.
- Trail Mix: A crunchy trail mix offers additional textures and flavors, making for a fun snack combo that keeps you energized.
Imagine enjoying your Healthy Homemade Butterfingers alongside a bright bowl of fresh berries, or perhaps dipping them into creamy almond milk—a delightful way to indulge!
Expert Tips for Healthy Homemade Butterfingers
-
Proper Corn Flake Crush: Ensure the corn flakes are crushed well to avoid large chunks that could affect the texture of your Healthy Homemade Butterfingers.
-
Temperature Matters: For best results, let the chocolate coating slightly cool before dipping the bars. This prevents melting the peanut butter filling.
-
Butter Consistency: If the mixture feels too crumbly, a little more peanut butter can help bind it. Aim for a smooth yet firm consistency.
-
Chocolate Quality: Choose high-quality dark chocolate for a rich flavor that enhances your Healthy Homemade Butterfingers, making them even more indulgent.
-
Storage Smart: Keep your bars in an airtight container in the freezer for up to three months. This keeps them fresh and ready for moments of sweet craving!
Make Ahead Options
These Healthy Homemade Butterfingers are perfect for busy home cooks looking to save time without sacrificing flavor! You can prepare the bars up to 3 days in advance by following the initial steps: mix the peanut butter, sweetener, and crushed corn flakes, then press the mixture into the loaf pan. Once set, cut into bars and store them in an airtight container in the freezer to maintain freshness. When you’re ready to enjoy, simply melt the chocolate and dip the bars before serving. This way, you’ve got a delicious, healthy treat that feels just as fresh as when you first made them, ready to satisfy any craving!
Healthy Homemade Butterfingers Variations
Feel free to switch things up with these tasty alternatives that’ll spark your creativity and delight your taste buds!
-
Nut Alternatives: Substitute almond or cashew butter for a different but equally delicious flavor profile. Try experimenting to see which nut butter tickles your fancy!
-
Seed Butter Swap: For a nut-free version, use sun butter or any other seed butter. It’s an excellent option for those with allergies, keeping the crunch and creamy goodness intact.
-
Flavor Boost: Add a pinch of sea salt to the chocolate mixture for a delightful salted chocolate flavor that perfectly balances sweetness.
-
Sweetener Twist: Use agave syrup instead of honey or maple syrup for a different sweetness profile that’s still vegan-friendly.
-
Chocolate Variations: Opt for white chocolate or carob chips for a playful take on the chocolate coating. It can transform the bars into a different, yet enjoyable treat!
-
Extra Crunch: Mix in chopped nuts, like walnuts or pecans, along with the corn flakes for added texture and a flavor boost in each bite.
-
Coconut Flakes: Dust the tops of your bars with unsweetened shredded coconut after dipping in chocolate for a tropical twist that pairs nicely with the creamy peanut butter.
-
Add Spices: Spice things up by incorporating a dash of cinnamon or vanilla extract in the peanut butter mixture. It adds warmth and depth, making your Healthy Homemade Butterfingers unforgettable!
For a great beverage pairing, enjoy them with a refreshing glass of Chicken Mein Flavorful or treat yourself to a homemade coffee with Homemade Pumpkin Spice to create a delightful afternoon.
How to Store and Freeze Healthy Homemade Butterfingers
Room Temperature: Keep your bars at room temperature for up to 3 days, but be mindful of warm environments, as they may soften.
Fridge: Store in an airtight container in the fridge for up to 1 week. This will help maintain their firmness and freshness.
Freezer: For longer storage, freeze wrapped bars in an airtight container or freezer bag for up to 3 months. They’re perfect for quick, healthy snacks anytime!
Reheating: Enjoy these Healthy Homemade Butterfingers straight from the freezer or let them sit at room temperature for about 10 minutes for the best texture before munching.
Healthy Homemade Butterfingers Recipe FAQs
How do I select the best peanut butter for this recipe?
Absolutely! For the best outcome, choose natural, unsweetened peanut butter, which provides richness without unnecessary added sugars or oils. Look for brands that list only peanuts (and possibly salt) in the ingredients. It enhances the flavor and helps bind your Healthy Homemade Butterfingers together perfectly.
What is the best way to store Healthy Homemade Butterfingers?
You can store your Healthy Homemade Butterfingers in an airtight container in the fridge for up to 1 week for a quick snack. If you want to keep them longer, freeze them! Just place them in an airtight container or freezer bag, and they’ll stay fresh for up to 3 months.
Can I freeze Healthy Homemade Butterfingers? How?
Of course! To freeze your Healthy Homemade Butterfingers, ensure they are completely set after dipping in chocolate. Place the bars in a single layer in an airtight container or wrap each individually in parchment paper for easy access. They’ll maintain their stunning flavor and texture for up to 3 months. When you’re ready to indulge, just take out a bar and enjoy!
What should I do if my bars are too crumbly?
Very! If your Healthy Homemade Butterfingers feel too crumbly, simply add a little more peanut butter to the mixture. Start with a tablespoon and mix well until it holds together better. If they’re still not binding properly, ensure you pressed the mixture firmly into the loaf pan to help it bind as it sets.
Are there any allergen considerations for this recipe?
Definitely! While this recipe is quite versatile, be sure to check all ingredients for allergens. It’s gluten-free, but if serving to someone with nut allergies, consider using sun butter or any seed butter in place of peanut butter. Always review chocolate packaging for potential allergens too, especially if you have sensitive guests.
How can I customize the flavor of my Healthy Homemade Butterfingers?
The more the merrier! You can switch up the nut butter—try almond or cashew for a different taste. Adding a pinch of sea salt to the chocolate mixture can create a delicious salted chocolate flavor. Feel free to experiment with different types of nut butters or mix-ins like dried fruits or seeds for a personal twist!
Healthy Homemade Butterfingers You Can Feel Good About
Ingredients
Equipment
Method
- Crush the corn flakes in a zip-top bag using a rolling pin until chunky.
- Combine peanut butter and maple syrup in a bowl, mixing until smooth.
- Fold crushed corn flakes into the peanut butter mixture.
- Press the mixture into a lined loaf pan to about 1-inch thickness and freeze for 1 hour.
- Cut the set mixture into 12 equal bars.
- Melt chocolate chips and coconut oil in the microwave, stirring until smooth.
- Dip each bar in melted chocolate, coating fully.
- Return bars to the freezer for 10 minutes to harden the chocolate.
- Store in an airtight container in the freezer.
Leave a Reply