
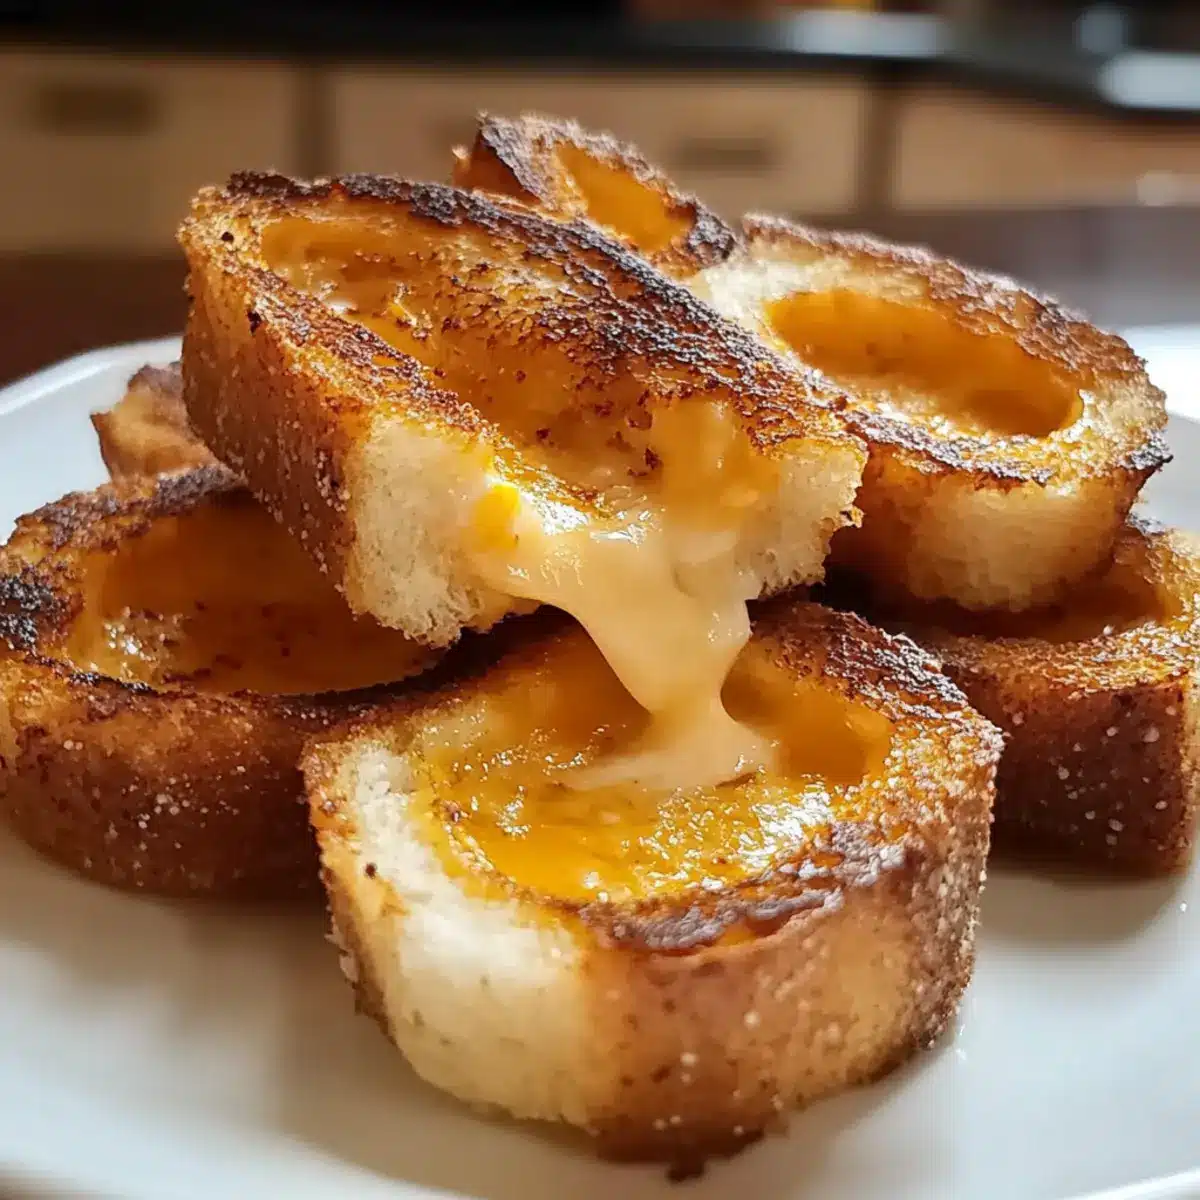
The aroma of grilled cheese sandwiches sizzling on the stove always takes me back to my childhood, warming my heart like a cozy hug. Today, I’m excited to share these Mini Grilled Cheese Dippers, a playful twist on a timeless favorite that’s bound to charm everyone around your table. Perfect for a quick meal or a fun appetizer at gatherings, this recipe is not only easy to whip up but also allows for plenty of customization, including gluten-free options! With their golden crust and gooey cheese, these delightful bites promise to please even the pickiest of eaters. Are you ready to transform your next snack time into a cheesy adventure?
Why are Mini Grilled Cheese Dippers Amazing?
Irresistible Flavor: Each bite of these Mini Grilled Cheese Dippers bursts with rich, gooey cheese, making them impossible to resist.
Quick & Easy: Ready in minutes, they’re the perfect solution for those busy days when you crave comfort food without the hassle.
Customizable Delight: Add your favorite ingredients, like crispy bacon or fresh spinach, to make them uniquely yours!
Kid-Friendly Fun: These dippers are guaranteed to please even the pickiest eaters, making them a hit for family meals or gatherings. Pair them with tomato soup for a classic twist!
Versatile & Adaptable: Whether you’re creating a gluten-free version or experimenting with different cheeses, these dippers invite creativity and inspire culinary exploration.
Mini Grilled Cheese Dipper Ingredients
• Perfect for any occasion!
For the Bread
- Sturdy Bread – Choose a good-quality sandwich bread for the best structure; gluten-free varieties work well, too.
For the Cheese
- Sharp Cheddar – Adds a delicious, bold flavor that pairs nicely with the buttery bread.
- Provolone – Offers fantastic meltability when combined with cheddar for a cheesy dream.
For Frying
- Butter – Creates a golden, crispy exterior that enhances the overall flavor of your dippers.
- Mayonnaise – A light spread can give a unique taste and crispy finish; swap for butter if desired.
Get ready to take these delightful Mini Grilled Cheese Dippers to the next level by incorporating your favorite flavors!
Step‑by‑Step Instructions for Mini Grilled Cheese Dippers
Step 1: Prepare the Bread
Start by slicing your sturdy bread into manageable pieces about 2 inches thick, perfect for dippers. Aim for uniform sizes to ensure even cooking. If using gluten-free bread, ensure it’s a robust variety for a delightful crunch. Set the bread aside on a clean cutting board while you gather your cheese and frying fat.
Step 2: Assemble the Sandwiches
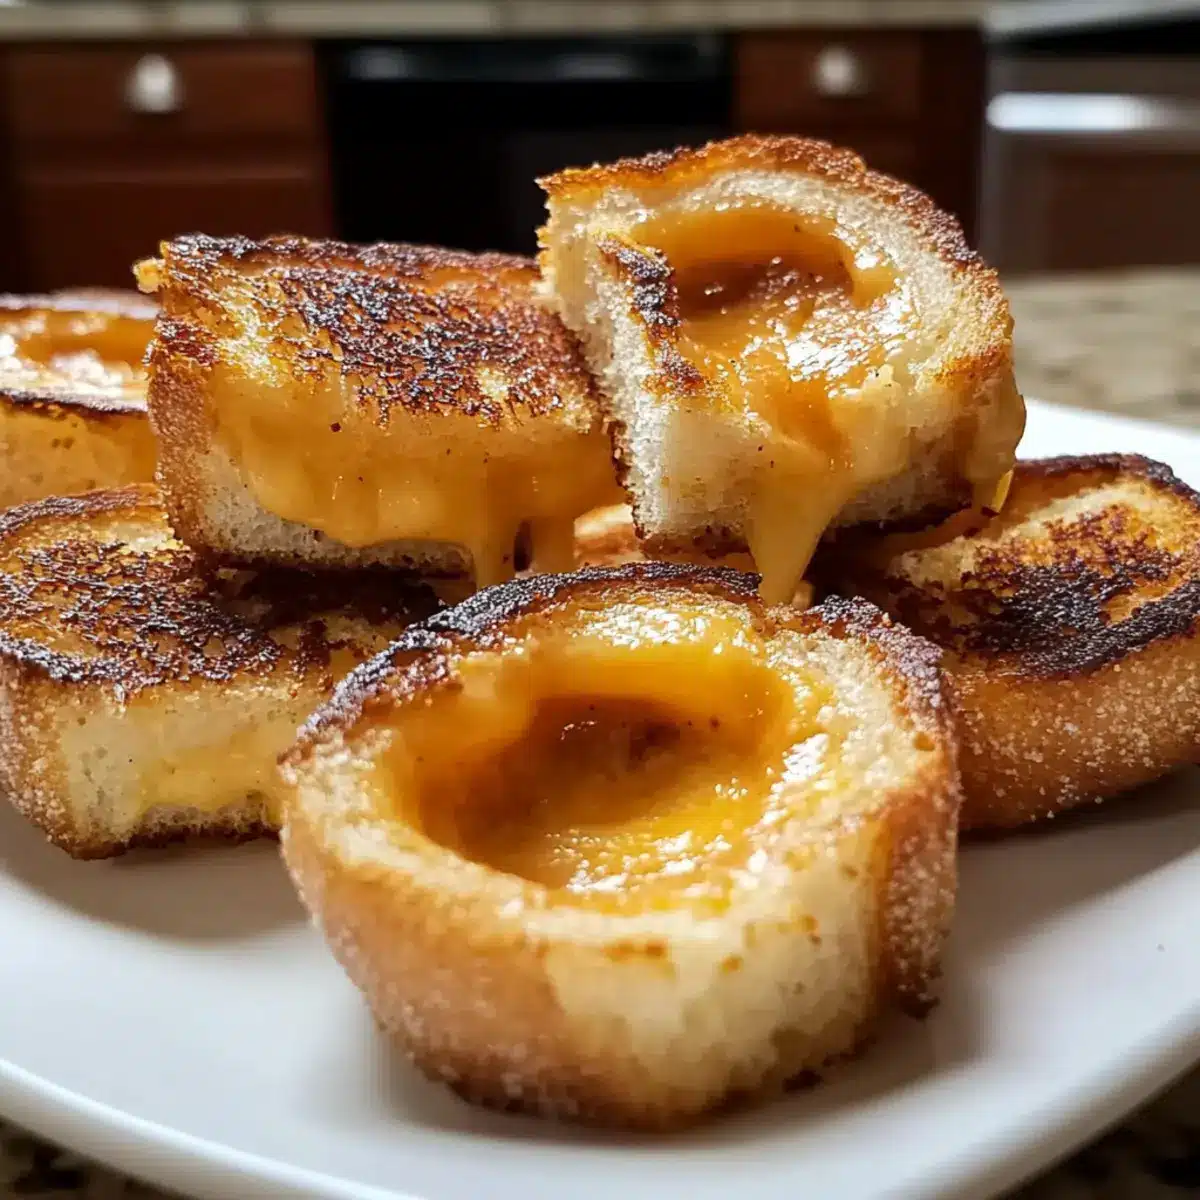
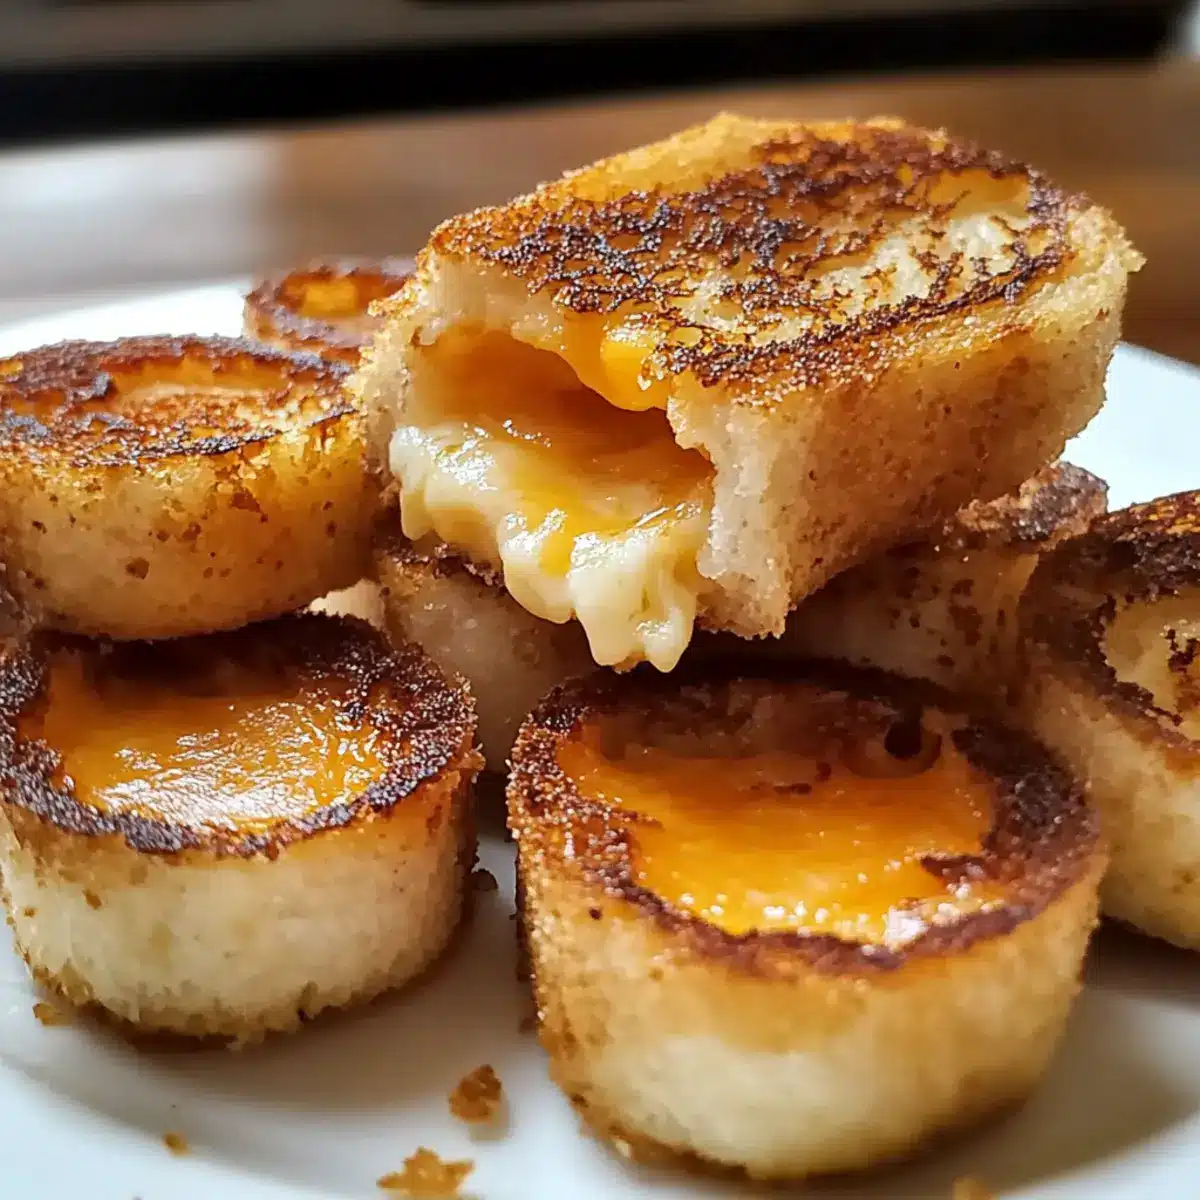
Take two slices of bread and generously layer your chosen cheese between them. For a tasty combo, use a blend of sharp cheddar and provolone for the gooey goodness. Make sure the cheese is evenly distributed; this ensures every bite of your Mini Grilled Cheese Dippers is flavorful. Gently press the sandwich together to hold it all in place.
Step 3: Heat the Skillet
Preheat a skillet over medium-low heat, allowing it to warm up for about 2-3 minutes. Then add a tablespoon of butter or a light spread of mayonnaise to the skillet, letting it melt and coat the bottom. The right heat is crucial here; if it’s too high, the bread may burn before the cheese melts, leaving you with unevenly cooked dippers.
Step 4: Grill the Sandwiches
Carefully place your sandwiches into the preheated skillet. Grill them for about 3-4 minutes, until the bottom is golden-brown and crispy. You’ll notice a delightful aroma fill the air as the cheese begins to melt. Keep an eye on the color to ensure they don’t burn; the perfect grill will enhance the flavor and texture of your Mini Grilled Cheese Dippers.
Step 5: Flip and Finish
Once the first side is beautifully browned, gently flip the sandwiches using a spatula. Grill the other side for another 2-3 minutes, checking continuously until the cheese is fully melted and both sides are golden-brown. The sizzling sound and rich smell will let you know they’re nearly ready!
Step 6: Rest and Slice
After both sides are perfectly grilled, transfer the sandwiches to a cutting board to rest for about 1-2 minutes. This allows the cheese to set slightly, making it easier to cut without oozing everywhere. The golden crust will keep its crunch while the cheese remains deliciously gooey inside.
Step 7: Create the Dippers
Using a sharp knife, cut each sandwich into bite-sized dippers, approximately 1-inch pieces. This size is perfect for dipping into your favorite sauces, whether it’s classic tomato soup or a zesty marinara. Each piece should maintain a good balance of crispy bread and cheesy goodness.
Step 8: Serve Immediately
Present your Mini Grilled Cheese Dippers warm, straight from the skillet. Serve them alongside a small bowl of soup or dipping sauce for a delightful experience. The combination of warm gooey cheese and that crispy exterior is an unbeatable treat, perfect for sharing with family and friends.

What to Serve with Mini Grilled Cheese Dippers
Transform your meal into a cozy experience by pairing these delightful bites with complementary treats that enhance their comforting flavor.
-
Tomato Soup: The classic pairing of warm tomato soup adds a tangy richness that elevates the grilled cheese experience. It’s like a hug in a bowl!
-
Marinara Sauce: A rich, zesty marinara offers a fun twist for dipping, perfect for adding an extra layer of flavor. It complements the cheesy dippers beautifully, making each bite enjoyable.
-
Crunchy Veggie Sticks: Fresh carrots, cucumbers, and bell peppers provide a refreshing crunch that contrasts wonderfully with the creamy cheese. Their natural sweetness balances the savory flavors.
-
Garlic Butter Dip: A warm garlic butter dip adds another layer of indulgence, enhancing the already rich experience with aromatic flavors. Dip those crispy dippers for a gourmet touch!
-
Side Salad: A light, crisp garden salad brings freshness to the table, serving as a beautiful contrast to the rich dippers. A simple vinaigrette will balance the meal perfectly.
-
Apple Slices: Sweet, crisp apple slices add a refreshing and unexpected fruity note, creating a delightful balance against the savory dippers. A perfect addition for a family-friendly meal!
-
Sparkling Apple Cider: Celebrate with bubbles! A glass of sparkling apple cider adds a festive touch, making your meal feel even more special while complementing the flavors beautifully.
Make Ahead Options
These Mini Grilled Cheese Dippers are perfect for meal prep, saving you time on busy weeknights! You can assemble the sandwiches up to 24 hours in advance, simply layering the cheese between slices of bread. To maintain their deliciousness, wrap them tightly in plastic wrap or store them in an airtight container in the refrigerator. When you’re ready to enjoy, just heat a skillet over medium-low and grill the sandwiches for about 3-4 minutes on each side until they’re golden brown and melty. This way, you’ll have crispy, gooey dippers ready to dip in no time, making them just as delightful as if you had made them fresh!
Expert Tips for Mini Grilled Cheese Dippers
-
Batch Cooking: Work in small batches to ensure even cooking. This prevents overcrowding the pan and guarantees each dipper is perfectly crispy.
-
Heat Control: Maintain medium-low heat while grilling. Too high of a temperature may burn the bread before the cheese melts, resulting in disappointing dippers.
-
Bread Selection: Choose sturdy bread to prevent sogginess and support the cheesy filling. If opting for gluten-free bread, select a quality variety for the best results.
-
Cheese Blends: Use a combination of sharp cheddar and provolone for a delicious melt. Experimenting with different cheeses can elevate your Mini Grilled Cheese Dippers’ flavor!
-
Serving Fresh: Serve the dippers immediately after grilling for the ultimate experience. They are best enjoyed warm with your favorite dipping sauce.
Mini Grilled Cheese Dippers Variations
Feel free to unleash your culinary creativity with these delightful ideas that cater to every taste and dietary need!
-
Gluten-Free: Substitute classic bread with gluten-free sandwich bread to ensure everyone can enjoy these cheesy bites without worry.
-
Bacon Boost: Add crispy bacon slices between the cheese layers for an extra smoky flavor that pairs perfectly with the melted goodness.
-
Veggie Delight: Incorporate fresh spinach or thin tomato slices for a wholesome twist; they’ll add color and nutrients without overwhelming the cheesy delight.
-
Spicy Kick: Mix in jalapeños or a dash of hot sauce to the cheese for those who crave a little heat; this fiery twist will wake up your taste buds!
-
Herbed Cheeses: Elevate the taste by using herbed cheese blends or adding fresh herbs like basil or chives between your sandwich layers for a fragrant profile.
-
Air Fryer Option: For a guilt-free version, use an air fryer by cooking them at 375°F for about 6-8 minutes, flipping halfway for even crispness.
-
Cheese Variety: Experiment with different cheese combinations, like pepper jack for a zesty bite or gouda for a rich, smoky flavor that adds depth.
-
Saucy Surprises: Instead of traditional ketchup or tomato soup, try experimenting with a balsamic reduction or spicy aioli for dipping to elevate your appetizer experience.
For even more delicious creations, consider pairing your dippers with a comforting bowl of tomato soup or explore a fantastic variation like Cheese Bread Cozy to maximize your cheesy enjoyment!
How to Store and Freeze Mini Grilled Cheese Dippers
Fridge: Store leftovers in an airtight container for up to 2 days. This keeps them fresh while maintaining their delicious flavor.
Freezer: For long-term storage, freeze the dippers in a single layer on a baking sheet. Once solid, transfer them to a freezer bag, where they’ll keep for up to 3 months.
Reheating: To enjoy your Mini Grilled Cheese Dippers again, reheat in a skillet over medium-low heat. This helps restore their crispy exterior and gooey cheese. Avoid the microwave for the best results!
Mini Grilled Cheese Dippers Recipe FAQs
What type of bread works best for Mini Grilled Cheese Dippers?
I recommend using sturdy bread like sourdough or whole grain, which provides great structure and crunch. If you’re looking for a gluten-free option, make sure to select a high-quality gluten-free sandwich bread that holds up well when grilled.
How should I store leftover Mini Grilled Cheese Dippers?
Absolutely! Store any leftovers in an airtight container in the fridge for up to 2 days. This keeps them fresh, and you’ll still be able to enjoy that delightful cheesy flavor.
Can I freeze Mini Grilled Cheese Dippers?
Certainly! To freeze, place the dippers in a single layer on a baking sheet and freeze until solid, which usually takes about 1-2 hours. Then, transfer them to a freezer bag or airtight container where they’ll keep well for up to 3 months. This method prevents them from sticking together and maintains their texture.
How do I reheat Mini Grilled Cheese Dippers for the best results?
For the best reheating results, place the dippers in a skillet over medium-low heat for 5-7 minutes, flipping occasionally until they’re heated through and crispy. This method ensures they regain their golden crust and gooey cheese without getting soggy, unlike reheating in the microwave.
Can I customize the recipe for dietary restrictions?
Yes, very! You can easily make gluten-free Mini Grilled Cheese Dippers by using gluten-free bread. Additionally, feel free to swap out the cheese for vegan alternatives if you’re avoiding dairy. You can even incorporate extras like spinach or diced tomatoes for added nutrition and flavor.
What do I serve with Mini Grilled Cheese Dippers?
These dippers are perfect with a variety of dipping sauces! You can’t go wrong with classic tomato soup, but marinara sauce or even a tangy ranch dip are wonderful options. Feel free to get creative and serve them with your favorite sauces for a customizable experience!
Irresistible Mini Grilled Cheese Dippers for Perfect Dipping Fun
Ingredients
Equipment
Method
- Slice bread into 2-inch thick pieces and set aside.
- Layer cheese between two slices of bread.
- Preheat skillet over medium-low heat and add butter or mayonnaise.
- Grill sandwiches for 3-4 minutes until golden-brown.
- Flip and grill the other side for another 2-3 minutes.
- Rest grilled sandwiches for 1-2 minutes before cutting.
- Cut into bite-sized dippers for serving.
- Serve immediately with dipping sauce.
Leave a Reply