
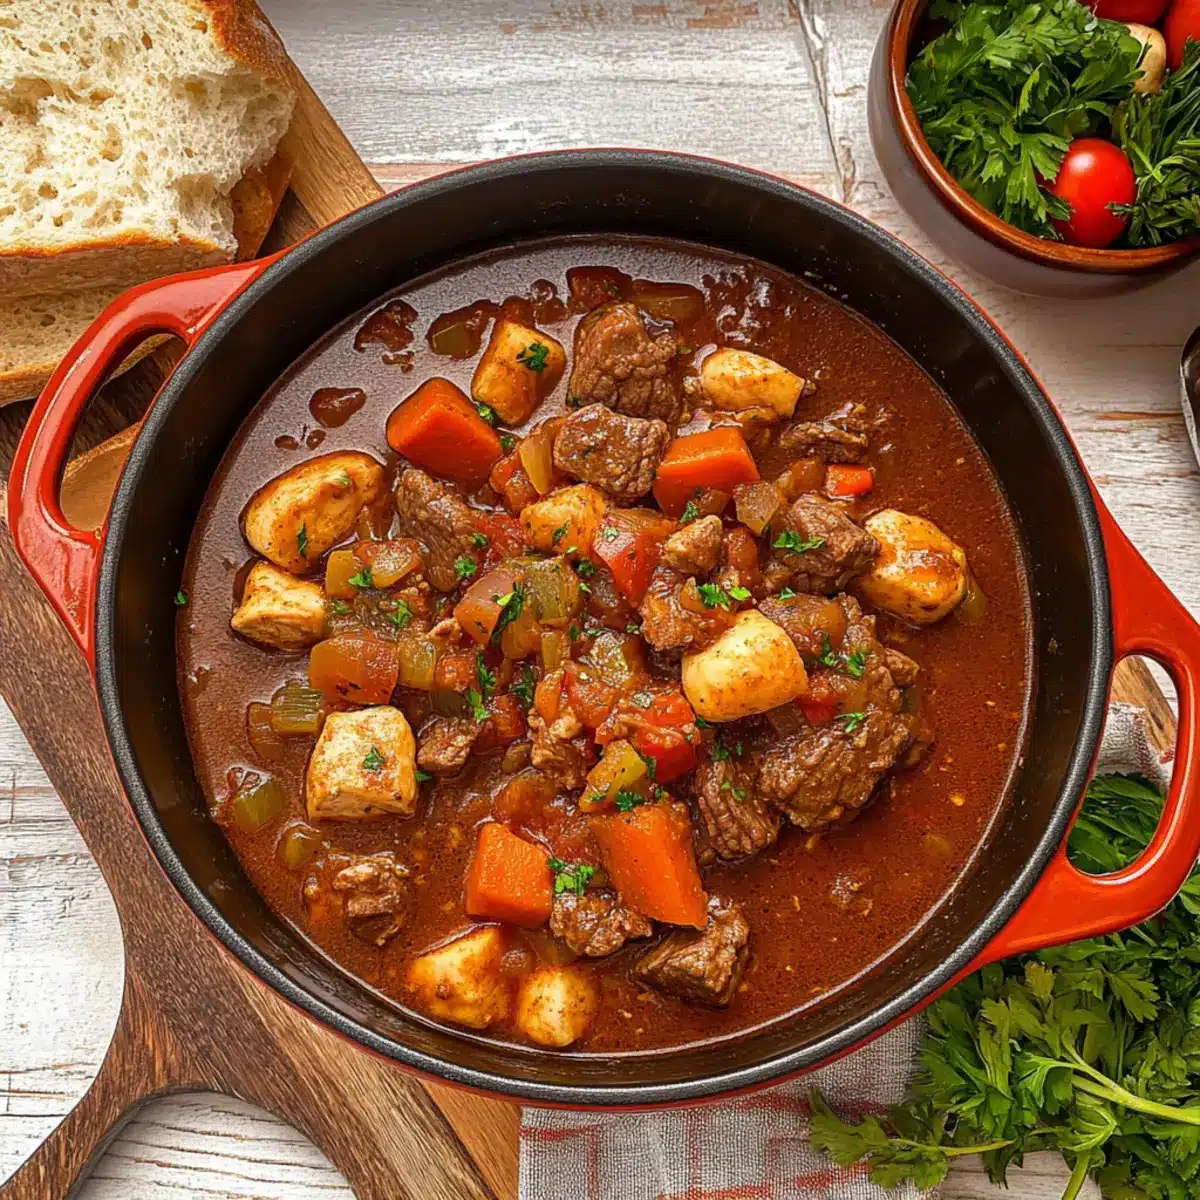
The moment the rich, savory aroma of Old-fashioned Mulligan Stew fills your kitchen, it feels like a warm embrace from cherished memories. This hearty one-pot meal is not just a dish; it’s a nostalgic journey that brings family and friends together, celebrating the art of slow cooking. With tender chunks of beef and chicken swimming in a thick, gravy-rich base, every spoonful is a reminder of simpler times. One of the best perks of Mulligan Stew is its flexibility—feel free to toss in whatever vegetables you have on hand! Plus, it’s a meal that’s incredibly easy to clean up afterward, allowing you to enjoy more time with loved ones rather than scrubbing pots. Are you ready to create this cozy classic that’s sure to become a favorite in your home?
Why is Mulligan Stew a must-try?
Heartwarming: This stew is not just a meal; it’s a nostalgic experience that evokes memories and brings loved ones together.
One-Pot Wonder: Enjoy the ease of a single pot for cooking, making clean-up a breeze!
Customizable: The flexibility to use any favorite veggies means you can tailor it to your taste and what you have available.
Savory Goodness: The rich, gravy-like sauce coats every ingredient, ensuring that every bite is bursting with flavor.
Time-Saving: Perfect for meal prep, as flavors deepen and improve when allowed to sit in the fridge! If you’re looking for more practical kitchen tips, check out our guide on meal prepping.
Mulligan Stew Ingredients
• Dive into the heart of comfort cooking with these essential ingredients.
For the Meat
- Beef chuck or stew meat – Forms the base of your stew, ensuring it becomes melt-in-your-mouth tender after slow cooking.
- Boneless skinless chicken thighs – Delivers extra protein and remains juicy; substitute breasts if you want to add them later in the cooking process.
For the Gravy
- All-purpose flour – Coats the meat and helps create a rich gravy; opt for gluten-free flour if you need an alternative.
- Kosher salt – A must for seasoning; feel free to adjust based on your taste preferences.
- Black pepper – Adds warmth and depth; freshly ground black pepper is ideal.
For the Aromatics
- Onion, carrots, celery – The classic mirepoix that forms the aromatic base; leeks or shallots can be a tasty alternative.
- Garlic – Elevates the flavor profile; fresh minced garlic is best for robust taste.
For the Flavor Enhancers
- Tomato paste – Adds rich umami; caramelization enhances its deep flavor—crushed tomatoes work in a pinch.
- Beef broth – The liquid foundation; choose low-sodium to keep the salt levels in check.
- Better Than Bouillon Beef Base – Intensifies beef flavor without excess salt.
- Worcestershire sauce – Adds a layer of umami; it’s optional but really elevates the dish.
- Bay leaves, thyme, oregano – Essential herbs that lend depth; fresh herbs are wonderful, but dried ones work too.
For the Vegetables
- Yukon Gold or Russet potatoes – Add heartiness and help thicken the stew naturally; other starchy potatoes are great as well.
- Cremini mushrooms – Optional yet delightful for an extra ‘beefy’ flavor; you can leave them out if preferred.
- Frozen mixed vegetables – A convenient twist; choose any mix you like for an easy addition.
- Fresh parsley – For garnish and a touch of freshness; green onions can be a nice alternative.
Get ready to dive into the cozy world of Mulligan Stew, where every ingredient brings a unique flair to your comforting one-pot meal!
Step‑by‑Step Instructions for Hearty Mulligan Stew
Step 1: Prepare Meat
Start by seasoning the beef chuck or stew meat liberally with kosher salt and black pepper. Dredge each piece in all-purpose flour, coating well. In a large Dutch oven, heat a drizzle of oil over medium-high heat. Sear the beef in batches for about 4-5 minutes per side, until it’s beautifully golden brown. Remove the meat and set aside for later.
Step 2: Brown Chicken
In the same pot, add a little more oil if needed and quickly brown the boneless chicken thighs for about 3-4 minutes, just until they develop a nice color. This step enhances the flavors of the Mulligan stew while ensuring that the chicken remains juicy. Once browned, transfer the chicken to the plate with the beef and set aside.
Step 3: Build Flavor Base
Lower the heat to medium and add the diced onions, carrots, and celery to the pot. Sauté these aromatic vegetables for about 5-7 minutes or until softened and fragrant. Next, add minced garlic and continue cooking for 1-2 minutes, stirring frequently. This colorful mirepoix serves as the flavorful foundation of your hearty Mulligan stew.
Step 4: Caramelize Tomato Paste
Stir in the tomato paste, allowing it to caramelize for about 2-3 minutes until it darkens slightly and becomes aromatic. This essential step adds a rich depth of flavor to your Mulligan stew, enhancing its overall taste. Make sure to stir continuously to prevent burning while it caramelizes.
Step 5: Create Gravy Base
Sprinkle the flour over the sautéed vegetables and tomato paste. Gradually deglaze the pot with beef broth, scraping up any delicious browned bits from the bottom. Allow the mixture to come to a gentle simmer, stirring constantly until it thickens, forming a rich gravy base that perfectly complements the hearty beef and chicken.
Step 6: Combine and Simmer
Return the browned beef and chicken to the pot along with any accumulated juices. Add additional beef broth, the Better Than Bouillon beef base, Worcestershire sauce, bay leaves, thyme, and oregano. Bring the mixture to a simmer and cover, cooking for about 45 minutes on low heat until the beef is nearly tender and bursting with flavor.
Step 7: Add Vegetables
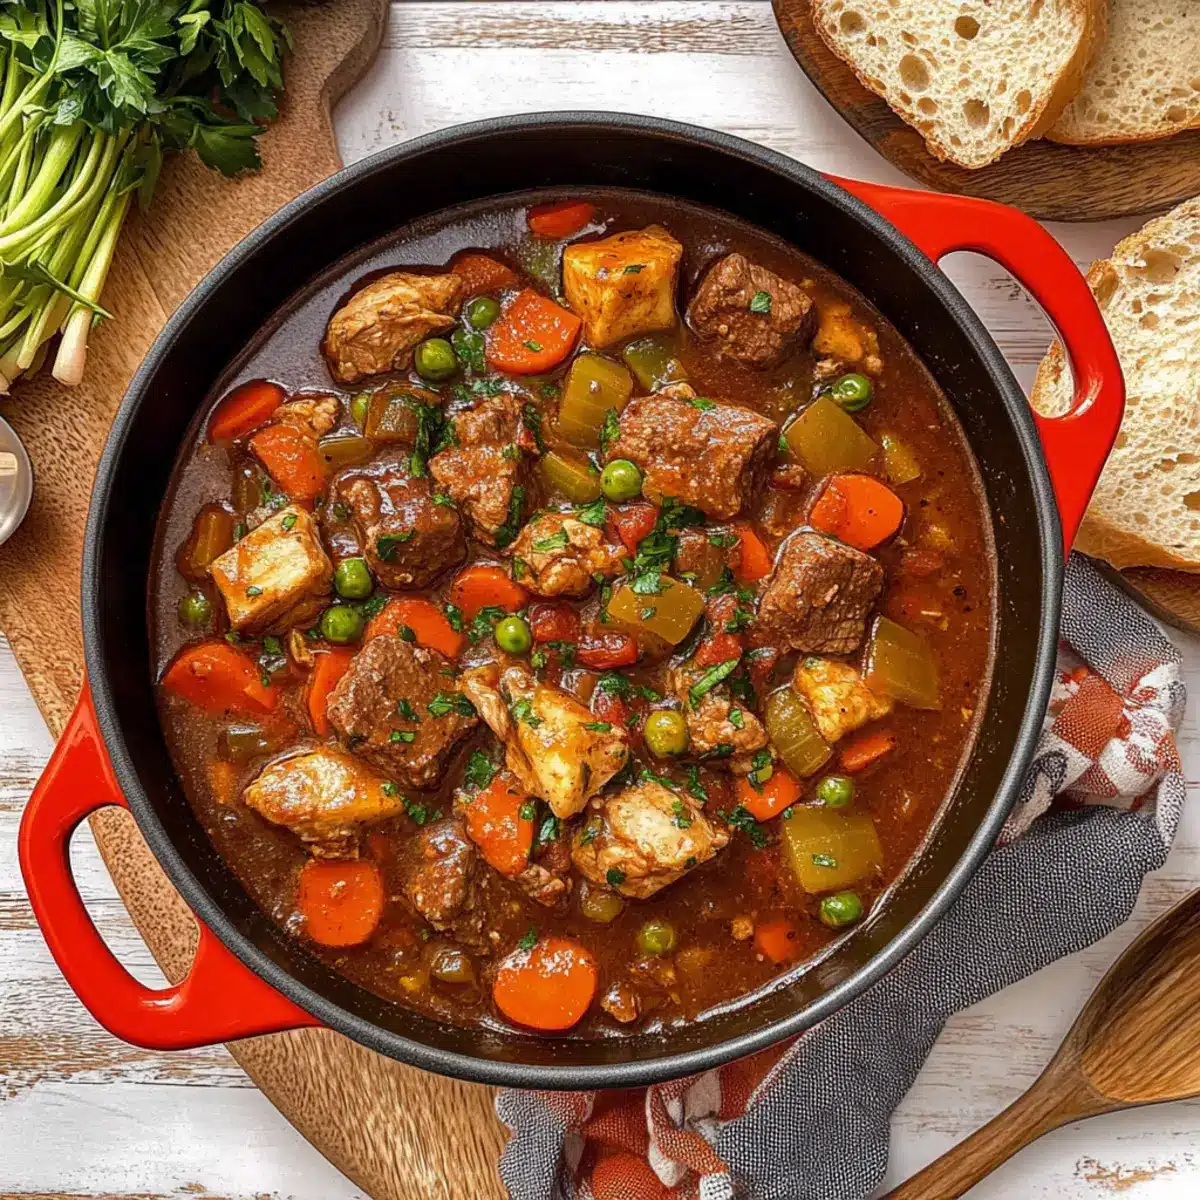
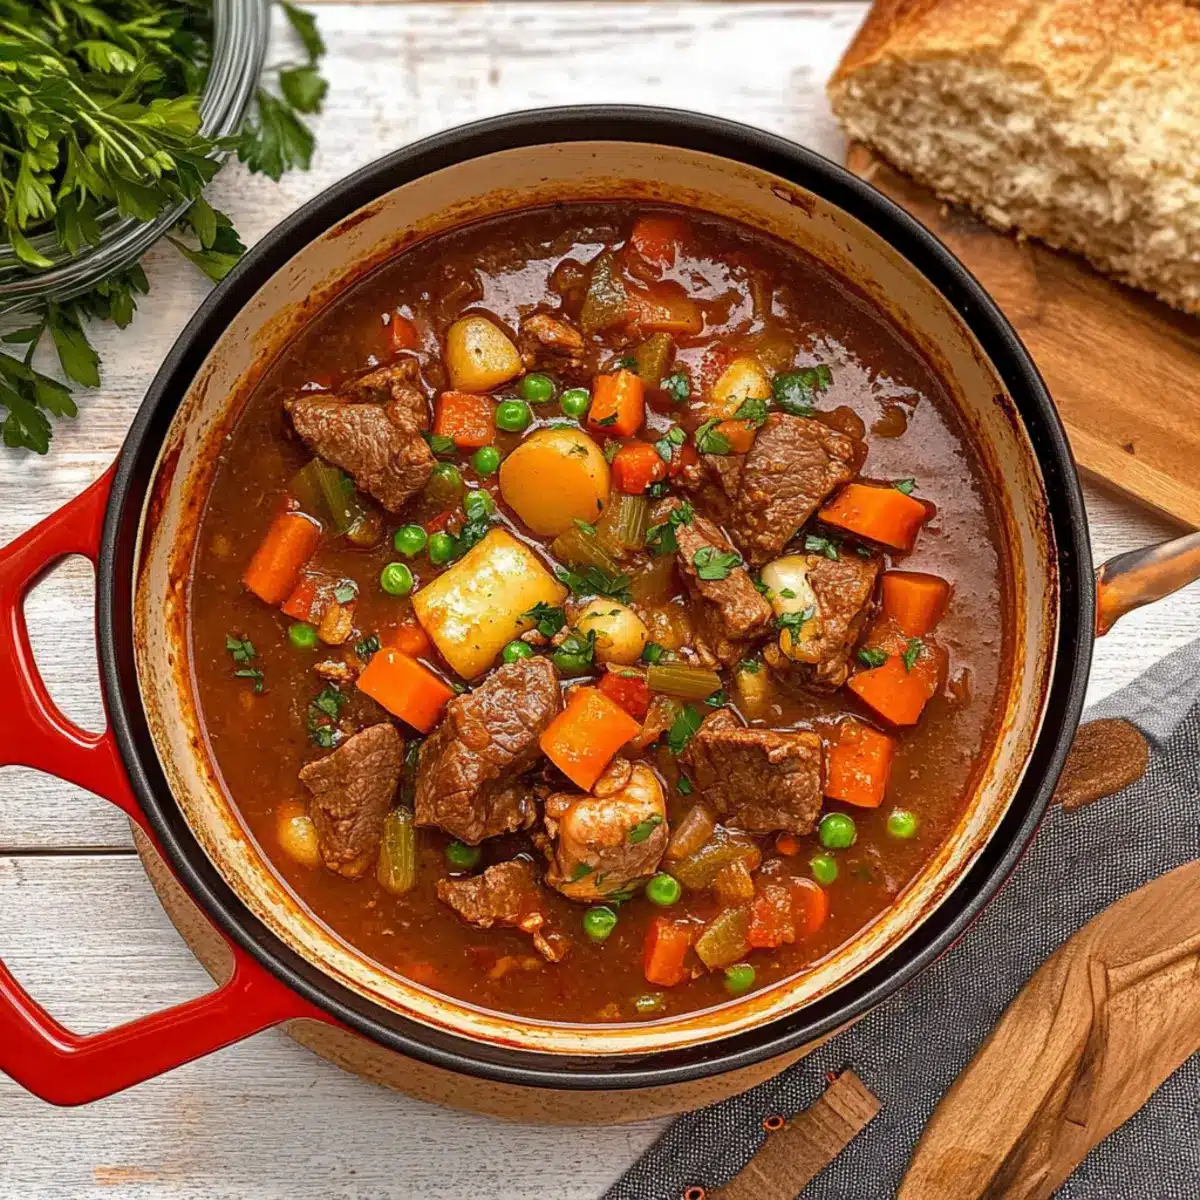
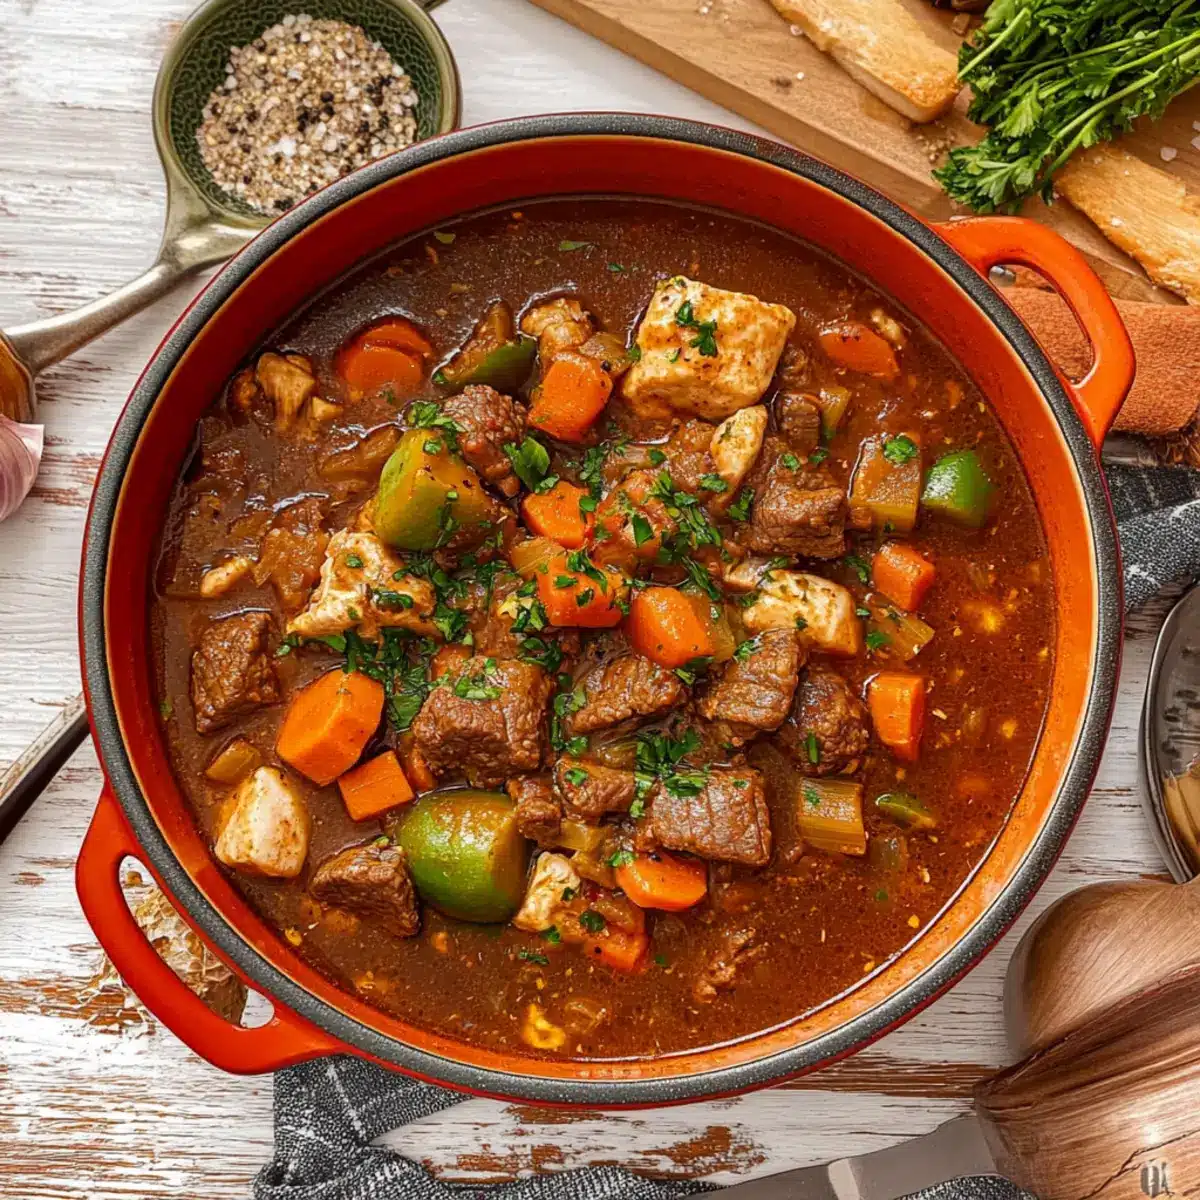
Once the beef is close to tender, add the chopped Yukon Gold potatoes, sliced cremini mushrooms, and any other fresh vegetables you desire. Stir gently to incorporate everything. Cover and allow the Mulligan stew to continue simmering for another 20-25 minutes, or until the potatoes are fork-tender and all flavors meld beautifully.
Step 8: Finish with Frozen Veggies
Remove the lid and stir in the frozen mixed vegetables, allowing them to heat through for about 5-7 minutes. This final step not only adds a pop of color but also maintains the stew’s comforting warmth. If you prefer a thicker consistency, simmer uncovered for an additional 10-15 minutes to reduce the liquid.
Step 9: Taste and Serve
After adjusting the seasoning with salt and pepper to your liking, let the Mulligan stew rest off the heat for a few minutes to thicken. Garnish with fresh parsley for a burst of color and freshness before serving warm. This hearty Mulligan stew will fill your home with delightful aromas, inviting everyone to enjoy a bowl of comfort together.
How to Store and Freeze Mulligan Stew
Fridge: Store leftover Mulligan Stew in an airtight container for up to 3 days; its flavors deepen and improve as it sits.
Freezer: Cool the stew completely before transferring to freezer-safe containers. It can be frozen for up to 3 months without losing its comforting flavors.
Reheating: When ready to enjoy, thaw overnight in the fridge and reheat on the stove over low heat, stirring occasionally until heated through. Add a splash of beef broth if it seems too thick.
Portioning: Consider freezing in individual servings for quick meals; perfect for those busy days when you crave homemade goodness!
Make Ahead Options
Preparing Mulligan Stew in advance is a fantastic way to save time on busy weeknights! You can chop the vegetables (onions, carrots, celery, and potatoes) and store them in the refrigerator for up to 3 days ahead of time, preventing any browning. Additionally, you can brown the beef and chicken in advance, letting them cool before transferring them to an airtight container for the fridge for up to 24 hours. When you’re ready to enjoy your hearty Mulligan Stew, simply finish the recipe by sautéing the prepped aromatics, incorporating the browned meat, and adding the broth and seasoning as directed. This way, you’ll have that glorious, comforting stew with minimal effort, just as delicious as if you made it from scratch!
Expert Tips for Mulligan Stew
- Searing Meat Properly: Make sure not to overcrowd the pan while browning; this ensures a perfect sear and rich, meaty flavor.
- Build Depth of Flavor: Don’t skip caramelizing the tomato paste; it adds a much-needed depth to the Mulligan stew’s overall taste.
- Adjust Thickness: If the stew turns out too thin, allow it to simmer uncovered for an additional 10-15 minutes to thicken it up.
- Rest After Cooking: Let your Mulligan stew rest for a few minutes off heat before serving; it helps the flavors meld beautifully and the stew thicken.
- Taste as You Go: Always taste and adjust seasoning towards the end; every ingredient can influence the final flavor profile.
What to Serve with Hearty Old-Fashioned Mulligan Stew
Pairing a hearty meal with the right sides elevates the comfort of your dining experience and creates a delightful feast.
- Creamy Mashed Potatoes: The velvety texture of mashed potatoes soaks up the rich gravy, making every bite extra comforting.
- Garlic Bread: Crispy and fragrant, a slice of garlic bread is perfect for mopping up every last drop of stew.
- Simple Green Salad: A crisp salad adds a refreshing crunch, balancing the savory richness of the Mulligan stew.
- Roasted Brussels Sprouts: Their slightly charred exterior and nutty flavor beautifully complement the warm, savory notes of the stew.
- Cornbread Muffins: Sweet and fluffy, these muffins add a delightful contrast and are great for enjoying with stews.
- Steamed Broccoli: Bright green and tender, broccoli offers a healthy, vibrant touch that pairs well with hearty flavors.
Finish off your meal with dessert for a complete experience. A warm slice of apple pie or some chocolate cake would be the perfect sweet ending!
Mulligan Stew Variations & Substitutions
Feel free to mix things up with these delightful twists and turns that will take your Mulligan Stew to the next level!
- Dairy-Free: Swap traditional beef broth for a rich vegetable broth to keep it light yet hearty.
- Vegetarian: Replace the meat with hearty lentils or chickpeas and load up on root veggies for a filling dish without meat. Lentils can soak up all the savory flavors beautifully.
- Root Veggie Boost: Toss in parsnips or turnips in place of potatoes for an earthy flavor twist that surprises and delights!
- Herb Variety: Experiment with fresh herbs like rosemary or sage, which can bring new depth—just a few sprigs can change the entire character of the stew.
- Spicy Kick: Add a pinch of cayenne pepper or some diced jalapeños for a zesty warmth that livens up the comforting dish. The heat will dance beautifully with the savory notes!
- Smoky Flavor: Introduce some smoked paprika to the pot for a subtle smokiness that adds an exciting layer to the stew. A little goes a long way!
- Parmesan Garnish: Top your stew with freshly grated Parmesan cheese as a savory finish—this adds a delightful umami that perfectly complements the richness of the stew.
- Quick-Cook Option: Use pre-cooked meat or rotisserie chicken to cut down your prep time significantly, making it perfect for weeknight dinners. You can still enjoy that homemade feel without all the fuss.
Embrace creativity! Mulligan Stew is all about making it your own while enriching those warm, comforting flavors that feel like home. If you need some inspiration for further veggie alterations, consider checking out our guide on seasonal vegetables.
Mulligan Stew Recipe FAQs
What kind of beef should I use for Mulligan Stew?
Absolutely! Beef chuck is the best choice for Mulligan Stew as it becomes incredibly tender during the long simmer. You can also use stew meat or brisket if you prefer. Just ensure it’s well-marbled for the richest flavor!
How do I store leftovers of Mulligan Stew?
Store your delicious Mulligan Stew in an airtight container in the refrigerator for up to 3 days. I often find that the flavors deepen and improve after a day in the fridge, making it even tastier when reheated!
Can I freeze Mulligan Stew?
Very! After cooling your stew completely, transfer it to freezer-safe containers or heavy-duty zip-top bags. It will stay fresh in the freezer for up to 3 months. When you’re ready to enjoy it, just thaw in the fridge overnight and reheat gently on the stove.
What should I do if my stew is too thin?
No worries! If you find your Mulligan Stew is thinner than you’d like, simply remove the lid and let it simmer uncovered for about 10-15 minutes. This allows some of the excess liquid to evaporate, thickening up that tasty gravy.
Are there any dietary considerations for this recipe?
Yes! For gluten-free options, substitute all-purpose flour with gluten-free flour. If you have allergies, double-check that all canned or packaged ingredients are free from allergens like soy or nuts. Also, remember that this stew is best enjoyed by humans—keep it away from your furry friends due to the potential garlic and onion content!
What is the best way to customize Mulligan Stew?
The more the merrier! You can easily customize your Mulligan Stew by adding any vegetables you have on hand, like bell peppers or green beans. Feel free to switch proteins too; using a mix of beef and chicken is a delightful option!
Hearty Mulligan Stew: A Cozy One-Pot Comfort Classic
Ingredients
Equipment
Method
- Season the beef chuck or stew meat with kosher salt and black pepper. Dredge each piece in all-purpose flour.
- Heat oil in a large Dutch oven over medium-high heat. Sear the beef for about 4-5 minutes per side until golden brown.
- Remove beef and set aside. In the same pot, brown the chicken thighs for about 3-4 minutes.
- Add diced onions, carrots, and celery. Sauté for 5-7 minutes until softened.
- Add minced garlic and cook for 1-2 minutes.
- Stir in tomato paste and allow to caramelize for 2-3 minutes.
- Sprinkle flour over vegetables and tomato paste, then deglaze with beef broth.
- Return beef and chicken to the pot; add more beef broth, Better Than Bouillon, Worcestershire sauce, bay leaves, thyme, and oregano. Simmer for 45 minutes.
- Add potatoes, mushrooms, and other fresh vegetables. Simmer for another 20-25 minutes.
- Stir in frozen mixed vegetables and heat through for 5-7 minutes.
- Let the stew rest for a few minutes before serving. Garnish with fresh parsley.
Leave a Reply