
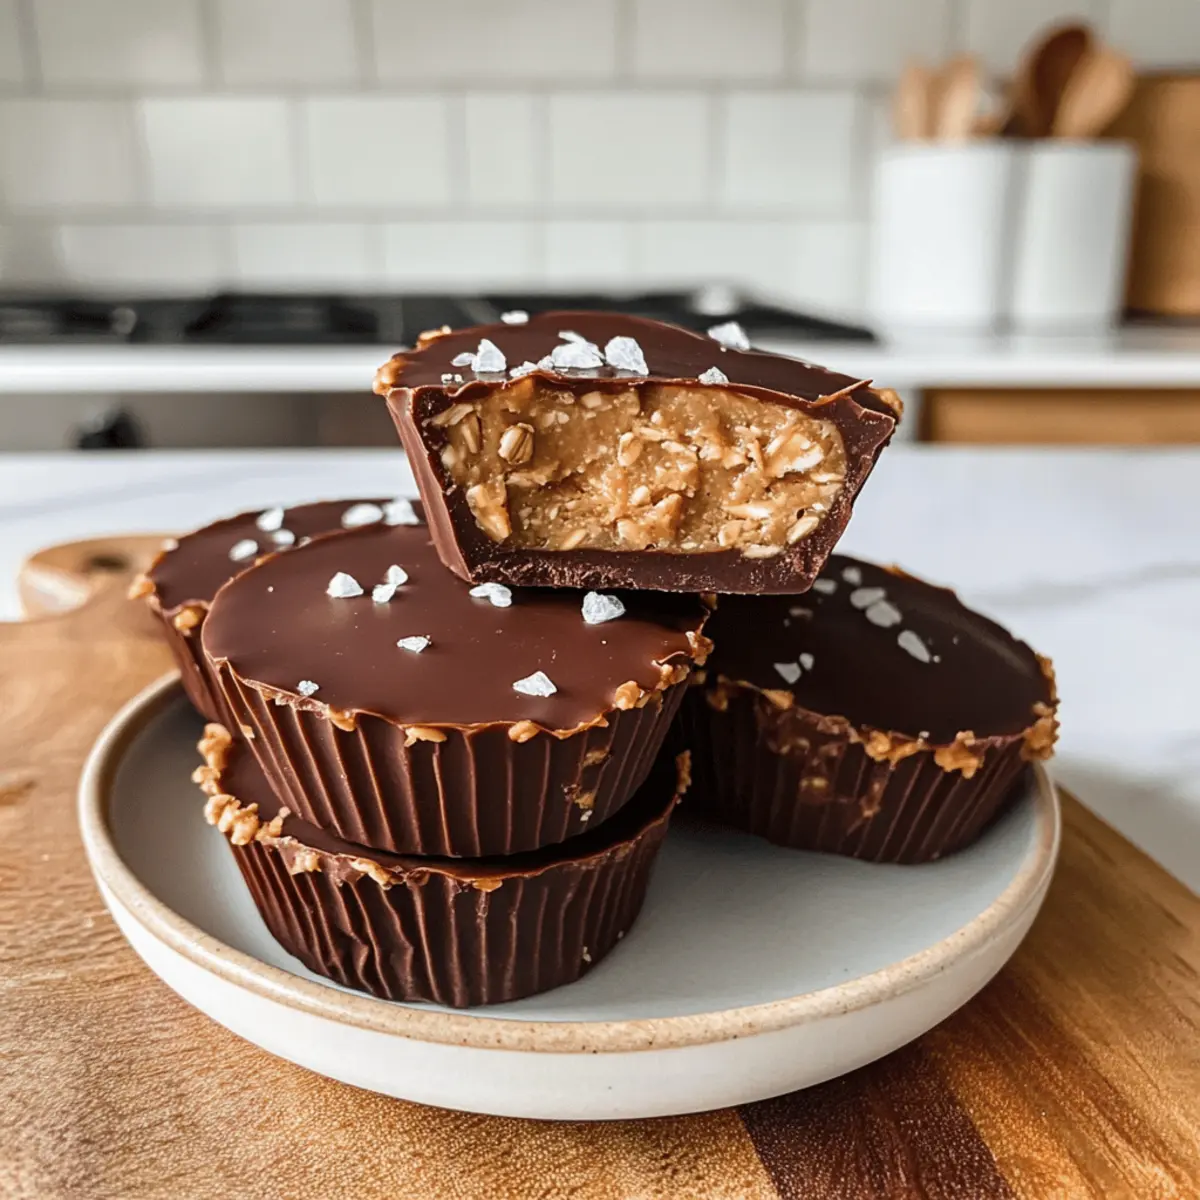
As I stood in my kitchen, contemplating what to whip up for a satisfying snack, I realized I had all the ingredients for something truly delightful: No-Bake Peanut Butter Oat Cups. The moment I combined creamy peanut butter with wholesome rolled oats and drizzled them in rich melted chocolate, I could hardly contain my excitement. Not only do these peanut butter oat cups come together in less than 20 minutes, but they’re also a fantastic gluten-free and vegan-friendly option for any health-conscious snacker. Packed with goodness and seriously easy to make, they’re perfect for busy days when you need a quick pick-me-up. Are you ready to indulge in a treat that promises both satisfaction and nutrition? Let’s dive in!
Why are Peanut Butter Oat Cups the best?
Irresistible Flavor Combination: The delightful mix of creamy peanut butter and rich chocolate creates a treat you’ll crave.
Quick & Easy: Made in just 20 minutes, these no-bake cups are perfect for busy lifestyles.
Healthy Snacking: With wholesome ingredients, they satisfy your sweet tooth without the guilt.
Versatile Options: Customize them with nut-free or protein-packed variations to suit your preferences.
Crowd Pleaser: Perfect for sharing or keeping all to yourself, they’re a hit at any gathering! Enjoy them as a post-workout snack or alongside your favorite drink. Want to explore other tasty treats? Check out Brown Butter Coffee for a lovely dessert option!
Peanut Butter Oat Cups Ingredients
For the Base
• Peanut Butter – Provides a creamy texture and rich flavor; feel free to substitute with any nut or seed butter for variety.
• Rolled Oats – Acts as the sturdy base for your oat cups; remember to use gluten-free oats if necessary for dietary needs.
• Maple Syrup – Adds natural sweetness and helps bind the ingredients; you can also use honey or agave syrup as alternatives.
For the Topping
• Chocolate Chips – Used for drizzling on top; opt for dairy-free vegan dark chocolate to keep it completely vegan.
• Flaky Sea Salt – An optional finishing touch that elevates the flavor, enhancing the overall peanut butter oat cups experience.
Step‑by‑Step Instructions for Peanut Butter Oat Cups
Step 1: Combine Peanut Butter and Maple Syrup
In a medium mixing bowl, scoop in your creamy peanut butter and pour in the maple syrup. Use a spatula to stir them together until the mixture is smooth and well blended, approximately 2-3 minutes. This is the delightful foundation for your Peanut Butter Oat Cups, so make sure no streaks remain!
Step 2: Fold in the Rolled Oats
Add the rolled oats into the peanut butter and maple mixture. Gently fold the oats with your spatula until they are fully incorporated, ensuring every morsel is coated with the luscious mixture. This should take about 1-2 minutes. You’ll know it’s ready when it clumps together, forming a cohesive mixture that holds shape easily.
Step 3: Transfer to Molds
Take your silicone molds and carefully scoop the oat mixture into each cup. Use your fingers or the back of a spoon to press down firmly, ensuring an even base that’s about half an inch thick. This step is crucial, as it helps create a sturdy structure for your Peanut Butter Oat Cups. Once molded, set aside for the next step.
Step 4: Top with Extra Peanut Butter
Now, add a dollop of peanut butter to the top of each filled cup. This generous dollop not only adds extra flavor but also makes for a visually appealing finish. Aim for about a teaspoon on each cup and smooth it out slightly. Pop the molds into the freezer and chill for about 20 minutes until firm.
Step 5: Melt the Chocolate Chips
While your cups are chilling, it’s time to melt the chocolate chips. Place them in a microwave-safe bowl and microwave in 30-second increments, stirring in between, until the chocolate is smooth and fully melted—usually about 1-2 minutes total. This silky chocolate will be the perfect topping for your Peanut Butter Oat Cups.
Step 6: Drizzle Chocolate Over Cups
Once the peanut butter layers have set, remove the molds from the freezer. Using a spoon, drizzle the melted chocolate generously over each cup, ensuring even coverage. This rich chocolate will not only add flavor but also a beautiful finish to your Peanut Butter Oat Cups. Return them to the freezer for another 20 minutes to allow the chocolate to harden.
Step 7: Remove from Molds and Serve
After the final freeze, gently remove the Peanut Butter Oat Cups from the silicone molds. If you encounter resistance, give them a gentle squeeze to release. If desired, sprinkle a little flaky sea salt on top to elevate the flavor, then serve your delicious creations either immediately or store them in an airtight container in the fridge or freezer for later enjoyment!
How to Store and Freeze Peanut Butter Oat Cups
Fridge: Store the Peanut Butter Oat Cups in an airtight container for up to 1 week. This keeps them soft and ready to enjoy anytime!
Freezer: For longer storage, freeze the oat cups in a single layer on a baking sheet, then transfer to an airtight container. They’ll last for up to 3 months!
Serving from Freezer: Remove the desired number of cups from the freezer and let them sit at room temperature for about 5-10 minutes before enjoying. This helps them soften slightly, making for a delightful bite.
Reheating: While these oat cups are best enjoyed cold or at room temperature, you can briefly microwave them for 10-15 seconds to warm them if you prefer a gooey texture.
Expert Tips for Peanut Butter Oat Cups
-
Use Silicone Molds: Silicone molds make it easier to remove the Peanut Butter Oat Cups without breaking them. They’re a game changer!
-
Watch the Peanut Butter Consistency: If your peanut butter is too runny, your cups may not hold together well. Choose a thicker brand for best results.
-
Melt Chocolate with Care: Stirring every 30 seconds helps prevent scorching when melting chocolate. Adding a touch of coconut oil can enhance the smoothness.
-
Chill Twice: Don’t skip the freezing stages—this ensures your Peanut Butter Oat Cups set properly, resulting in a deliciously firm texture.
-
Customize Your Cups: Feel free to add extras like chia seeds or cacao nibs for a nutrient boost and texture variation in your Peanut Butter Oat Cups!
What to Serve with No-Bake Peanut Butter Oat Cups
Savor the delicious moments of life with these irresistible bites, perfectly paired for a wholesome experience.
-
Fresh Fruit Salad: Bursting with sweetness and vibrant colors, a mix of seasonal fruits complements the nutty flavors of the oat cups beautifully. Enjoying this fresh medley adds a refreshing crunch that balances the creamy texture.
-
Nutty Trail Mix: A delightful combination of nuts and dried fruits offers an added crunch, enhancing the overall snack experience. Pairing the cups with trail mix makes for an energizing combo, perfect for mid-afternoon cravings.
-
Smoothie Bowl: A thick, creamy smoothie topped with seeds and fruits provides an indulgent yet healthy breakfast or snack that carries you through your day. The smooth, fruity flavors beautifully contrast with the chewy oat cups.
-
Chia Seed Pudding: Creamy and nutrient-packed, this delectable pudding brings additional fiber and a delightful texture that pairs naturally with the oat cups. It’s a sweet yet healthy treat that complements the peanut butter and chocolate layers.
-
Herbal Tea: A warm cup of chamomile or peppermint tea can be the perfect calming sip alongside your oat cups. The light aroma and warmth of herbal tea enhance the overall snack experience, making it feel more indulgent.
-
Plant-Based Milk: Enjoy these oat cups with a glass of almond or oat milk for a satisfying and nutrient-rich beverage. The creamy texture of the milk beautifully complements the chewy cups, fulfilling your cravings without feeling heavy.
-
Dark Chocolate Dipped Strawberries: For a sweet contrast, serve chocolate-dipped strawberries alongside. They add an elegant touch and echo the chocolatey goodness of the oat cups for a decadent treat experience.
-
Cold Brew Coffee: The rich, smooth flavors of cold brew make it an excellent drink pairing that can elevate your snack time. A sip of this invigorating beverage alongside the oat cups transforms the moment into a delightful coffee break.
-
Frozen Yogurt Swirl: A swirl of frozen yogurt, topped with nuts or fruit, adds a cool, creamy element that balances the rich, nutty flavors. This combination is a fun way to make your snack feel like a dessert!
Make Ahead Options
These Peanut Butter Oat Cups are perfect for meal prep enthusiasts! You can prepare the base mixture—combining the peanut butter, maple syrup, and rolled oats—up to 24 hours in advance. Simply cover the bowl and refrigerate it until you’re ready to mold the cups. For the best quality, make sure to press the mixture into the molds firmly before freezing for 20 minutes. When ready to finish, just add the dollop of peanut butter and drizzle with melted chocolate, then freeze again for an additional 20 minutes. This way, you’ll enjoy delicious, homemade peanut butter oat cups, without the last-minute rush!
Peanut Butter Oat Cups Variations
Feel free to get creative and personalize your Peanut Butter Oat Cups with these delightful twists.
-
Nut-Free: Substitute peanut butter with sunflower seed butter for a delicious, nut-free treat. Perfect for school lunches or nut-free households!
-
Protein-Packed: Mix in a scoop of your favorite protein powder to the peanut butter mix. This adds a nutrition boost while keeping the flavor intact!
-
Chocolate Variety: Try using white chocolate chips or even caramel-flavored chocolate for a unique topping twist. Each chocolate brings its own delicious notes, enhancing your oat cups!
-
Add Crunch: Toss in some chopped nuts, seeds, or granola into the mix before molding. This adds a satisfying crunch and exciting texture to your cups!
-
Fruit Infusion: Incorporate dried fruits like cranberries or apricots into the batter for a sweet and chewy surprise. These dried fruits complement the rich peanut butter beautifully!
-
Spice it Up: Add a pinch of cinnamon or even a dash of cayenne pepper for a warm, spicy kick. This unexpected addition elevates flavor, making your cups even more irresistible.
-
Top it Off: Experiment with toppings like shredded coconut, mini chocolate chips, or even a drizzle of honey. These will not only enhance flavor but also add a visual flair!
You may find other sweet inspirations by checking out Garlic Butter Beef or exploring the rich world of Apple Pie Caramel. Happy cooking!

Peanut Butter Oat Cups Recipe FAQs
How do I choose the right peanut butter for my oat cups?
Absolutely! For the best results, choose a natural peanut butter that has a thick and creamy consistency. Avoid brands with added sugars or unhealthy oils, as they can alter the texture of your oat cups. If you prefer, almond or cashew butter can also work beautifully as alternatives!
How can I store my Peanut Butter Oat Cups?
You can keep your Peanut Butter Oat Cups in an airtight container in the refrigerator for up to 1 week. This helps maintain their soft, chewy texture, making them perfect for quick snacking throughout the week. For longer storage, pop them in the freezer. They’ll last up to 3 months when placed in a sealed container.
What’s the best way to freeze Peanut Butter Oat Cups?
Great question! To freeze your oat cups, first place them in a single layer on a baking sheet and freeze them until solid, about 1-2 hours. Once frozen, transfer them to an airtight container or a freezer-safe bag. This method prevents them from sticking together, allowing you to grab just one whenever you need a quick treat!
Can I make these oat cups nut-free?
Very! If you or someone you know has nut allergies, you can easily substitute the peanut butter with sunflower seed butter. It gives a similar creamy texture and nutty flavor without the allergens. Additionally, be sure to use gluten-free oats if necessary for dietary needs.
What should I do if my oat cups aren’t holding together?
If your Peanut Butter Oat Cups are falling apart, the likely culprit is the consistency of the peanut butter. Make sure to use a thicker brand, as thinner peanut butter can lead to a crumbly mixture. If that happens, try chilling the cups longer, or add a bit more rolled oats to help bind the mixture together!
Peanut Butter Oat Cups You'll Crave: No-Bake Goodness
Ingredients
Equipment
Method
- In a medium mixing bowl, combine peanut butter and maple syrup, stirring until smooth (2-3 minutes).
- Fold rolled oats into the peanut butter mixture until fully incorporated (1-2 minutes).
- Scoop the mixture into silicone molds, pressing down to form an even base.
- Top each cup with a dollop of peanut butter, then chill in the freezer for 20 minutes.
- Melt the chocolate chips in a microwave-safe bowl, stirring every 30 seconds until smooth (1-2 minutes).
- Drizzle melted chocolate over each cup and return to the freezer for another 20 minutes.
- Once firm, gently remove from molds and sprinkle with flaky sea salt if desired.
Leave a Reply