
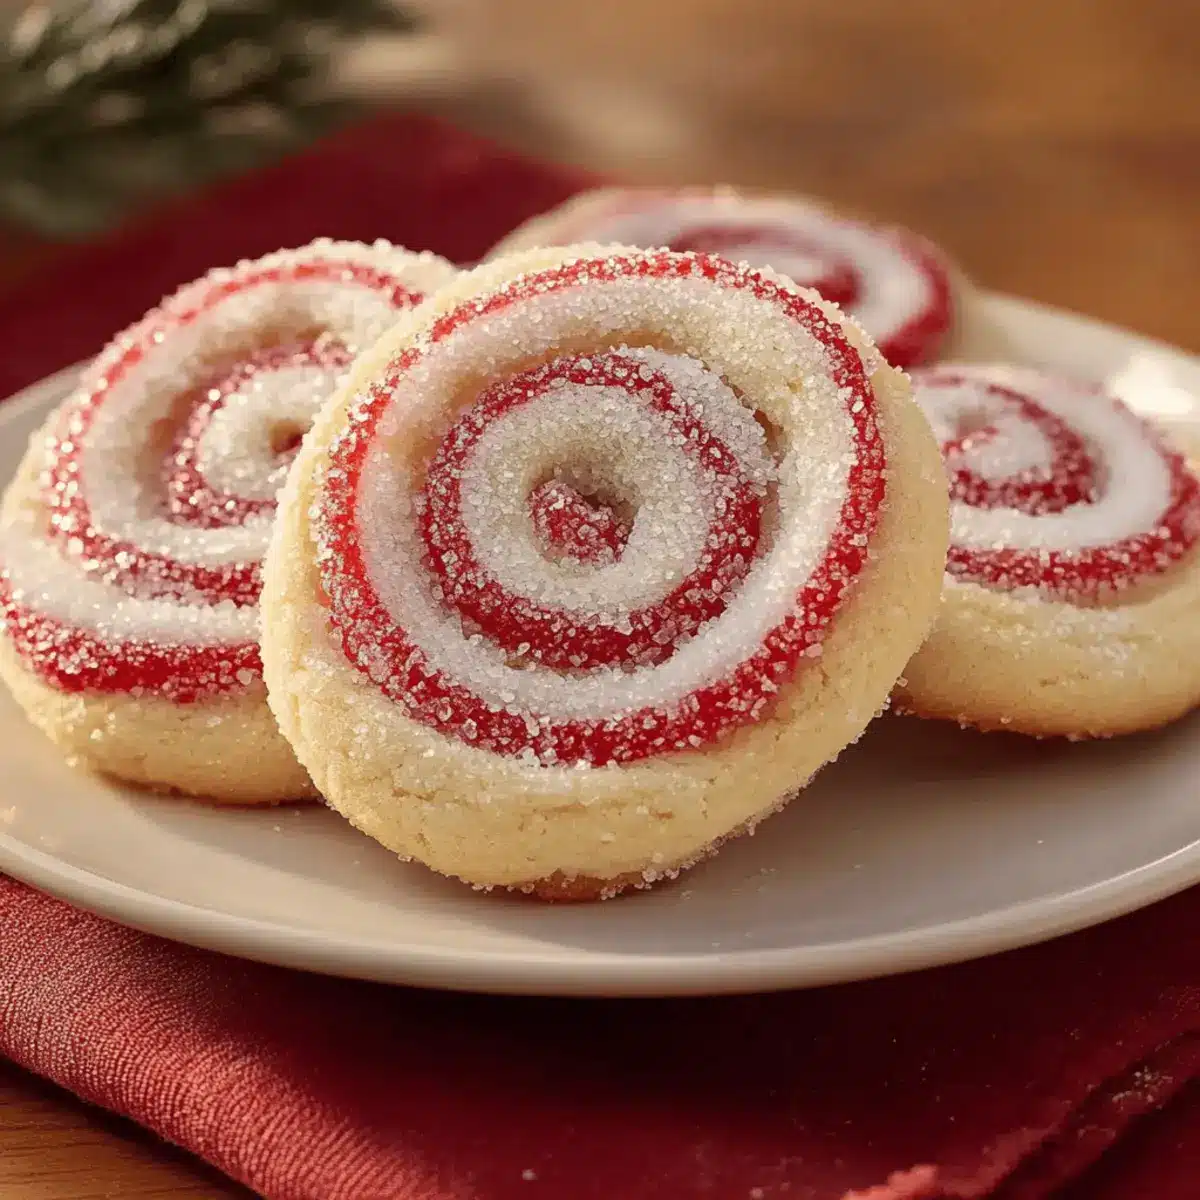
There’s nothing quite like the enchanting aroma of freshly baked cookies wafting through your home, especially during the holiday season. Today, I’m excited to share my delightful Peppermint Swirl Cookies, a perfect symphony of festive flavor and eye-catching aesthetics. With a sprinkle of crushed peppermint on the outside and those gorgeous red and white swirls, these cookies aren’t just a treat for the taste buds—they’re an absolute showstopper for your holiday gatherings. The best part? They’re a breeze to whip up, making them an ideal addition to your baking repertoire. Let’s dive into this whimsical recipe that’s sure to become a cherished tradition in your kitchen. Ready to impress your friends and family with bakery-perfect Peppermint Swirl Cookies? Keep scrolling for the details!
Why Are These Cookies Irresistible?
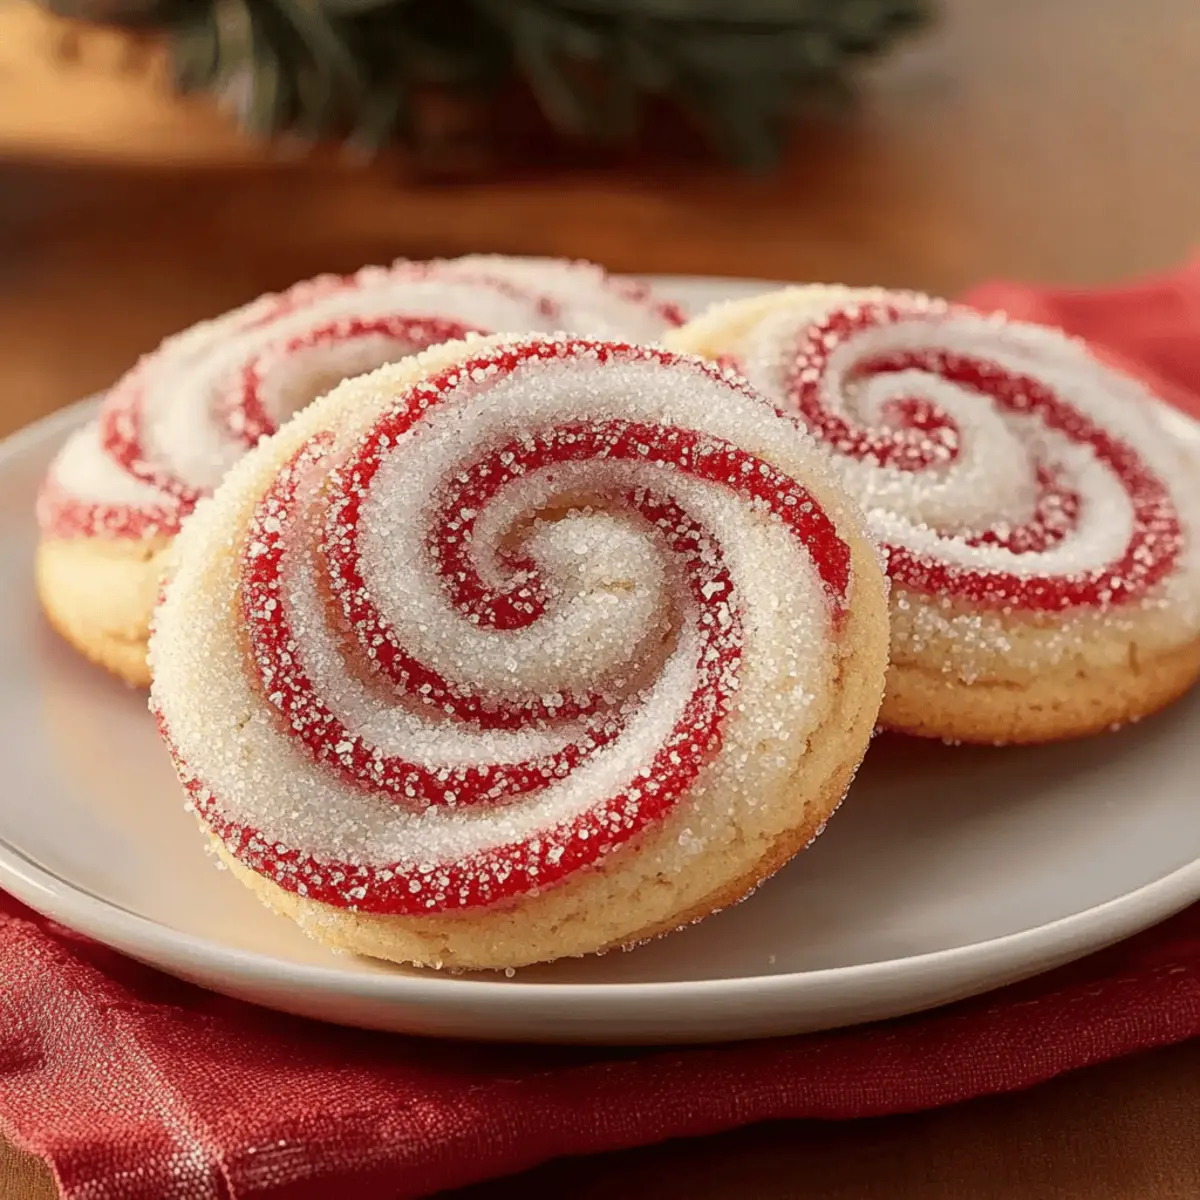
Festive Visuals: The vibrant red and white swirls create a stunning presentation, making them the perfect centerpiece for any holiday gathering.
Simple Technique: With easy-to-follow steps, these cookies are perfect for both novice bakers and seasoned chefs. Don’t forget to check out Brown Butter Cookies for another delicious treat!
Crowd-Pleasing Flavor: The refreshing peppermint combined with sweet vanilla makes every bite a delightful experience.
Versatile Options: While they shine on their own, feel free to pair them with hot cocoa or coffee for a cozy treat.
Make Ahead: You can prepare the dough in advance—freeze unbaked cookies for a last-minute holiday bake. These Peppermint Swirl Cookies will surely become a cherished tradition!
Peppermint Swirl Cookies Ingredients
For the Dough
- All-purpose flour – Provides structure for the cookies; you can use a gluten-free blend for a suitable substitution.
- Baking powder – Acts as a leavening agent, helping achieve the right texture without making the cookies cakey.
- Salt – Always essential, it enhances the overall flavor.
- Unsalted butter (softened) – Key to creating a tender crumb and rich flavor when properly creamed.
- Granulated sugar – Sweetens the dough and contributes to a delightful texture when mixed with butter.
- Large egg – Binds all the ingredients together, adding moisture that matters.
- Vanilla extract – Balances the minty freshness with aromatic notes for an extra depth of flavor.
- Peppermint extract – Infuses each cookie with that signature cool refreshment, making the Peppermint Swirl Cookies truly festive.
- Red gel food coloring – Delivers vibrant swirls without introducing moisture that could affect the dough.
For the Coating
- Coarse sugar or crushed peppermint candies – Adds a delightful sparkle and texture, elevating each cookie’s appeal.
Step‑by‑Step Instructions for Peppermint Swirl Cookies
Step 1: Prepare Dry Ingredients
In a medium bowl, whisk together 2 cups of all-purpose flour, 1 teaspoon of baking powder, and a pinch of salt until well combined. This ensures that the leavening agent is evenly distributed throughout the flour mixture. Set the bowl aside as you move on to the next step in making your delightful Peppermint Swirl Cookies.
Step 2: Cream Butter and Sugar
In a large mixing bowl, use an electric mixer to cream together 1 cup of softened unsalted butter and 1 cup of granulated sugar. Beat on medium speed for about 3-5 minutes until the mixture is light and fluffy. The color will lighten, indicating it’s ready for the next stage of your cookie-making adventure.
Step 3: Add Egg and Extracts
Once the butter and sugar are perfectly creamed, add in 1 large egg, 1 teaspoon of vanilla extract, and 1 teaspoon of peppermint extract. Beat on medium speed until everything is completely combined, about 1-2 minutes. The mixture should be smooth and evenly blended, creating a fragrant base for your Peppermint Swirl Cookies.
Step 4: Combine Mixtures
Gradually add the prepared dry ingredients to the wet mixture, mixing on low speed until a soft dough forms. This process should take about 1-2 minutes. As you mix, the dough will pull away from the sides of the bowl, indicating it’s ready to be shaped.
Step 5: Divide Dough
Once the dough is fully combined, gently divide it into two equal halves. Leave one half plain, while you will color the second half using red gel food coloring. Start by adding a few drops of the coloring to one half and mix thoroughly until you achieve a vibrant red hue, essential for those beautiful swirls in your Peppermint Swirl Cookies.
Step 6: Chill Dough
Wrap each dough half securely in plastic wrap and place them in the refrigerator to chill for at least 30 minutes. This chilling step helps the dough firm up, making it easier to roll out and preventing the colors from bleeding together during baking.
Step 7: Roll Out Dough
After chilling, take one half of the dough and roll it out on a lightly floured surface into a rectangle measuring about 10×12 inches and approximately 1/4 inch thick. Repeat the process with the colored dough. Taking your time to ensure even thickness will result in perfectly shaped Peppermint Swirl Cookies.
Step 8: Layer and Roll Log
Once both dough halves are rolled out, stack the red dough over the plain dough. Press them together gently but firmly to combine. Starting from one long side, carefully roll the layered dough tightly away from you into a log shape, ensuring the swirls stay intact as you go.
Step 9: Second Chill
Wrap the rolled log in plastic wrap once again and chill in the refrigerator for at least 2 hours. This final chilling allows the dough to firm up sufficiently, ensuring clean slices when you’re ready to bake your Peppermint Swirl Cookies.
Step 10: Bake
Preheat your oven to 375°F (190°C). Once ready, remove the log from the refrigerator and slice it into 1/4-inch rounds. Place these cookie slices on a baking sheet lined with parchment paper and bake for 8-10 minutes. Look for the edges to turn lightly golden, signaling the perfect doneness.
Step 11: Cool
After baking, let the cookies cool on the baking sheet for about 5 minutes. Then, carefully transfer them to a wire rack to cool completely. This cooling step allows the flavors to settle, making your Peppermint Swirl Cookies even more delightful to enjoy!
Peppermint Swirl Cookies Variations
Feel free to get creative with your festive baking by exploring these delicious twists and substitutions!
-
Almond Flavor: Substitute almond extract for peppermint for a delightful and nutty flavor profile. This twist brings a warm, cozy edge to your cookies, perfect for those who enjoy a change.
-
Gluten-Free Option: Use a 1:1 gluten-free all-purpose flour blend to make these cookies gluten-free while maintaining their delightful taste and texture.
-
Colorful Swirls: Experiment with different food colors like green or blue to create swirls that fit a different holiday theme. Imagine a cheerful rainbow cookie that’s just as fun to eat as it is to look at!
-
Chocolate Drizzle: Drizzle melted chocolate over cooled cookies for an extra layer of indulgence. The rich chocolate perfectly balances with the refreshing peppermint flavor.
-
Minty Cream Filling: Create a sandwich cookie by adding a mint-flavored cream between two cookies. With each bite, it’s a delightful surprise that enhances the peppermint experience!
-
Spicy Kick: Add a pinch of cayenne pepper to the dough for a surprising heat that pairs beautifully with the sweet peppermint. It’s a thrilling combination that will spark interest at your holiday gathering!
-
Candy Cane Crunch: Fold in crushed candy canes into the dough for a textured bite that gives an extra festive crunch. This mini explosion of minty flavor adds a wonderful twist to the classic cookie!
-
Ice Cream Sandwiches: Turn your Peppermint Swirl Cookies into ice cream sandwiches by placing your favorite ice cream between two cookies. This indulgent treat is sure to please everyone at your gathering!
Looking for more cookie perfection? Check out these delightful recipes for Strawberry Crunch Cookies and Chocolate Chip Cookies to inspire your next baking adventure!
How to Store and Freeze Peppermint Swirl Cookies
Room Temperature: Store your Peppermint Swirl Cookies in an airtight container at room temperature for up to 5-7 days to maintain their delightful flavor and texture.
Fridge: For extended freshness, you can keep them in the fridge for up to 2 weeks. Just remember to seal them well to prevent drying out or absorbing other odors.
Freezer: Freeze unbaked dough or baked cookies for up to 2-3 months. Wrap them tightly in plastic wrap, then place them in a freezer-safe bag. Thaw before slicing or serving.
Reheating: If you want to enjoy that fresh-baked taste again, reheat cookies in a 350°F (175°C) oven for about 5-7 minutes, just until they’re warm and slightly crisp.
What to Serve with Bakery-Perfect Peppermint Swirl Cookies
There’s nothing quite like creating a delightful spread that perfectly complements your festive baking, infusing warmth and cheer into every gathering.
-
Rich Hot Cocoa: The creamy texture and chocolatey warmth perfectly balance the refreshing peppermint in the cookies, creating a cozy pairing.
-
Coffee Bliss: A steaming cup of freshly brewed coffee enhances the flavors, providing a lovely contrast to the sweetness of the cookies.
-
Nutty Biscotti: These crunchy treats would add an extra layer of texture and flavors that make for an engaging taste experience alongside the soft, tender cookies.
-
Classic Eggnog: Embrace the holiday spirit with a glass of homemade eggnog, offering a nutty and slightly spiced flavor that pairs beautifully with peppermint.
-
Festive Fruit Salad: A colorful mix of seasonal fruits adds a refreshing touch, brightening up the palate between bites of rich peppermint goodness.
-
Sugar Cookies: For those who adore sweets, pair your Peppermint Swirl Cookies with soft sugar cookies adorned with holiday-themed icing for a dazzling cookie platter.
-
Chocolate Dipped Pretzels: These salty, sweet snacks provide a delightful crunch, wonderfully balancing the cookie’s festive flavor profile.
-
Vanilla Ice Cream: Serve with a scoop of velvety vanilla ice cream, allowing the coolness to complement the warm cookies beautifully.
-
Spiced Apple Cider: The warm, spiced notes from apple cider create a comforting ambiance, enhancing the nostalgic flavors of the holiday cookies.
-
Peppermint Bark: The ultimate seasonal treat, adding an explosion of peppermint flavor to your spread, perfectly echoing the beloved taste of the cookies.
Expert Tips for Peppermint Swirl Cookies
-
Butter Temperature: Ensure your butter is perfectly softened at room temperature. Overly cold or melted butter can lead to dense cookies.
-
Chill Time: Don’t rush the chilling process! Chilling the dough properly is crucial to achieve clean, vibrant swirls in your Peppermint Swirl Cookies.
-
Mixing Method: Avoid overmixing your dough; mix just until combined. This helps maintain the tender texture you’re aiming for.
-
Cutting Technique: Use a sharp knife to slice the log into cookies for clean edges. A dull knife may squish the swirls and ruin the aesthetic.
-
Baking Attention: Keep a close eye on your cookies while baking. Even a minute too long can lead to dryness; think golden edges, not brown!
Make Ahead Options
These Peppermint Swirl Cookies are perfect for busy home cooks looking to save time during the hectic holiday season! You can prepare the cookie dough up to 24 hours in advance by wrapping each half in plastic wrap and refrigerating them. For even longer storage, freeze the unbaked dough logs for up to 2-3 months; simply thaw in the refrigerator overnight before slicing. To maintain their beautiful swirls and prevent color bleeding, ensure you chill the dough properly. When you’re ready to bake, slice the chilled logs into rounds and follow the baking instructions for delicious, fresh cookies just as if they were made on the spot!
Peppermint Swirl Cookies Recipe FAQs
What kind of flour should I use for Peppermint Swirl Cookies?
You should use all-purpose flour for these cookies, as it provides the right structure. If you’re looking for a gluten-free option, a 1:1 gluten-free all-purpose flour blend with xanthan gum works great as a substitute!
How long do Peppermint Swirl Cookies last when stored?
Store your cookies in an airtight container at room temperature for up to 5-7 days. To keep them fresh longer, place a slice of bread in the container to maintain moisture and prevent them from becoming too dry.
Can I freeze the Peppermint Swirl Cookies?
Absolutely! You can freeze both unbaked dough and baked cookies. Wrap the unbaked dough tightly in plastic wrap, then place it in a freezer-safe bag, and it will last up to 2-3 months. To freeze baked cookies, just ensure they are completely cooled, then store them in an airtight container in the freezer. When you’re ready to enjoy, thaw before slicing or serving.
What should I do if my dough is too sticky?
If your dough feels too sticky, that usually means it hasn’t chilled enough or it’s a bit overmixed. Make sure to chill the dough for at least 30 minutes as per the instructions. If it’s still too sticky after chilling, you can gradually mix in a little more flour, a tablespoon at a time, until it reaches a workable consistency.
Are these cookies safe for pets?
No, it’s best to avoid sharing Peppermint Swirl Cookies with pets, as chocolate and certain flavors can be harmful. The peppermint extract, while safe in small amounts for humans, can also upset your pet’s stomach, so it’s better to keep them as a delicious treat just for the family!

Deliciously Festive Peppermint Swirl Cookies for the Holidays
Ingredients
Equipment
Method
- In a medium bowl, whisk together flour, baking powder, and salt; set aside.
- Cream butter and sugar in a large mixing bowl until light and fluffy.
- Add egg, vanilla extract, and peppermint extract; mix until combined.
- Gradually mix in dry ingredients to form a soft dough.
- Divide dough in half; color one half with red food coloring.
- Chill both halves in plastic wrap for 30 minutes.
- Roll out each dough half into a rectangle; stack colored dough over plain dough.
- Roll tightly into a log; chill again for 2 hours.
- Preheat oven to 375°F (190°C). Slice log into 1/4-inch rounds and bake for 8-10 minutes.
- Cool on a baking sheet for 5 minutes, then transfer to a wire rack.
Leave a Reply