
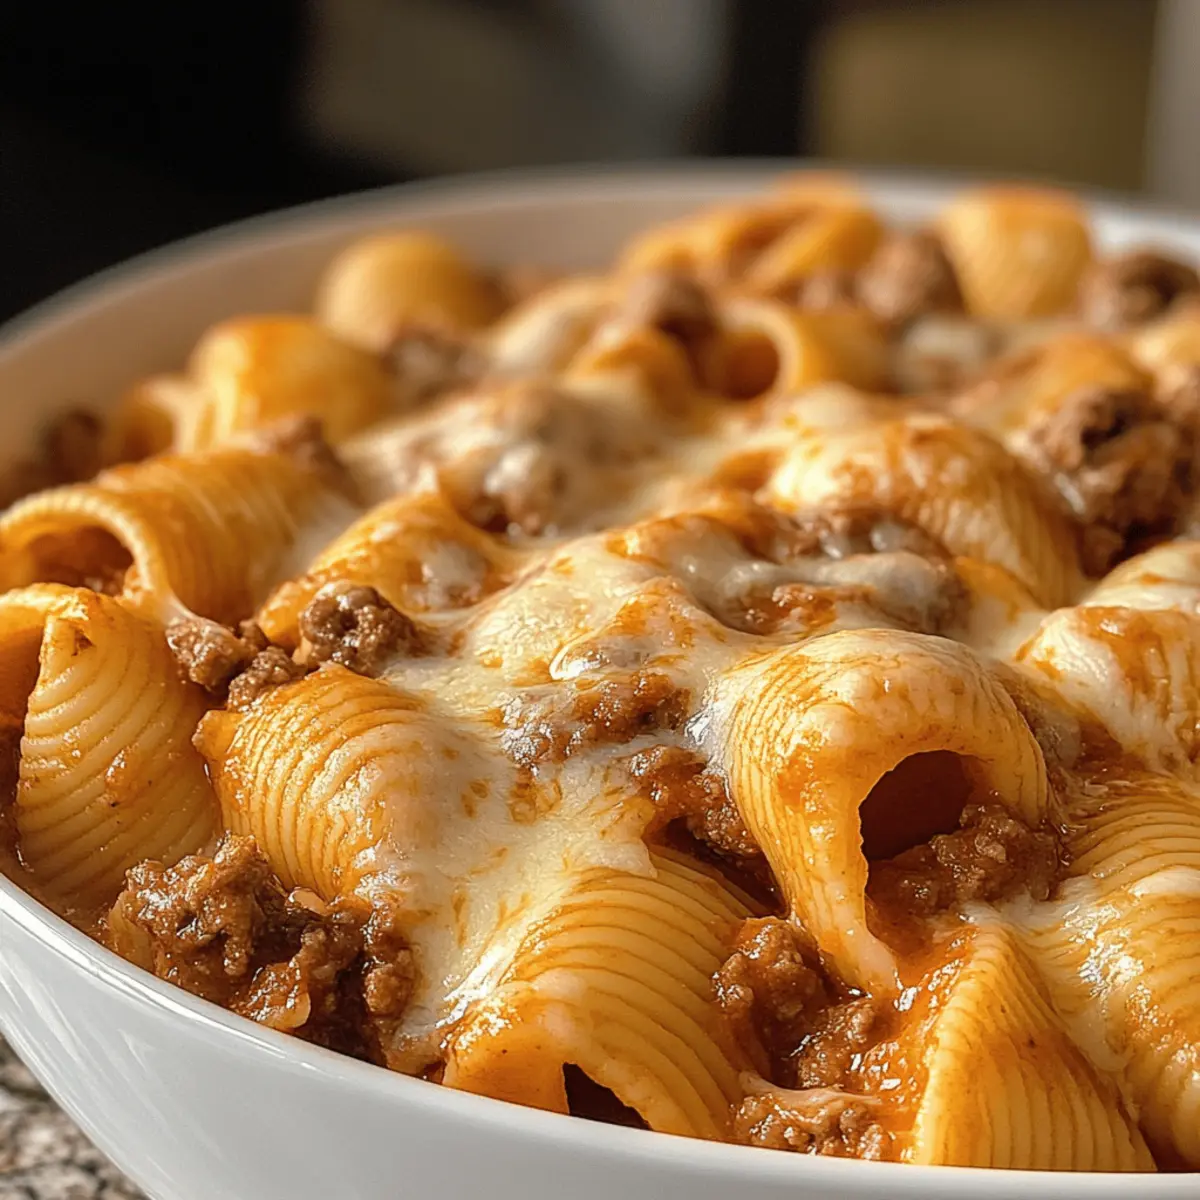
On a chilly evening, there’s nothing more comforting than curling up with a hearty bowl of Crockpot Cheesy Ranch Beef Pasta Shells. This dish is like a warm hug from your favorite childhood dinner, seamlessly blending creamy cheese with tender beef nestled in delightful pasta shells. The beauty of this easy recipe lies in its hands-off approach, making it the perfect solution for busy weeknights when time is tight but comfort food cravings call. Plus, it’s family-friendly, so you can rest assured that even the pickiest eaters at the table will be satisfied. Are you ready to take your weeknight dinner game to the next level with this simple, satisfying meal?
Why Will You Love This Dish?
Comforting, nostalgic flavors: This recipe brings back memories of family dinners with its creamy cheese and savory beef that will warm your heart and soul.
Hands-off cooking: Using a crockpot, you can set it and forget it while preparing other activities.
Versatile options: Swap out ground beef for turkey or even sautéed mushrooms for a delicious vegetarian twist, making it adaptable for everyone.
Cheesy goodness: Layered with both cheddar and mozzarella, every bite is luxuriously cheesy, offering a delightful taste sensation.
Quick to prepare: With minimal cooking time involved, you can have a hearty meal ready in just a few hours. If you love the ease of slow-cooked meals, be sure to try my easy One Pot Garlic Butter Shrimp Pasta for another family-friendly dish!
Ranch Beef Pasta Shells Ingredients
• Discover the essential components for this delicious dish!
For the Pasta Filling
- Ground Beef – Offers rich protein and flavor; consider substituting with ground turkey for a lighter option.
- Onion (small, diced) – Adds a sweet and savory depth; use yellow or white onions for the best taste.
- Garlic (2 cloves, minced) – Infuses wonderful aroma; can substitute with garlic powder if needed (1/2 tsp).
For the Sauce
- Ranch Seasoning Mix (1 packet, 1 oz) – Provides tanginess and herbal notes; feel free to use homemade ranch seasoning for a personal touch.
- Condensed Cheddar Cheese Soup (1 can, 10.5 oz) – Creates a creamy, cheesy base; you can swap it for cream of mushroom or a homemade cheese sauce.
- Milk (1 cup) – Adds richness to the sauce; whole milk is best, but a dairy-free option works too.
- Shredded Cheddar Cheese (1 cup) – Amplifies the cheesy flavor; feel free to mix in different cheeses for a twist.
- Shredded Mozzarella Cheese (1 cup) – Contributes creamy stretchiness; consider using Monterey Jack for a different flavor profile.
For the Pasta and Liquid
- Medium Pasta Shells (12 oz, uncooked) – Perfect for holding the delicious filling; adjust cooking times if using other pasta shapes.
- Beef Broth (2 cups) – Provides moisture and richness; vegetable broth is a great substitute for a meat-free option.
Seasonings and Garnish
- Salt and Pepper – To taste; adjust according to your preference.
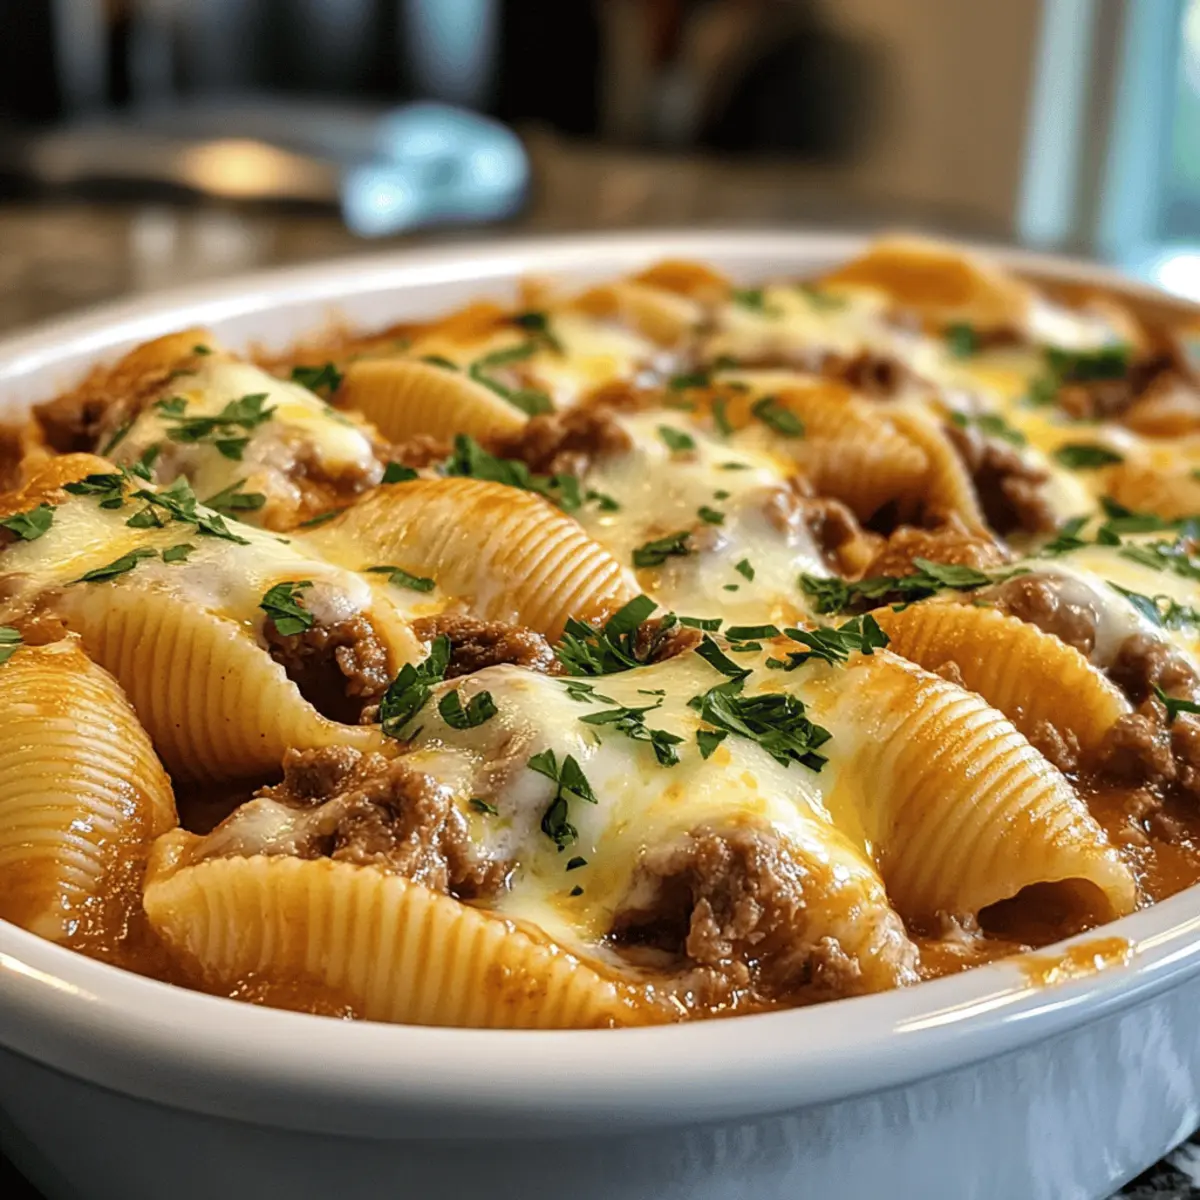
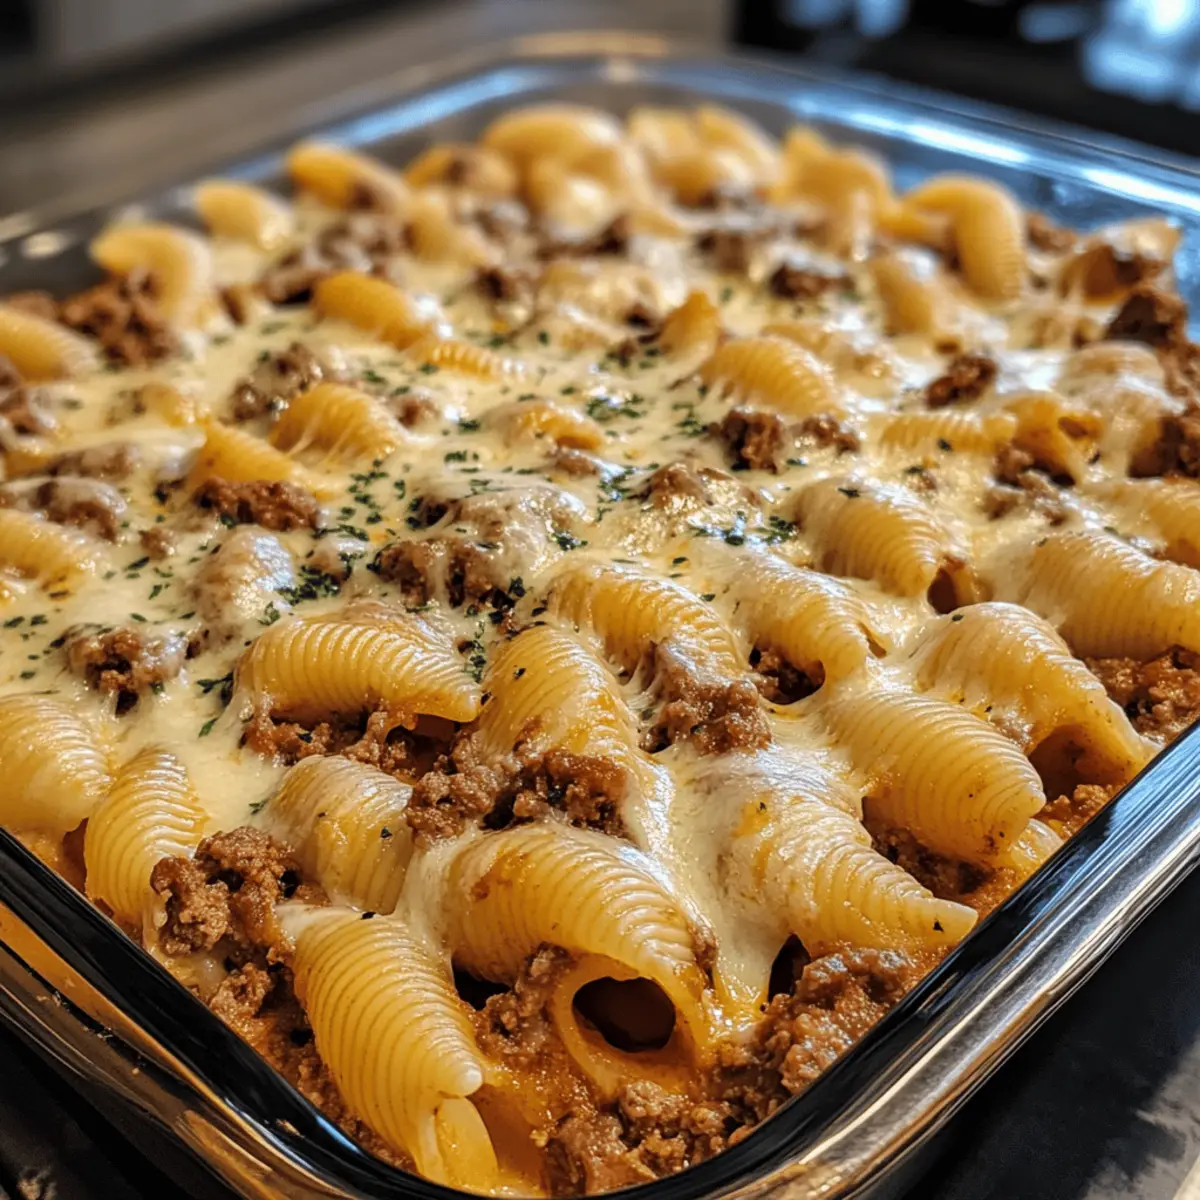
- Chopped Parsley (for garnish, optional) – Adds a vibrant color and a fresh herbaceous finish.
Dive into the world of comfort food with these key ingredients for your Ranch Beef Pasta Shells!
Step‑by‑Step Instructions for Crockpot Cheesy Ranch Beef Pasta Shells
Step 1: Brown the Beef
In a skillet over medium heat, brown 1 pound of ground beef along with 1 small diced onion and 2 minced garlic cloves. Stir occasionally for about 5-7 minutes until the beef is no longer pink and the onions are translucent. Drain any excess fat to keep the dish lighter.
Step 2: Combine Ingredients in the Crockpot
Transfer the cooked beef mixture to your crockpot. Add 1 packet of ranch seasoning mix, 1 can of condensed cheddar cheese soup, and 1 cup of milk. Layer in 1 cup of shredded cheddar cheese, 1 cup of shredded mozzarella cheese, 12 ounces of uncooked medium pasta shells, and 2 cups of beef broth.
Step 3: Stir and Submerge
Gently stir all ingredients until well combined, ensuring that the pasta shells are submerged in the liquid. This will help the shells cook evenly in the delicious creamy ranch sauce. If needed, add a little more broth to keep everything covered.
Step 4: Slow Cook the Pasta Shells
Cover the crockpot with its lid and cook on LOW for 3-4 hours. After about 2 hours, give the mixture an occasional stir to prevent any sticking and ensure even cooking. You’ll know it’s done when the pasta shells are tender and the cheeses are fully melted.
Step 5: Season and Serve
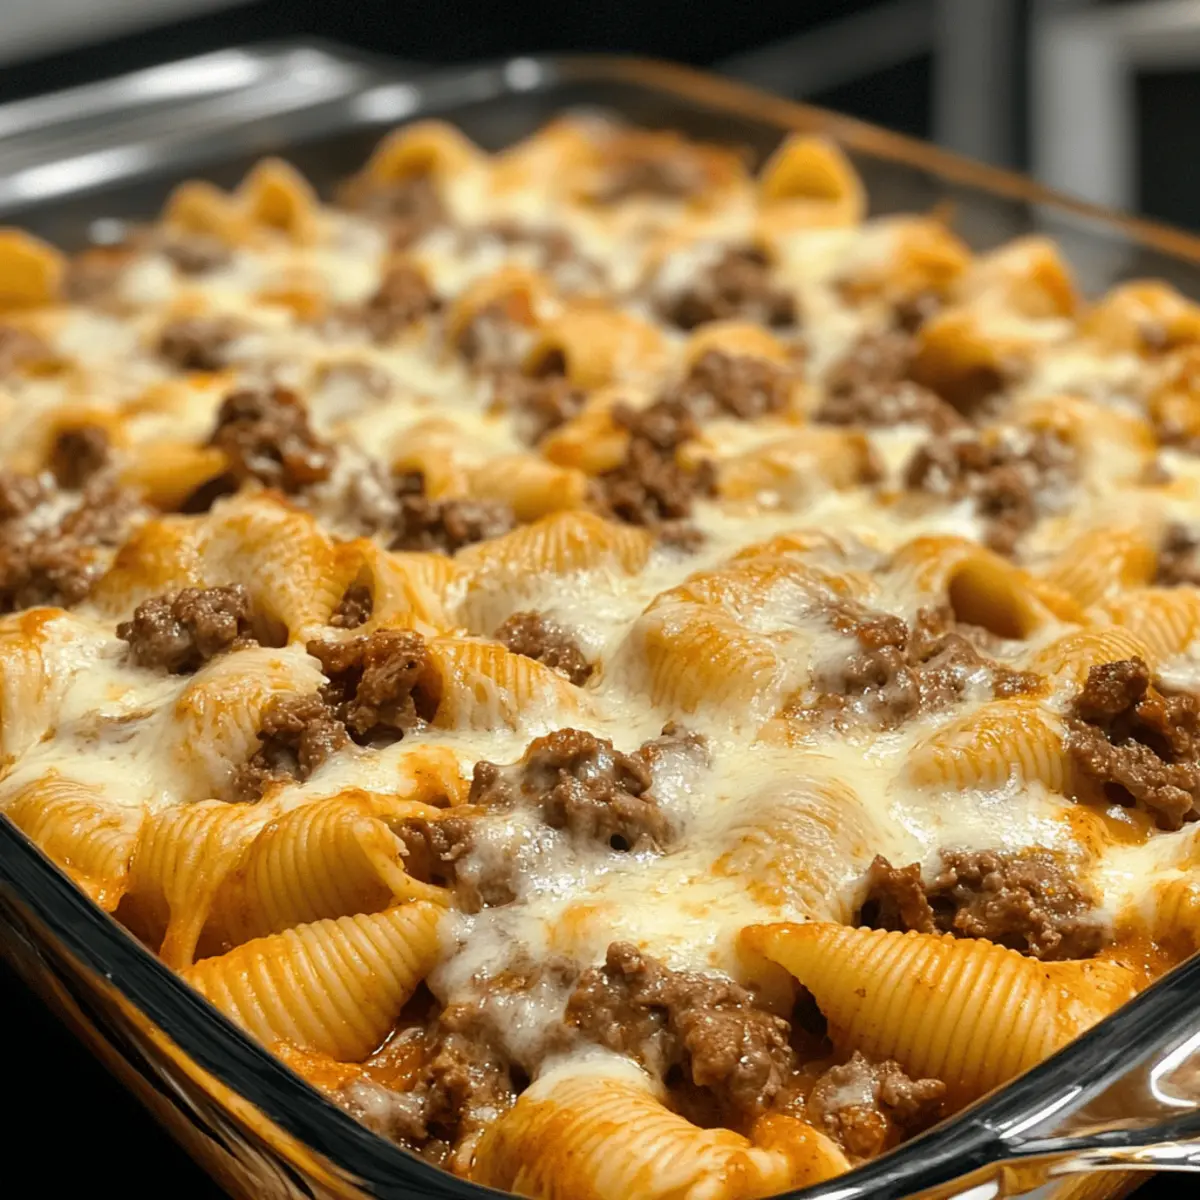
Once cooked, taste the dish and season with salt and pepper to your liking. If desired, garnish with freshly chopped parsley for a splash of color and extra flavor. Serve the Crockpot Cheesy Ranch Beef Pasta Shells warm, perfect for cozy family dinners!
Expert Tips for Ranch Beef Pasta Shells
-
Submerge the Pasta: Ensure the pasta shells are completely submerged in the liquid to avoid uneven cooking and a dry texture.
-
Check Consistency: For a creamier sauce, consider adding an additional 1/4 cup of milk during cooking. Adjust as needed based on preference.
-
Pasta Shape Swap: Feel free to swap the medium pasta shells with other shapes like penne or rigatoni; just adjust cooking times accordingly.
-
Avoid Overcooking: Be mindful of cooking time; overcooking can lead to mushy pasta. Start checking for doneness after about 3 hours.
-
Cheese Variations: Experiment with your favorite cheese combinations for a unique flavor twist; try a spicy pepper jack for added kick in your Ranch Beef Pasta Shells!
Ranch Beef Pasta Shells Variations
Feel free to sprinkle in your own twist to this comforting dish!
- Dairy-Free: Use coconut milk and a dairy-free cheese blend for a deliciously creamy, plant-based option.
- Ground Turkey: Swap ground beef for ground turkey for a lighter, leaner meal that still satisfies.
- Creamy Swap: Replace cheddar cheese soup with cream cheese for extra richness and smoothness in your sauce.
- Veggie Delight: Toss in sautéed mushrooms and chopped spinach to add bright flavors and nutritional benefits.
- Different Cheese: Mix in a blend of pepper jack and cheddar for a spicy cheesy kick that brings extra zest.
- Gluten-Free: Opt for gluten-free pasta shells to enjoy this cozy dish without the gluten.
- Spice It Up: Add diced jalapeños or crushed red pepper flakes for a touch of heat that warms the soul.
- Herb Infusion: Toss in fresh herbs like basil or thyme for an aromatic twist that brightens each bite.
Let your creativity shine while making these Ranch Beef Pasta Shells, and if you’re in the mood for more delicious recipes, my easy Garlic Butter Beef and Cajun Chicken Pasta are wonderful options to explore, too!
Make Ahead Options
These Crockpot Cheesy Ranch Beef Pasta Shells are perfect for meal prep enthusiasts! You can brown the ground beef and prepare the filling up to 24 hours in advance. Simply brown the beef with the onions and garlic, let it cool, and refrigerate it in an airtight container. You can also assemble the complete dish—mixing all ingredients in the crockpot except for the pasta—up to 3 days ahead; just store it in the fridge. When you’re ready to cook, stir in the uncooked pasta and follow the cooking instructions. This way, you’ll have a quick and satisfying dinner ready with minimal effort, just as delicious as if made fresh!
How to Store and Freeze Ranch Beef Pasta Shells
Fridge: Store leftovers in an airtight container for up to 3 days. Reheat in the microwave or on the stovetop, adding a splash of milk to maintain creaminess.
Freezer: Freeze before cooking by wrapping the uncooked mixture tightly in plastic wrap and foil. It can last up to 3 months. Thaw overnight in the fridge before slow cooking.
Reheating: For reheating, place thawed Ranch Beef Pasta Shells in a crockpot and warm on low for about 2 hours, stirring occasionally to ensure even heat distribution.
Serving Freshness: Enjoy the best flavors by consuming the dish within a week of preparation, as the cheese can become less creamy over time.
What to Serve With Crockpot Cheesy Ranch Beef Pasta Shells
On chilly nights, enhance your cozy meal experience with delightful sides that complement the creamy flavors of your pasta dish.
-
Crisp Green Salad: A mix of fresh greens with a tangy vinaigrette adds a refreshing contrast to the rich pasta, enhancing your dining experience.
-
Garlic Bread: The crunchy, buttery slices with a hint of garlic pair perfectly with cheesy pasta, perfect for sopping up every last bite of sauce.
-
Steamed Broccoli: Lightly steamed, vibrant broccoli brings a fresh, nutrient-rich balance to the creamy heaviness of the pasta shells. Its slight crunch can add a lovely texture contrast to your meal.
-
Roasted Vegetables: Seasoned and roasted, a colorful medley of veggies like bell peppers and zucchini provides a sweet, earthy flavor that enhances the overall comfort of your dish.
-
Cheesy Garlic Biscuits: Fluffy and buttery with a cheesy twist, these biscuits create a delightful pairing that echoes the creamy goodness of your Ranch Beef Pasta Shells, making each bite an indulgent treat.
-
Iced Tea or Lemonade: A refreshing iced beverage brings a welcome contrast to the rich meal, cleansing the palate with each sip to balance flavors beautifully.
-
Warm Chocolate Chip Cookies: For dessert, indulge in warm cookies, their gooey chocolate contrasting with the savory pasta and rounding out your meal with a sweet note.
Ranch Beef Pasta Shells Recipe FAQs
What type of ground meat can I use for this recipe?
Absolutely! While ground beef gives a rich flavor, you can easily substitute it with ground turkey or chicken for a lighter dish. Additionally, for a vegetarian twist, consider using sautéed mushrooms or a meat substitute like lentils or crumbled plant-based protein. The key is to maintain the flavors and texture that make this dish so comforting.
How should I store leftovers of the Ranch Beef Pasta Shells?
Store any leftovers in an airtight container in the refrigerator for up to 3 days. When you’re ready to enjoy them again, simply reheat in the microwave or on the stovetop. I recommend adding a splash of milk to retain that creamy consistency!
Can I freeze the Ranch Beef Pasta Shells?
Yes, freezing is a great option! You can freeze the uncooked mixture by wrapping it tightly in plastic wrap and then in aluminum foil. This should keep well for up to 3 months. When you’re ready to cook, simply thaw it overnight in the fridge before placing it in the crockpot.
What if my pasta shells come out mushy?
To prevent mushy pasta, make sure to keep an eye on the cooking time. Cooking on low for 3-4 hours generally yields great results. If it starts to overcook, simply stir less often and check for tenderness earlier. Also, ensure the pasta is well-submerged in the broth throughout cooking.
Is this recipe suitable for those with dairy allergies?
To adapt this dish for dairy-free diets, you can use almond milk or another dairy substitute in place of milk, and choose a dairy-free cheese for the cheddar and mozzarella. Be sure to check the ranch seasoning mix, as some brands may contain dairy ingredients. Opt for a homemade mix to ensure it fits your dietary needs!
How can I enhance the flavor of the Ranch Beef Pasta Shells?
I often enjoy adding a pinch of red pepper flakes for heat or a dash of Worcestershire sauce for added depth. Fresh herbs like thyme or oregano can also brighten the overall flavor. Feel free to experiment with your favorite seasonings and make it your own while enjoying the rich taste of the Ranch Beef Pasta Shells!
Creamy Ranch Beef Pasta Shells for Cozy Family Nights
Ingredients
Equipment
Method
- In a skillet over medium heat, brown the ground beef along with the diced onion and minced garlic. Stir occasionally for about 5-7 minutes until the beef is no longer pink and the onions are translucent.
- Transfer the cooked beef mixture to your crockpot. Add the ranch seasoning mix, condensed cheddar cheese soup, and milk. Layer in the shredded cheddar cheese, shredded mozzarella cheese, uncooked pasta shells, and beef broth.
- Gently stir all ingredients until well combined, ensuring that the pasta shells are submerged in the liquid.
- Cover the crockpot and cook on LOW for 3-4 hours. Stir occasionally after 2 hours to prevent sticking.
- Once cooked, taste and season with salt and pepper. Garnish with freshly chopped parsley and serve warm.
Leave a Reply