
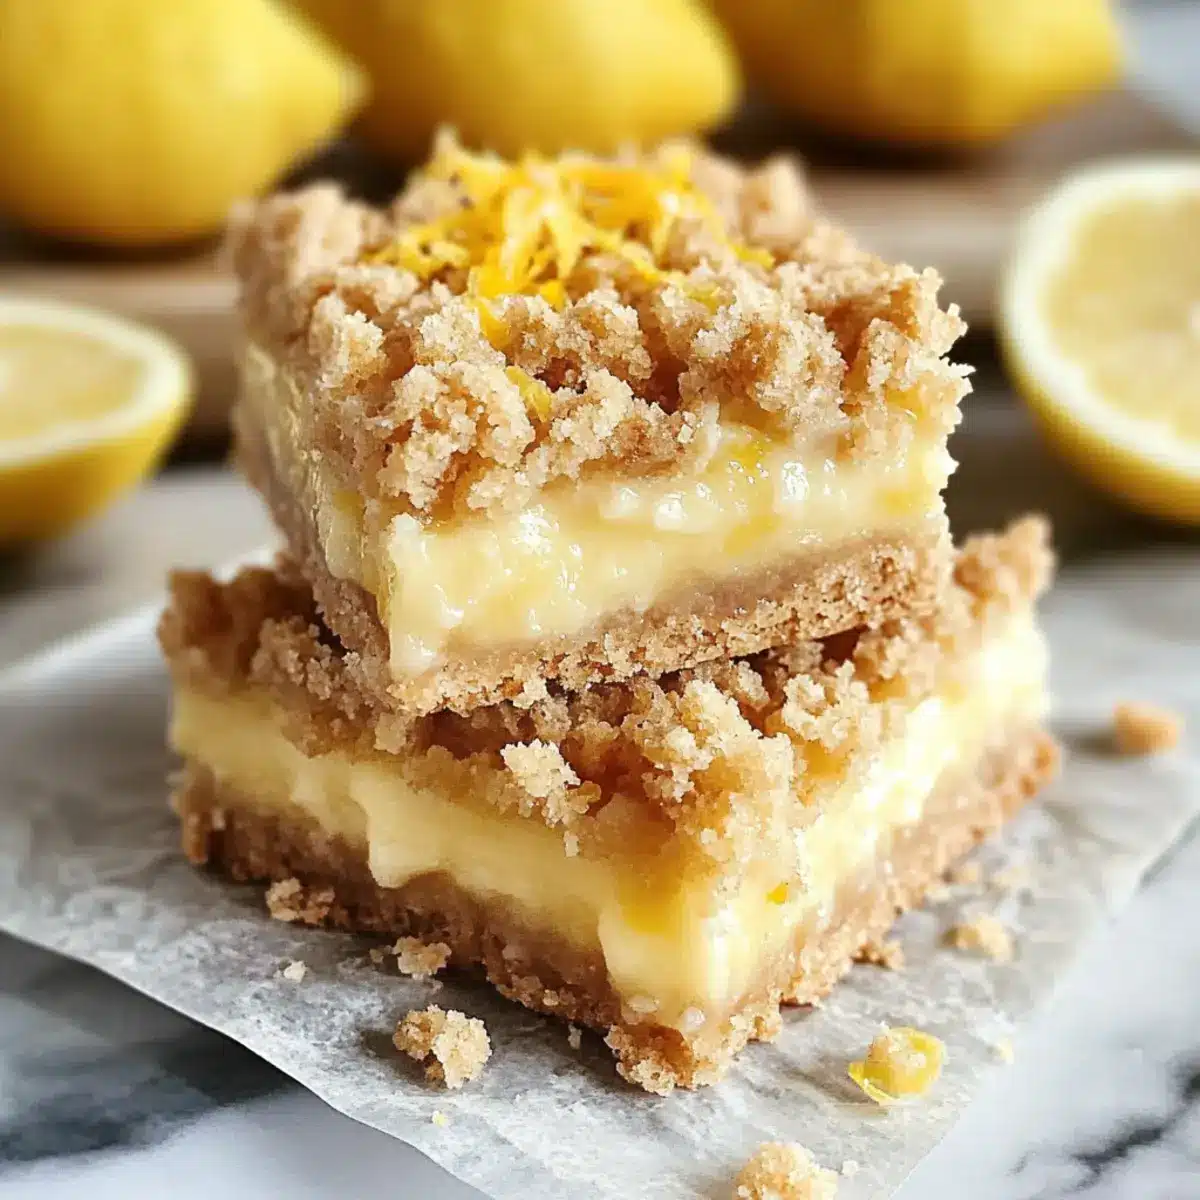
The moment I took a bite of these Homemade Lemon Crumb Bars, I was transported to a sunlit kitchen, where laughter mingled with the irresistible scent of fresh citrus. The creamy lemon filling, perfectly nestled between a buttery crust and a crumbly top, strikes that perfect balance of sweet and tangy flavors that dances on the palate. What makes this recipe even more delightful is how easy it is to whip up—perfect for those busy days when you crave something homemade, but don’t have hours to spare. Plus, with a gluten-free option available, everyone can indulge in this refreshing treat! Ready to impress your family and friends with this crowd-pleasing dessert? Let me show you how to make these bars that are sure to become a staple in your dessert rotation!
Why Will You Love These Bars?
Bright, Zesty Flavor: The vibrant lemon filling creates a refreshing burst of citrus that invigorates any dessert table.
Easy to Make: With just a few simple steps, you can produce bakery-quality bars right from your kitchen—perfect for quick treats!
Gluten-Free Friendly: Easily swap in gluten-free flour to share this delightful dessert with everyone, ensuring no one misses out.
Crowd-Pleasing: Whether for a family gathering or a potluck, these Homemade Lemon Crumb Bars are bound to enliven the atmosphere and leave guests raving.
Versatile Additions: Feel free to experiment by adding your favorite fruits or nut toppings, making every batch unique. Try pairing them with a scoop of ice cream for that extra richness!
Homemade Lemon Crumb Bars Ingredients
-
For the Crust
• All-Purpose Flour – Provides structure; substitute with gluten-free flour for a delicious gluten-free version.
• Oats – Adds a delightful crumbly texture; old-fashioned oats work best for that perfect crunch.
• Salt – Enhances overall flavor; a small but essential ingredient for balancing sweetness.
• Baking Soda – Helps to leaven the crust; always use fresh for the best results.
• Melted Butter – Brings richness and a delicious buttery flavor; coconut oil can also be used for a dairy-free option.
• Brown Sugar – Adds sweetness with a hint of caramel; feel free to swap in coconut sugar for a lower glycemic choice.
• Vanilla Extract – Introduces aromatic sweetness; pure extract offers the best flavor profile. -
For the Lemon Filling
• Sweetened Condensed Milk – Creates a rich and creamy filling; evaporated milk works as a lighter alternative.
• Sour Cream (or Yogurt) – Adds creaminess and a slight tang; Greek yogurt can be used for a protein boost.
• Egg Yolk – Acts as a binder for the filling; for a vegan option, consider omitting it, adjusting for consistency.
• Lemon Juice – Provides bright acidity and flavor; always opt for fresh juice for maximum zest.
• Lemon Zest – Intensifies the delicious lemon flavor; lime or orange zest can be fun substitutes for variety. -
For the Topping
• Powdered Sugar (optional, for serving) – Adds a lovely touch of sweetness on top; a drizzle of melted chocolate is also a fantastic enhancement.
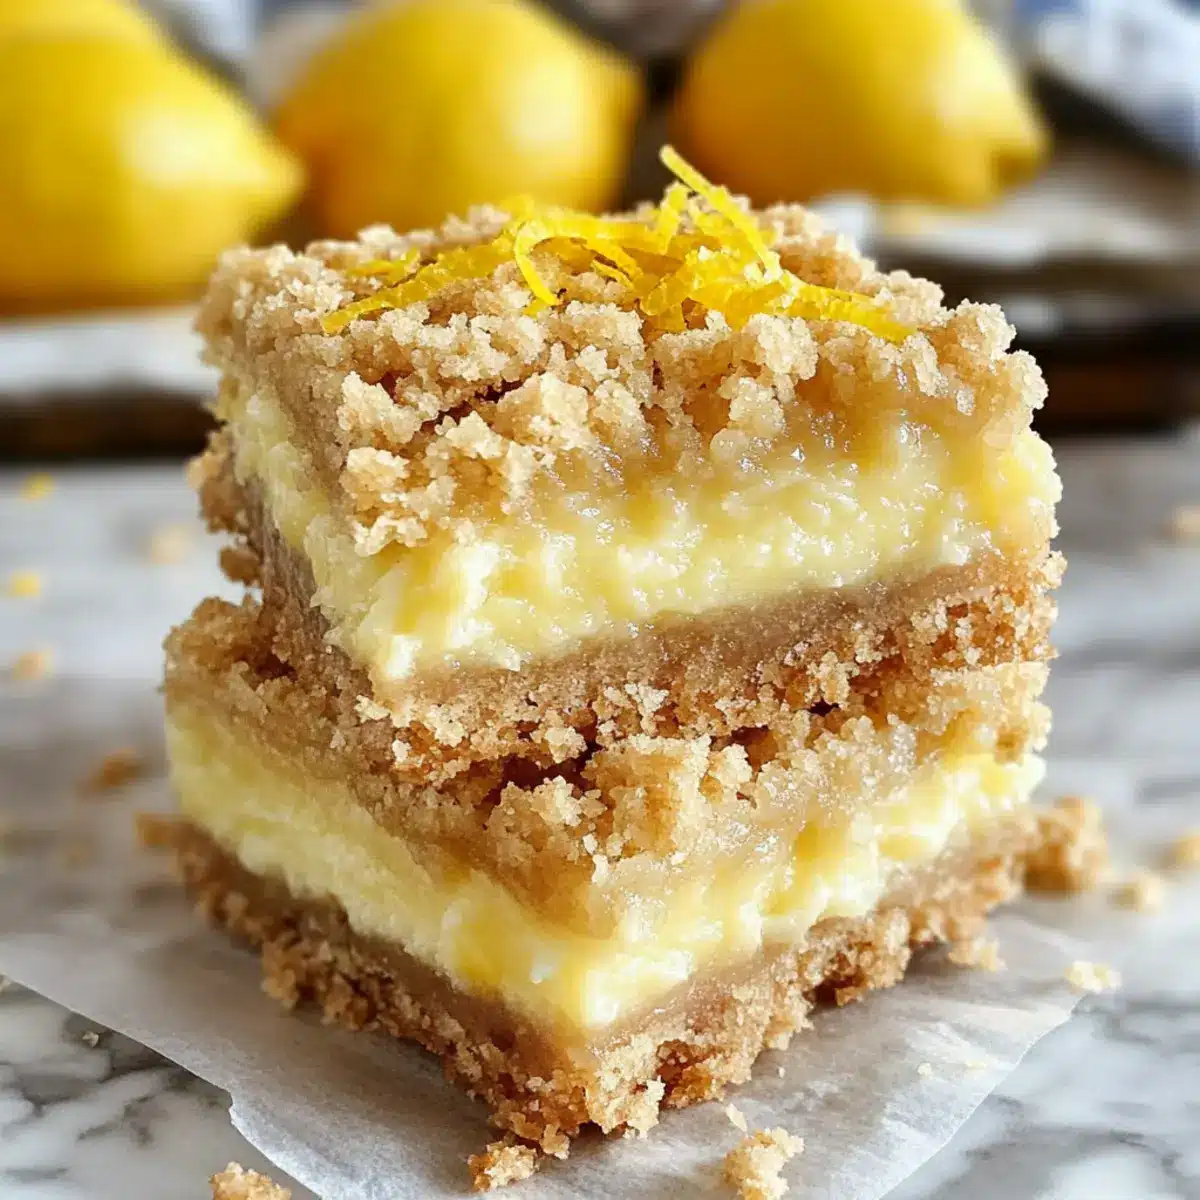
Dive into the delightful flavors of these Homemade Lemon Crumb Bars—the perfect way to brighten your day!
Step‑by‑Step Instructions for Homemade Lemon Crumb Bars
Step 1: Preheat the Oven
Begin by preheating your oven to 350°F (175°C). While it heats, line a 9×9 inch baking pan with foil or parchment paper, allowing some overhang on the sides. This will make it easy to lift out the bars once baked. Set the prepared pan aside as you move on to the next step.
Step 2: Combine Dry Ingredients
In a medium bowl, whisk together 1 cup of all-purpose flour, 1 cup of oats, 1/4 teaspoon of salt, and 1/2 teaspoon of baking soda. This mixture forms the base of the crust and topping for your Homemade Lemon Crumb Bars. Ensure there are no lumps, and set it aside while you prepare the wet ingredients.
Step 3: Mix Wet Ingredients
In a large bowl, combine 1/2 cup of melted butter, 1 cup of brown sugar, and 1 teaspoon of vanilla extract. Whisk these ingredients together until smooth and creamy. This delightful mixture will create a rich flavor in your crust. Feel free to let it sit for a moment while you bring the dry ingredients into play.
Step 4: Combine Mixtures
Pour the dry ingredient mixture into the wet bowl and stir gently until fully combined. Reserve 3/4 cup of this mixture for the crumb topping. Press the remaining dough into the bottom of the prepared baking pan, creating an even layer. Bake this crust in the preheated oven for 10 minutes, or until it begins to set lightly.
Step 5: Prepare Lemon Filling
While the crust is baking, gather a mixing bowl and whisk together 1 can of sweetened condensed milk, 1/2 cup of sour cream, 1 egg yolk, 1/4 cup of fresh lemon juice, the zest of one lemon, and 1 teaspoon of vanilla extract until the mixture is smooth and creamy. This filling will provide that luscious lemon flavor you crave.
Step 6: Assemble Bars
Once the crust has baked for 10 minutes, carefully remove it from the oven. Pour the prepared lemon filling over the warm crust, spreading it evenly with a spatula. Crumble the reserved topping over the lemon filling generously, ensuring some areas are well covered.
Step 7: Bake Again
Return the pan to the oven and bake the bars for an additional 17 to 20 minutes. You’ll know they are done when the top is lightly golden and the filling has set but may still jiggle slightly in the center. Keep an eye on them to avoid over-baking.
Step 8: Cool and Slice
Once baked, remove the pan from the oven and let the bars cool completely on a wire rack. Once cool, use the overhanging foil or parchment to lift the bars from the pan. Slice into squares with a sharp knife, cleaning the knife between cuts for neat edges.
Homemade Lemon Crumb Bars Variations
Feel free to get creative and customize your Homemade Lemon Crumb Bars to suit your taste buds!
-
Gluten-Free: Substitute all-purpose flour with a cup-for-cup gluten-free blend for a delicious alternative. Your gluten-free friends will thank you!
-
Fruit-Infused: Try using lime or orange juice and zest instead of lemon for a refreshing twist. The citrus sings differently while staying equally delightful.
-
Berry Swirls: Incorporate raspberry or blueberry preserves into the lemon filling for a pop of color and flavor. The fruity ribbons will create a beautiful presentation.
-
Nuts Galore: Add chopped walnuts or pecans to the topping for an added crunch and nuttiness that complements the creamy filling exceptionally well.
-
Dairy-Free Delight: Replace sour cream with coconut yogurt and sweetened condensed milk with coconut milk for a luscious dairy-free version that’s just as indulgent.
-
Choco-Lemon Combo: Drizzle melted dark chocolate over the bars after cooling for a decadent chocolate-lemon fusion. This twist adds richness that’s impossible to resist!
-
Minty Breeze: Add fresh mint leaves to your filling for a refreshing herbal contrast. This unexpected minty zing will surely enchant your tastebuds.
For inspired combinations, consider serving your bars alongside Banana Oatmeal Bars or a scoop of Lemon Butter Lobster for a cohesive citrus theme. Enjoy experimenting!
What to Serve with Homemade Lemon Crumb Bars?
These delightful bars beckon for the perfect companions to create an unforgettable dessert experience.
-
Whipped Cream: A dollop of homemade whipped cream adds a luscious creaminess that balances the zesty lemon, enhancing each bite.
-
Vanilla Ice Cream: Served alongside, a scoop of vanilla ice cream melts beautifully, providing a sweet contrast to the tangy filling.
-
Fresh Berries: Light and juicy strawberries or blueberries lend a burst of freshness, beautifully complementing the flavors of the bars.
-
Mint Leaves: A sprig of fresh mint adds a refreshing touch, both in aroma and flavor, elevating your dessert to a new level.
-
Iced Tea: A chilled glass of lemon-infused iced tea echoes the bars’ citrus notes, creating a delightful harmony of flavors.
-
Lemon Sorbet: For a citrus double-whammy, lemon sorbet offers a tart and refreshing palate cleanser that pairs perfectly with the bars.
-
Chocolate Drizzle: A simple drizzle of melted chocolate over the top enhances sweetness and brings an elegant touch to the homemade treat.
-
Coconut Whipped Cream: For a tropical flair, try coconut whipped cream—its light, airy texture complements the crumb bars beautifully.
-
Sparkling Water: A bubbly sparkling water with a hint of lemon is a refreshing drink that cleanses your palate while enjoying this dessert.
Expert Tips for Homemade Lemon Crumb Bars
-
Crust Cooling: Allow the crust to cool slightly before adding the filling to keep the layers distinct and prevent mixing.
-
Sharp Knife: Use a sharp knife for cutting the bars to ensure clean edges. Wipe the knife between cuts for the best results.
-
Gluten-Free Guarantee: When opting for a gluten-free version, verify that all ingredients are certified gluten-free to keep your Homemade Lemon Crumb Bars safe for everyone.
-
Use Fresh Ingredients: Always go for fresh lemon juice and zest; this enhances the bright flavor that makes these bars special.
-
Experiment with Flavors: Don’t hesitate to try different fruits in the filling or top with nuts for a unique twist on this delightful dessert!
-
Storage Solution: To keep your bars fresh, store them in an airtight container in the fridge, where they will last up to a week.
Make Ahead Options
These Homemade Lemon Crumb Bars are perfect for busy cooks looking to save time during the week! You can prepare the crust and crumble topping up to 24 hours in advance by storing the refrigerated dough wrapped tightly in plastic wrap. Just remember to keep it separate to maintain that crumbly texture. Additionally, the lemon filling can be whisked together and stored in the refrigerator for up to 3 days before assembling. When you’re ready to enjoy your bars, simply press the crust into the pan, add the filling, crumble the topping on top, and bake. This allows you to preserve the delicious flavor and texture, ensuring your bars are just as delightful as when freshly made!
How to Store and Freeze Homemade Lemon Crumb Bars
Fridge: Keep your Homemade Lemon Crumb Bars in an airtight container, where they will stay fresh for up to a week. This is perfect for enjoying a zesty treat any day of the week!
Freezer: For longer storage, freeze the bars by wrapping them tightly in plastic wrap and placing them in a freezer-safe container. They can last up to 3 months in the freezer without losing flavor.
Thawing: To thaw frozen bars, simply transfer them to the fridge overnight or let them sit at room temperature for about an hour before serving.
Reheating: If you prefer warm bars, gently reheat them in the microwave for 10-15 seconds or in the oven at a low temperature until warmed through. Enjoy!
Homemade Lemon Crumb Bars Recipe FAQs
How do I choose the right lemons for the filling?
Absolutely! When selecting lemons, look for ones that are firm, bright yellow, and slightly fragrant. Avoid lemons with dark spots or dull skin, which may indicate they are overripe. Freshness is key; those that yield slightly to pressure tend to have juicy pulp.
How should I store my Homemade Lemon Crumb Bars?
To keep your Homemade Lemon Crumb Bars fresh, store them in an airtight container in the refrigerator for up to a week. This ensures the creamy filling remains bright and the crust stays firm. If you like, you can also layer parchment paper between the bars to prevent sticking.
Can I freeze Homemade Lemon Crumb Bars?
Absolutely! For freezing, wrap each bar individually in plastic wrap and place them in a freezer-safe container. They can last for up to 3 months. When you’re ready to enjoy them, thaw them in the refrigerator overnight or let them sit at room temperature for about an hour before serving.
What should I do if my filling is too runny?
If your filling turns out too runny, it may need more binding agent. For future batches, consider adding an additional egg yolk or a bit more sour cream. Alternatively, you can bake the bars a little longer to help set the filling, but keep an eye on the crust to ensure it doesn’t over-bake.
Are there any allergy concerns with this recipe?
Yes, definitely! This recipe contains common allergens such as eggs and dairy. For a dairy-free version, you can substitute the sour cream with a non-dairy yogurt and the butter with coconut oil. Always double-check that your gluten-free flour is made in a gluten-free facility if gluten sensitivity is a concern.
Can I make adjustments for a lower-sugar version?
Very! To reduce the sugar in your Homemade Lemon Crumb Bars, you can cut down the brown sugar by half and replace the sweetened condensed milk with a mixture of unsweetened almond milk and a low-calorie sweetener. This way, you can enjoy the same delightful taste with fewer calories!
Delicious Homemade Lemon Crumb Bars That Brighten Your Day
Ingredients
Equipment
Method
- Preheat your oven to 350°F (175°C). Line a 9x9 inch baking pan with foil or parchment paper.
- In a medium bowl, whisk together flour, oats, salt, and baking soda. Set aside.
- In a large bowl, combine melted butter, brown sugar, and vanilla extract. Whisk until smooth.
- Pour the dry mixture into the wet mixture and stir until combined. Reserve 3/4 cup for topping. Press remaining mixture into the prepared pan.
- Bake crust for 10 minutes until lightly set.
- In a separate bowl, whisk together sweetened condensed milk, sour cream, egg yolk, lemon juice, lemon zest, and vanilla extract until smooth.
- Pour the lemon filling over the crust and crumble the reserved topping over it.
- Bake again for 17 to 20 minutes until lightly golden and the filling is set but jiggles slightly.
- Let the bars cool completely, then lift out and slice into squares.
Leave a Reply