
Can you hear the oven timer going off? That sweet sound means your kitchen is about to become the center of attention with a luscious Strawberry Cheesecake Dump Cake that’s ridiculously simple to whip up! Picture this: creamy cheesecake blended perfectly with sweet, vibrant strawberries, all wrapped in a soft, fluffy cake. This delightful dessert is not just quick to prepare—making it a lifesaver for those busy weeknights—but it’s also an adaptable recipe for gluten-free and vegan diets. You won’t just save time; you’ll create a showstopper that will impress your friends and family at any gathering. So, are you ready to dive into this easy gourmet adventure? Let’s get cooking!
Why is this Dump Cake a Must-Try?
Simplicity at Its Best: This Strawberry Cheesecake Dump Cake comes together with minimal ingredients and steps, making it a breeze for even novice bakers.
Deliciously Versatile: Feel free to swap in your favorite fruits or use a gluten-free cake mix. You can customize it to fit anyone’s dietary needs!
Crowd-Pleasing Appeal: The creamy cheesecake and juicy strawberries create an irresistible flavor combination that will leave your guests craving more.
Time-Saving Delight: With just a few simple steps, you’ll have a show-stopping dessert ready in no time—perfect for unexpected guests or last-minute celebrations.
Perfectly Balanced Sweetness: This recipe uses less sugar than traditional cheesecakes, giving you a lighter dessert that doesn’t skimp on taste.
Consider serving this beauty with a scoop of vanilla ice cream or fresh whipped cream for a truly indulgent experience! Looking for more unique treats? Try our Strawberry Shortcake Sushi or these delightful Strawberry Crunch Cookies.
Strawberry Cheesecake Dump Cake Ingredients
For the Strawberry Layer
• Sliced Strawberries – Adds sweetness and tartness; substitute with blueberries, raspberries, or peaches based on personal preference.
• Granulated Sugar (1/4 cup) – Helps macerate strawberries; adjust based on fruit sweetness.
For the Cheesecake Layer
• Cream Cheese (softened) – Creates the luscious cheesecake layer; substitute with plant-based cream cheese for a vegan option.
• Vanilla Extract – Enhances flavor depth; can be omitted for simplicity.
For the Cake Base
• Yellow Cake Mix – Provides the cake base and structure; use gluten-free cake mix for a gluten-free version.
• Granulated Sugar (3/4 cup) – Sweetens the cake; adjust to fit your taste preferences.
• Melted Butter – Adds richness; can be replaced with vegetable oil if needed.
• Milk – Moistens the batter; substitute with almond, oat, or coconut milk for dairy-free options.
• Salt – Balances flavors; omit if using salted butter.
Final Touch
• Powdered Sugar – A light dusting adds a sweet finish; optional, for presentation.
With these essential ingredients, you’re well on your way to crafting a delightful Strawberry Cheesecake Dump Cake that will undoubtedly brighten up any dessert table!
Step‑by‑Step Instructions for Strawberry Cheesecake Dump Cake
Step 1: Preheat Your Oven
Begin by preheating your oven to 350°F (175°C). This temperature ensures that your Strawberry Cheesecake Dump Cake bakes evenly and achieves that lovely golden-brown color. While the oven heats, gather your baking dish and grease it lightly with butter or cooking spray to prepare for the batter.
Step 2: Prepare the Strawberries
In a mixing bowl, combine your sliced strawberries with 1/4 cup of granulated sugar. Allow them to sit for about 10 minutes. This process, known as maceration, will draw out the sweet juices from the strawberries, enhancing their flavor and ensuring a juicy layer within your dump cake.
Step 3: Make the Cheesecake Layer
In another bowl, beat together the softened cream cheese, 3/4 cup of sugar, and a splash of vanilla extract until the mixture is smooth and creamy. You can use an electric mixer for a fluffier texture, but a sturdy whisk will also work. Aim for a velvety consistency to create a luscious cheesecake layer that complements the strawberries beautifully.
Step 4: Mix the Cake Batter
In a large mixing bowl, combine the yellow cake mix, melted butter, milk, and a pinch of salt. Stir gently until just combined; be careful not to overmix as it can affect the cake’s fluffiness. The batter should be thick and slightly lumpy, ensuring a perfect base for your Strawberry Cheesecake Dump Cake.
Step 5: Layer the Batter
Pour half of the cake batter into the greased 9×13-inch baking dish, spreading it evenly across the bottom. This layer forms the sturdy base for your dessert. The batter should cover the dish but not be overly thick, allowing for the cheesecake layer and strawberries to fit nicely atop.
Step 6: Add the Cheesecake and Strawberries
Carefully spread the cheesecake mixture over the batter, ensuring an even layer across the surface. Next, spoon the macerated strawberries on top of the cheesecake layer, distributing them evenly. This multiple-layer approach creates a delightful mix of textures and flavors in your Strawberry Cheesecake Dump Cake.
Step 7: Top with Remaining Batter
Now, dollop the remaining cake batter over the strawberries and cheesecake layer, ensuring it covers them as evenly as possible. Use a spatula to smooth the batter across the surface, creating a nice seal that will help keep the cake moist during baking.
Step 8: Bake to Perfection
Place the assembled cake in the preheated oven and bake for 45-50 minutes. Keep an eye on it as it bakes; it’s ready when the top is golden brown and a toothpick inserted into the center comes out clean. The aroma filling your kitchen will be irresistible, tempting everyone around!
Step 9: Cool and Dust
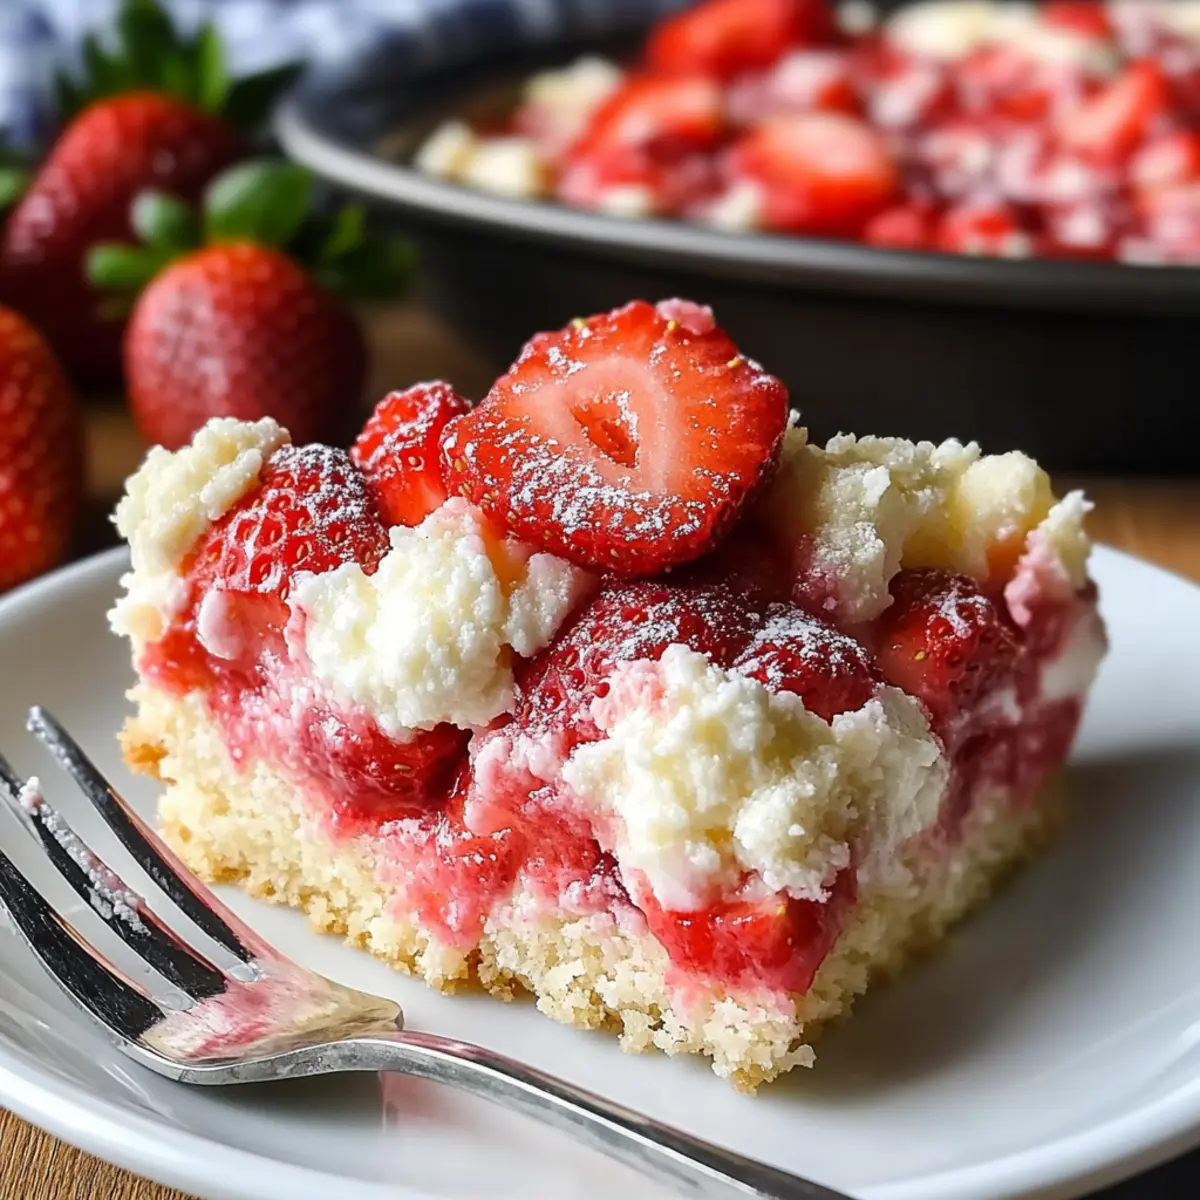
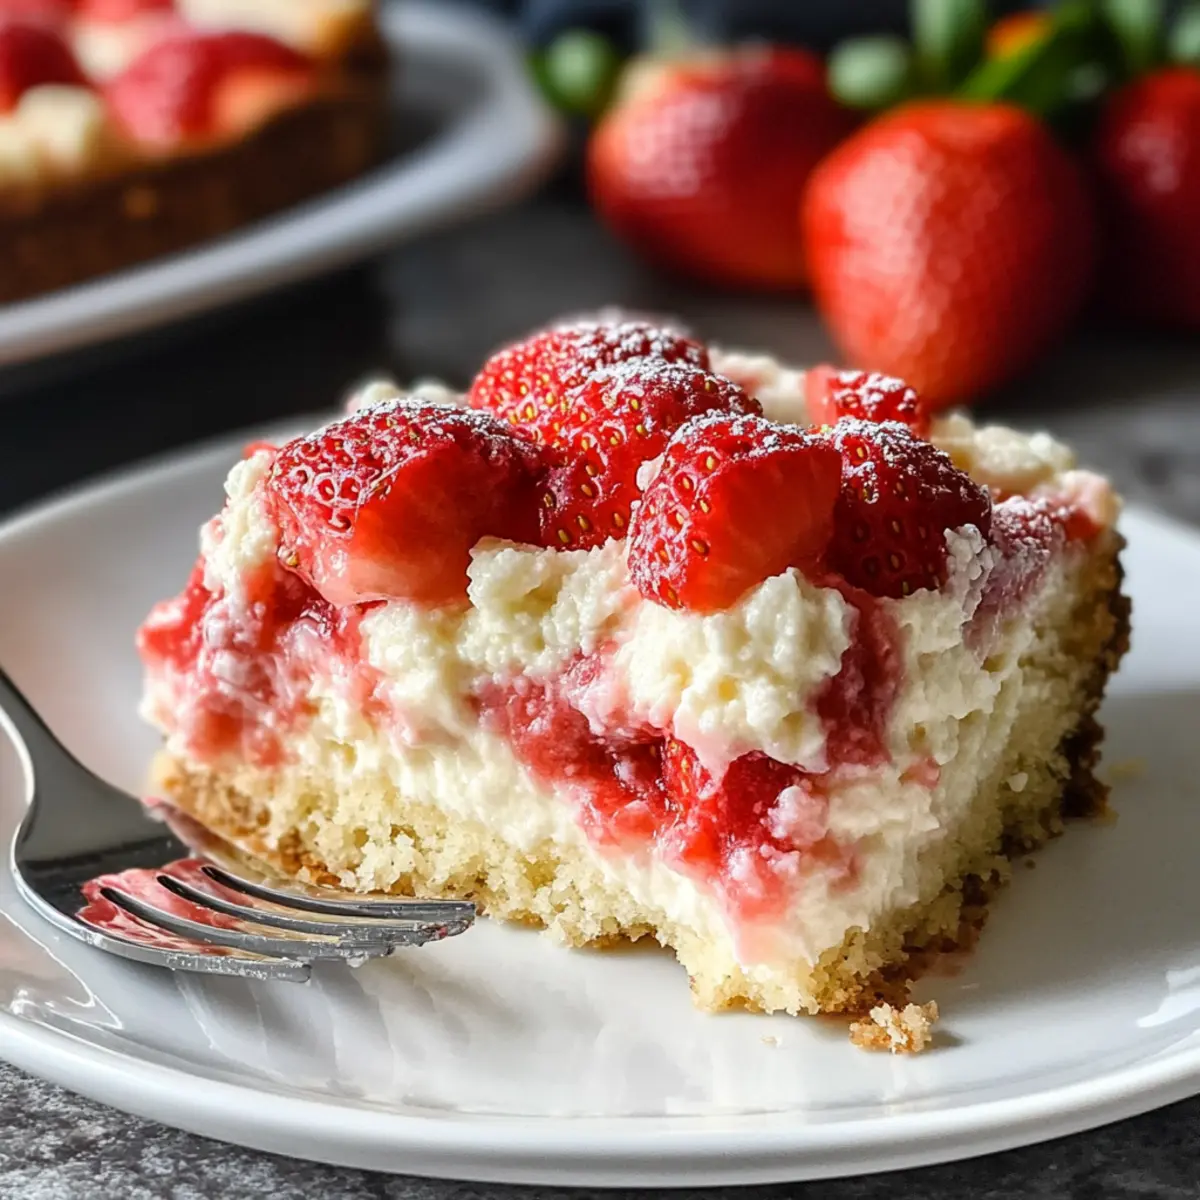
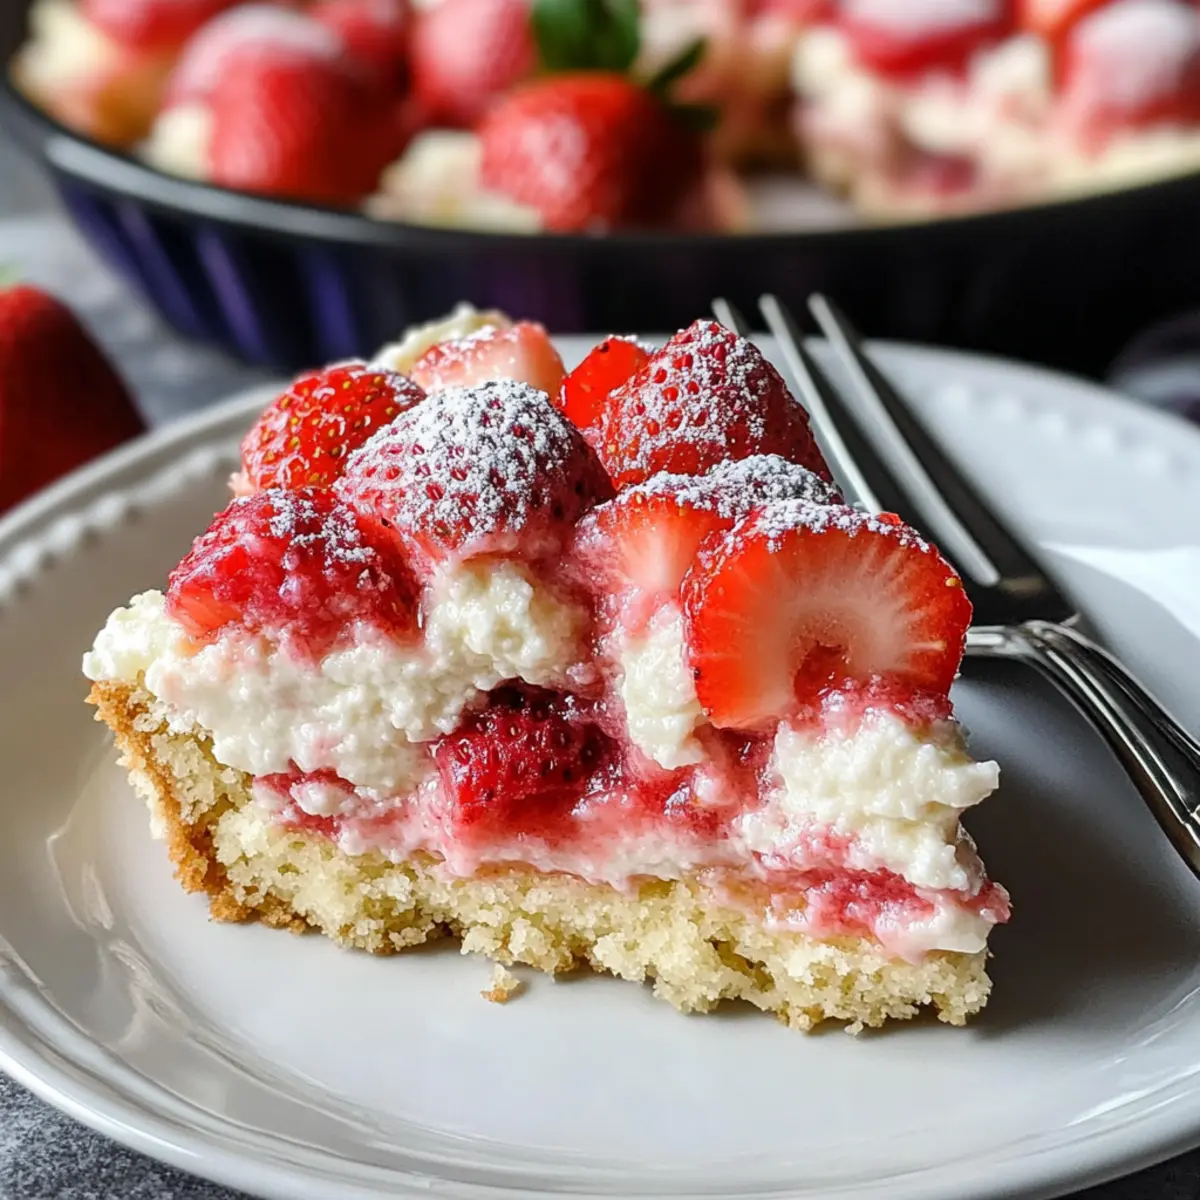
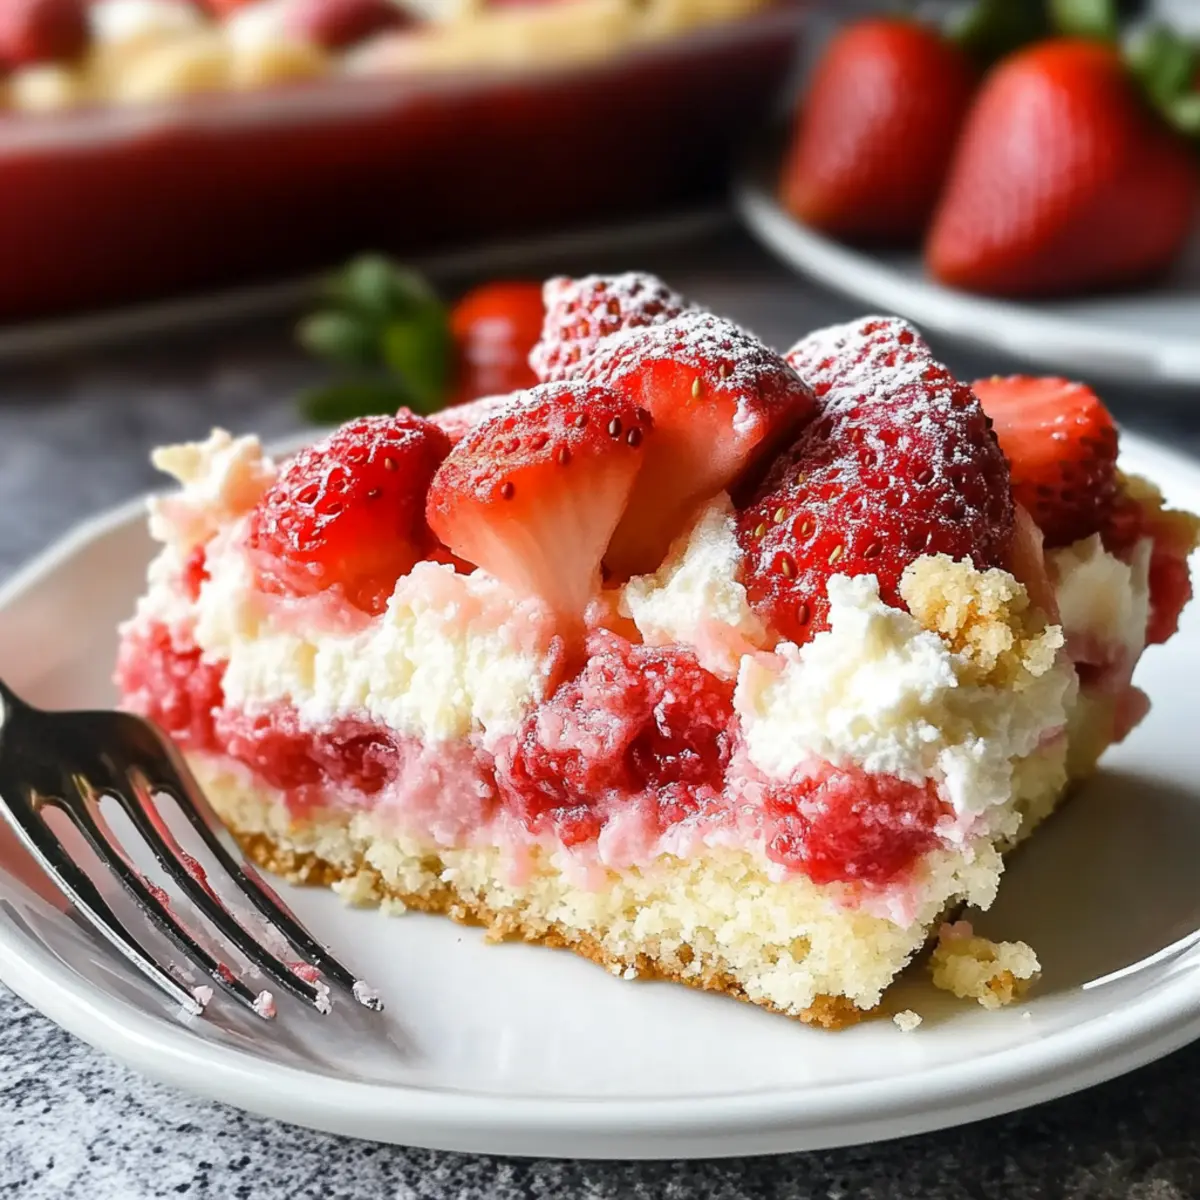
Once baked, remove your Strawberry Cheesecake Dump Cake from the oven and allow it to cool for about 10-15 minutes. This cooling time helps the layers set and makes slicing easier. Before serving, you may dust the top with powdered sugar for a cheerful presentation!
Step 10: Serve and Enjoy
Slice your delightful Strawberry Cheesecake Dump Cake into squares and serve it warm or at room temperature. For an extra indulgent treat, consider pairing each slice with a scoop of vanilla ice cream or a dollop of whipped cream. This dessert is sure to be a crowd-pleaser at any gathering!
What to Serve with Strawberry Cheesecake Dump Cake
Indulge in the delightful experience of crafting a full meal centered around your delicious dessert, turning a simple gathering into a memorable feast.
- Whipped Cream: A light, fluffy topping that adds a creamy texture, balancing the rich layers of cheesecake and strawberries.
- Vanilla Ice Cream: The melty sweetness of vanilla ice cream complements the tangy cheesecake layer and enhances the overall flavor experience.
- Fresh Berries: A medley of whipped raspberries or blueberries can elevate the dish’s presentation, offering a pop of color and freshness.
- Chocolate Drizzle: A warm chocolate sauce adds a luxurious touch that pairs beautifully with the dessert’s fruity notes and creamy finish.
- Mint Sprigs: A few sprigs of fresh mint on top add a vibrant touch and a refreshing contrast to the sweeter flavors.
- Sparkling Lemonade: This zesty, bubbly drink refreshes the palate perfectly, making it an ideal companion to the rich strawberry cheesecake dump cake.
- Coffee or Tea: A comforting cup of coffee or herbal tea rounds out the meal, bringing warmth and enhancing the dessert’s richness while offering a delightful after-dinner experience.
- Cheesecake Brownies: For those who crave more decadence, pair with cheesecake brownies for an ultimate dessert combo that guests will rave about!
- Shortbread Cookies: These buttery cookies provide a satisfying crunch, balancing the softness of the dump cake while adding delightful flavors to the table.
Make Ahead Options
These Strawberry Cheesecake Dump Cakes are perfect for meal prep enthusiasts! You can prepare the strawberry layer and cheesecake mixture up to 24 hours in advance. Simply slice the strawberries and mix them with sugar, allowing them to macerate before placing them in the fridge. For the cheesecake layer, beat together the softened cream cheese, sugar, and vanilla, then cover and refrigerate until you’re ready to assemble. When it’s time to bake, simply follow the remaining steps to layer and bake your dump cake. This method keeps everything just as delicious while saving you precious time on busy days! Enjoy the satisfaction of a homemade dessert with minimal fuss!
Strawberry Cheesecake Dump Cake Variations
Feel free to get creative with this recipe and adapt it to your taste preferences!
-
Berry Medley: Swap strawberries for a mix of blueberries, raspberries, or even peaches for a flavorful twist. Each fruit brings a unique sweetness that elevates the dish!
-
Dairy-Free Delight: Use plant-based cream cheese and a dairy-free cupcake mix to make a delicious vegan version that everyone can enjoy. It’s just as luscious, proving you don’t need dairy for flavor.
-
Nutty Crunch: Add fried nuts or crushed almonds to the batter for an exciting crunch and deeper flavor profile. The added texture creates a delightful contrast to the creamy cheesecake.
-
Spiced Up: Incorporate a pinch of cinnamon or nutmeg into the cake mix for a warm, spiced flavor that enhances the sweetness of the strawberries beautifully.
-
Choco-Berry Fusion: For a bit of decadence, fold in chocolate chips into the batter or sprinkle them on top before baking. The melted chocolate adds a rich layer of flavor to the cake.
-
Caramel Drizzle: Drizzle warm caramel sauce over the finished cake for a dreamy, indulgent twist. This adds a luscious sweetness that’s hard to resist.
-
Ice Cream Swirl: Layer scoops of your favorite ice cream between the cake and cheesecake for a delightful surprise in every slice. Imagine the creamy goodness melting into the warm cake!
For more fun treats, you might want to explore our refreshing Strawberry Banana Pudding or these energizing Sweet Coconut Cream Pancakes. Each of these recipes can add to the perfect culinary adventure in your kitchen!
Expert Tips for Strawberry Cheesecake Dump Cake
• Don’t Overmix Batter: Overmixing can lead to a dense cake. Stir just until ingredients are blended to keep it light and fluffy.
• Perfect Maceration: Allow strawberries to macerate for at least 10 minutes; this enhances their flavor and ensures a juicy layer in your Strawberry Cheesecake Dump Cake.
• Cooling Time Matters: Let the cake cool for 10-15 minutes before slicing. This allows the layers to set for easier, cleaner cuts.
• Customize Your Ingredients: Feel free to swap in other fruits or use gluten-free and vegan options. This recipe is all about making it your own!
• Garnish for Presentation: A light dusting of powdered sugar not only adds sweetness but also elevates the cake’s appearance—perfect for serving to guests!
How to Store and Freeze Strawberry Cheesecake Dump Cake
Fridge: Store leftover Strawberry Cheesecake Dump Cake in an airtight container for up to 3 days. It tastes even better chilled, so don’t hesitate to enjoy it straight from the fridge!
Freezer: If you want to keep your cake longer, wrap individual portions tightly in plastic wrap and then place them in a freezer-safe bag. It can be frozen for up to 2 months—perfect for future indulgence!
Reheating: To enjoy your frozen cake, simply thaw it in the fridge overnight. For a fresh-out-of-the-oven feel, reheat slices in the microwave for about 15-30 seconds or bake at 350°F (175°C) for 10 minutes.
Serving Tip: Dust with powdered sugar just before serving to add a sweet finish to your Strawberry Cheesecake Dump Cake!
Strawberry Cheesecake Dump Cake Recipe FAQs
What type of strawberries should I use for this recipe?
Absolutely! When selecting strawberries, choose ripe, bright red berries without dark spots or signs of decay. If you’re looking for alternatives, feel free to swap strawberries for blueberries, raspberries, or even peaches to create your own signature dump cake.
How should I store leftover Strawberry Cheesecake Dump Cake?
Store any leftovers in an airtight container in the refrigerator for up to 3 days. This dessert tastes delightful chilled, so feel free to enjoy it straight from the fridge!
Can I freeze Strawberry Cheesecake Dump Cake?
Very! To freeze your cake, wrap individual portions tightly in plastic wrap, then place them in a freezer-safe bag. This method keeps them fresh for up to 2 months. When you’re ready to enjoy, simply thaw in the fridge overnight and reheat in the microwave for about 15-30 seconds or bake at 350°F (175°C) for 10 minutes.
How do I ensure my dump cake doesn’t turn out too dense?
The key to a fluffy Strawberry Cheesecake Dump Cake is not to overmix your batter. Mix just until combined to keep the texture light. Also, be sure to let the strawberries sit for at least 10 minutes to enhance their flavor through maceration, ensuring a juicy layer that complements the cake perfectly.
Can I make this recipe gluten-free or vegan?
Absolutely! To create a gluten-free version, simply use a gluten-free yellow cake mix. For a vegan option, substitute the cream cheese with plant-based cream cheese and use a dairy-free milk alternative, such as almond or coconut milk. These substitutions will keep the delightful flavors intact while accommodating different dietary needs.
Is there anything I should consider for allergies?
Yes! If you’re serving guests with allergies, make sure to check for any reactions related to dairy, gluten, or other particular ingredients. Always mention that the cake contains cream cheese and potentially cross-contamination. It’s best to provide alternatives or adjust the recipe if necessary for those with specific dietary restrictions.
Delightful Strawberry Cheesecake Dump Cake for Easy Bliss
Ingredients
Equipment
Method
- Preheat your oven to 350°F (175°C) and grease a 9x13-inch baking dish.
- Mix sliced strawberries with granulated sugar and let sit for 10 minutes.
- Beat cream cheese, sugar, and vanilla until smooth and creamy.
- Combine cake mix, melted butter, milk, and salt in a bowl and mix lightly.
- Pour half of the batter into the baking dish and spread evenly.
- Spread the cheesecake mixture over the batter, then spoon the macerated strawberries on top.
- Dollop the remaining batter over the strawberries and cheesecake layer.
- Bake for 45-50 minutes until golden brown and a toothpick comes out clean.
- Cool for 10-15 minutes before dusting with powdered sugar and serving.
- Serve warm or at room temperature, optionally with ice cream or whipped cream.
Leave a Reply